Can I Make Something Crystal Clear? (As Glass)
![]()
Omigosh. November is over at midnight! For me, December will be even busier than November – and Canada doesn’t have Thanksgiving in November! – has been, and I wouldn’t have thought that possible. But here we are…
Last week I signed off with a promise to show you something really cool, and I hope you’ll be suitably impressed. It all started with a message from Carol (gnana96): “Hi Jan, I have another tutorial suggestion for you. Several years ago I started scrapping family recipes for my kids and adult grandchildren. The first year they got an album and several recipes and every year I give them 7 to 10 more to add to their collection.
This year one of the templates I used was from The Cherry On Top What’s Cookin, template 1. The template has a mixer and a bowl which I thought would be so cute for my 7 minute frosting. The bowl on the template is white and I thought it would be cute to make it a glass bowl so I applied one of Karen Schulz (Snickerdoodle) glass styles to the bowl and my sister Ellen and I both decided that it just didn’t look right so I ended up attaching a patterned paper to the bowl. (The layout was for the bingo challenge and I posted it as # 13)
I’m not sure if I chose the wrong glass style or if my idea itself was flawed. I know Ellen has tried to apply glass styles to something besides a bowl and she didn’t think it worked either so I am hoping you can help us out.
How do we decide which style to apply and what needs to be done to make it look right. How do we make a glass bowl look like a glass bowl and not like a glossy part of the wall.
Thanks
Carol”
Well, didn’t I have to right away start playing with those glass styles (after I ran to the store and bought them – how did I not have them in my stash??). Today’s tutorial will look at making a solid opaque object transparent and three-dimensional, and next week I’ll show you how to create a realistic look against some “wallpaper”. [<whispers> I had some issues with Elements and had to reset all my preferences, then it was still giving me a hard time. That’s why the text is a little wonky on the screenshots.] Let’s go!
I started out with this bowl from Wimpychompers‘ Baking Traditions (retired). She has a mixer in the kit too, with a metal bowl; I opted to use this one but the technique will absolutely work on pretty much anything. The only alteration I made to the bowl was to make it taller.

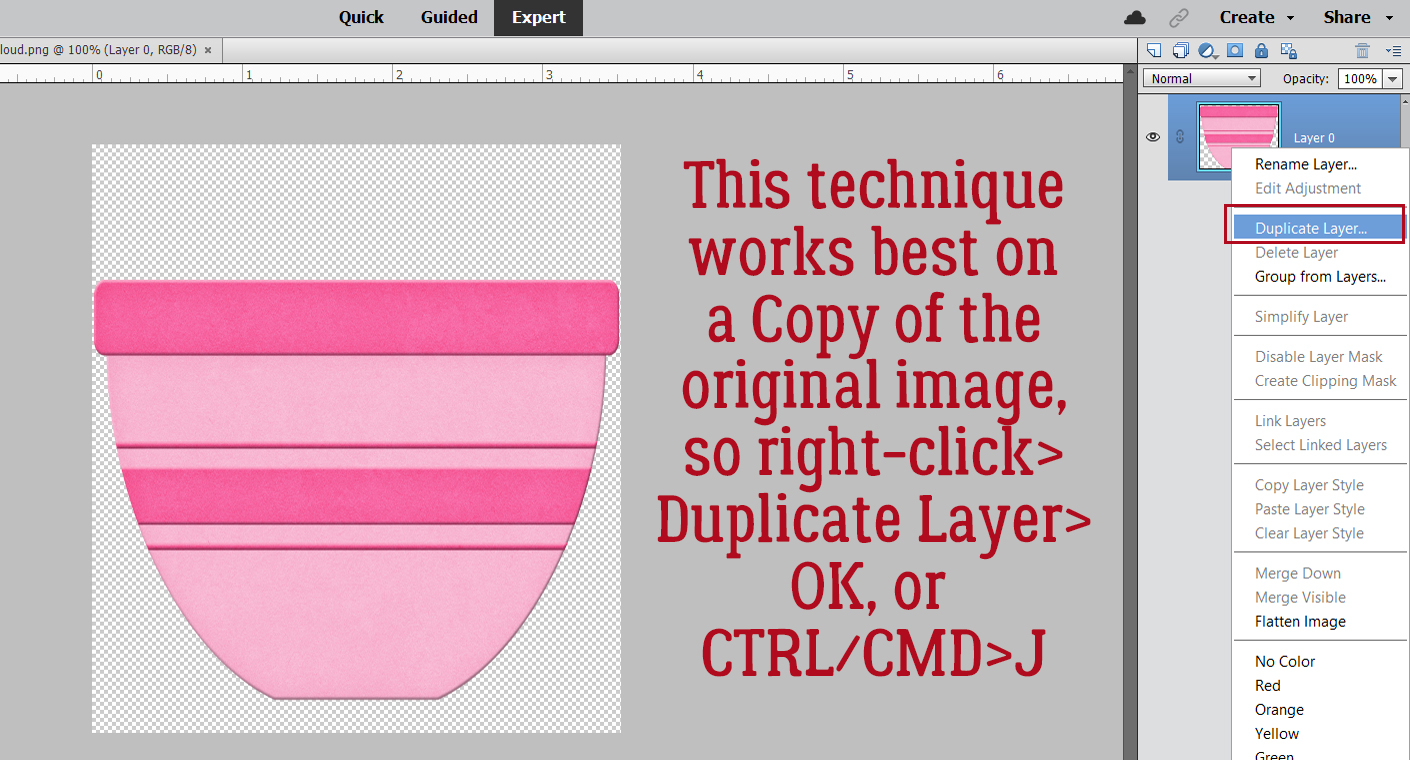
For this technique to work it goes best on a Copy of the object, so right-click>Duplicate Layer>OK or CTRL/CMD>J gets that done.
I have several clear glass bowls and the upper edges of them are all thicker than the rest of the bowl, so I decided to make my digital glass bowl the same. I’m going to give that top band a bit more heft later. For right now, I activated the Rectangle Marquee Tool.
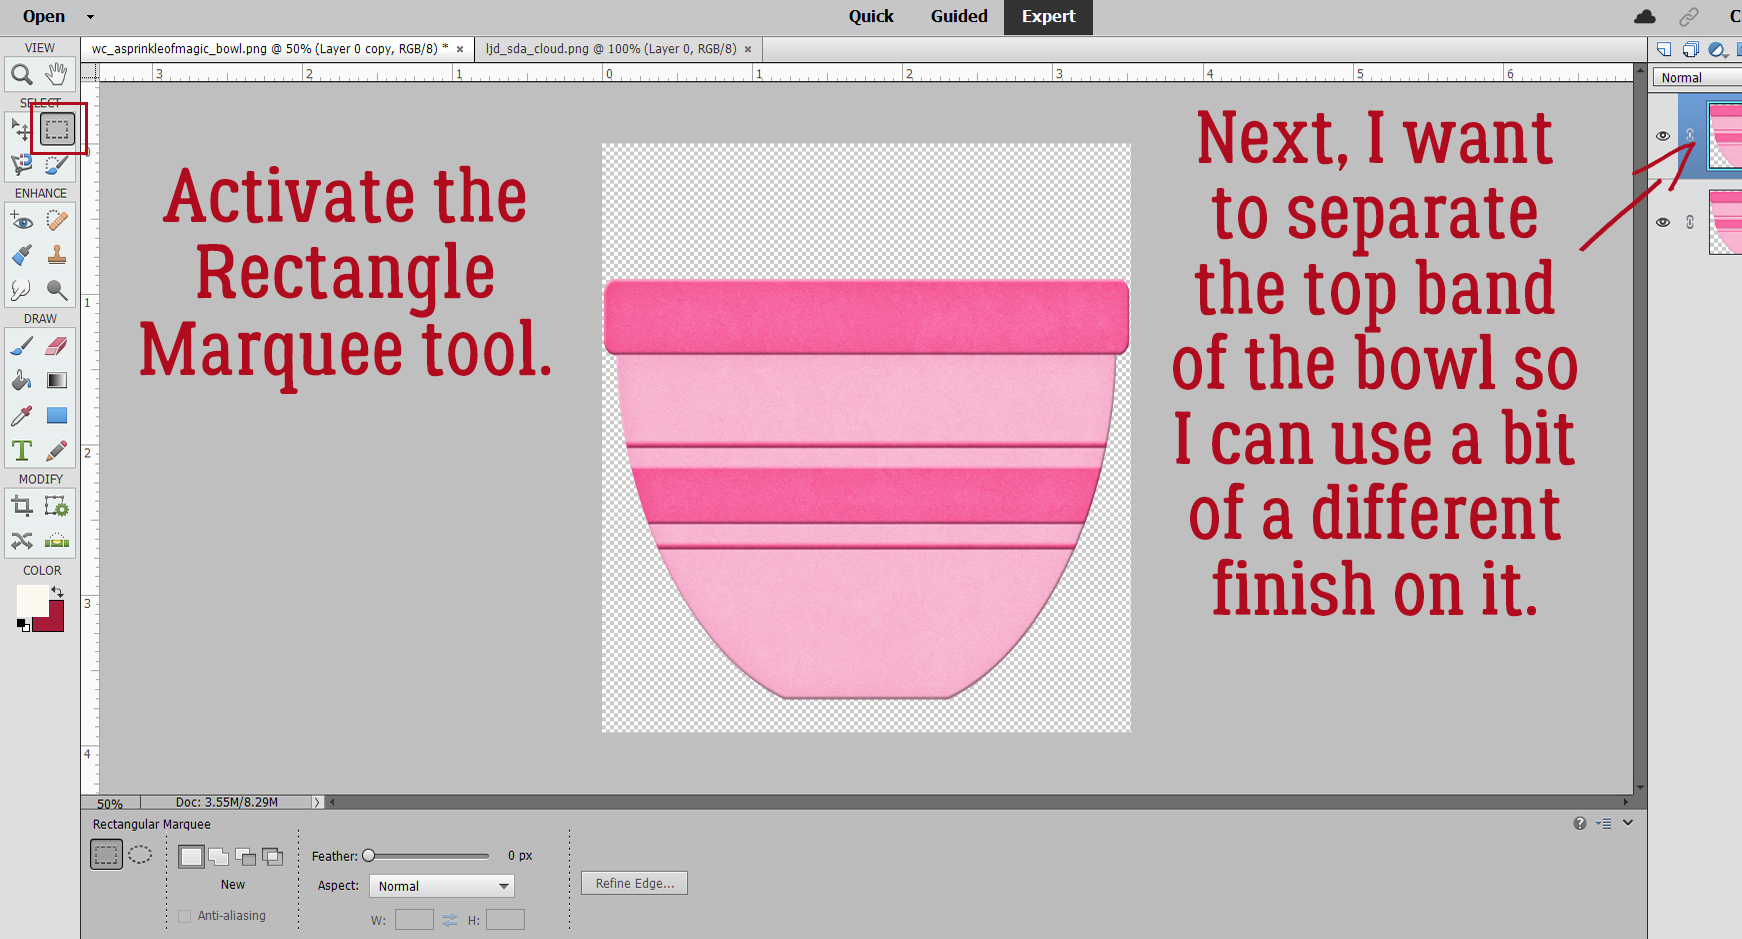
Working with the Copy layer, Select the top band using the Rectangle Marquee Tool as shown.

Now we want to make a Copy of JUST THE BAND. To do that you can click Edit>Copy or CTRL/CMD>C.

The band needs a layer of its own, so add a blank layer above the two bowl layers by clicking on the sheet of paper icon.

Now Paste the Copy of the band onto that new layer: Edit>Paste or CTRL/CMD>V.

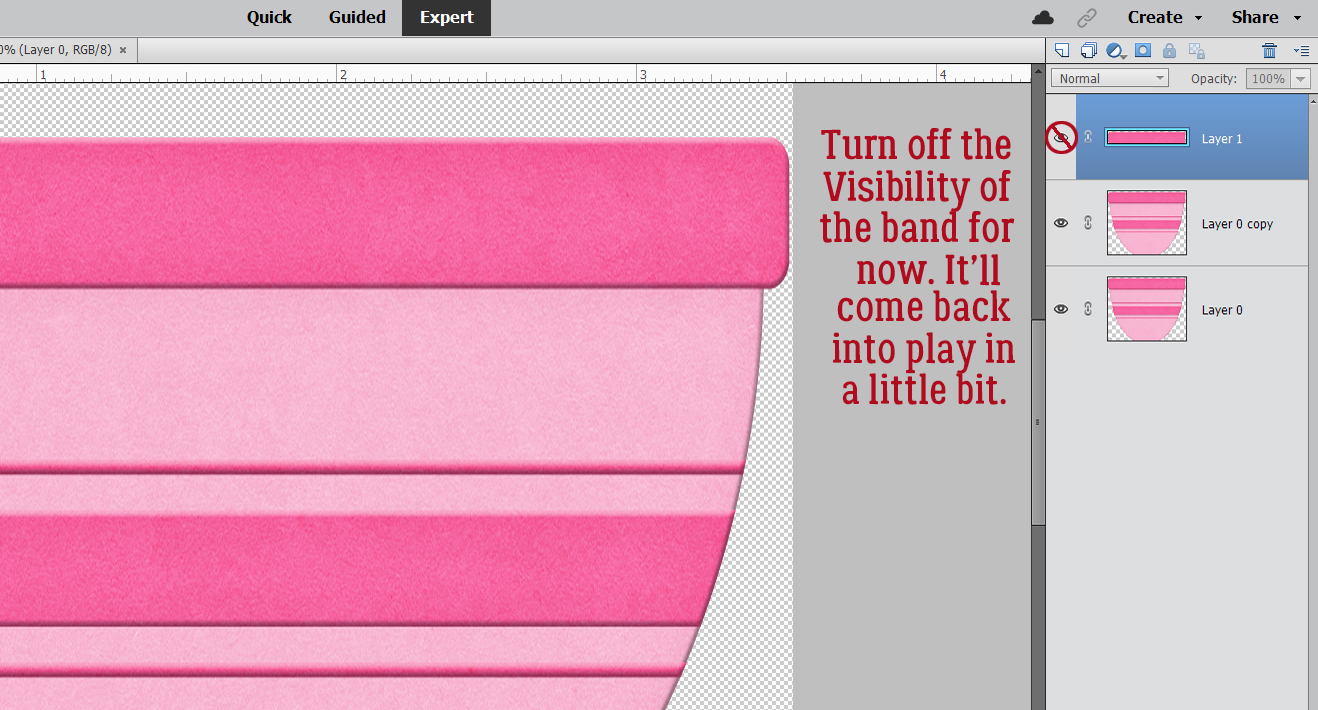
For right now, let’s turn the Visibility for the band off. It won’t go anywhere.
I was steam-rollering through the technique when it occurred to me that I probably haven’t covered how to load Styles. How remiss of me!! If you’re not a pro at loading Styles, follow along. First, make sure you know where the .ASL file containing the Styles lives on your computer. Click on the Styles button at the bottom right of the Layers Panel. It looks like a deck of cards. When the Styles menu opens, click on the icon that looks like a stack of paper, at the top right of the Layers Panel, up there underneath the Share button. That opens the settings menu for the Styles tool. Click on Load Styles. Then when the pop-up opens, find your .ASL file in your folders and double-click on it. There! The Styles will show up in the dropdown menu now. I rename all my .ASL files for easier recognition, so on my list the glass Styles come up as Glass Karen Schulz. (I’ve linked to the store so you can find them quickly!)
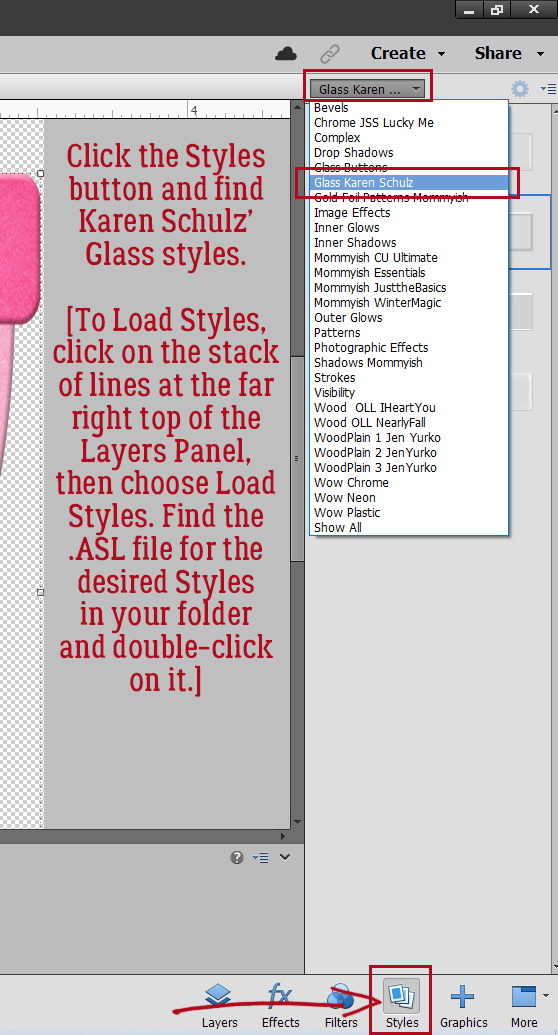
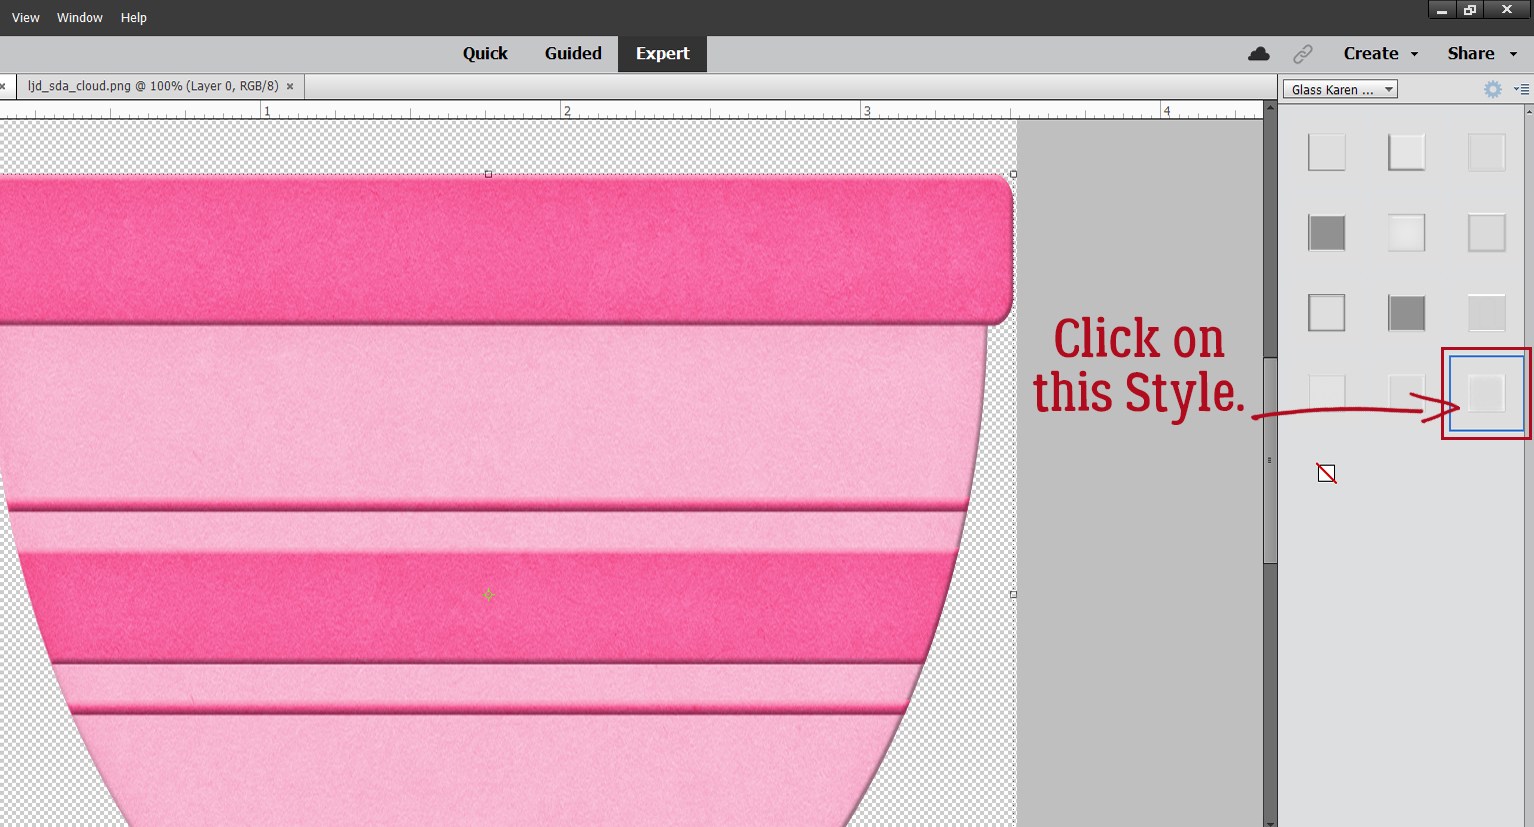
Karen hasn’t used a descriptive name for the Styles, just numbers. The one you want to use is the one I’ve outlined.
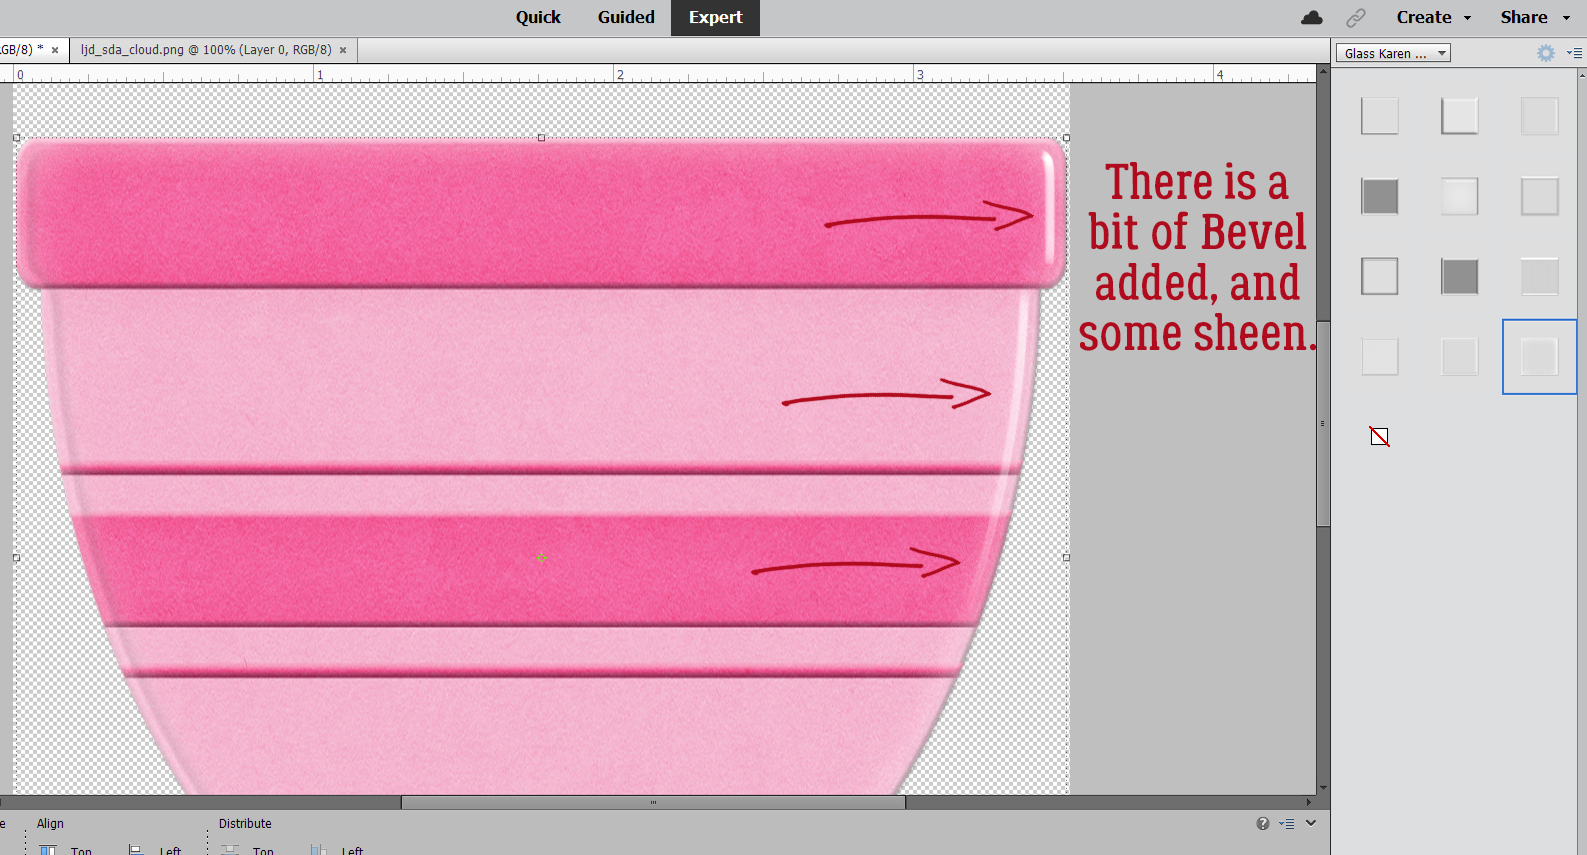
In this screenshot, both bowl layers are Visible. Can you see the rounded Bevel and the shine?
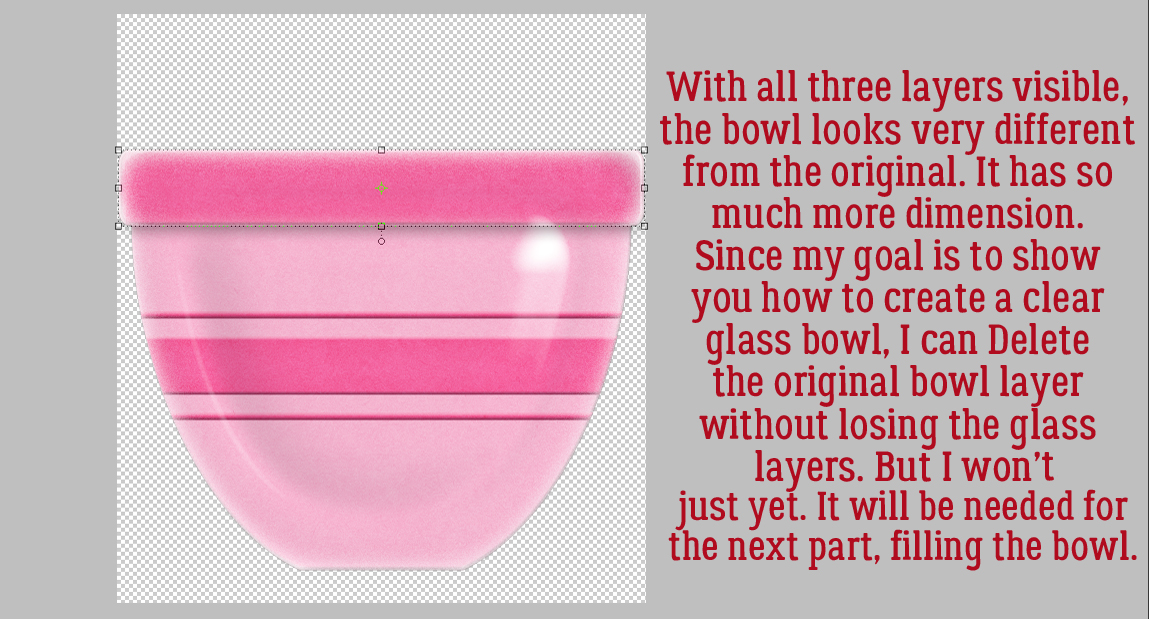
Here I’ve turned the original bowl and top band layers’ Visibility off. All that’s left is the shiny clear glass! But it doesn’t look much like a bowl. So let’s play with the settings! Double-click on the fx icon for the bowl’s Copy layer where the Style has been applied. You’ll see this pop-up menu with the default settings for this Style.

It took me some fiddling to get this right. Don’t be afraid to experiment! I increased the Opacity for the Inner Glow to 75% and the Bevel all the way to 250 pixels. Now it looks round!

Next, let’s apply a different Style to the band layer.

Now, we’ll tweak the fx as before, with these settings.

With the Visibility for all layers turned on, this is how the bowl would look as a glossy ceramic. The original bowl layer isn’t needed any more for the technique, but I’m not going to Delete it yet.
Let’s put some cookie dough in the bowl! I turned the bowl Copy layer and band off for this part, leaving just the original bowl visible. This cloud from Lindsay Jane‘s Sunny Days Ahead (retired) looks a bit like dough if you squint. But how can I make it fit into the bowl?

Make sure the cloud is completely covering the bottom of the bowl. Select the edges of the bowl by CTRL/CMD>clicking on the bowl’s layer thumbnail (the little picture in the Layers Panel) with the cloud layer active.

Now it’s time to Invert the Selection by clicking Select>Inverse or CTRL/CMD>SHIFT>I.

To remove the bits of the cloud hanging over the edges of the bowl, Edit>Cut or CTRL/CMD>X and it’ll disappear.

I nudged the “dough” up a bit to create the illusion of glass walls. You’ll see what I’m talking about in a minute. But before we get there, I want to make my “dough” look like it was made with butter and not shortening, so I’ll need to make a Copy of the “dough” layer. Right-click>Duplicate Layer>OK or CTRL/CMD>J.

I really tried to change the colour on this “dough” using the quick-and-easy Paint Bucket, but it looked HORRIBLE. So instead, let’s add a Layer>New Fill Layer>Solid Color.
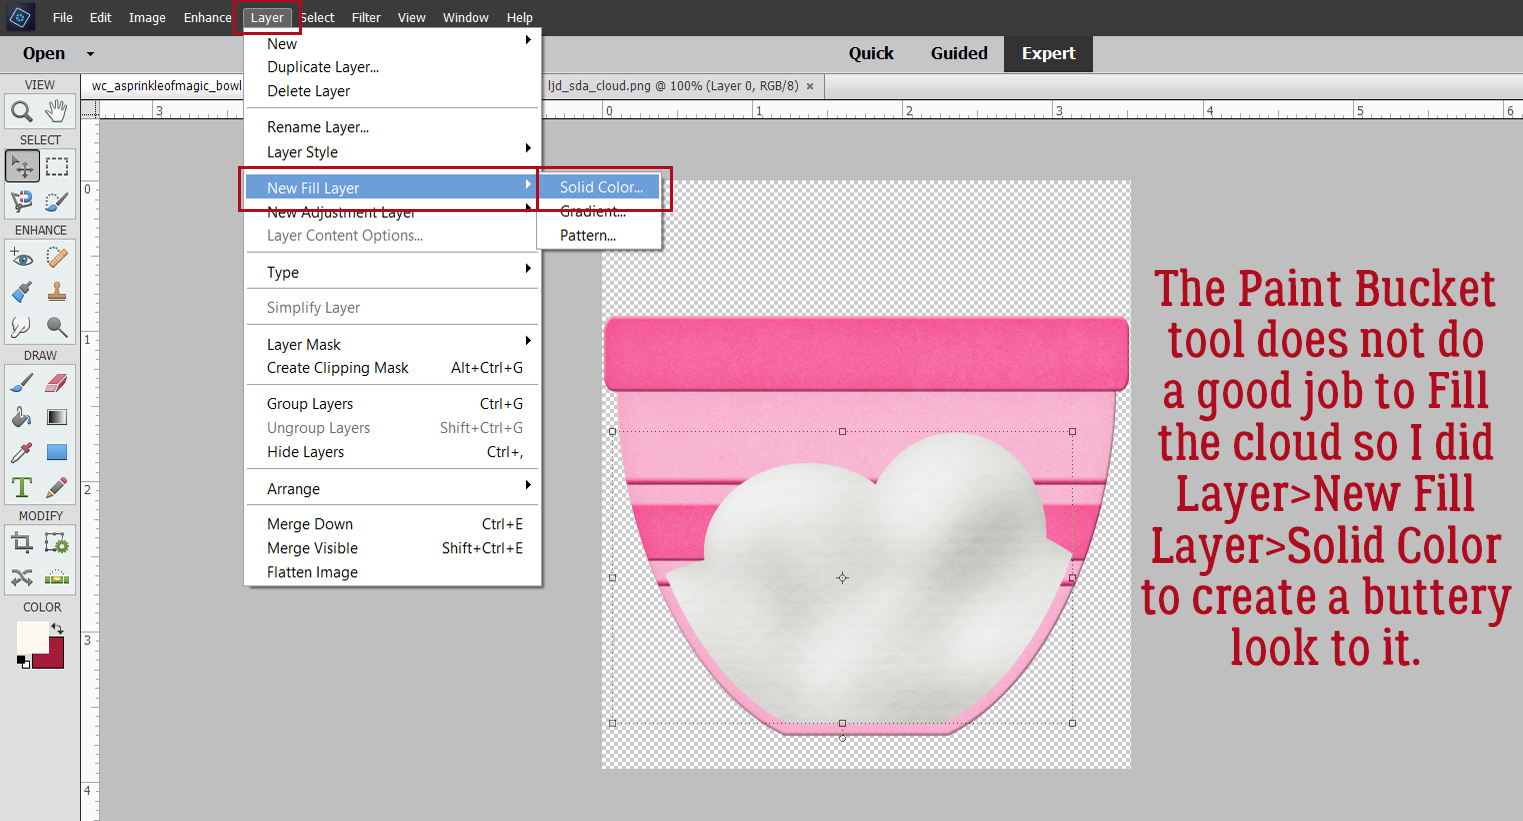
Check that box Use Previous Layer to Create Clipping Mask.

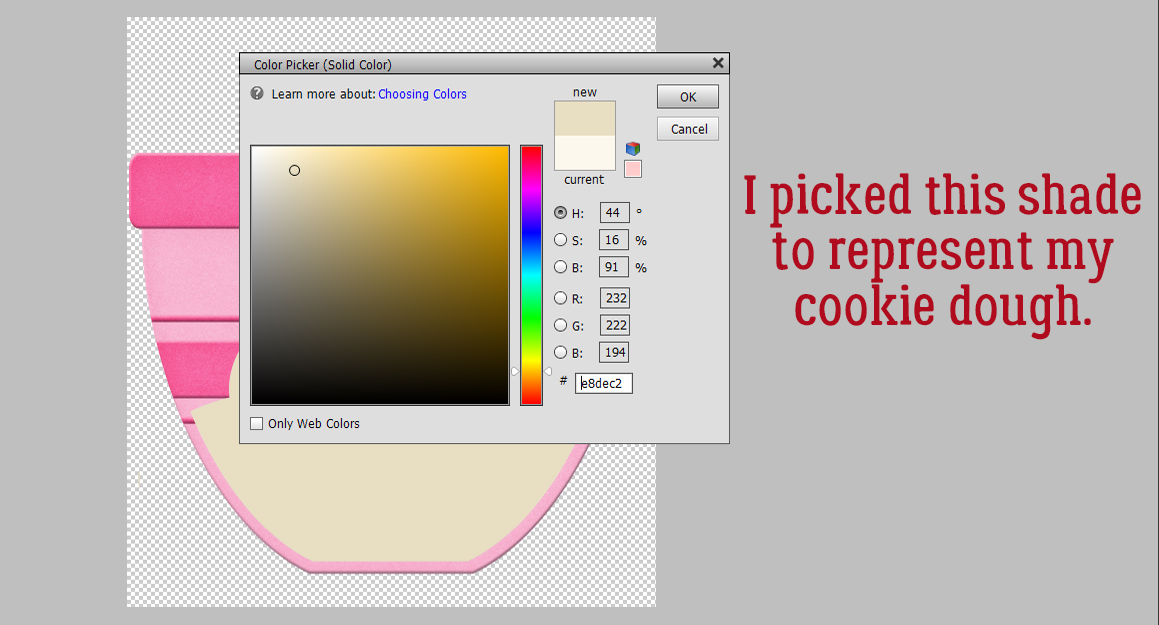
Then pick a colour that looks like “dough”. Or whatever colour you like!
Next, Merge the Fill Layer with the Copy cloud layer.

To preserve the lumpiness of the “dough” change the Blend Mode to Linear Burn.

Et voilà! Cookie dough in a glass mixing bowl!!

Carol, I hope this is what you were expecting. Happy birthday!
PDF VERSION : https://bit.ly/3FXy1cw
![]()