Remember that Pattern Brush?
![]()
[Link to PDF goes here when Ginger has time to convert}
A few weeks ago I showed you how to use the Pattern Brush Guided Edit to create your own scatters. And I might have mentioned I’d do another quick tutorial on adding Styles to them for an even more interesting look. Today’s the day! To make it easier for me (you… us) to see what I’m doing, I’ve dropped a piece of neutral solid paper on my workspace. There will be lots of review in this one, so you shouldn’t have to hunt down the original tut.
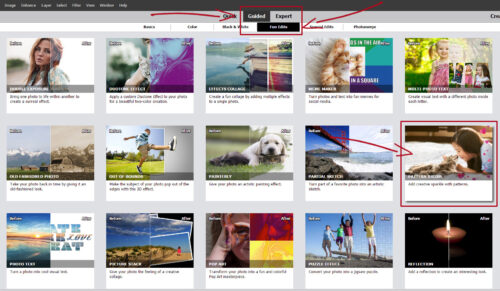
Click on the Guided button on the gray bar at the top of the workspace, then click on Fun Edits, then choose Pattern Brush.
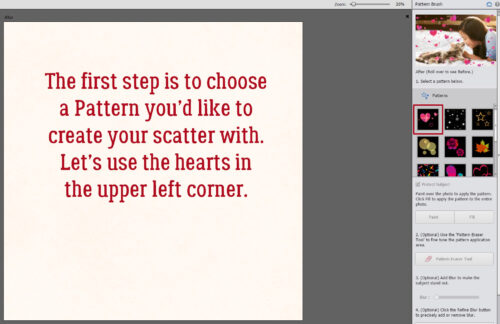
Now to choose a Pattern. I went with the hearts in the upper left corner of the menu. We’ll use another one later.
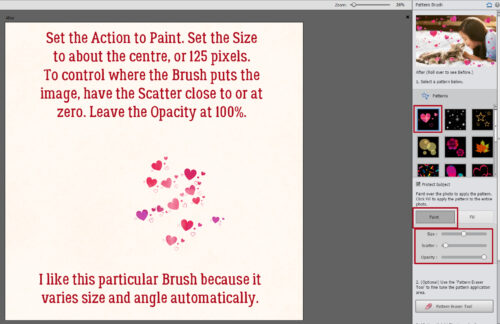
Make sure the Action is set to Paint. (If we were making randomly patterned paper we could use the Fill Action.) Set the Size to about 125 pixels, which is halfway on the slider. This particular Brush changes the size and angle of each grouping. In playing with this Edit, I discovered the best way to have the Brush go where I want it, the Scatter setting must be as close to zero as possible. Otherwise there’s a REAL randomness and a lot of overlap. Keep Opacity at 100%. When you use the Paint setting, you’ll see a “ghost” outline of the Brush close to the actual size of the image it’ll create.
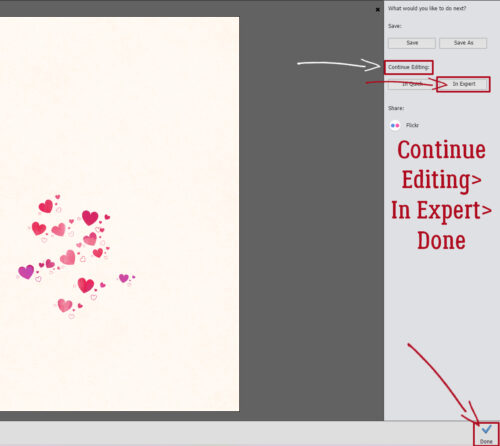
When you have a cluster you like, click the Continue Editing button then the In Expert button, then go down to the bottom of the screen and click Done.
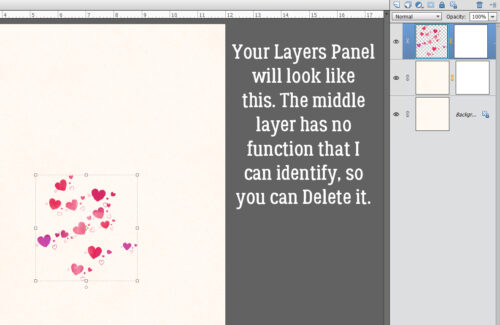
Elements has created a Layer Mask with your scatter on it, plus another layer with a Layer Mask that seems to have no role in the task at hand. Feel free to bin it.
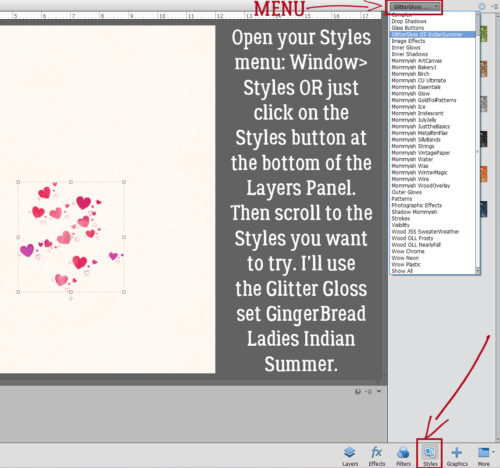
On to the fun part! Elements usually has more than one way to access a feature or a command; for Styles, you can click on the Window tab at the top of the workspace then click Styles. OR you can go to the bottom of the Layers Panel and click on the dedicated Styles button. You can see which way I do it. 😀 There’s a dropdown Styles menu attached to the button at the top of the Layers Panel once you’ve activated the Styles, so click it and start looking for the ones you want to try. I went with the GingerBread Ladies’ Indian Summer glitter gloss.
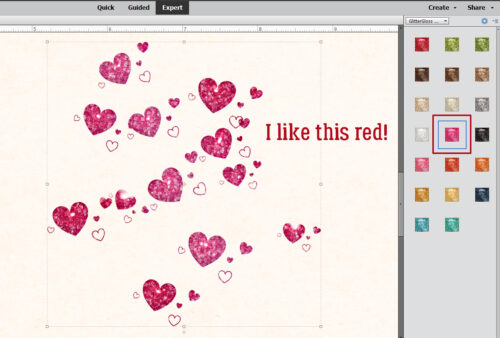
I tried all the reds and pinks, settling on this one. It’s nice, but still a little bleh. So I’m going to tweak the settings.
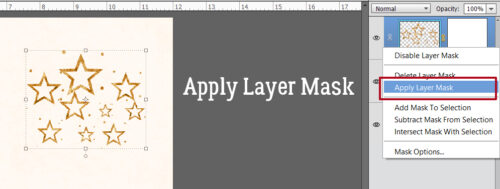
But before I can do that, I’ll need to Apply the Layer Mask to get to the adjustments.
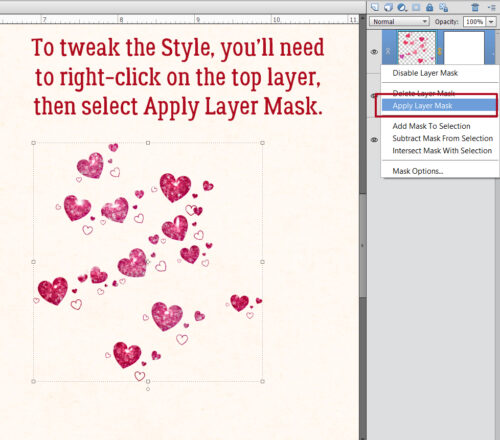
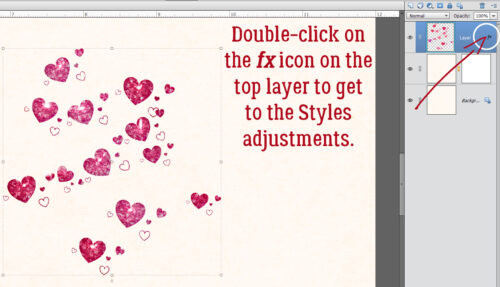
There it is! Double-click on the fx there on the right edge of the layer.
These are the default settings for the Style I used. Any or all of them can be adjusted, with what’s happening visible on the screen in real time.
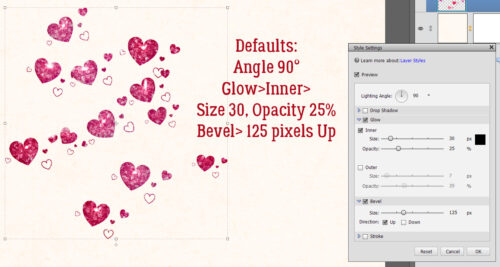
I changed the Lighting Angle to 120° (make sure this setting matches the rest of your layout!), added a little Drop Shadow close to the hearts and decreased the Bevel. The difference is subtle, but now the hearts look rounded, shiny and have good dimension. The littlest, outline-only hearts look like they’re glittery.

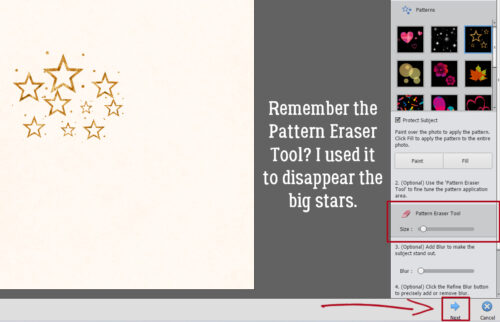
Next I played with the Star Brush. It only varies the size of the cluster, so all the stars will be in the same orientation. [There’s a way to change the angles, but it’s a multi-step process involving a lot of Cutting and Pasting, and we’re not going there.] If you’re wanting to keep your scatter on the smaller scale, you can stamp your larger “ghost” Brush on another part of your canvas like I have here.
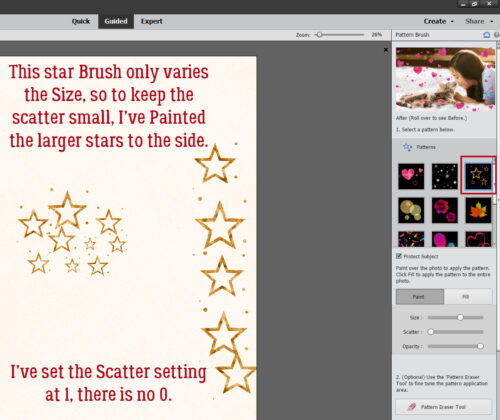
Then I used the Pattern Eraser Tool to make the bigger starts go away. 😉
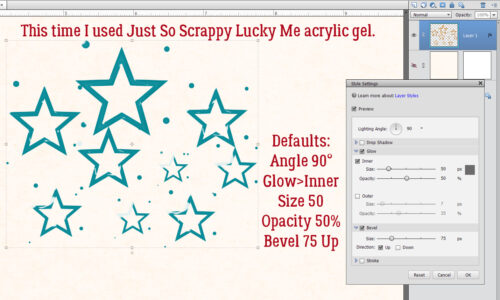
Katy, the designer Just So Scrappy/Ooh La LaScraps usually creates an array of Styles for her collections. Aimee Harrison always has matching Glitters; LDrag Designs, Wetfish Designs, Karen Schulz and Cindy Ritter too may have some Styles you like. The one I used is Just So Scrappy Lucky Me acrylic gel. Defaults as shown.
I want a bit more of a defined shine to them, so I’ll Apply the Layer Mask.
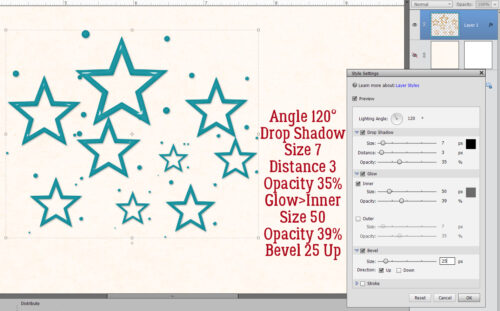
Once again I changed the Lighting Angle to 120°, added a Drop Shadow, decreased the Opacity of the Inner Glow and dropped the Bevel by 2/3. Now the stars look like they’ve been molded out of acrylic.
You can have a lot of fun experimenting with this Edit and with your Styles. Now, go get ready for [inter]National Scrapbooking Day… it’s coming up fast! Who knows, there might be some Styles up for grabs!
P.S. Thank you all for being so patient with the PDF versions… Ginger‘s been run off her feet with the server change and all the issues that cropped up for that, but she promises to get the conversions done as soon as she can.
![]()