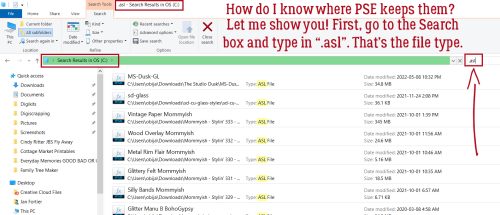
Quick Trick: What the Font?!
![]()
PDF Version : https://bit.ly/3SqmX0b
Today’s Quick Trick is literally a 5 second life saver! You may recall that I’m teaching myself to use Cricut Design Space. It has some similarities to PSE, although it’s REALLY not intuitive at all. One similarity is the extensive use of fonts in projects. Which, of course, leads to… “ACK!! I need to update this/correct spelling/change wording/add something and I can’t find the font I used! Help!!!” This one little trick will end that – and it works on both platforms!
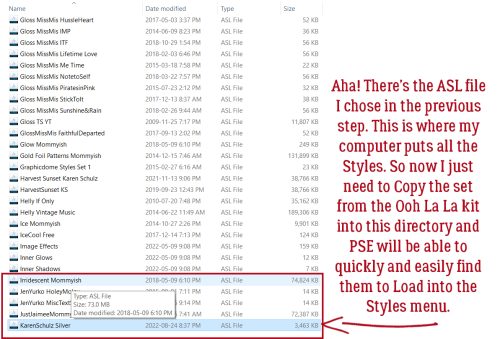
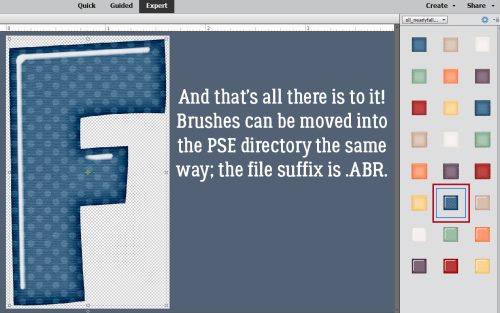
In my screenshot, the text in the speech bubble is a font I picked up somewhere… could be dafont, or Creative Fabrica, or Font Bundles… I don’t know. I love it for this layout of my youngest grandpuppy. But it’s not going to stay in my brain.

But – if I double-click on the text to the right of that big T where Elements is just showing the first couple of words of my text, I can type in the font’s name there and the layer will save it for posterity! Now, this only works if you save a layered version, either PSD or TIFF, of your layout, as I do. If you know you’ll be Simplifying your text – to change fonts, for example – you can do this step before you Simplify. The layer’s new name will be the same as your font.

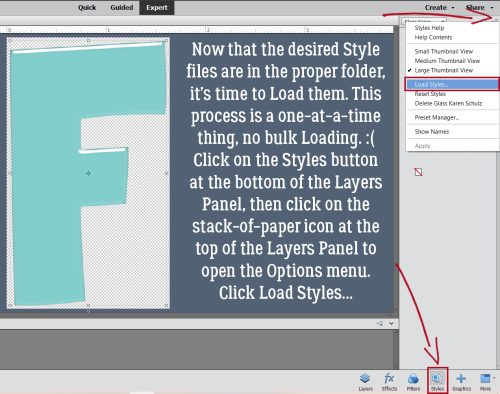
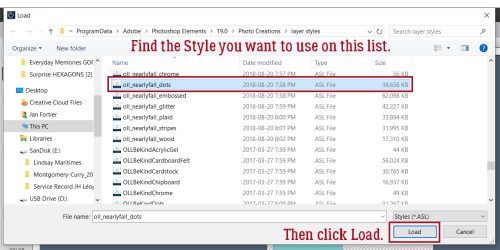
Another option is to add a text layer to your layout somewhere with the names of all the fonts you’ve used. This layer can be made invisible by closing the eye on the layer; it won’t show in the Gallery or if you decide to print your layout, but it’ll be preserved in case you need to use the same fonts again!
Personal note: My dad’s cancer is back and he’s filled with metastases. He has declined treatment and will be receiving palliative care. It’s impossible to predict how long he has, so if I’m suddenly MIA, you can assume I’m with my family.
![]()