Anchors Aweigh! (Reverse Masking)
![]()
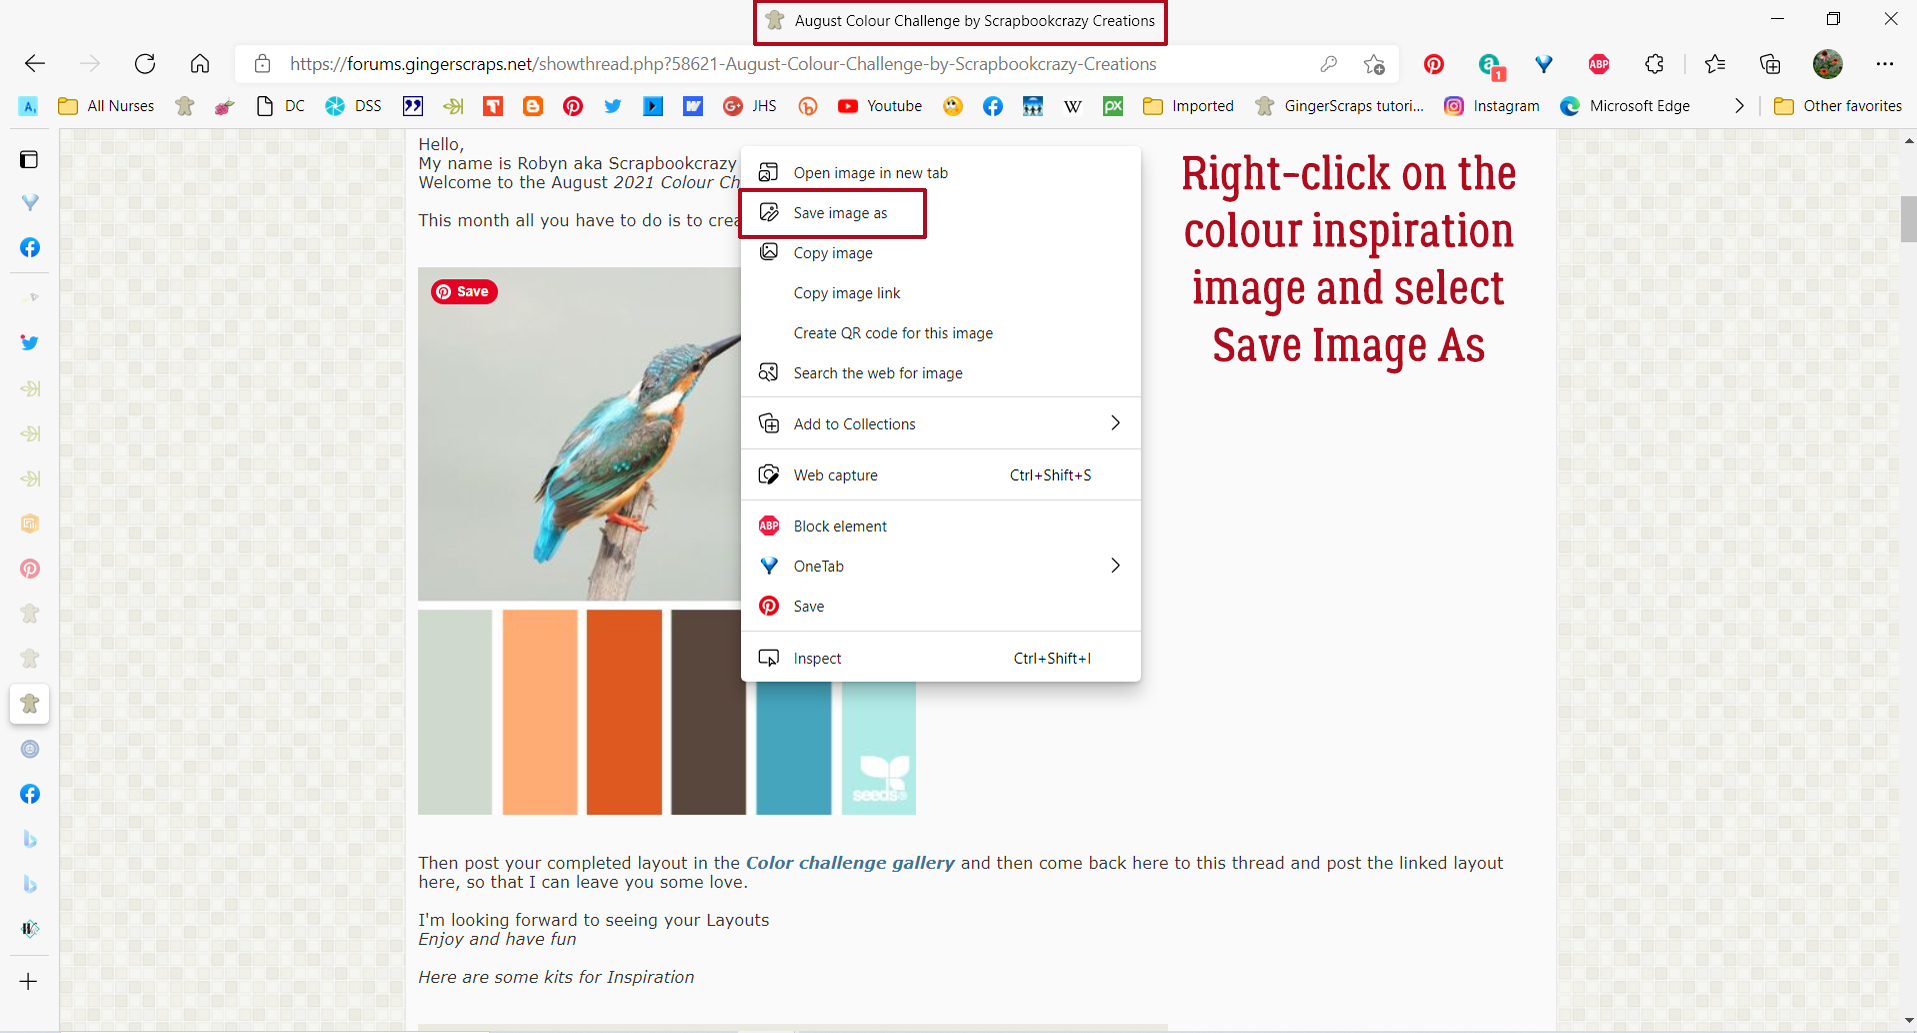
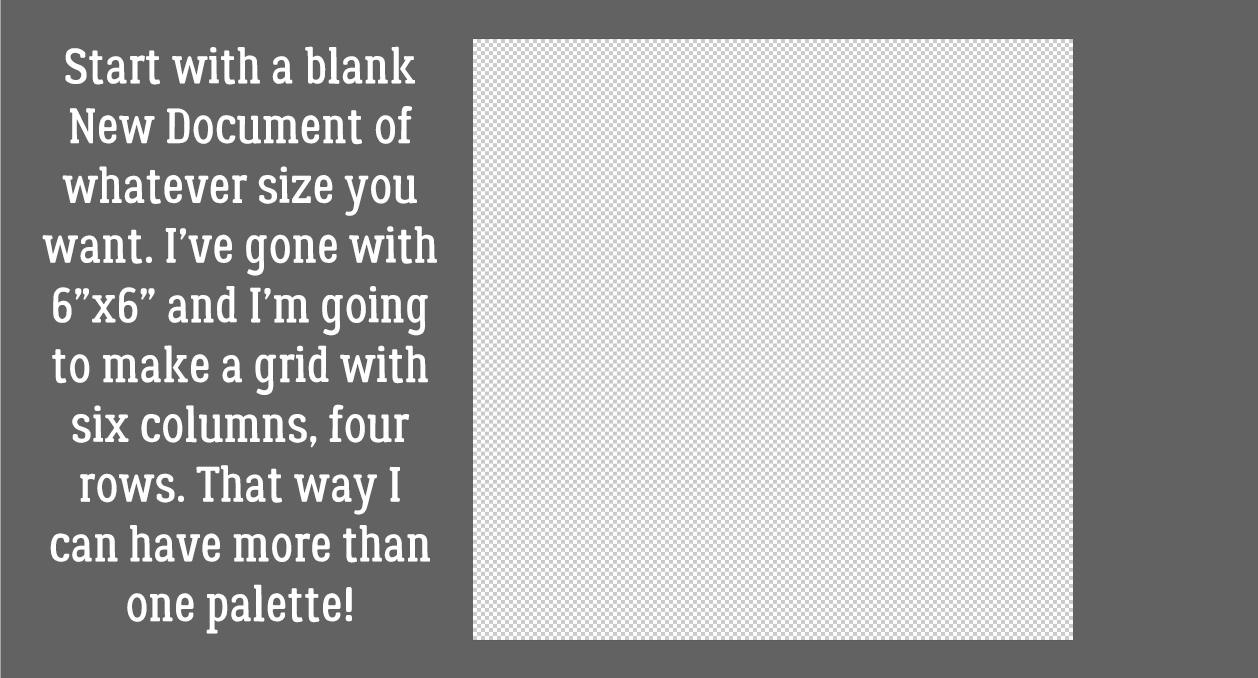
Hey GingerScrappers! It’s raining in the Okanagan… something that hasn’t happened much around here for months. That makes today a perfect day to do some scrapping.
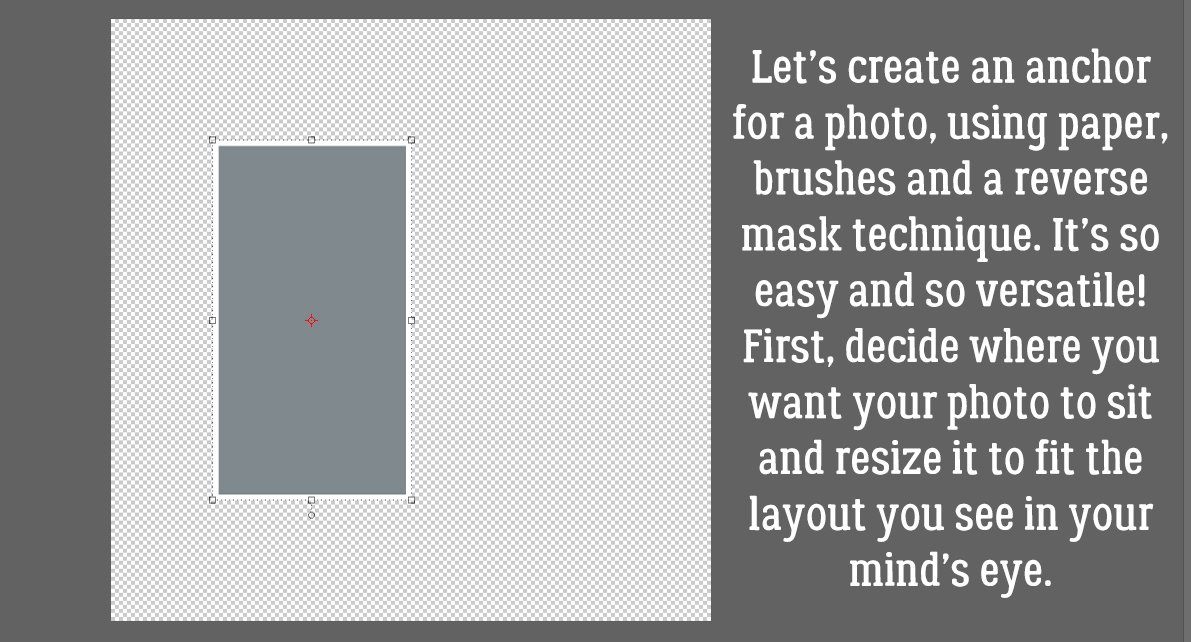
I want to talk a little bit about anchors though. Not the heavy iron pieces that keep ships from floating away. The kind that help bring cohesion and polish to our layouts by keeping our photos from floating away! Think for a minute about how template designers create their templates and what draws your eye to them. There are lots of factors that come into play when choosing a template, and consciously or unconsciously, anchors are usually involved. They can take many forms. Paper strips and stacks are likely the most common anchors. But paint splats, brushes, masks, scatters and ephemera can all play that supporting role. Even a grungy paper itself can provide an anchoring effect when there’s a faded area that sort of frames your photo. But what if you want something a little different? Let me show you how to create an anchor point using paper, brushes and a reverse mask. The suggestion for this topic came from Ellen [gmae], with a hat-tip to AnnieA for the example she provided in the Gallery.
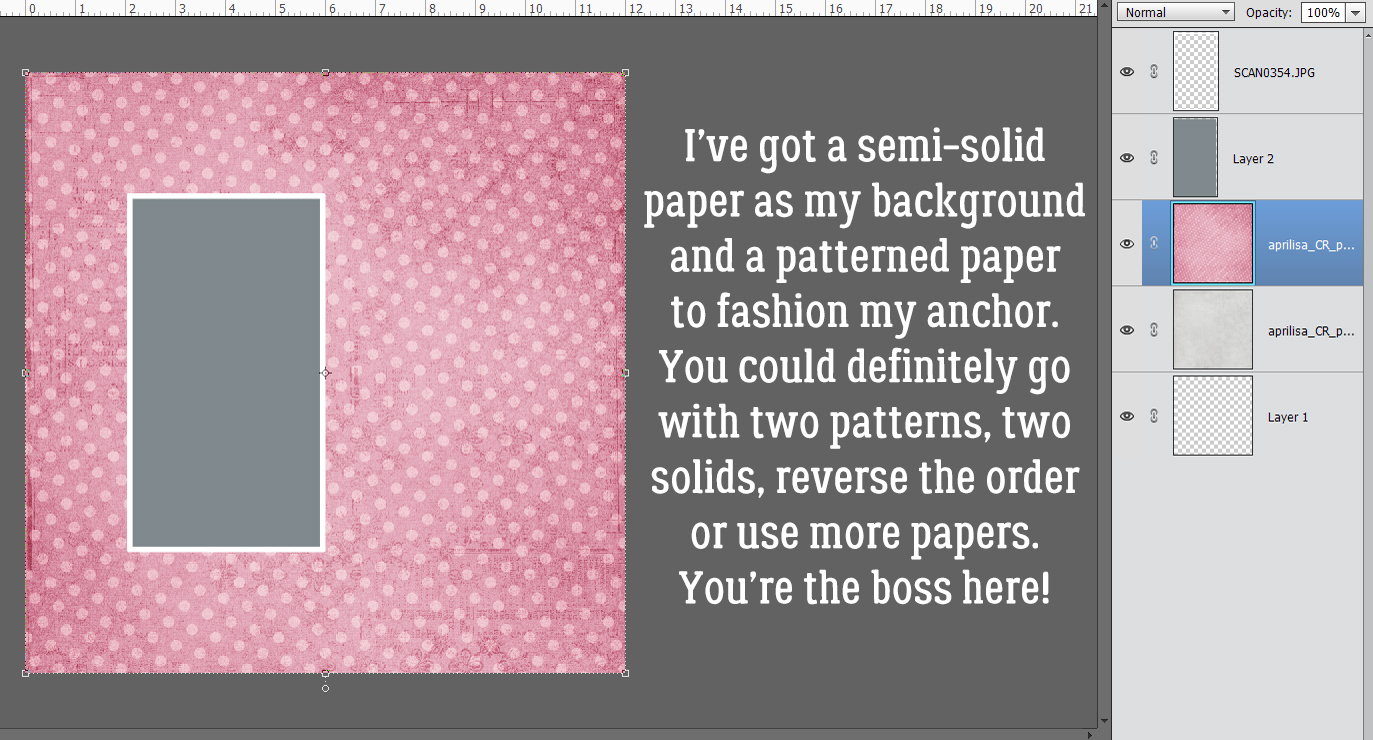
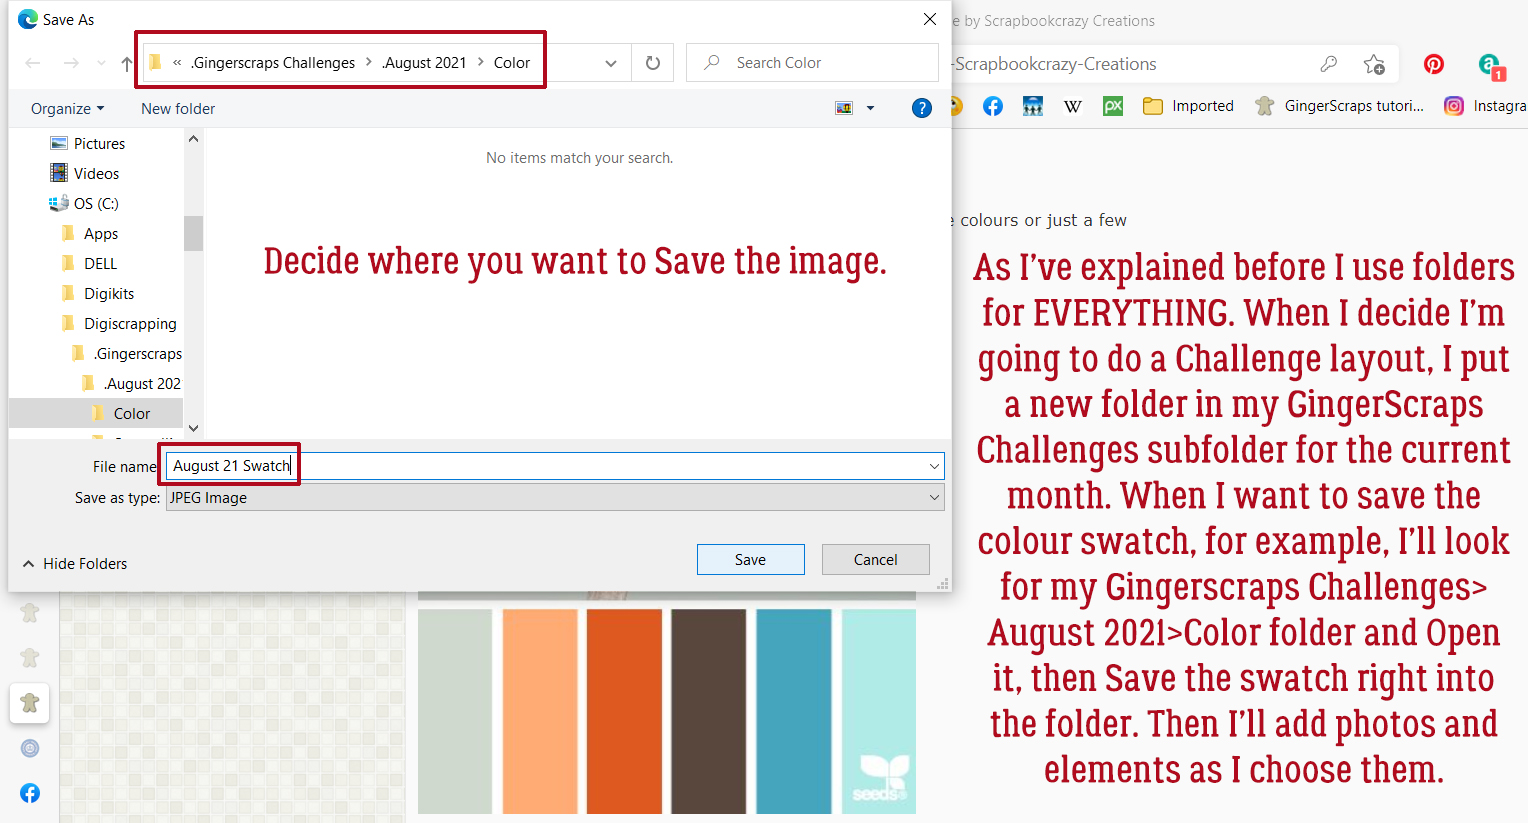
In my demo, I’ll be using a semi-solid paper and a patterned paper from Aprilisa‘s (retired) Captured Romance kit. [I chose it because my layout will be showcasing a heritage wedding photo.] If you choose to use this technique, you can use whatever combo you like: solid/solid, solid/patterned, patterned/patterned or any other combination you like. I’m using a freeform method in my demo; if you choose to use a template, turn visibility to all layers but the background and your focal photo spot off so you can see what you’re doing while we work through it. My photo spot is sized to the wedding photo I’m going to use.
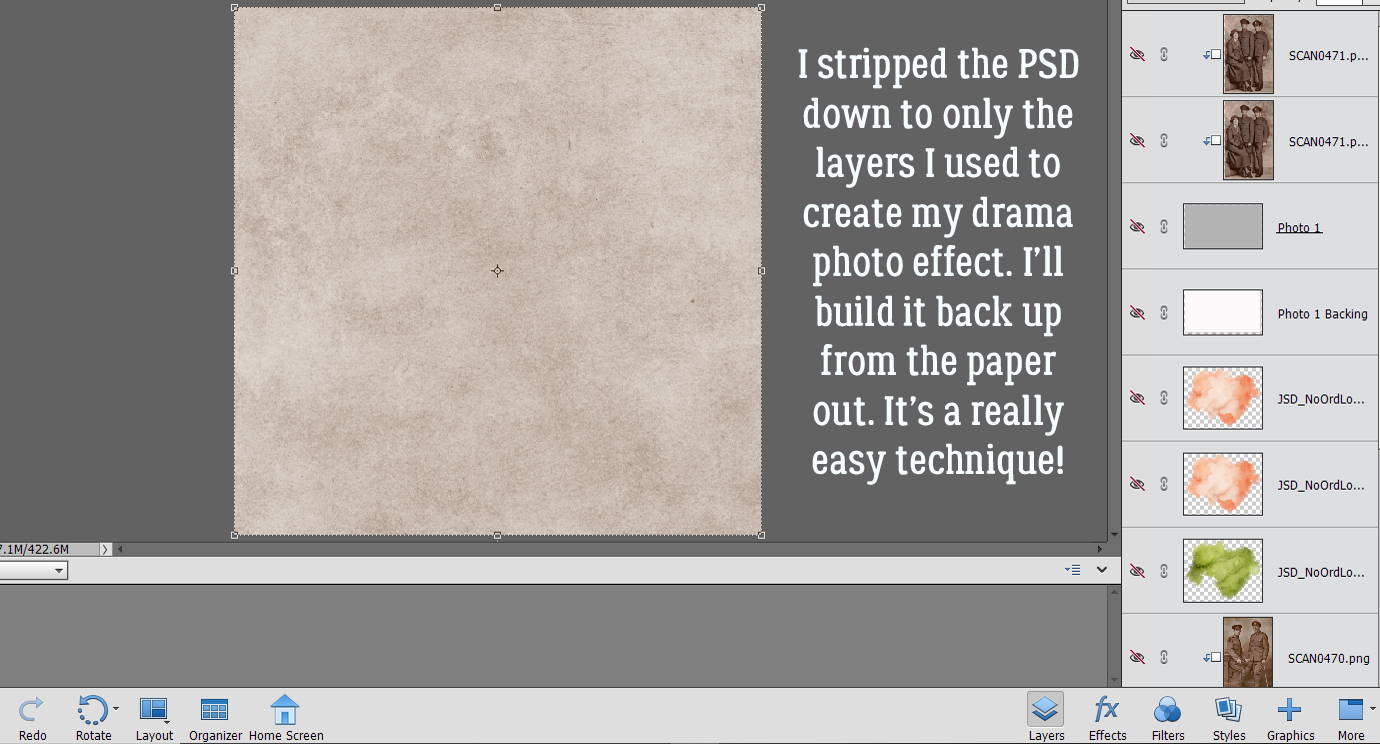
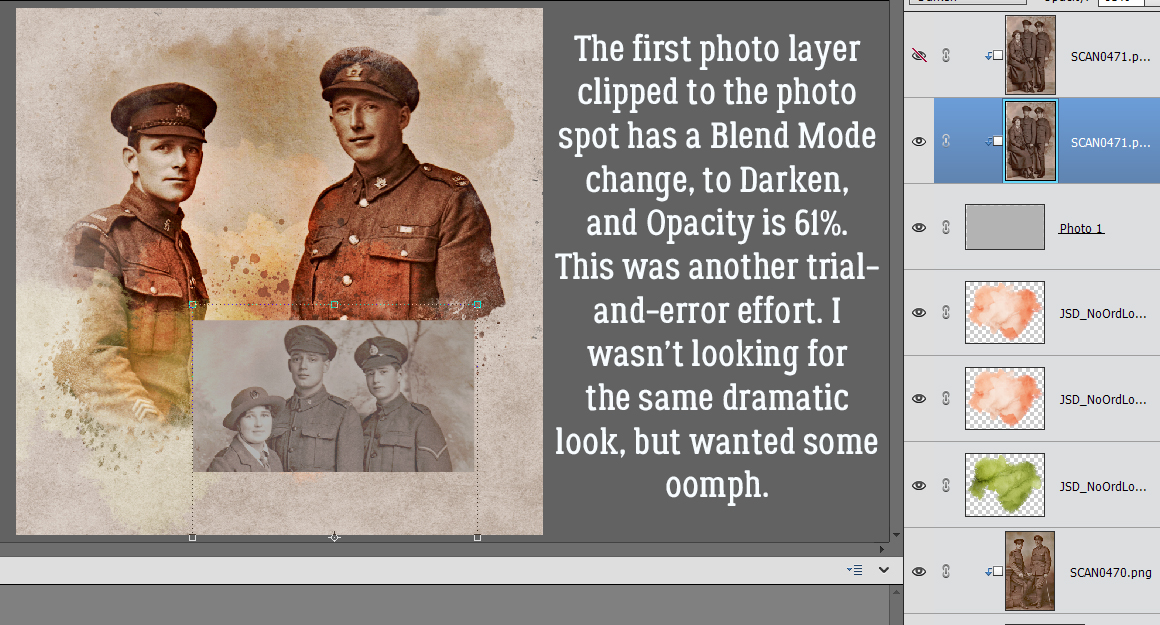
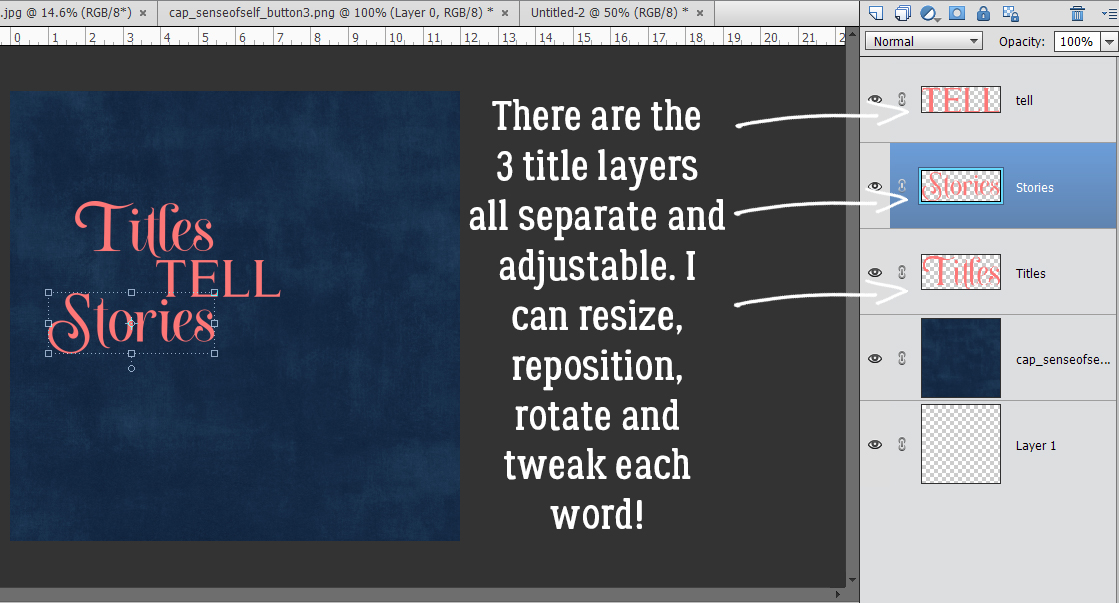
I stacked the semi-solid gray paper behind the photo spot and popped the patterned paper above it.
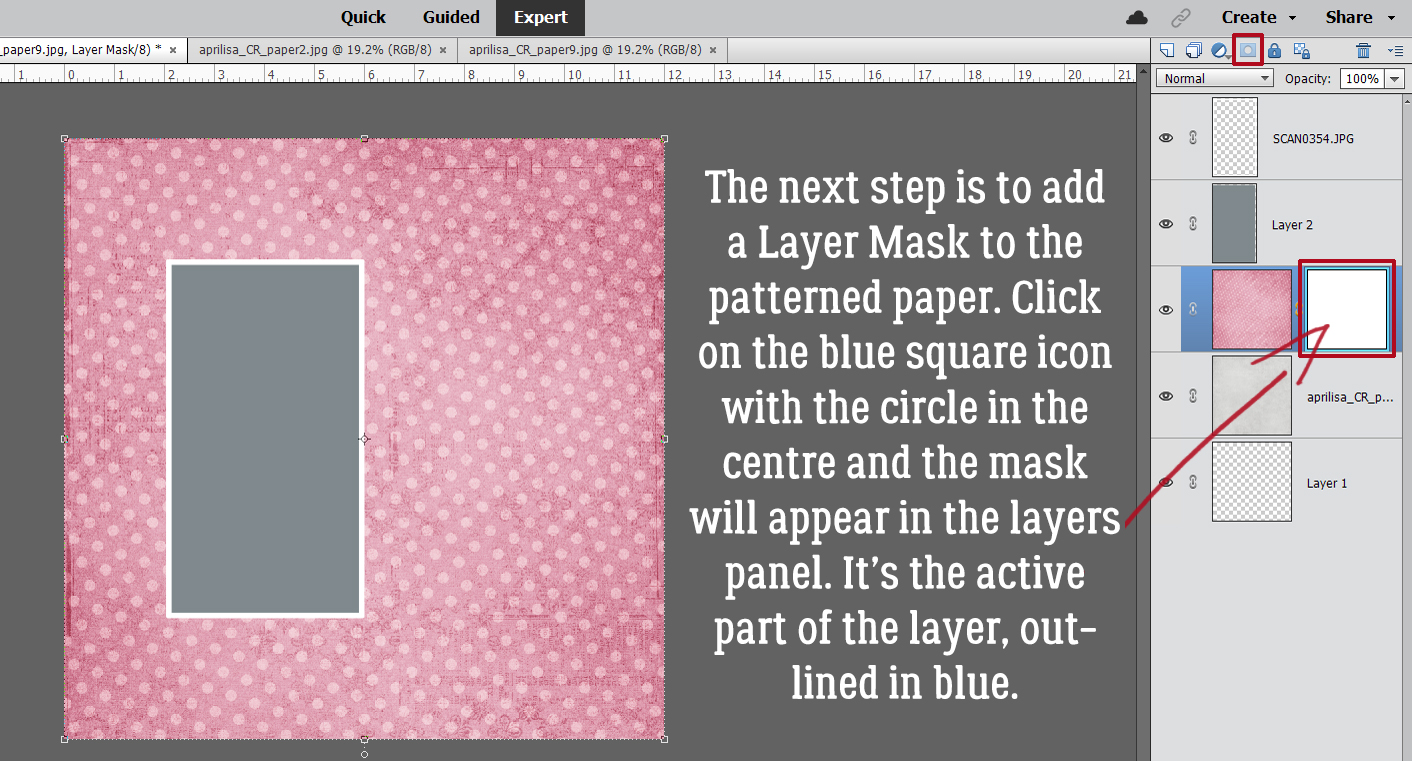
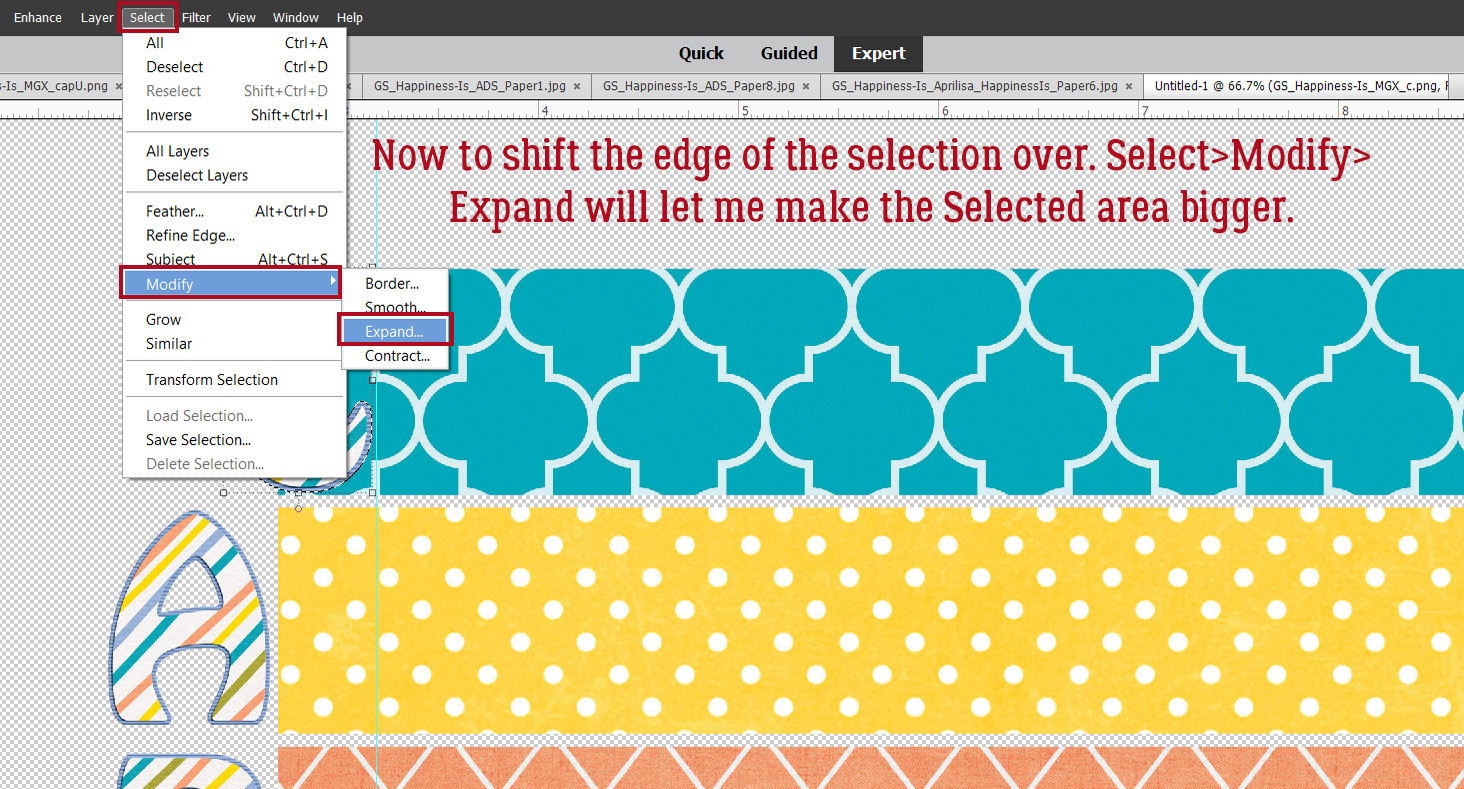
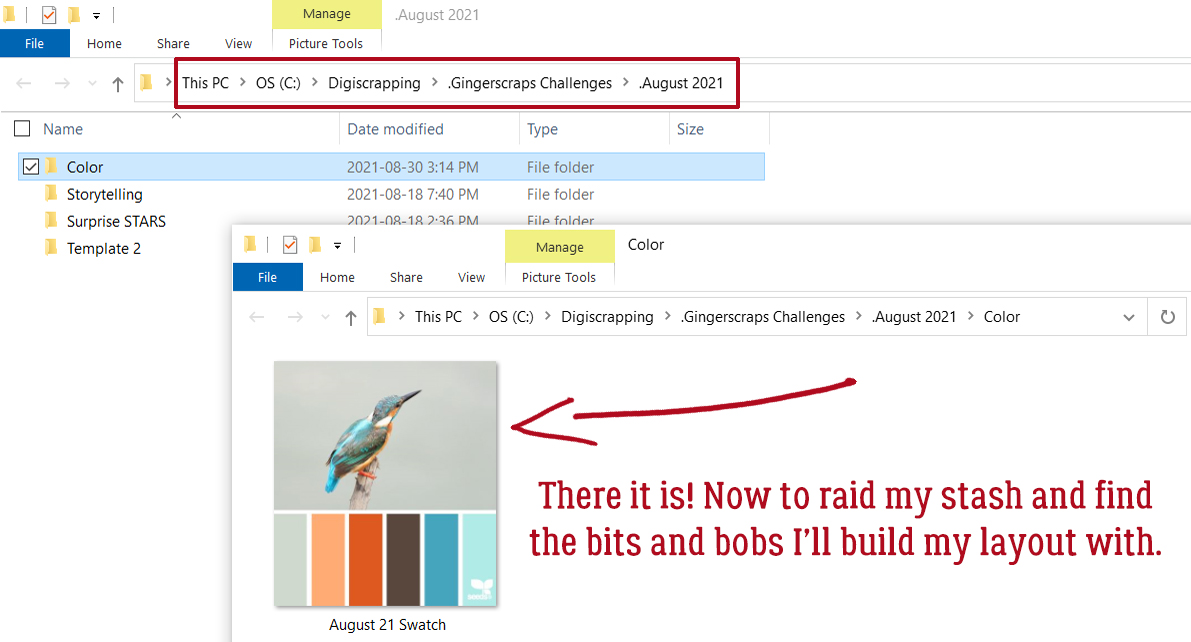
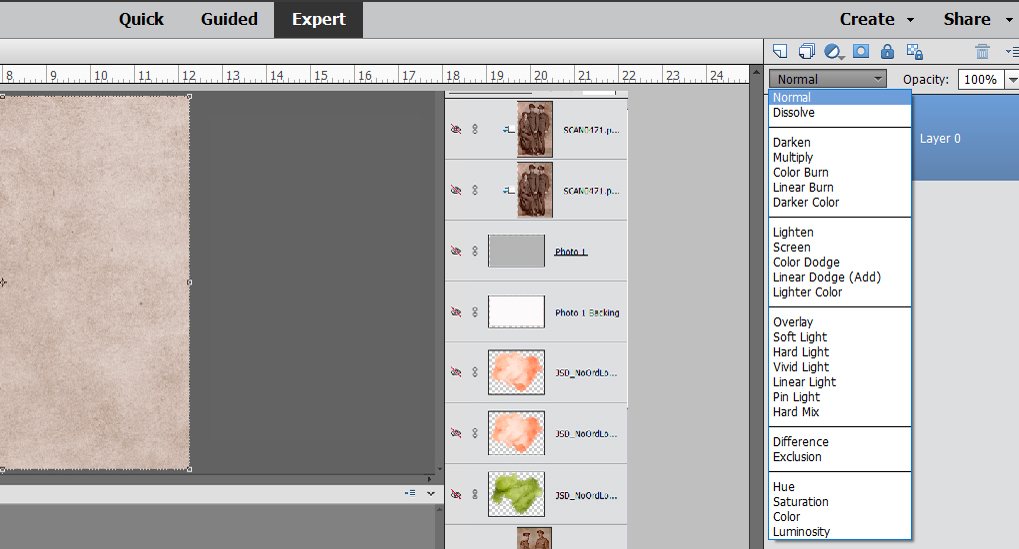
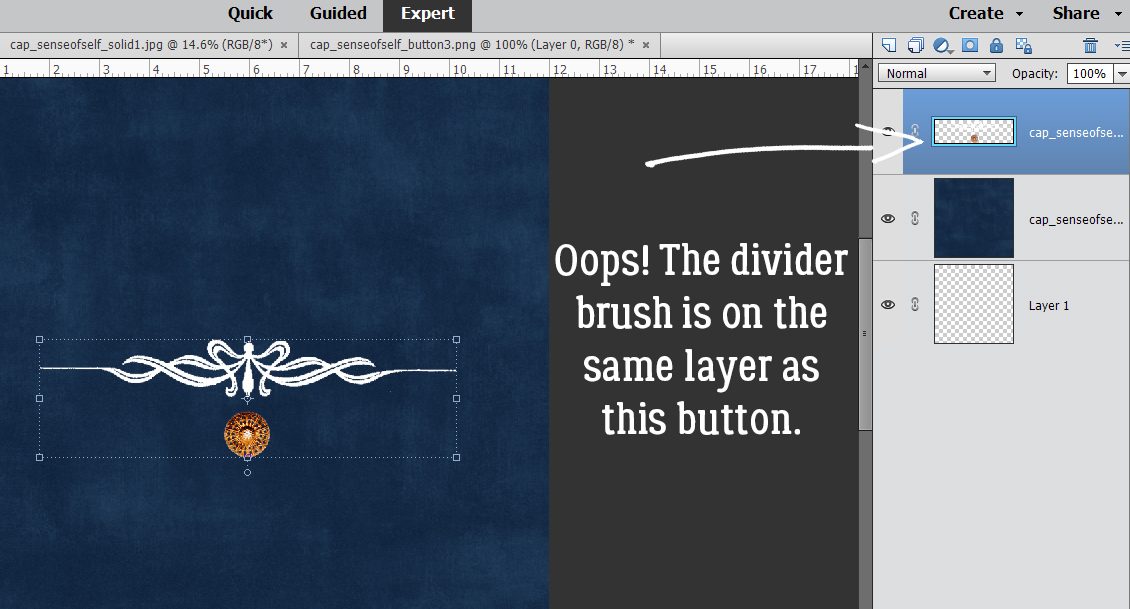
If you’re a faithful follower [thank you!!] you’ll already know I love layer masks. They’re considered a non-destructive way of removing parts of a layer; you’ll see that the colour pickers change to white and black when you add a layer mask. White reveals, black conceals. But whatever you’ve concealed is still there, lurking in the background, just in case you want it to reappear. That’s the definition of non-destructive in the Photoshop/Elements context. If you’re concealing some part of a photo or an object and you oops, all is not lost. Just click the X key to swap conceal for reveal and paint it back in! The uses for layer masks are infinite, limited only by your imagination. So to create a layer mask, click on the blue square icon with the circle in the centre, found across the top of the layers panel. You’ll see the mask appear to the right of the layer you’re masking, and it’ll have a blue box around it indicating that’s the part of the layer that is active.
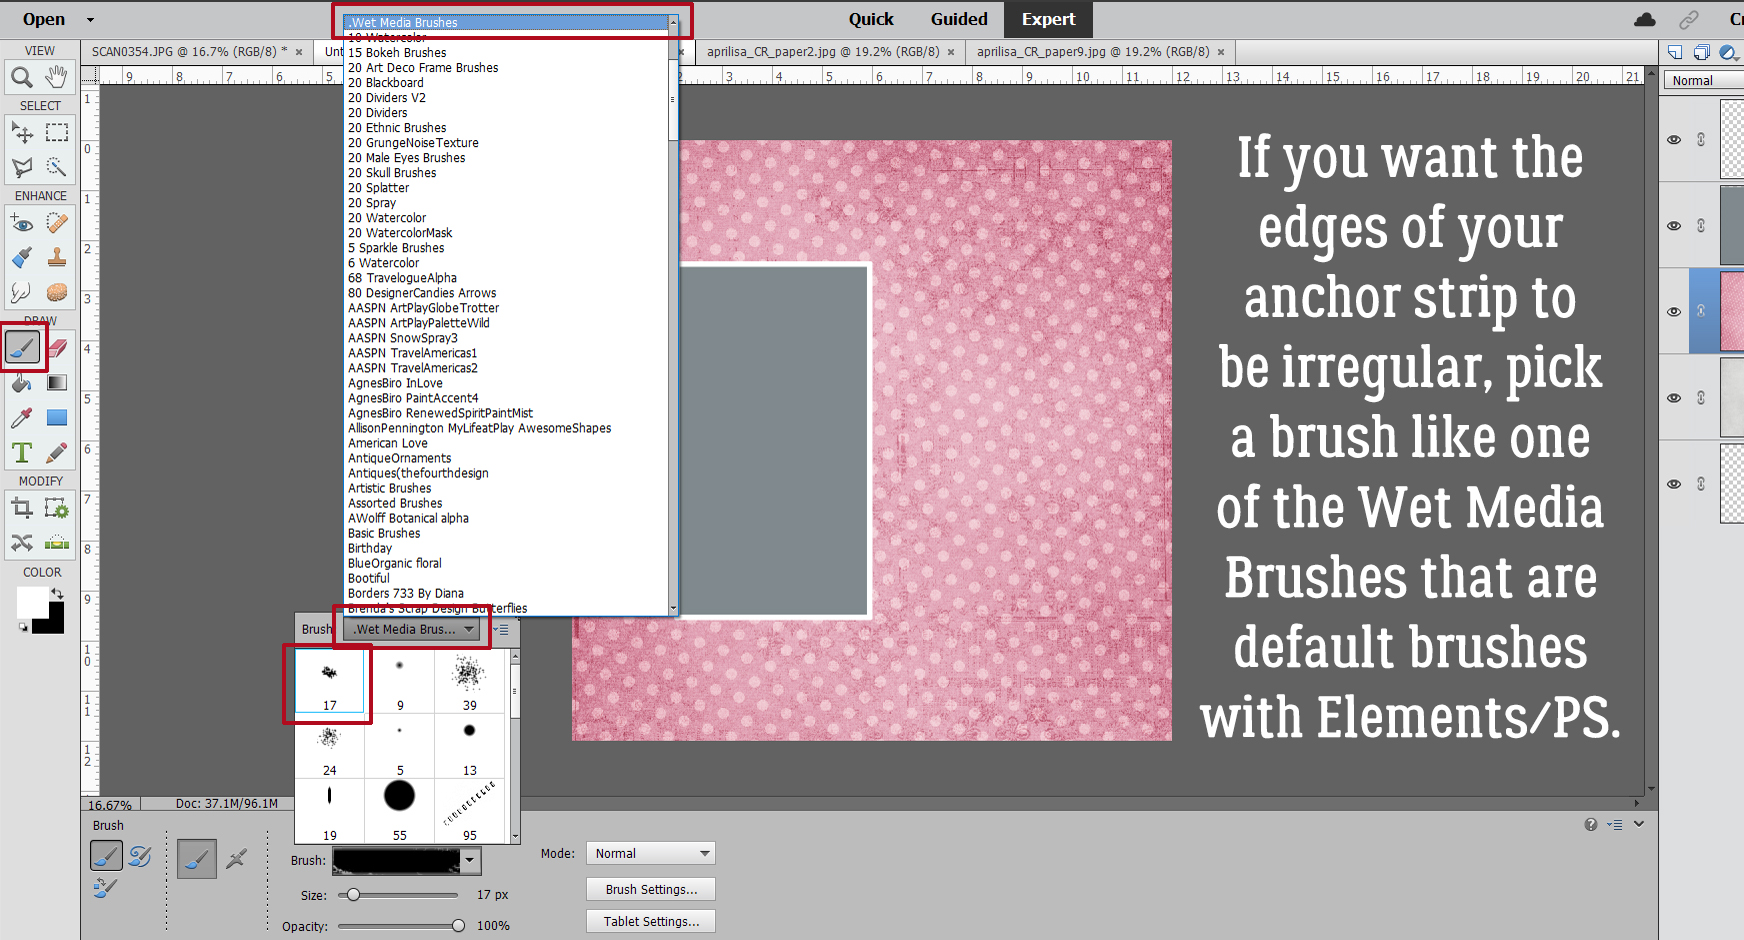
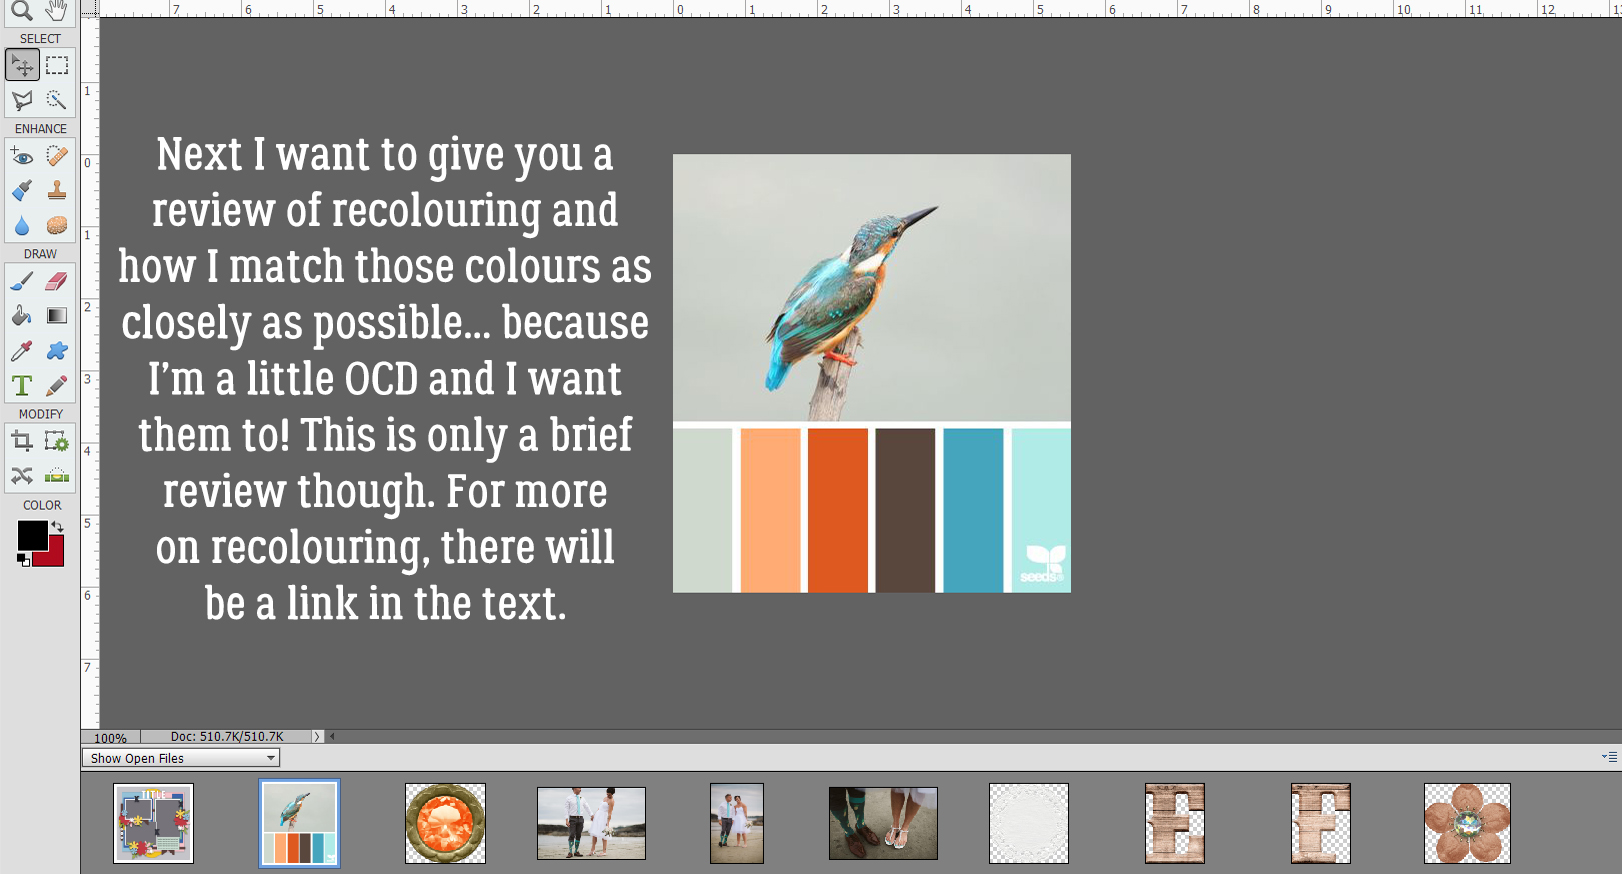
Elements has a default selection of brushes already installed in the software when you download it. They’re pretty basic brushes but are useful for a lot of things. My assumption is that we’re not making a nice straight, crisp edge on our contrasting papers so for this demo I’m going to use a Wet Media Brush. The number at the bottom of the thumbnail is the default size of the brush. You can ignore that. [Yeah. I have a lot of brushes. Many of them were free.]
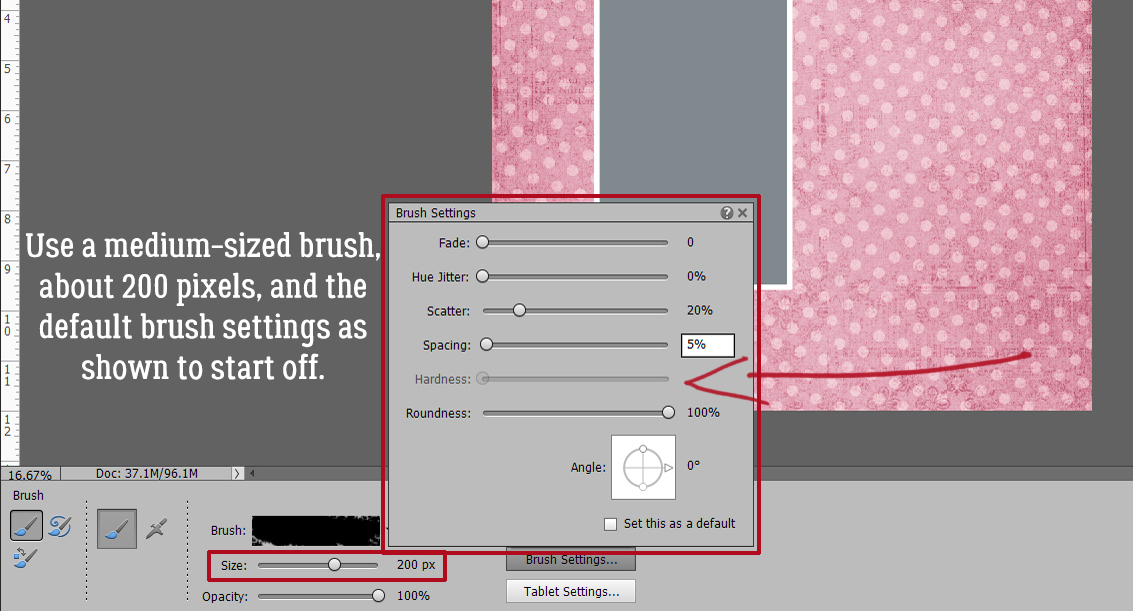
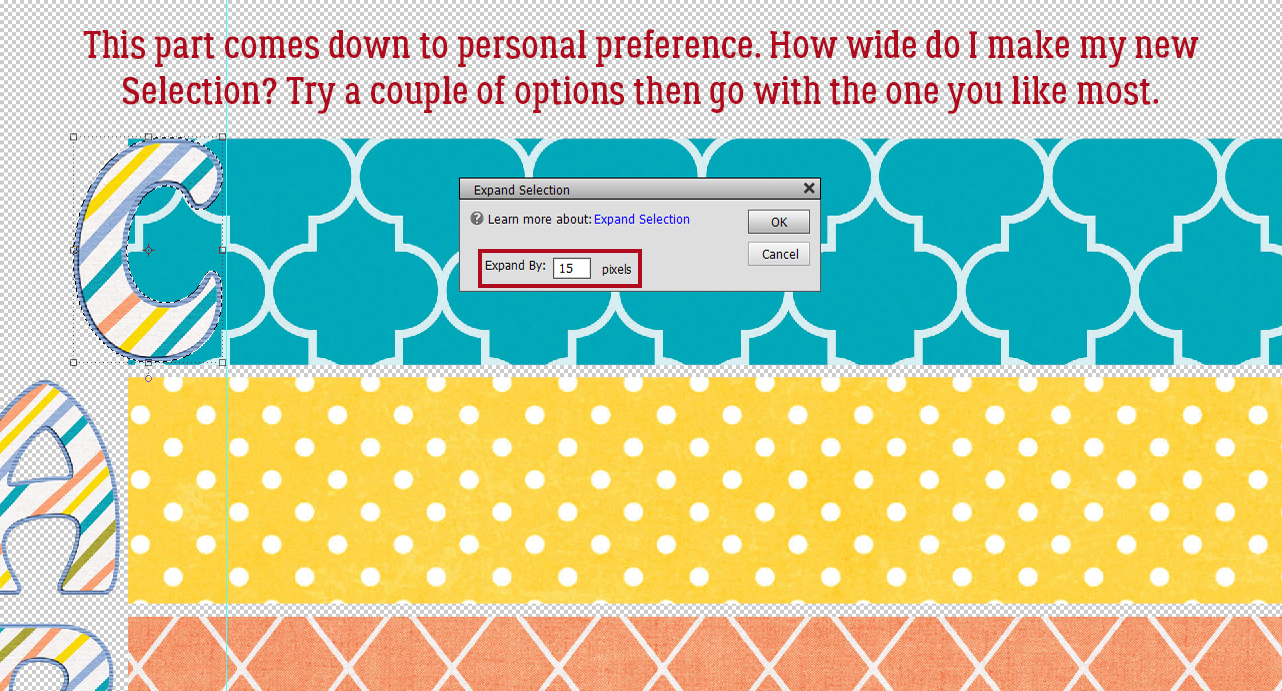
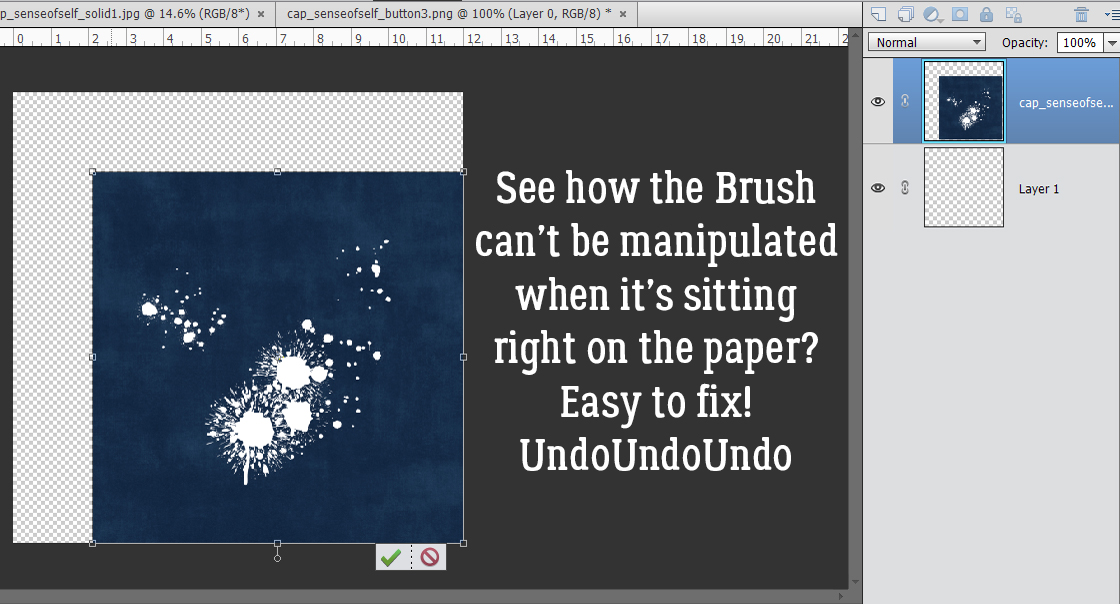
Resize the brush so it’s manageable but not too big. 200 pixels is a good place to start. The default brush settings are shown in the Brush Settings menu.
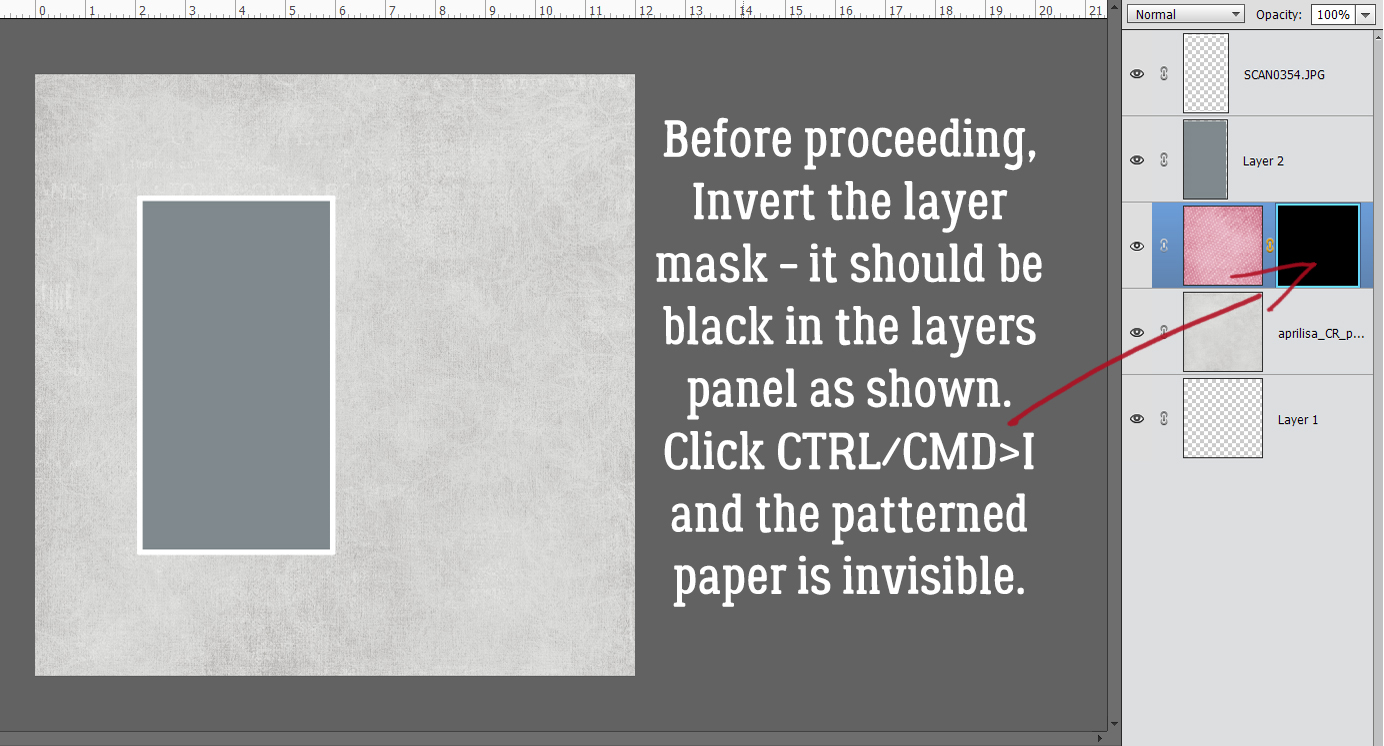
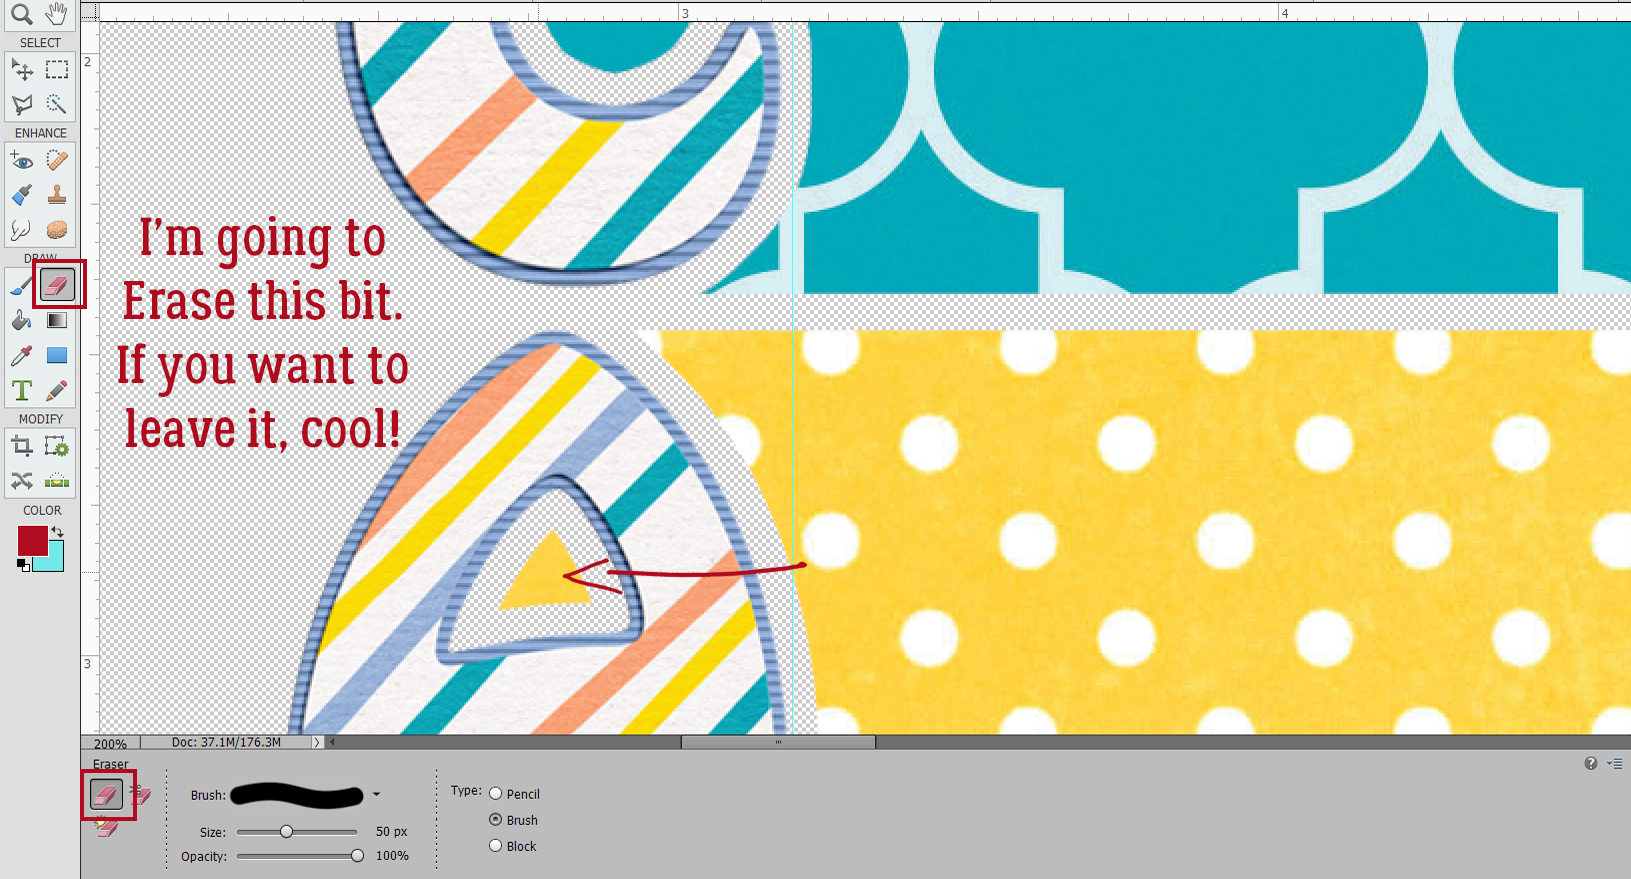
Before using the brush, the layer mask must be inverted. We want it to conceal everything then reveal only the parts we want to see. The mask thumbnail will be black and the paper/object being masked will be invisible. To get there, just click CTRL/CMD>I. Make sure the foreground colour in the Color Picker is white… otherwise nothing will happen!
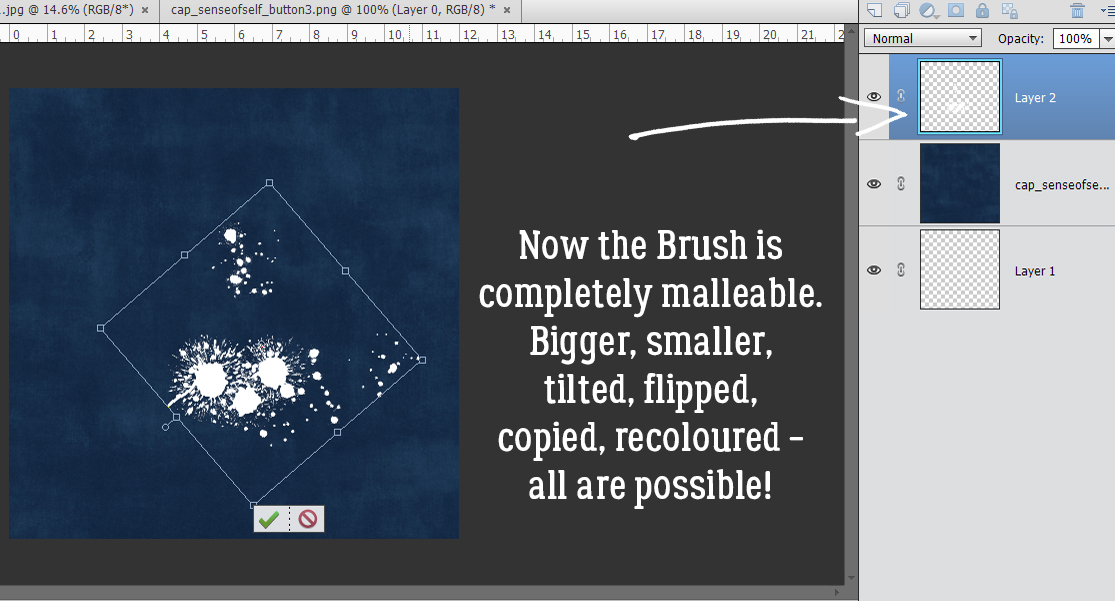
My first version is a simple oblong heart shape. I just dragged the brush to draw out a heart! Check out the layer mask. See what happened?

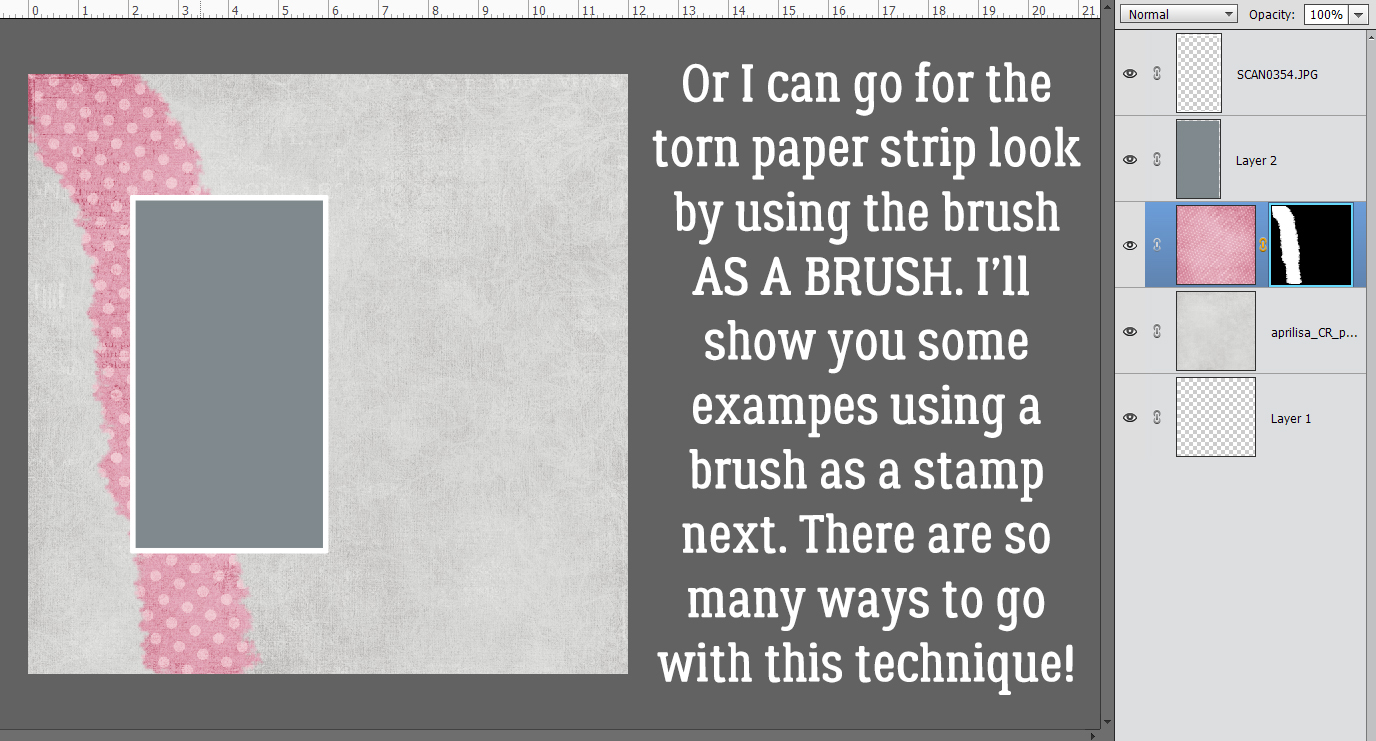
Here I’ve just dragged my brush in a sort of swath, cutting off a corner of the gray paper.
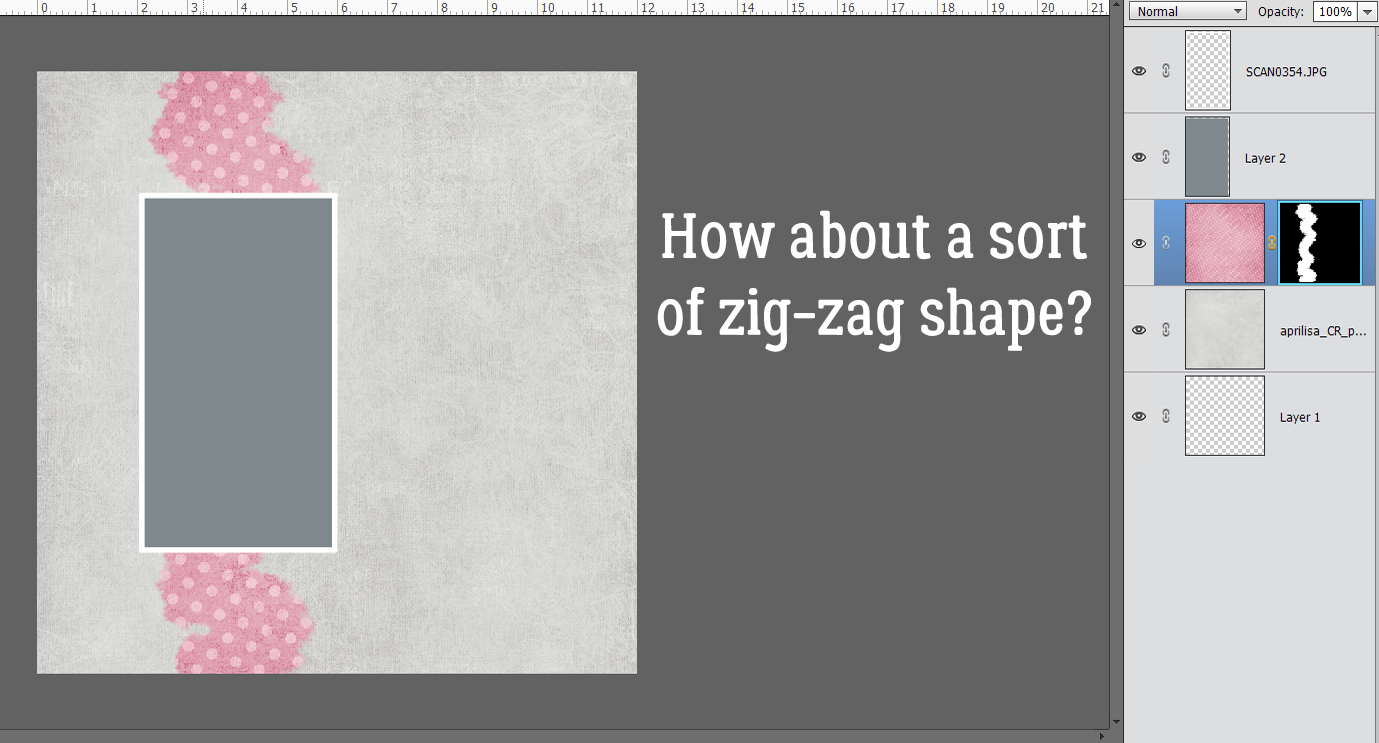
Zig-zags can look pretty cool.
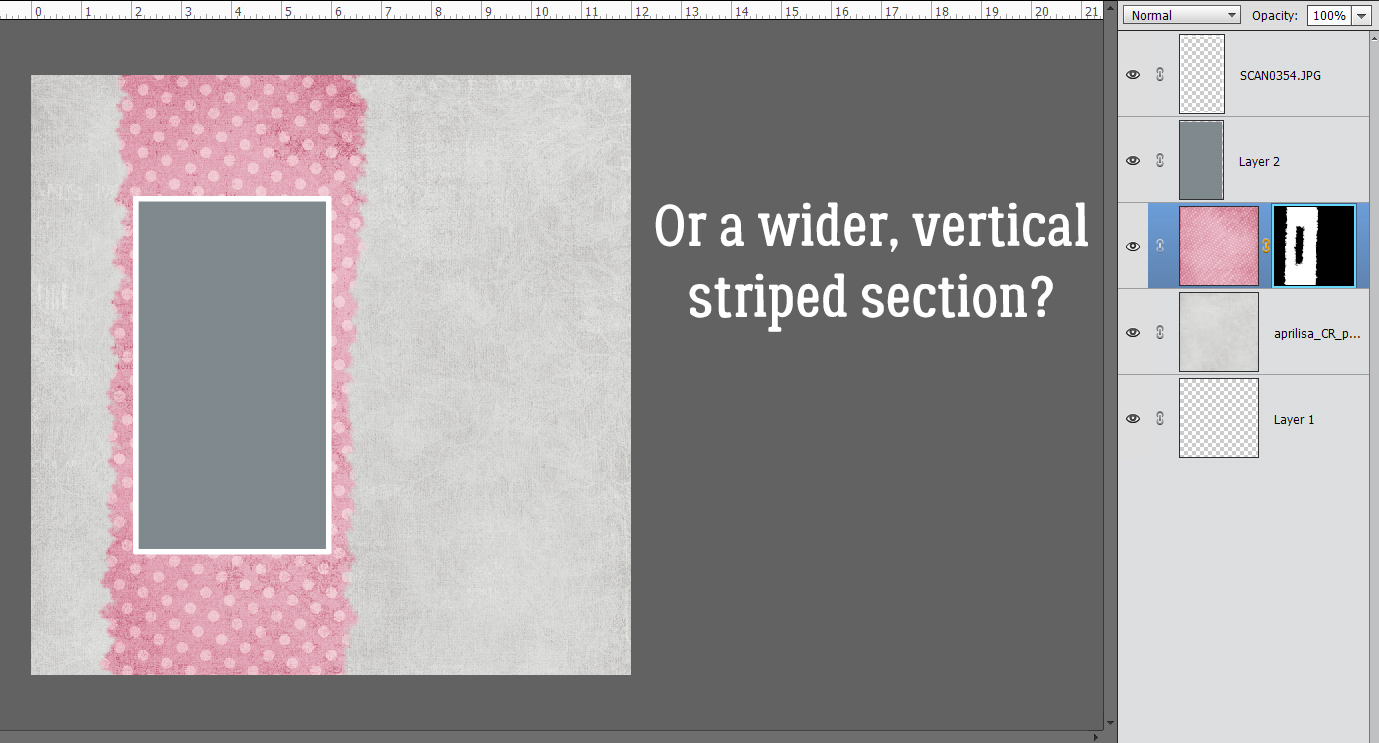
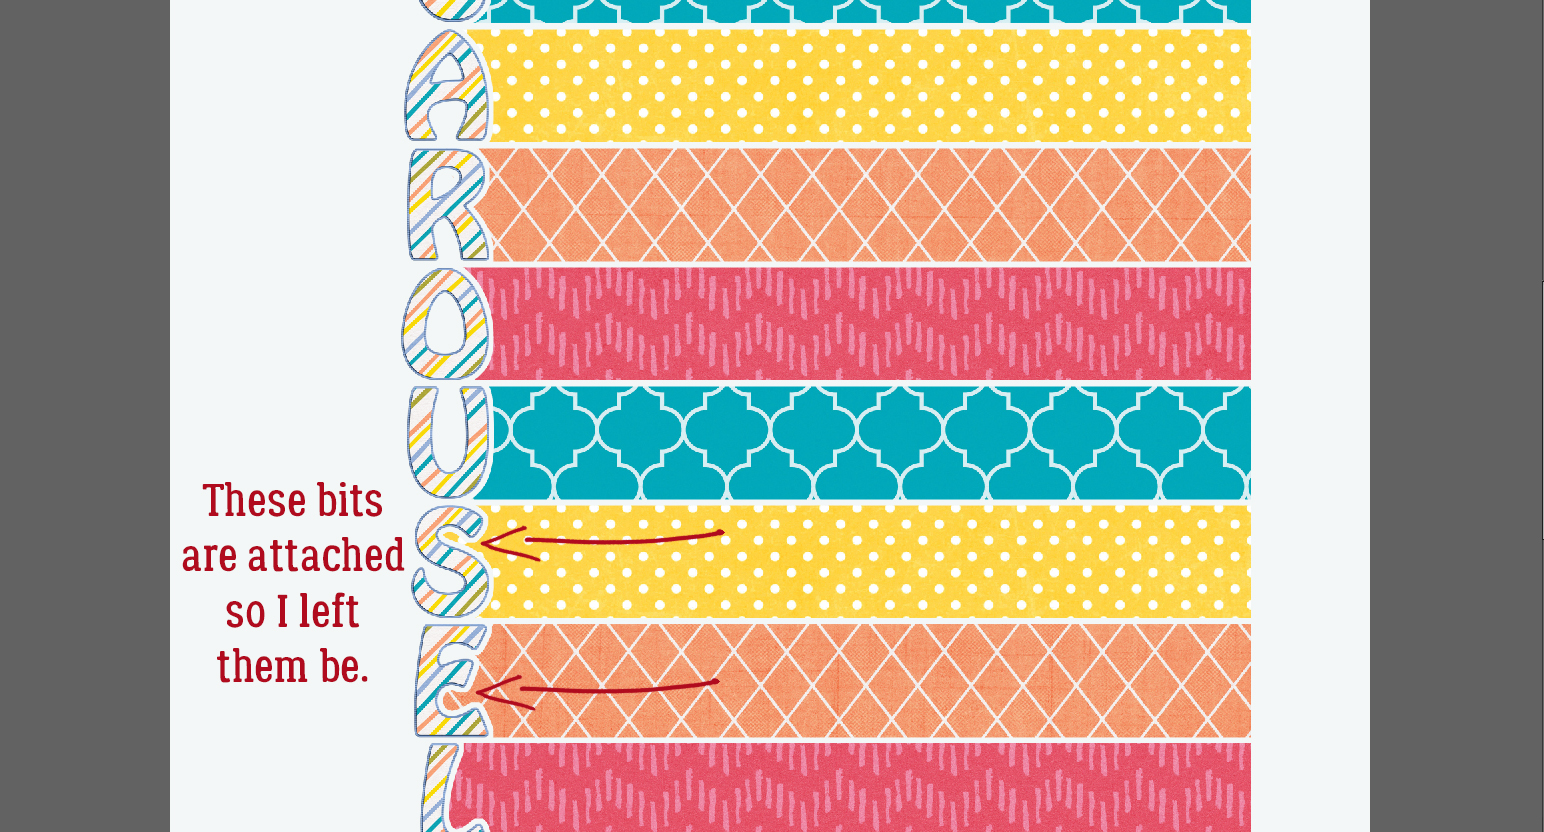
Or making several vertical passes frames the photo as well as anchors it.
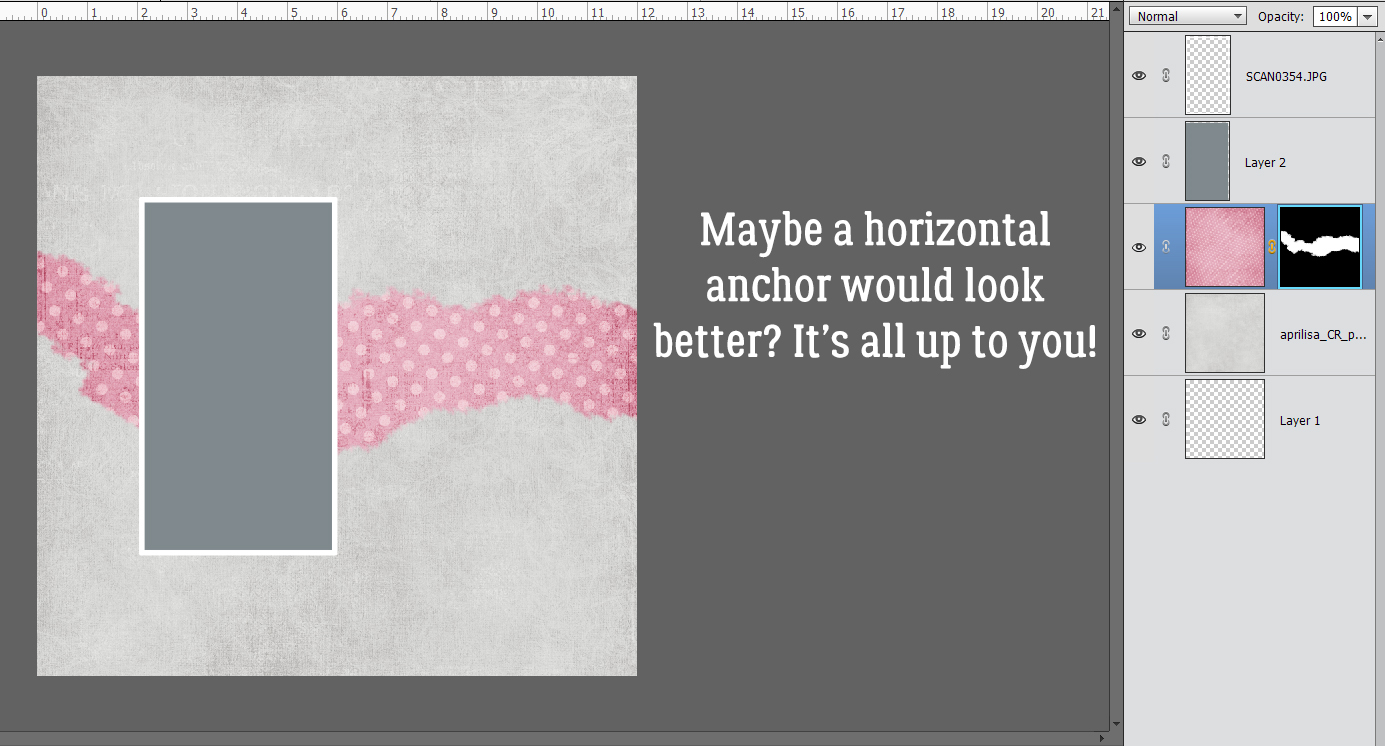
But what if we go horizontally?
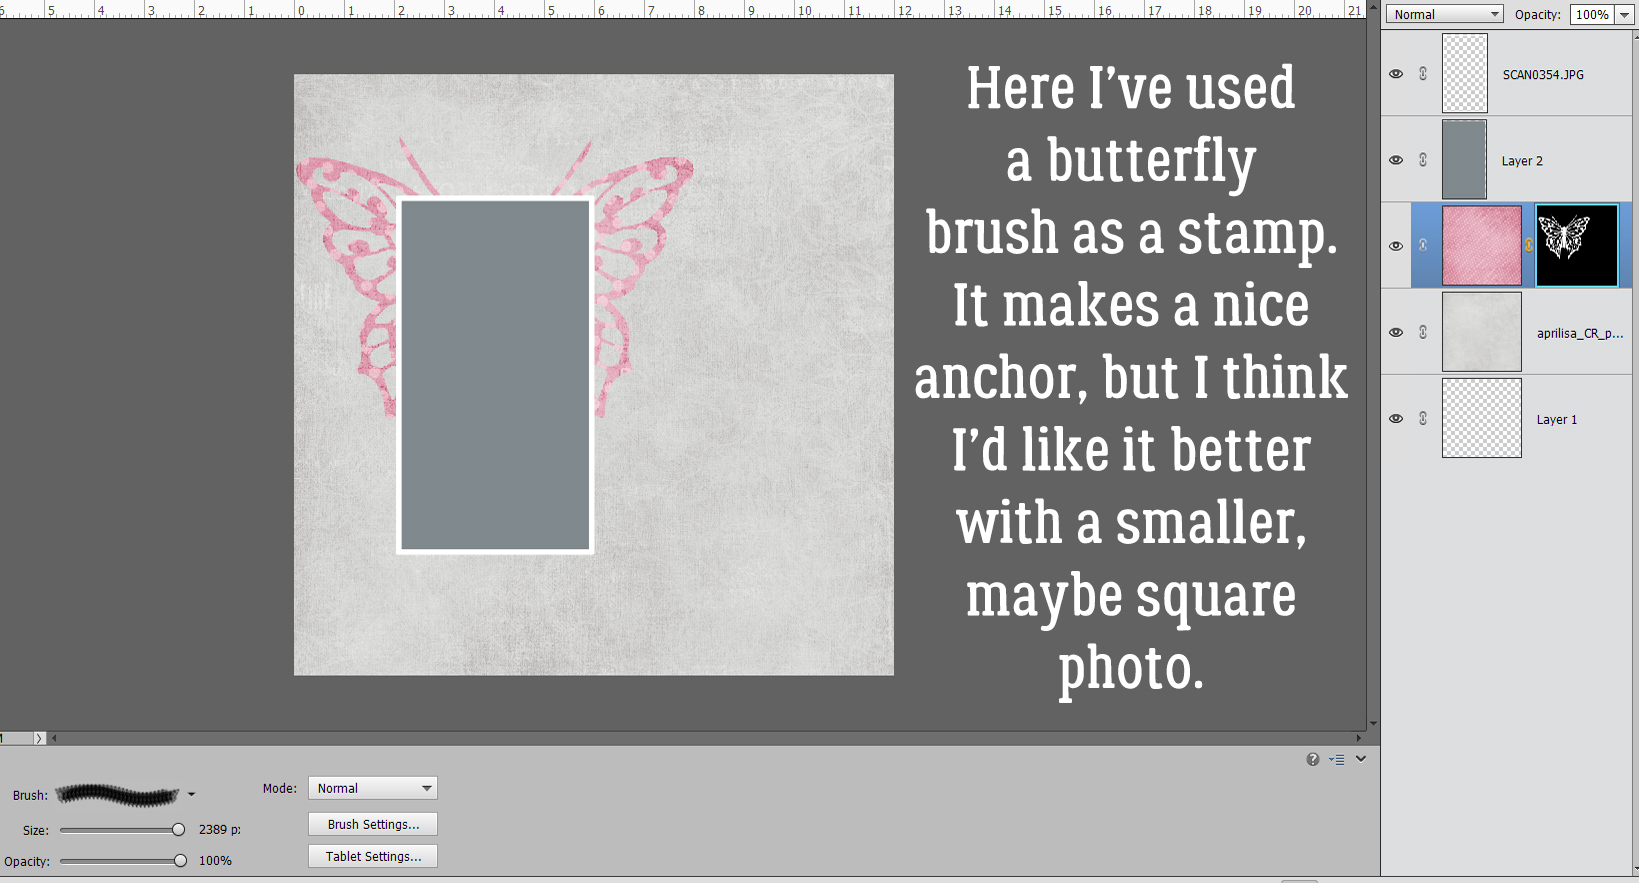
Following are a few examples of using a brush as a stamp to create an anchor. To do this, make the brush as large as you can. With this butterfly brush, I think it would look better under a smaller, squarer photo. See how the polka dots on the paper show up?
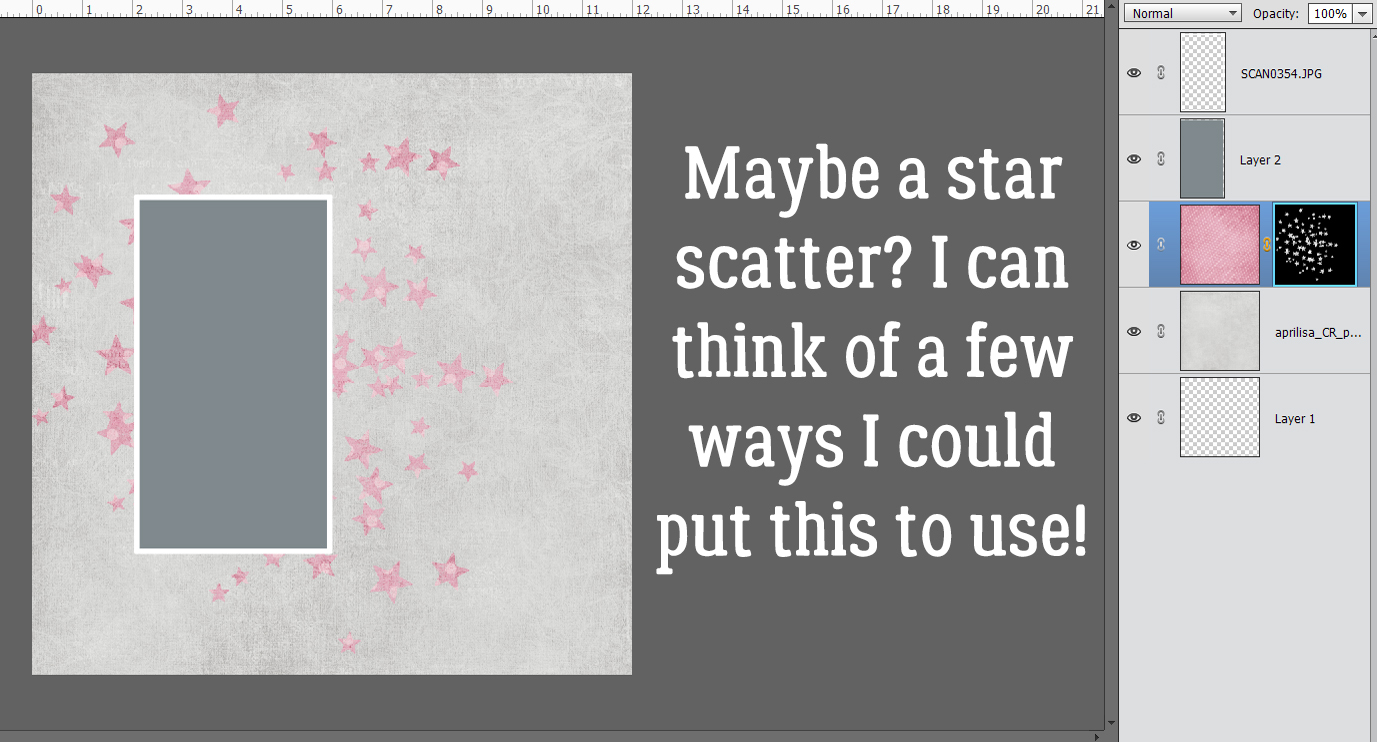
This star scatter [a challenge brush from CathyK a long time ago] would work better with a much smaller, more obvious pattern, don’t you think?
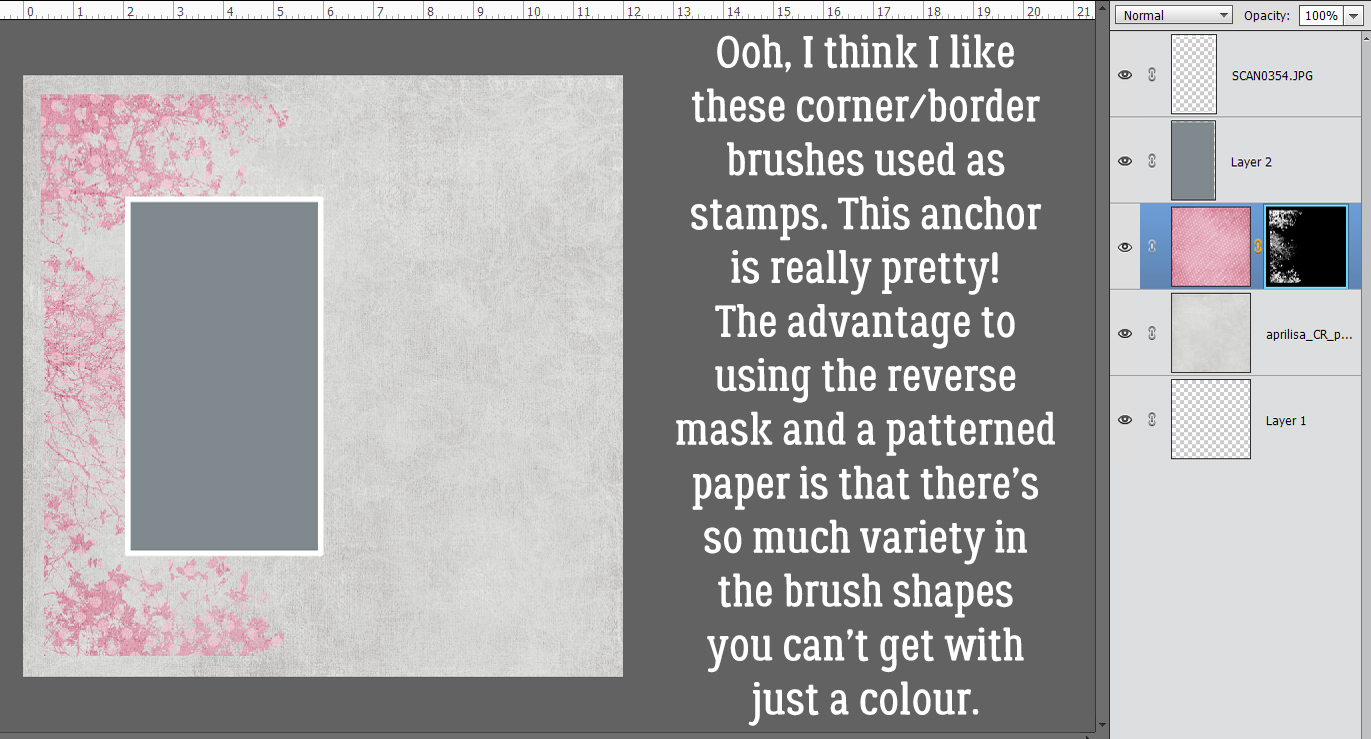
Ooh, I like the idea of this one. Not necessarily the execution though… I used three different brushes from a free set called Corners with Birds. I’d want to make sure the brushes don’t overlap because the contours are muddied.
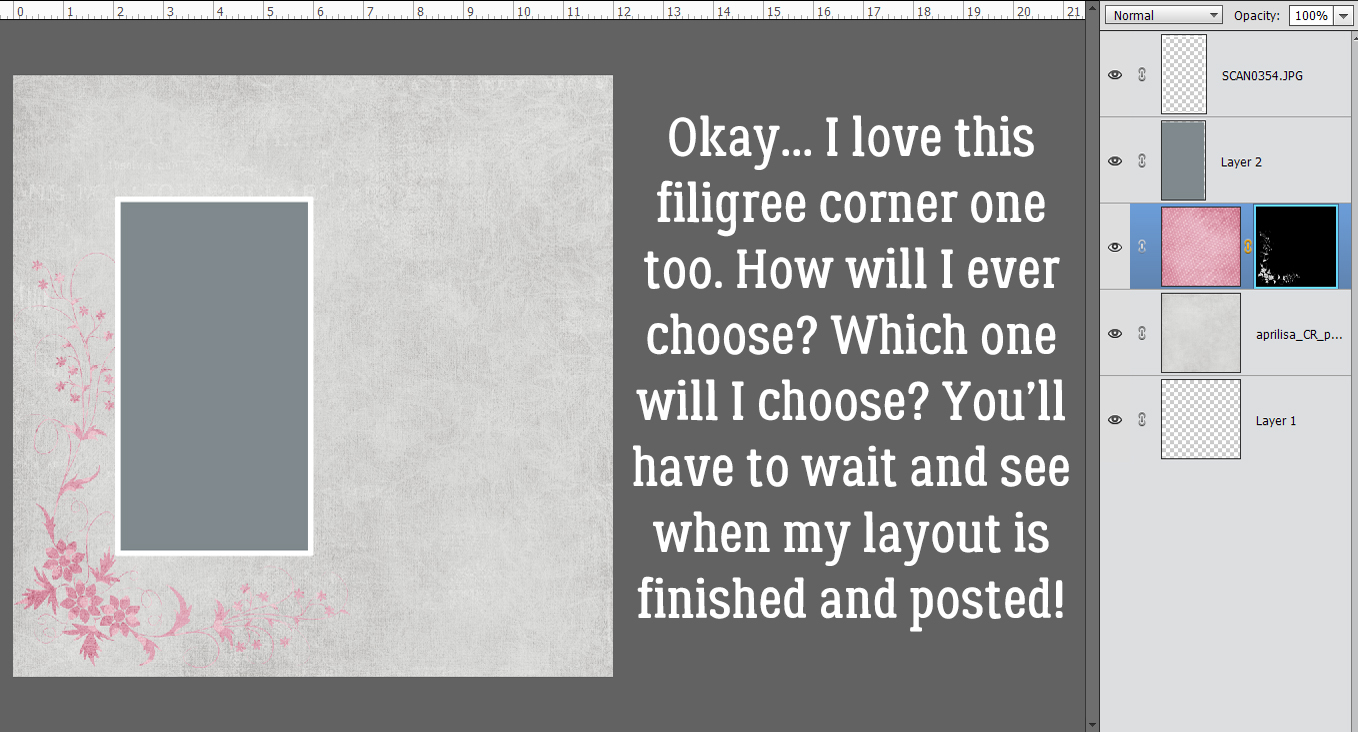
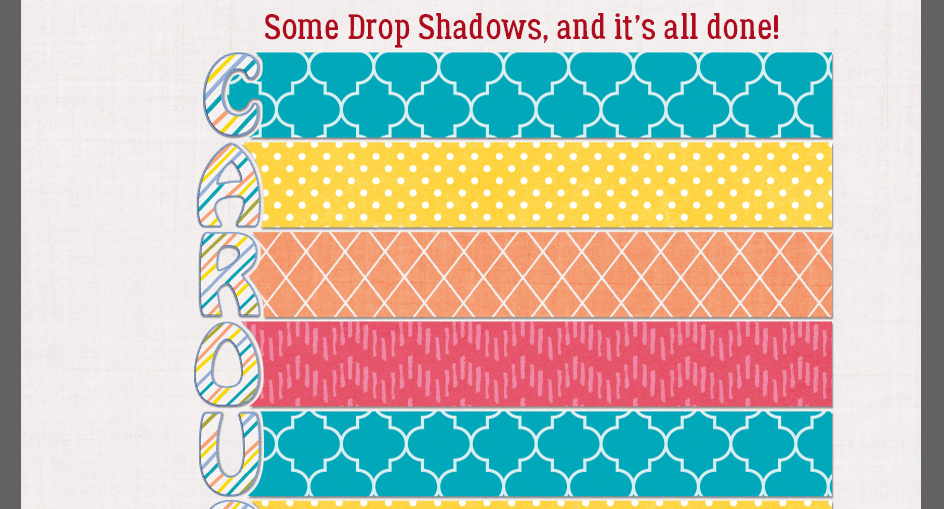
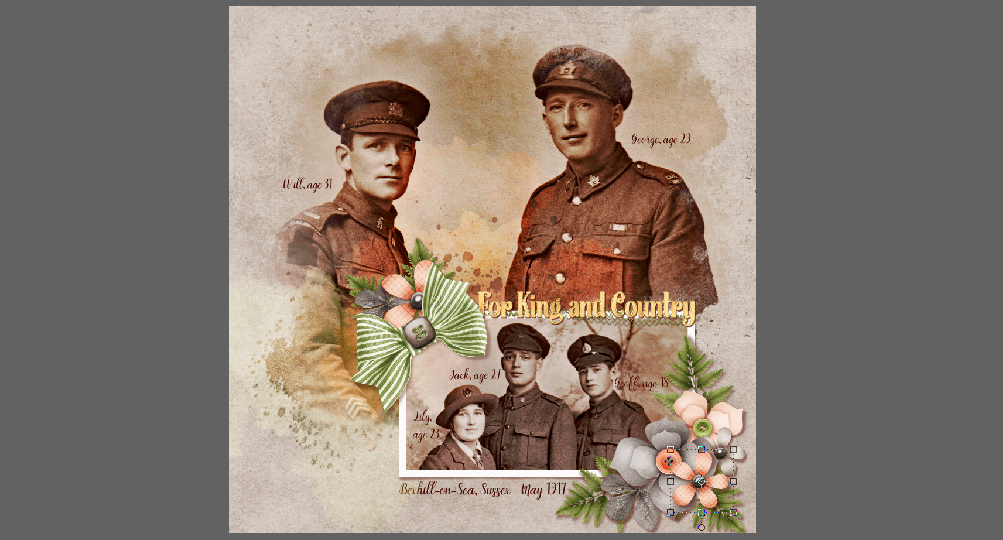
Then there’s this filigree floral corner. I really like this one! But which version will I settle on? You’ll have to look for my layout in the Gallery to find out. I’m still on the fence!!
If you’ve seen something you’d love to emulate but aren’t sure how to get there, just shoot me a message and I’ll see what I can do to make it work for you!
PDF Version: https://bit.ly/39cdrH3
![]()

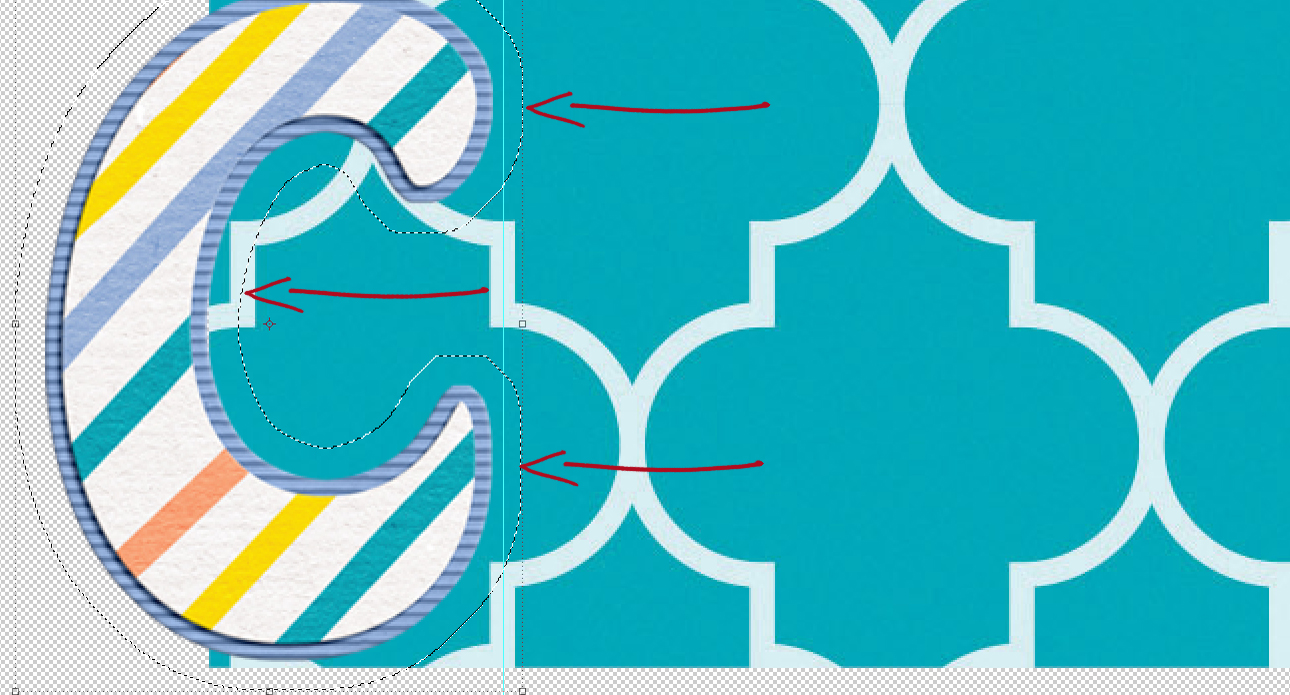


 Following the same process I used the Eye Dropper to pick a spot of lighter blue.
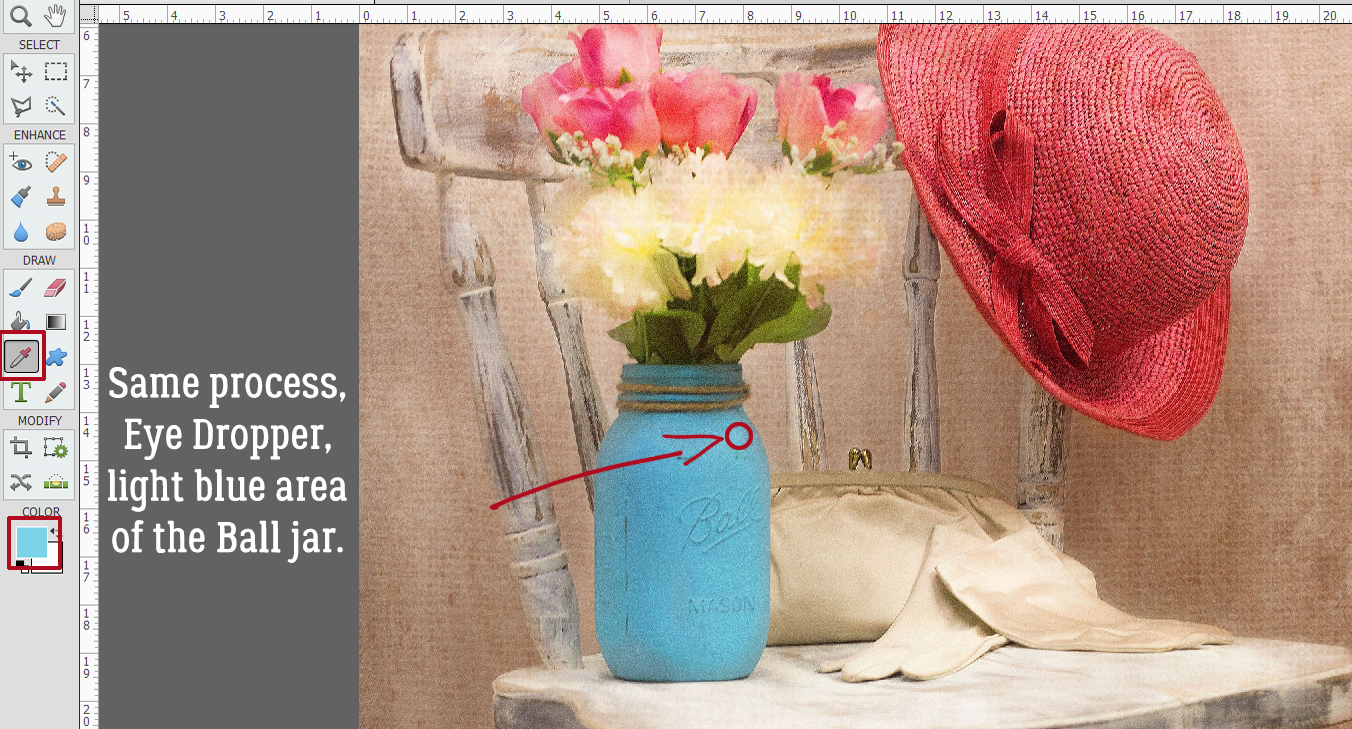


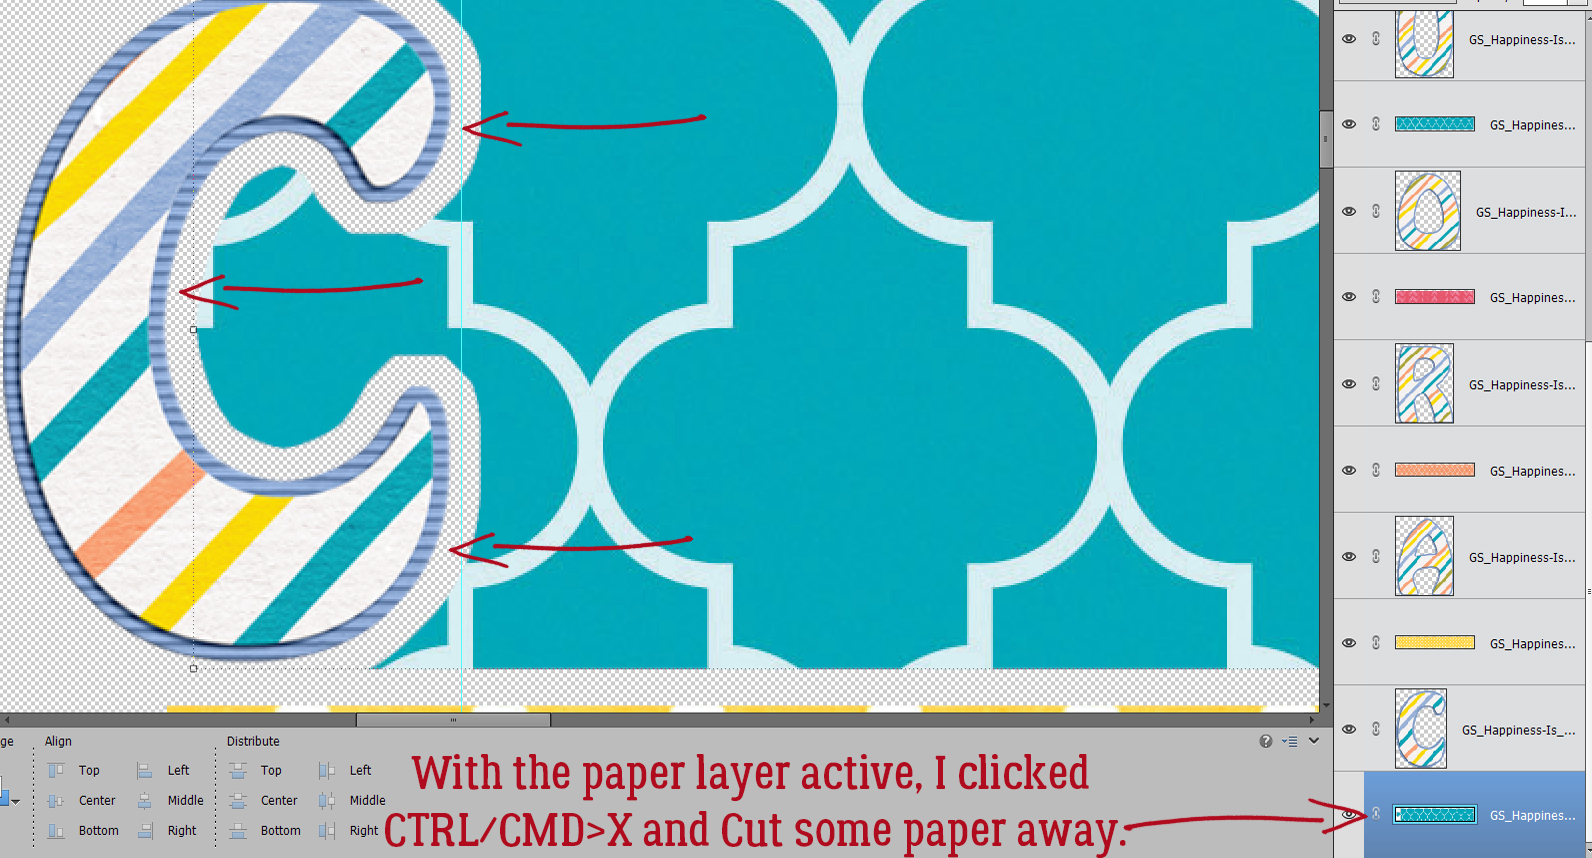
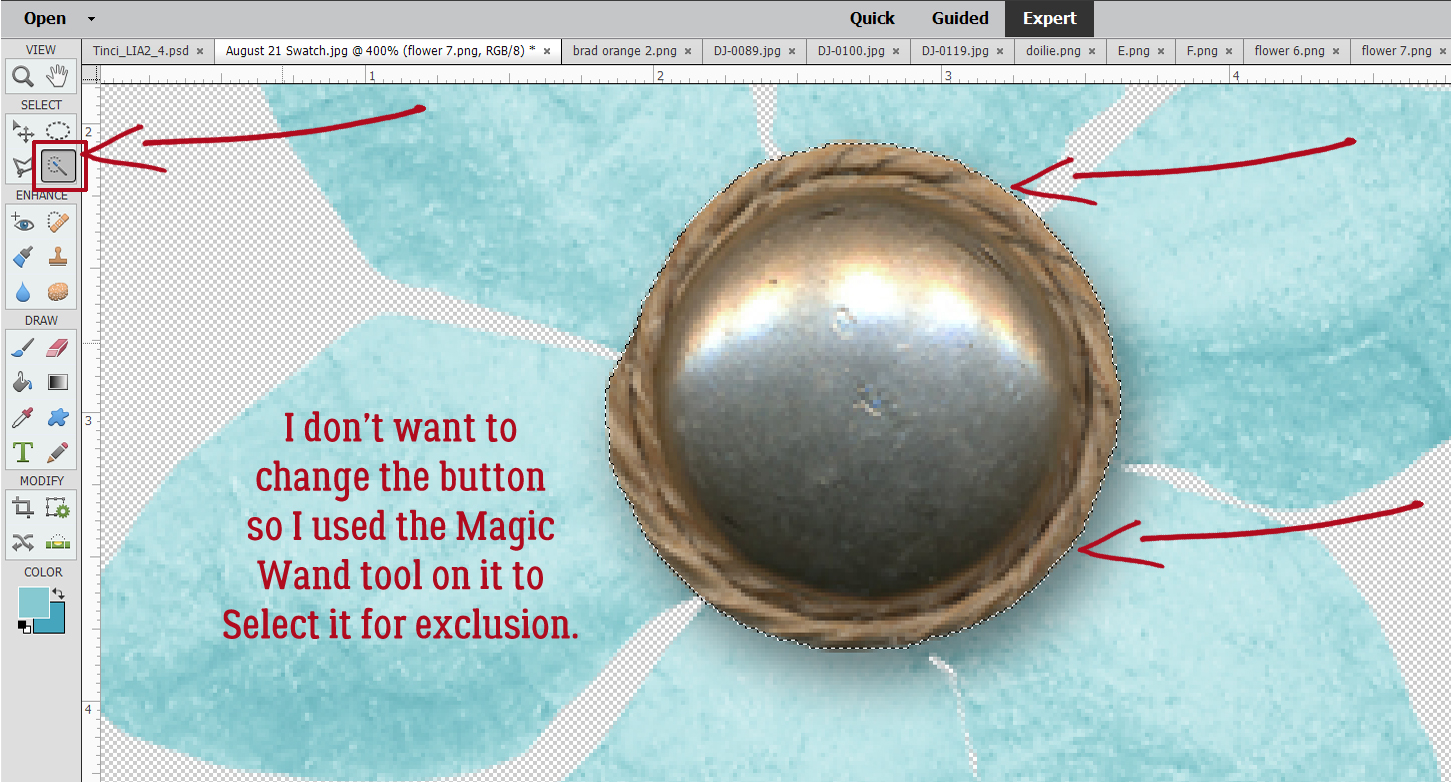
 In the Gallery comments, Jill pondered whether I’d done any (labour-intensive) extractions or other witchery to obtain my results, but I didn’t. I used the mask exactly how
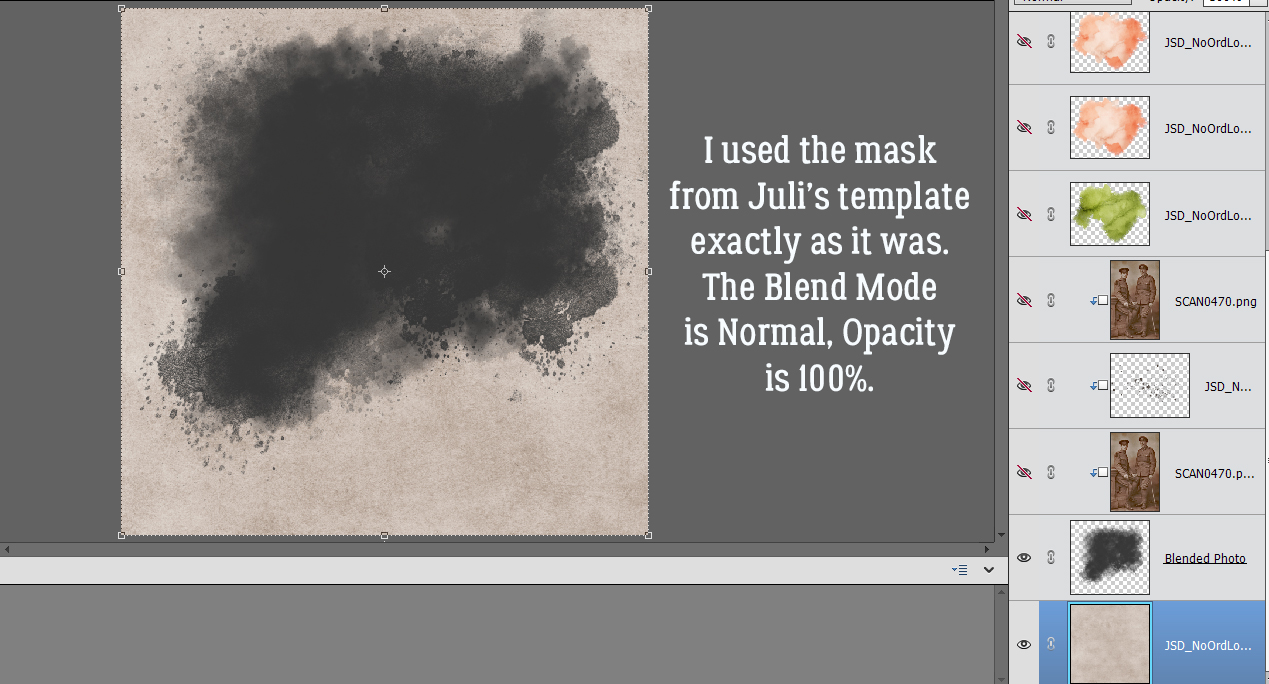

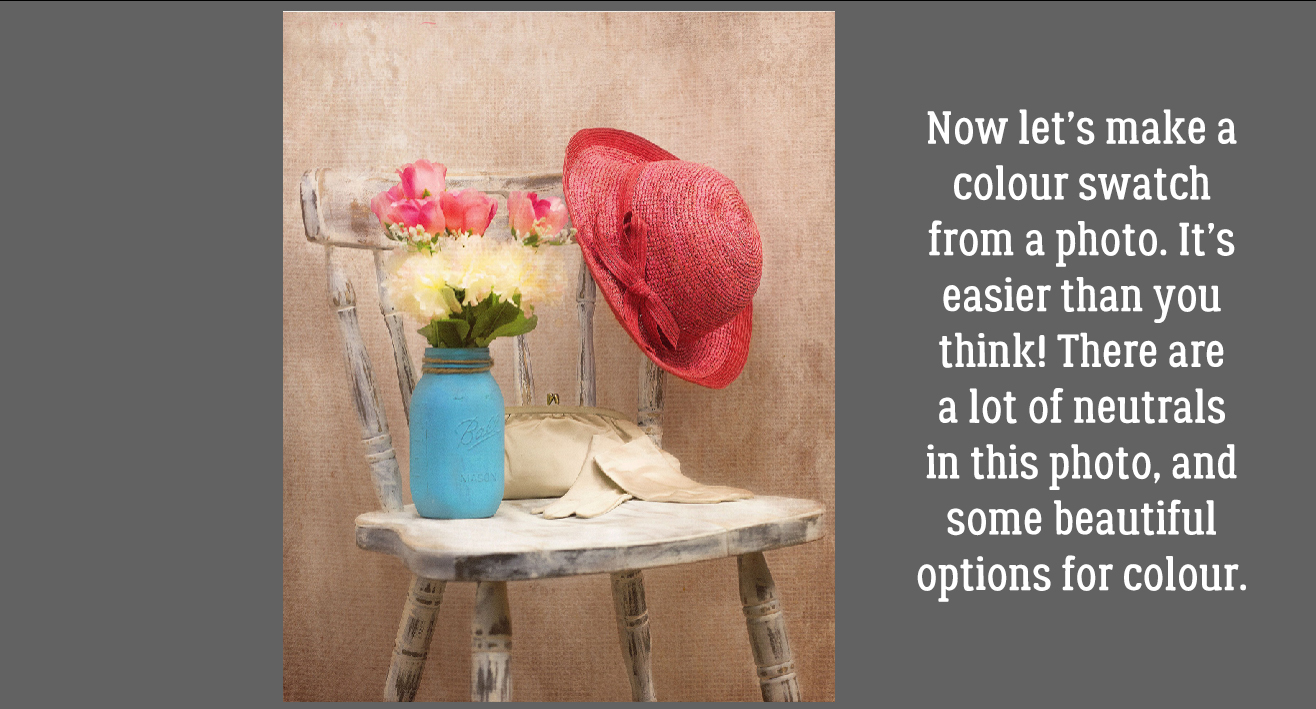
 Another example: this month’s