Challenge Spotlight June 2025
![]()
This month I’ve chosen CathyK‘s Quote Challenge. I’ve often looked for a quote to express my thoughts or feelings in better words than I could come up with in the moment. In fact, I have an entire album of memes on my phone – the lazy woman’s communication strategy. 😉 I’ll admit I haven’t really been all that creative lately; my son’s knee injury has turned into a whole thing, which has eaten up so much of my mental bandwidth, so mindless activities are filling my inactive moments. But I know YOU, dear GingerScrappers, have NOT been idle! I’m going to share the layouts that have been uploaded to the Challenge Gallery for this month’s Challenge, with some comments on how they meet the terms of said Challenge. Each layout is directly linked to the Gallery so you can take a closer look, or leave your own comments. Just click on the Scrapper‘s name and you’ll zoom right there. But first, let’s look at the quote Cathy chose for this month.
“Between every two pine trees there is a door leading to a new way of life” – John Muir
Each of us will interpret those words slightly – or completely! – differently. It’s not a requirement that the quote itself appears on a layout, but the theme of the quote should be readily identifiable. Are trees a metaphor here for some sort of portal? What exactly does a new way of life mean? Let’s see!
Karen Diamond leads the way. Her photo shows us an idyllic spot surrounded by nature. Yep, there are trees in there! Her word art says “wander often, wonder always,” “finding my way” and “a beautiful path”. To me, this speaks to the struggle many of us face in figuring out how to be our best selves. But in a beautiful, meaningful way.

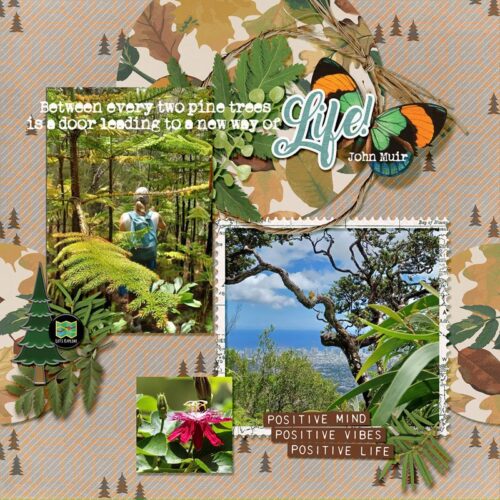
The message I perceive in glee‘s layout is one of trusting the universe to lead us in the right direction, as evidenced by the hiker and the panoramic view of a gorgeous vista.
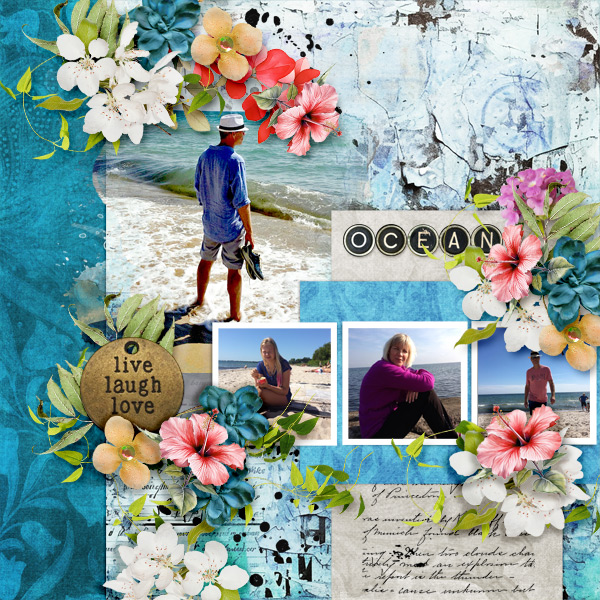
Pixel Palette has created a true masterpiece here. The metaphor of trees-as-portals is demonstrated in her blended imagery. To me, the bearded gentleman is contemplating his life: Has it been what I wanted it to be? What can I do to make it more?
![]()
Paths and frontiers have informed pbhill‘s interpretation, and she’s even used an arrow to point the way. To me it says, there are no limits to your world but those you yourself impose.

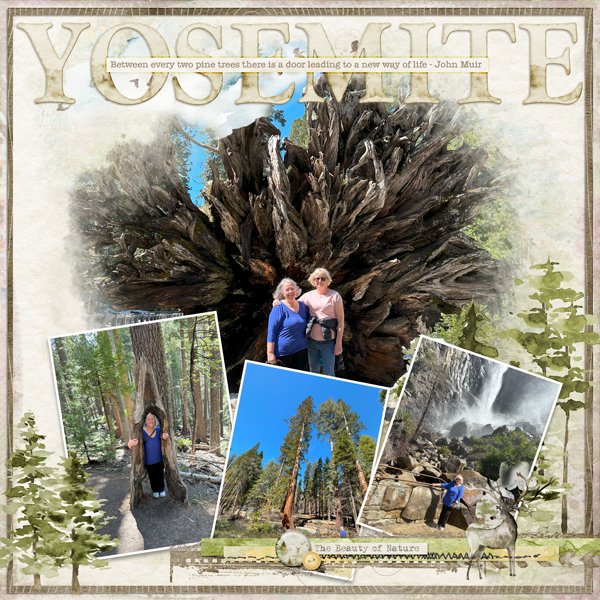
FormbyGirl also used trees to represent the theme of the quote… literally! I love the perspective in her photos that illustrates the enormity of our world and how our places within it must be intentional.
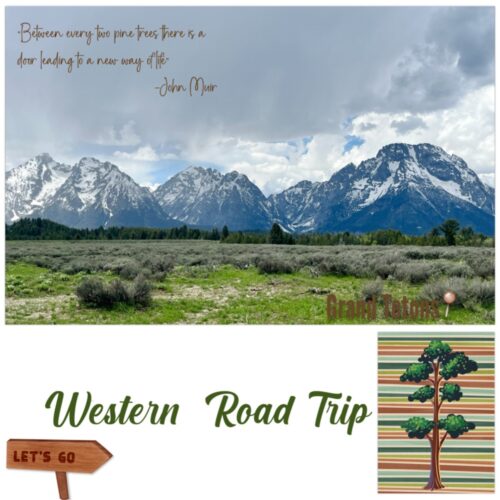
For her layout, jenmoody23 chose a large photo of a prairie leading to the Grand Tetons. It says to me that there’s no one “best” place to be in life, that beauty is truly in the eye of the beholder. It also could suggest that trying new things – like moving from the prairies into the mountains – might be what we’re meant to do.
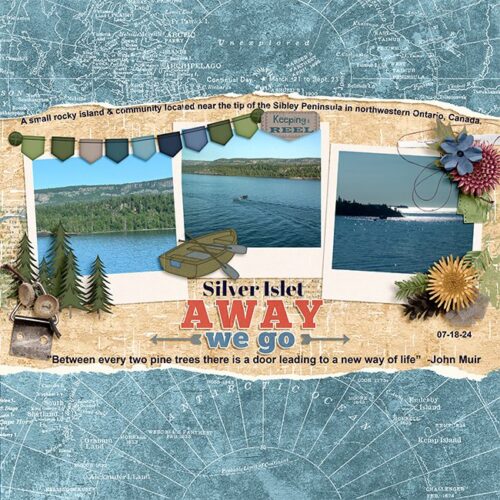
Trees do appear on msbrad‘s layout but they’re not the focus. Michi is filling her see-the-world bucket list and documenting as she goes. Her layout shows something very different from her usual surroundings, and it tells me she found something very compelling about that difference. But could she live on a tiny, rocky island in the middle of Lake Superior, or in the tiny town at the farthest point on the Sibley Peninsula? A Lake Superior winter would indeed be a “new way of life” for a Southern belle!
How would you interpret the quote? I have an idea of how I’d meet this Challenge and I might even be inspired to follow through! Winner, winner!! Pizza dinner!
![]()