Tearing Up the Sheets (of Cardstock)
![]()
Have you ever wondered how other scrappers get their torn paper to look so realistic? Let me show you…
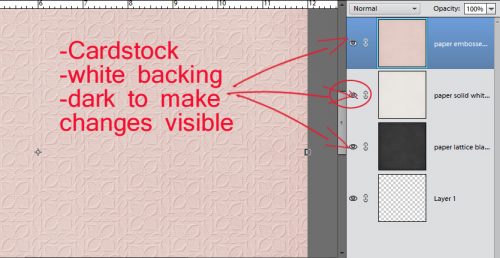
If you were to tear a piece of high-quality cardstock, which generally has colour applied to one or both sides with a white core, you’d get a bit of an irregular edge, with varying amounts of white backing paper showing along it. So to demonstrate this, I’ve used an embossed cardstock from Ooh La La Scraps‘ simply gorgeous bundle You and Me. Fortunately for me, there is also a solid white, textured paper in the kit too, so I’m going to use it for the core. (For the first few steps, I turned the visibility of the white paper layer off.) And to make it easier to see what I was doing, I put a piece of gray patterned paper behind it all.
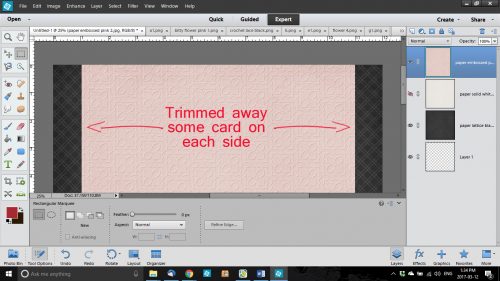
I wanted to have tears along both vertical edges of the paper and I wanted some of the background to be visible. I also wanted to Work Smart Not Hard. So I selected the layer with my pink cardstock on it and using the Rectangular Marquee tool, I selected a portion of paper then Edit>Cut [WSNH: CTRL/CMD>X]I trimmed away some paper from each side. You’ll see why this is a WSNH tip as we go along.
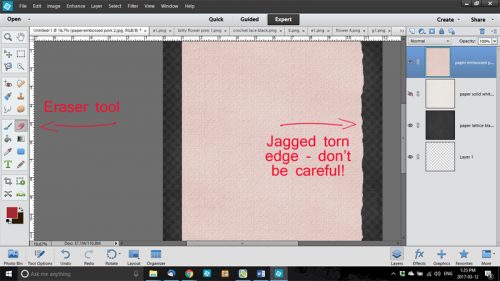
I then selected the Eraser tool and a relatively small brush size. Working along the right side of my canvas, I erased away some of the pink cardstock in an irregular, jagged manner. Don’t try to be too careful because you want it to look… well, TORN. If it might make it easier for you to visualize, take a real piece of paper, any kind, and tear it. For real. Then look at the edge. It’s not gonna be perfect!
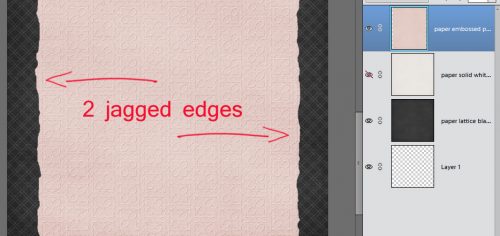
Because I wanted both sides to be torn, I repeated the process on the left side of the canvas too. You may have noticed that I broke my own rule of only erasing on a Layer Mask. If you’re wondering why, it’s because it really doesn’t matter if I erase too much of these papers. It doesn’t have to be perfect. It’s better if it ISN’T perfect.
Once I was happy with the edges of my tears, I turned the visibility of my white paper layer back on and trimmed away some of it along both edges in the same way I did with the pink. It made me so happy to see that the texture of the white paper was the same as the pink – that core layer should have some texture to it too.
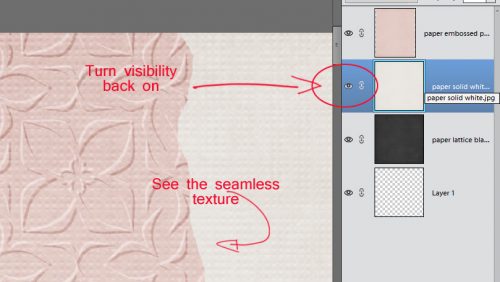
The next step was to erase the edges of the white paper just like I did with the pink cardstock. Zoom in close to your work so you can see exactly what you’re doing.
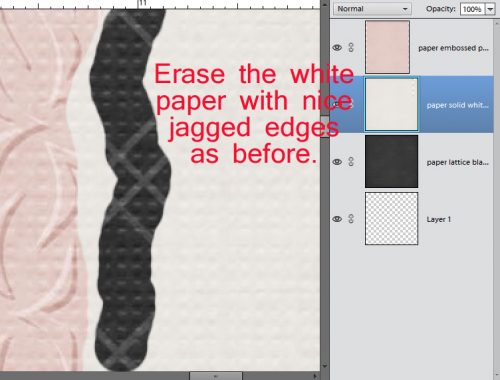
This time I erased close in to the pink paper in some places and veered away a bit in others.
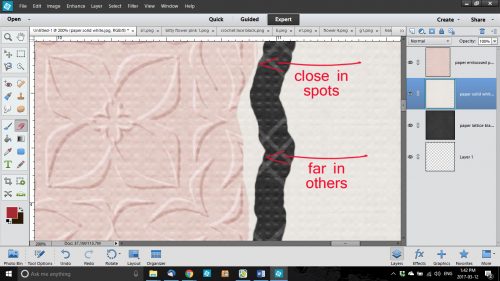
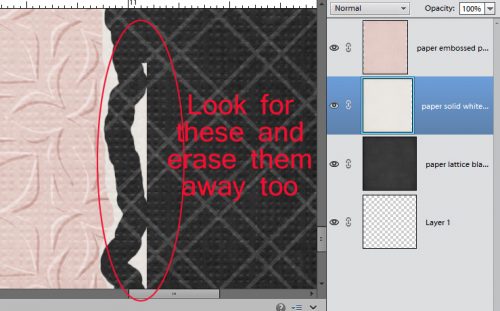
When you zoom back out, there may be some bits of white paper still there. These have to be erased too.
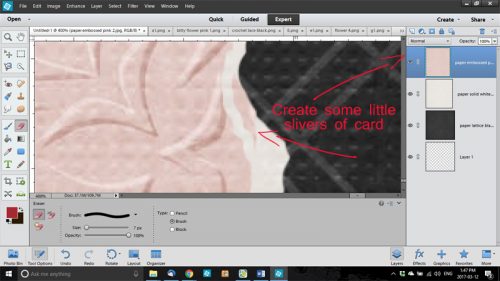
After I had my white edges the way I wanted them, I selected the pink cardstock layer again and went back with the Eraser tool and created some little slivers of torn paper as shown below. This would happen with real cardstock, so I always include a few little shreds.
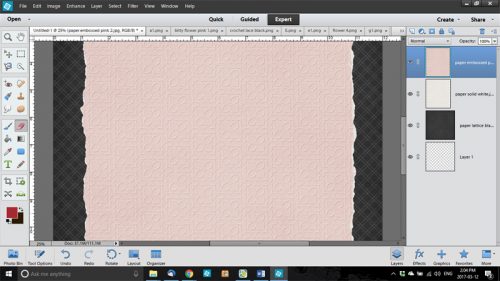
Here’s a full screen view of the two torn edges.
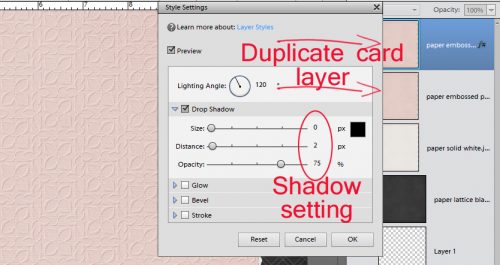
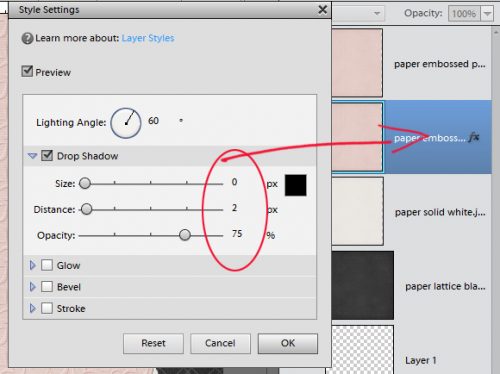
The last step to ensuring realism is to add a very infinitesimal shadow to the cardstock layer. I like to have shadows visible on both edges, so to accomplish that I duplicated [WSNH: CTRL/CMD>J]the pink cardstock layer before I applied a drop shadow. I used a simple shadow, with the following settings: Size 0, Distance 2 and Opacity 75. (These aren’t hard-and-fast, use whatever settings look the most realistic to you. Just remember them for later.)
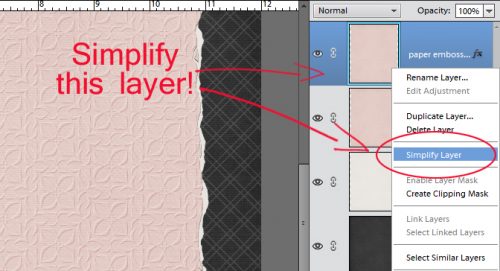
When I had my shadow just so, I Simplified the layer. Doing that locks the shadow to the cardstock so it doesn’t change later.
Then I did the same thing with the second pink cardstock layer, with one difference – the angle of the shadow.
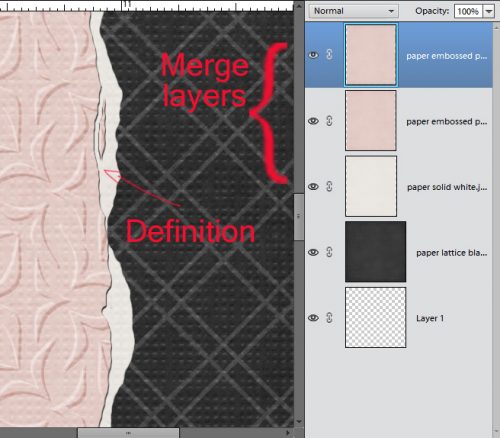
After both layers had that little extra definition provided by the shadows, I merged the two pink cardstock layers with the white paper layer. [WSNH: Select all layers then CTRL/CMD>E]
And here’s the finished layout. Can you see what other techniques I’ve shown you have also been used?

Remember, if you’ve used a technique from these tutorials, post your finished layout in the GingerScraps Facebook Tutorial Tuesday Challenge Gallery for an opportunity to have YOUR chance to challenge me. If you’re not a Facebooker, you can post a link to the layout you’ve created with the tutorial you used in the comments section here on the Blog. I’ll get a notification and will then enter you into the draw. The first week of each month I’ll have a random draw of all entries and the winner will be announced at the end of the first tutorial of that month.
TTFN!
![]()