Vacation Memories Sanitized!
![]()
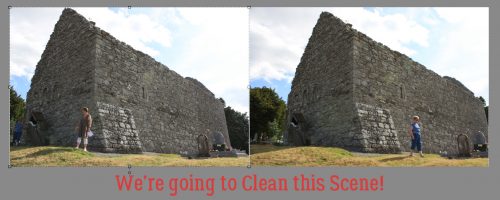
I’m back!! My vacation to Ireland surpassed all my expectations and I’ve got about 400 new photos to turn into lasting memories. I’m still looking through them to see which ones are amazing and which are only so-so. If you remember the tutorial from this time last year where I talked about taking better photos you might already know that I’m a fan of cropping in the viewfinder. That means looking at a scene through the lens and moving around so that I can eliminate a lot of things I can’t (or don’t want to) fix later… like posts growing out of the top of people’s heads. One aspect we have no real control over is that people will unknowingly walk into our carefully-composed shot and get in the way of that perfect image. There are times when it’s possible to just wait for them to wander on, and others when it’s not. So I’ve started taking two or three shots from the same spot a few second apart, allowing the people in my way to move along a bit. Why? Because I know I can Clean the Scene with a Guided Elements Edit!
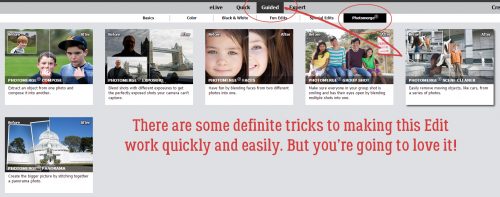
Elements has had a Scene Cleaner Photomerge edit since Version 7. It works in basically the same way, but it’s accessed a little differently. For versions 7-13, you need to go to the Edit tab then select Photomerge Scene Cleaner from the dropdown. For versions 14 and later, click on Guided>Photomerge>Scene Cleaner.
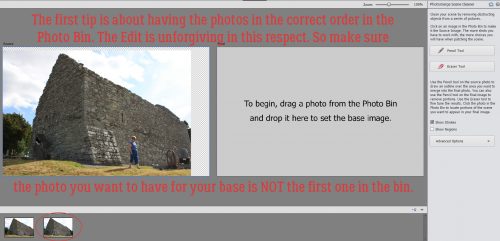
My example will only use two photos but you can merge as many as you need to in order to eliminate strangers from your memories. I’ve found that with my particular laptop (which gives me enormous grief sometimes) and my particular installation of PSE 15, it’s best not to have the target photo – the one with all the best angles and aspects – in the first position in the Photo Bin. You can reorder your photos and elements in the Bin simply by dragging them into the spot where you want them then dropping them there.
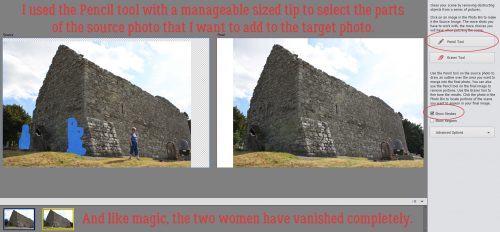
When you click on the Guided>Photomerge>Scene Cleaner button, that first photo in the Bin will populate the left side of your screen. Then drag and drop the TARGET photo into the right hand side. If you look closely you’ll see that the “Source” image is outlined in the Bin with blue, while the “Target” or “Final” image is in yellow.
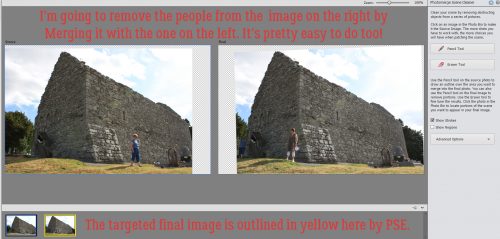
You’re going to be shocked when you see how easy this is to accomplish. I clicked on the Pencil Tool in the Edit menu, then looking at the Final image, I scribbled on the Source image over the general areas where the two women (Gail on the left, Eleanor on the right) are using a moderate-sized brush tip. Usually that’s enough to totally solve the intrusion. If necessary, you could enlarge the area you’ve covered, or b some of it on that Source image. PSE will show you what your final image will look like so you’ll see where tweaking is needed.
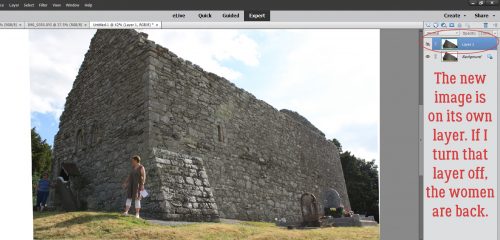
As with all the other Guided Edits, once you’ve done what you set out to do, you click on the Next button at the lower right corner of your workspace and then either save your work or open it in Expert to continue working on it. As you can see, this Edit has made all the changes on a new layer. The easiest way to make the changes permanent is to Merge the two layers together.
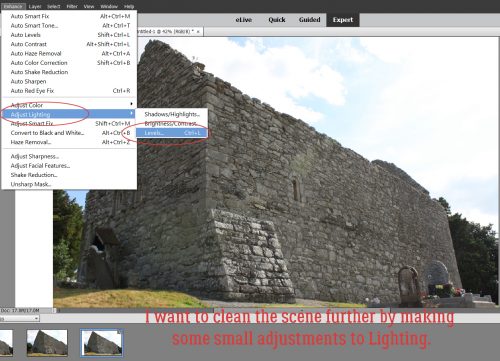
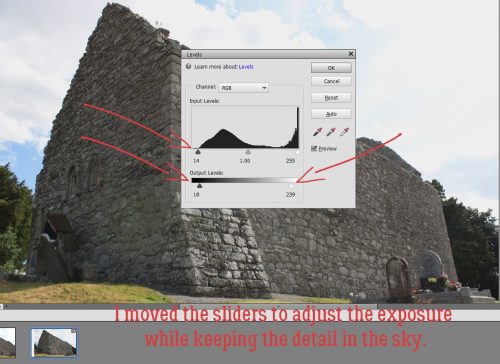
I’m sure you knew I wasn’t finished with this photo. I want the clouds and sky to look better, and the stones to be a bit sharper. So first I chose Enhance>Adjust Lighting>Levels (CTRL/CMD>L) to make some exposure adjustments.
Don’t overdo this adjustment.
Then I moved on to Enhance>Adjust Lighting>Brightness/Contrast. Again, this photo didn’t need a lot of adjusting. But this slight tweak has added more detail to the clouds.
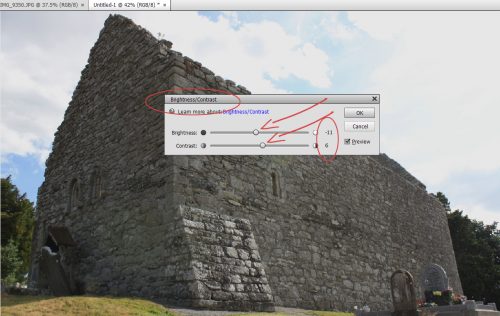
But I feel like the shadows are still too dark, so I went to Enhance>Adjust Lighting>Shadows/Highlights.
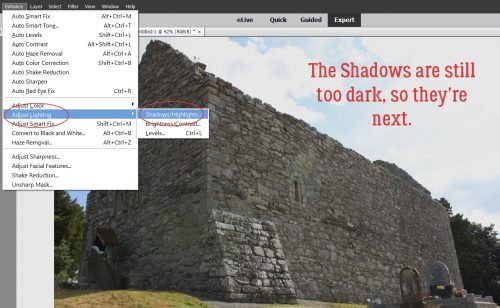
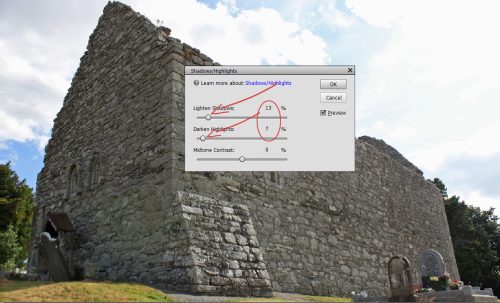
The shadows just needed a bit of illumination and there’s great detail visible there now.
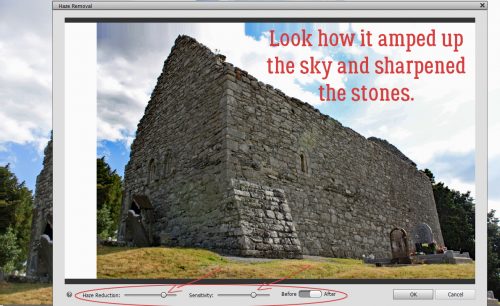
And of course, once the rest of the image looked good, I hit it with my new favourite enhancement, Haze Removal.
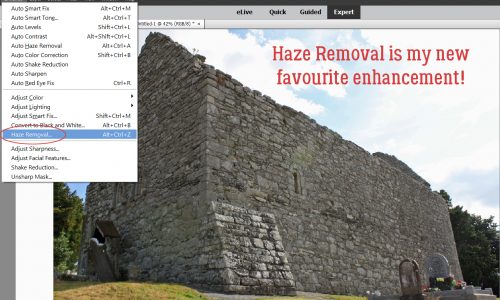
I love that this tool adds drama to the sky, sharpens and deepens the stones and just brings the Oomph with it.
This tutorial marks the end of my second year as your faithful tutor. I can’t believe I’ve found enough new things to show you to build about 100 tutorials around them, but here we are!
This is the final image of St. Finian’s Roman Catholic Church, Aghowle, Shillelagh, Wicklow. It dates from the 12th century and is in ruins. It will be the star of a double spread at a later date.
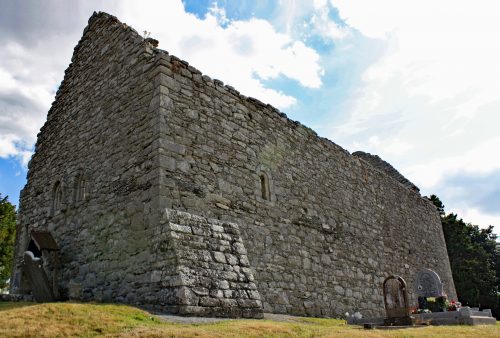
One scene cleaned, a dozen or more to go…
![]()