The Photoshop Elements No-Diet Weight Loss Plan
![]()
Take THREE! Today’s really starting to feel more like a Monday than a Tuesday… WordPress isn’t playing nice again this week. But I’ll persevere, because I really want you to have this little weapon in your arsenal. Kim Kern asked in the comments after last week’s post if I knew how she could slim herself down a smidge in a photo she otherwise liked. So I dug out a photo of yours truly that didn’t make me cringe so I can show you how to lose 10 pounds without dieting.
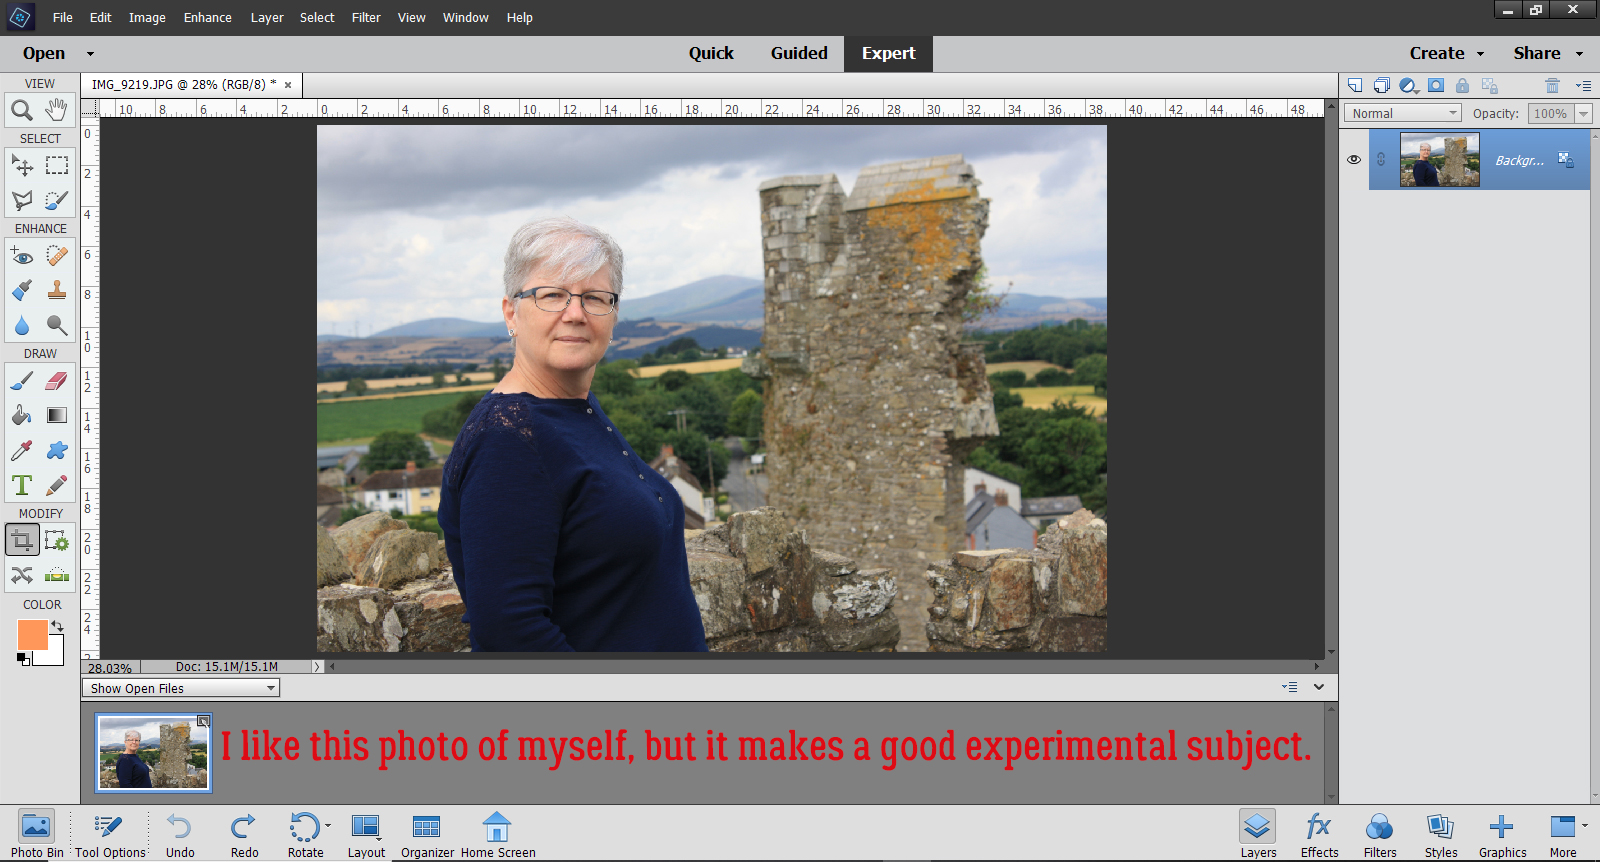
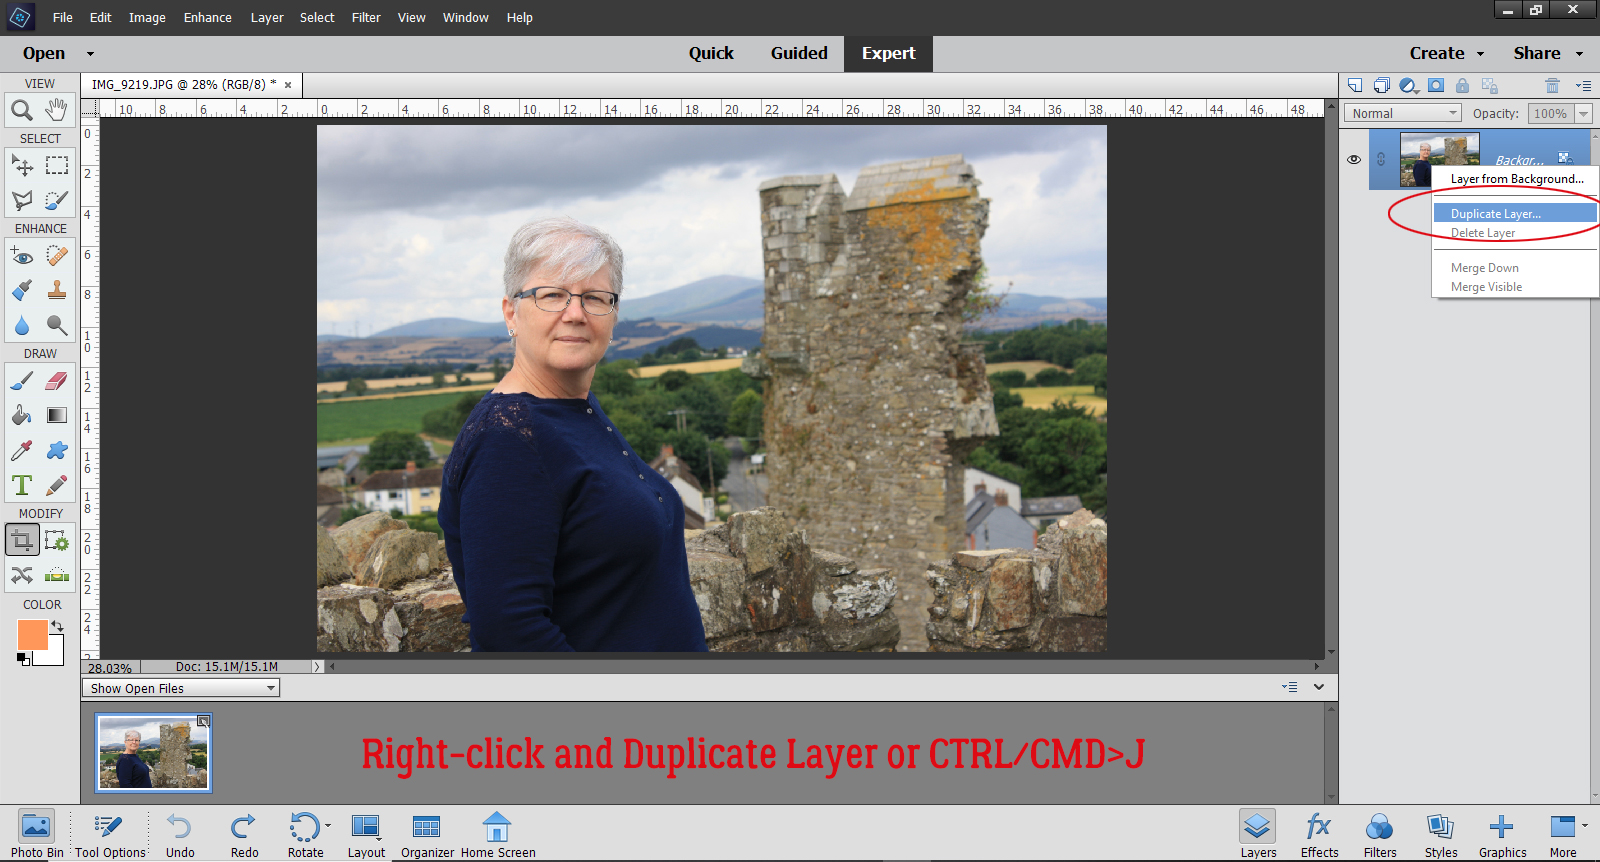
First things first. I made a Copy of my photo so I could do all my experimenting on the Copy layer and lot the original. This is a good habit to get into when you’re photo-editing because if you’re not thrilled with your efforts, you can go back to that background layer and start over. To add a Copy layer, right-click on the photo layer in the Layers Panel and select Duplicate Layer, or use the keyboard shortcut CTRL/CMD>J.
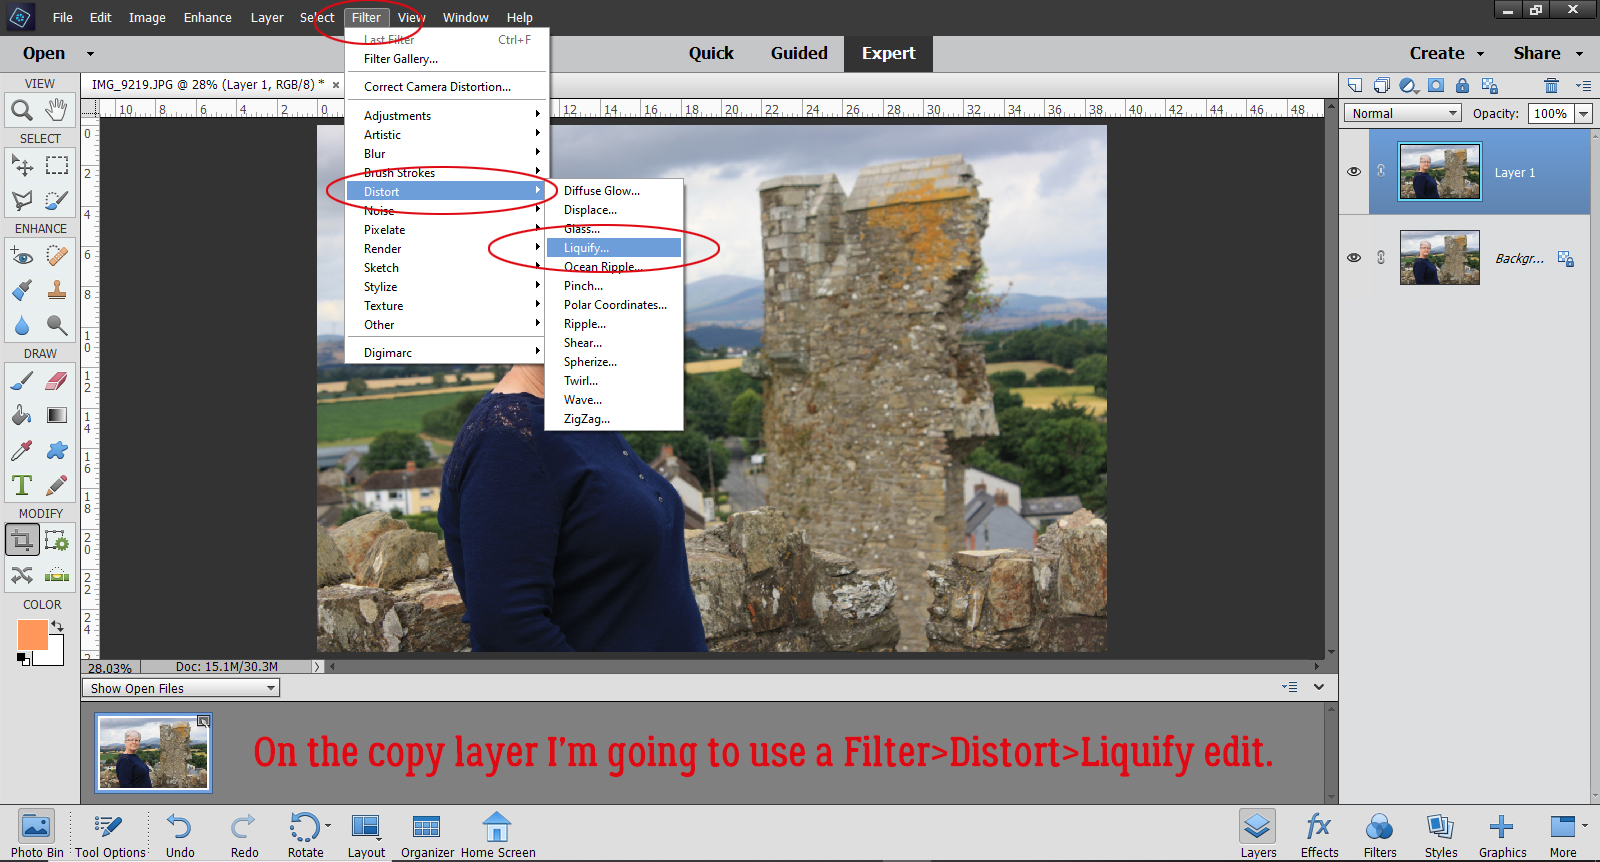
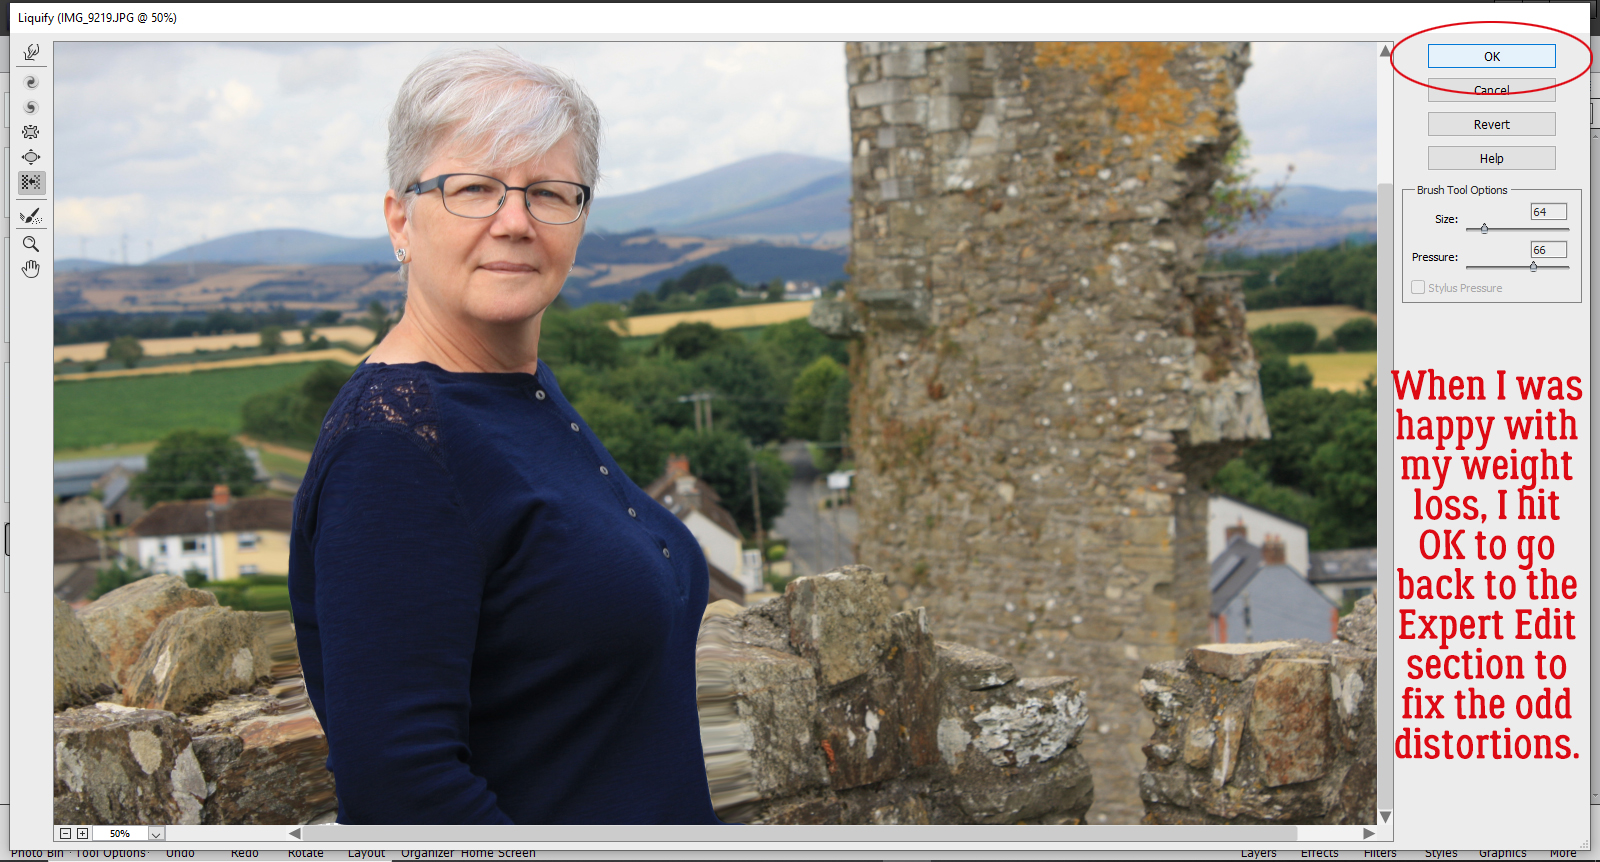
Now, to that Copy layer, I’m going to apply a Filter. Click Filter>Distort>Liquify.
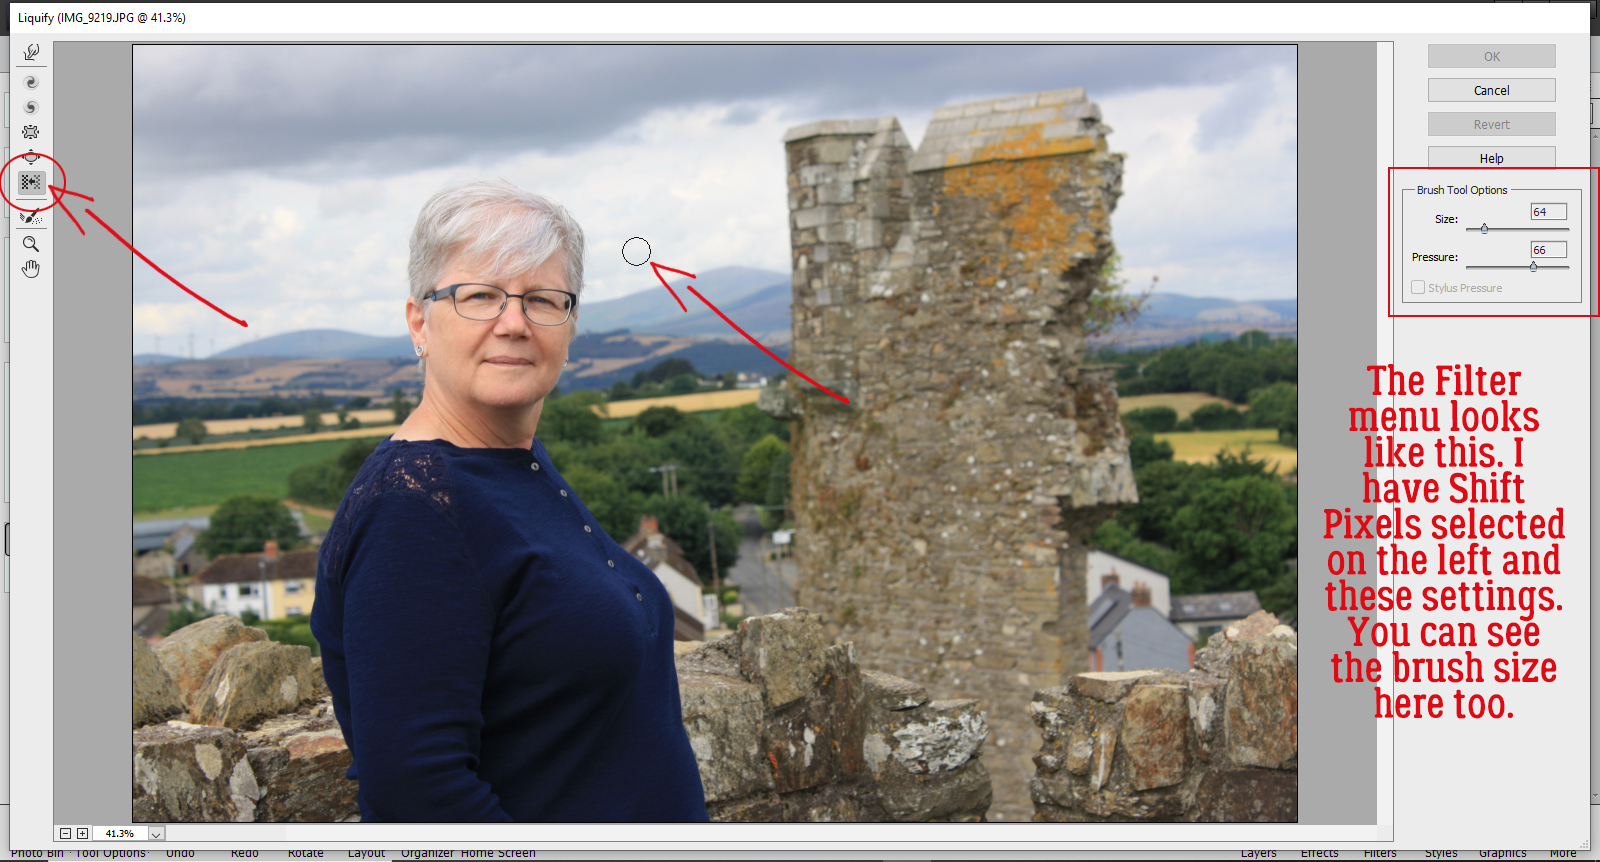
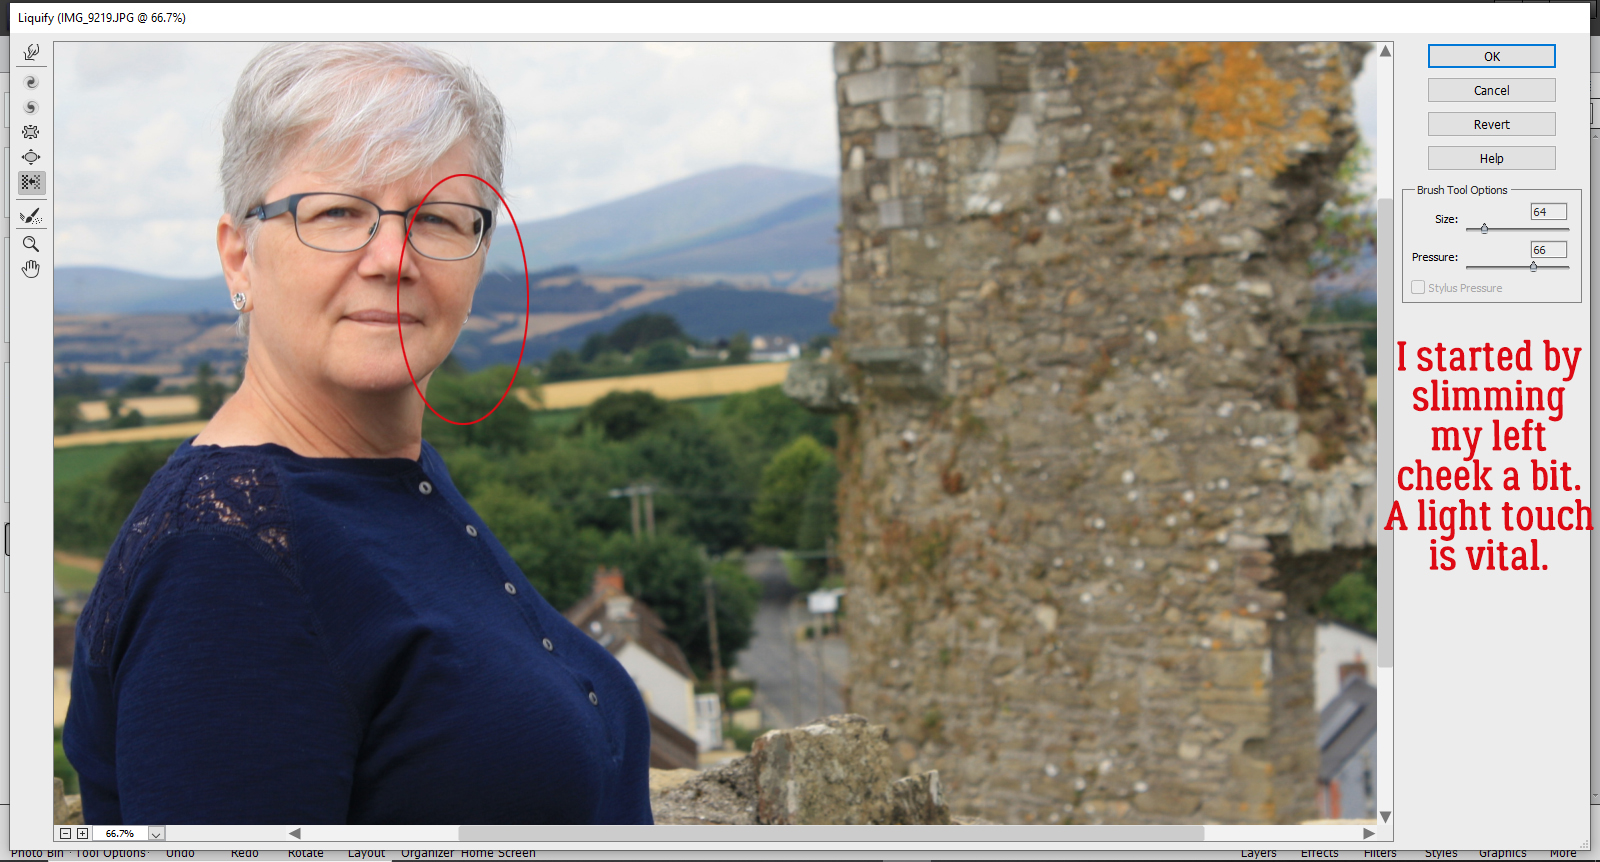
The Filter menu looks like this. The Tool options are along the left hand side of the workspace and the settings are on the upper right. For this edit I’m going to use the Shift Pixels option, the one with the icon that looks like two parallel brick walls with an arrow in between them. The brush I’m using is a soft, 64 pixel basic brush with a Pressure of 66. A light hand and a soft touch will give you the best results with the least backtracking.
I started my weight loss by gently slimming my left cheek. There’s no obvious clue for which direction to move your brush, or at least I didn’t find one. I started near my chin and very gently brushed upward until I got to the top of my ear. Just a tiny change is all that’s needed.
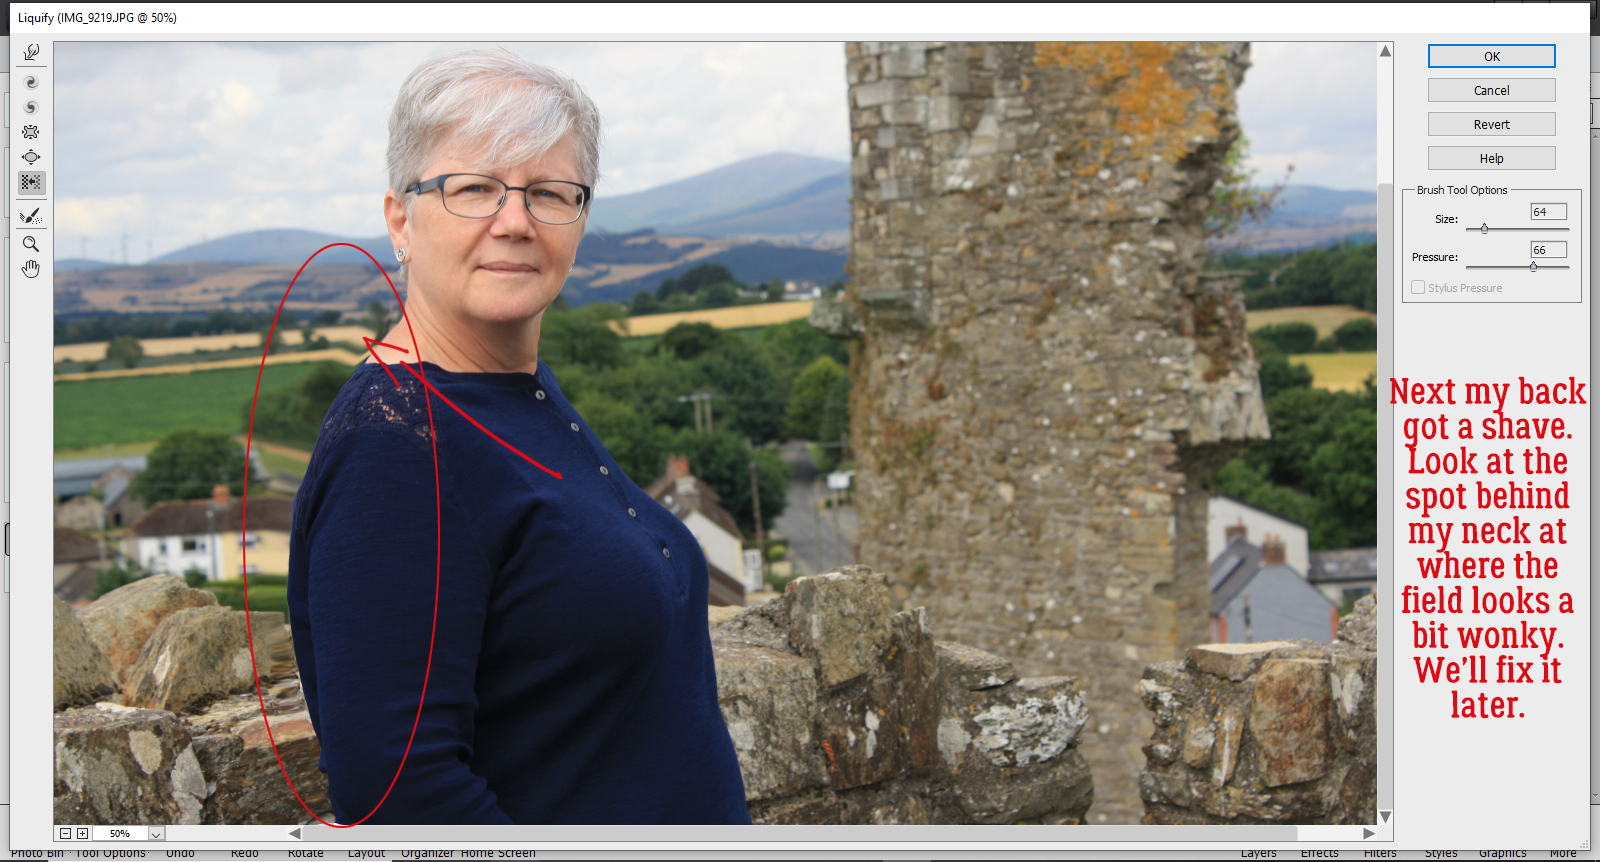
Then I took on my back fat. For this part, I started at my neck and brushed toward my bum. This is where you can see the distortion that happens in the background. It’s something I’ll fix later.
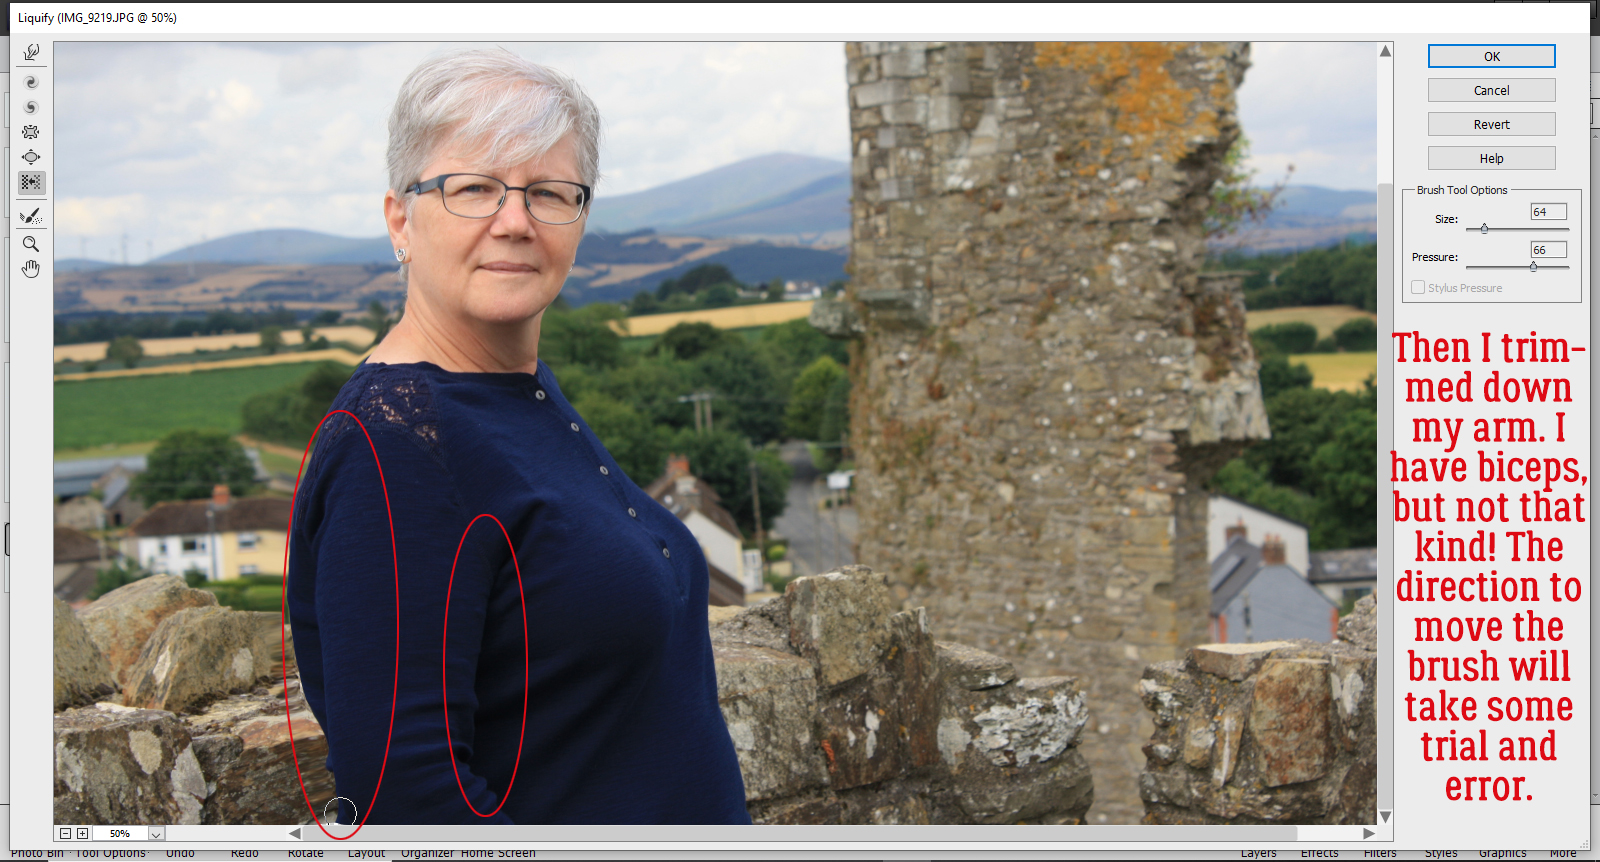
I moved on to making my arm look less meaty. I went elbow-up on the back of my arm and shoulder down on the inside.
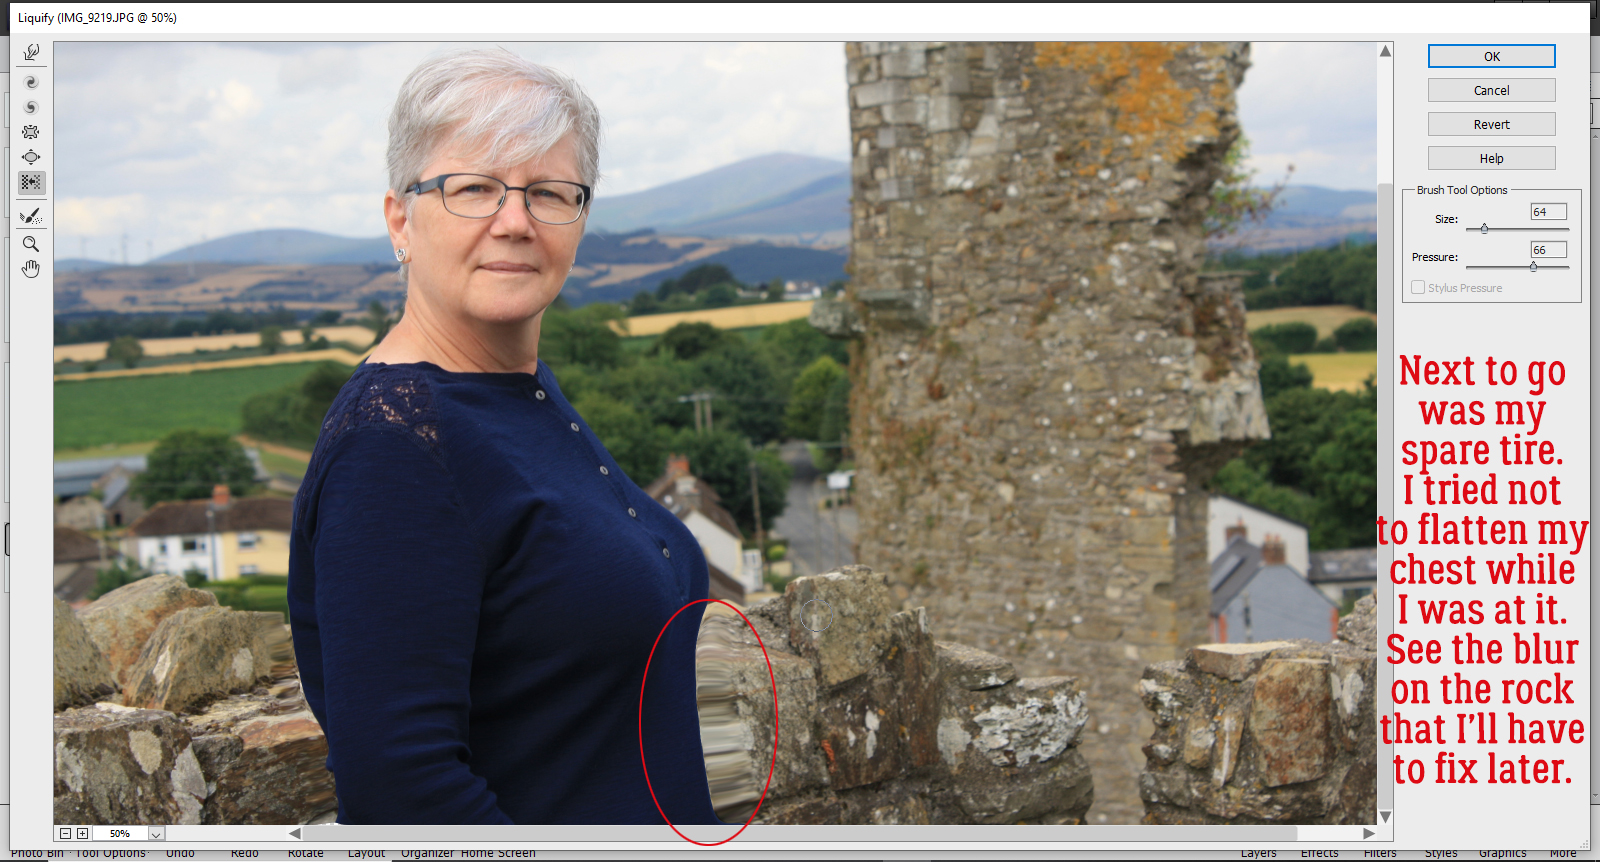
Muffin top was my next zone. It too worked better going bottom up. It took me a few small adjustments to get to where I felt thinner, and I was careful not to flatten my chest. It’s really easy to see the blurring on those stones!
Once I was satisfied that I’d successfully slimmed but didn’t go overboard, I clicked on OK to go back to the Expert Editor.
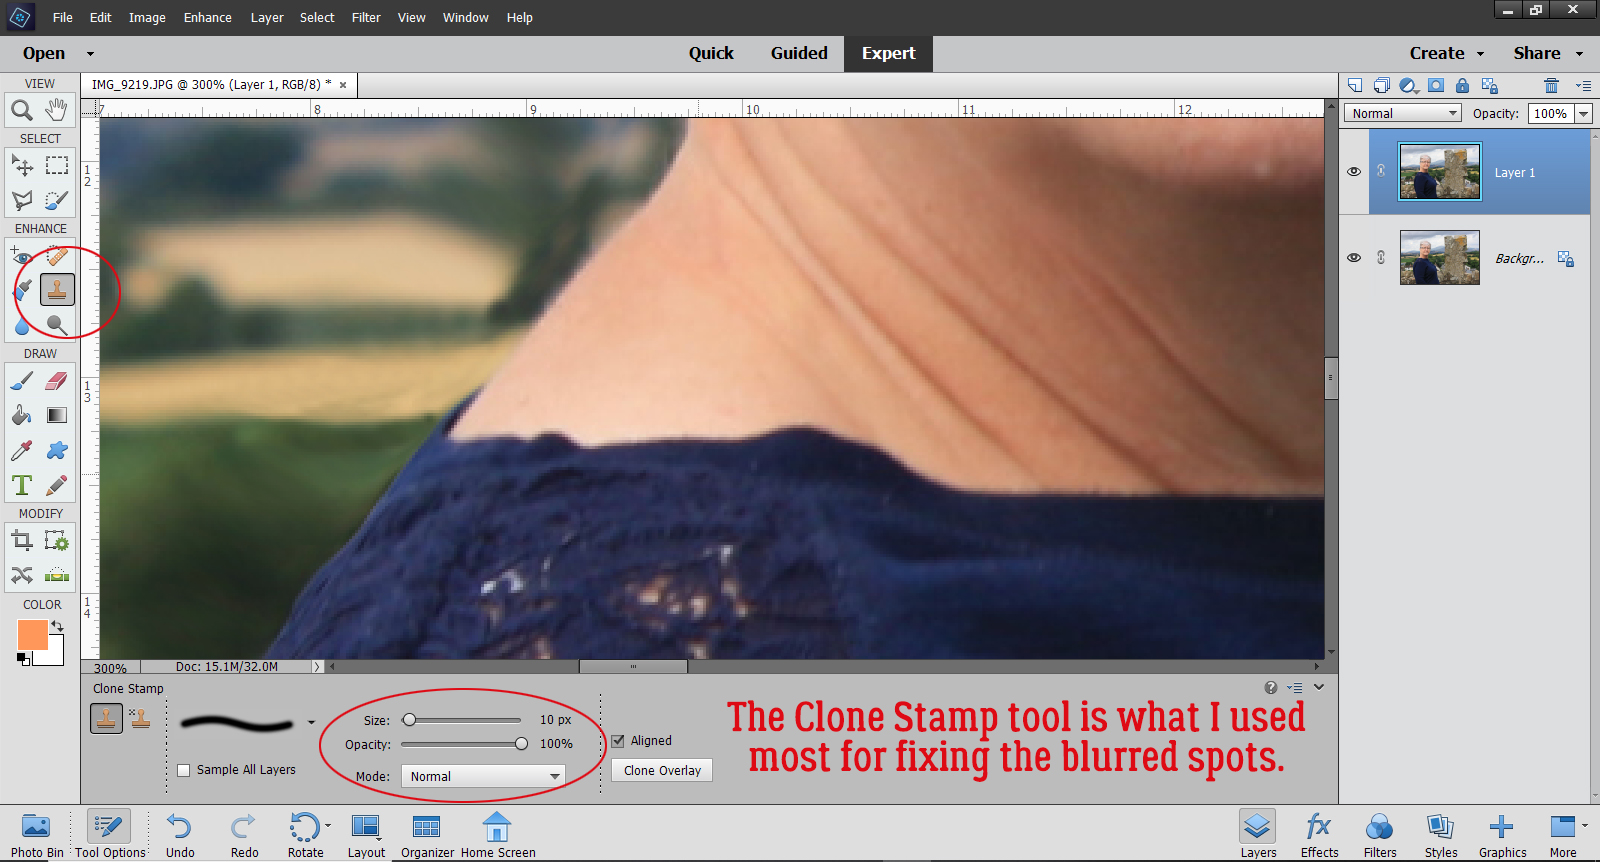
Now to fix the weird spots. I started with the Clone Stamp tool and Zoomed in a lot so I could make my adjustments minutely. For this part, it’s best to use a fairly small soft round brush, at least at the beginning. Never used the Clone Stamp? Decide what part of your image is going to make the least visible correction and hold down ALT then click on that spot. Move your cursor to where you want your change to happen BEFORE you click again to apply that area you just Cloned. If you’re too close to the source, you’ll end up with a muddy mess. I worked on that bit of field behind my neck.
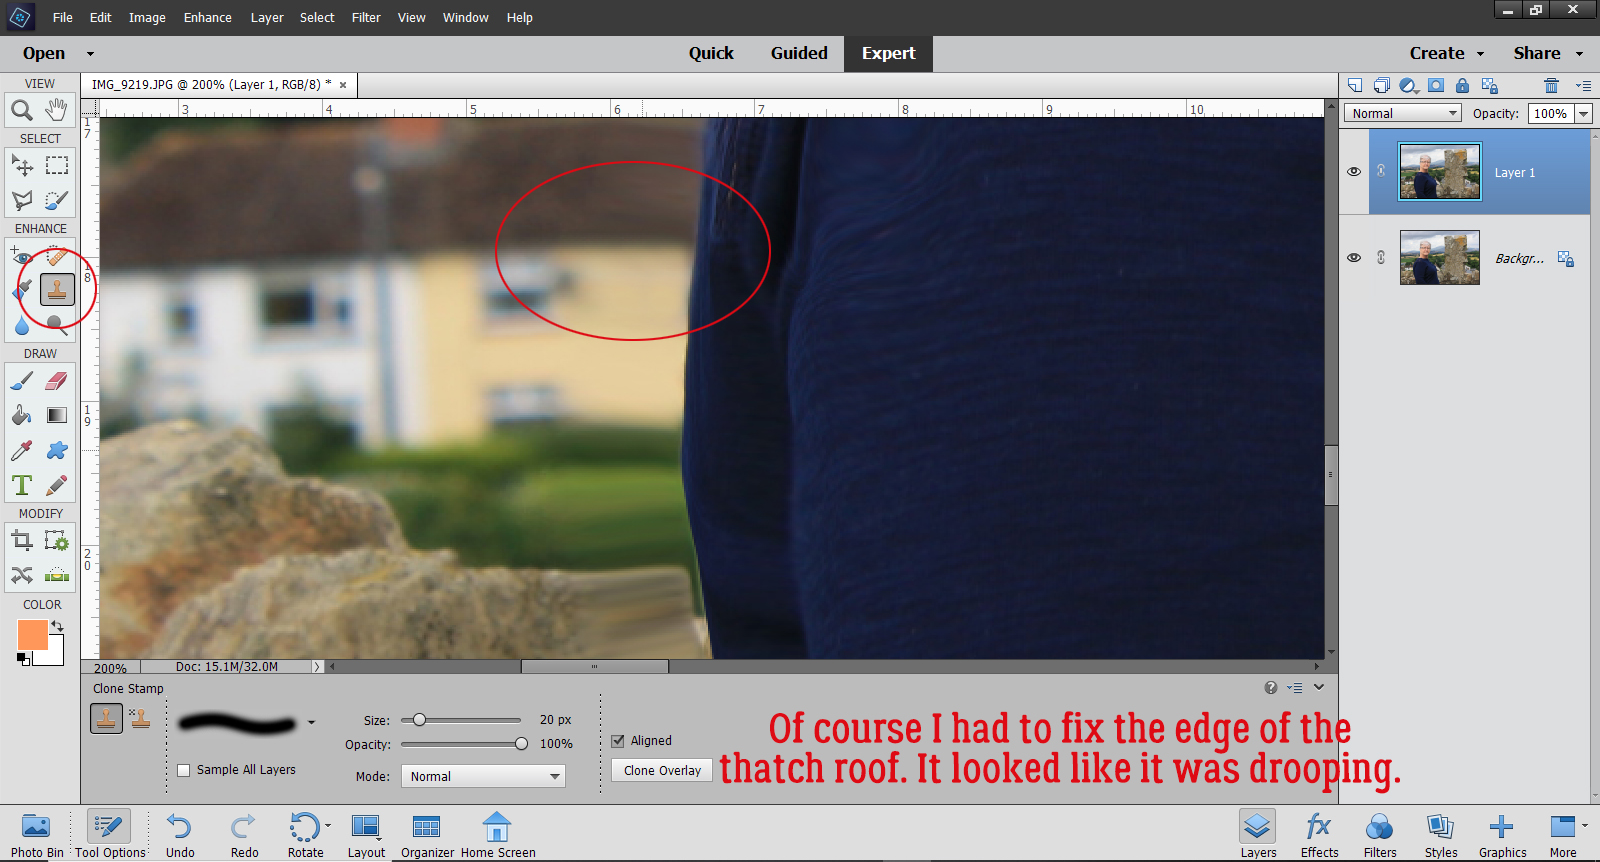
Then I moved on to remove the droop from the thatched roof on the yellow house at my back. For this kind of fix, if you click for your source with your cursor right over the straight edge of the object, Elements will give you a nice continuous straight line when you move the cursor over. To avoid visibly blurring an area that should be sharp, like where my sweater overlaps the wall, I switched my brush tip to a hard-edged one.
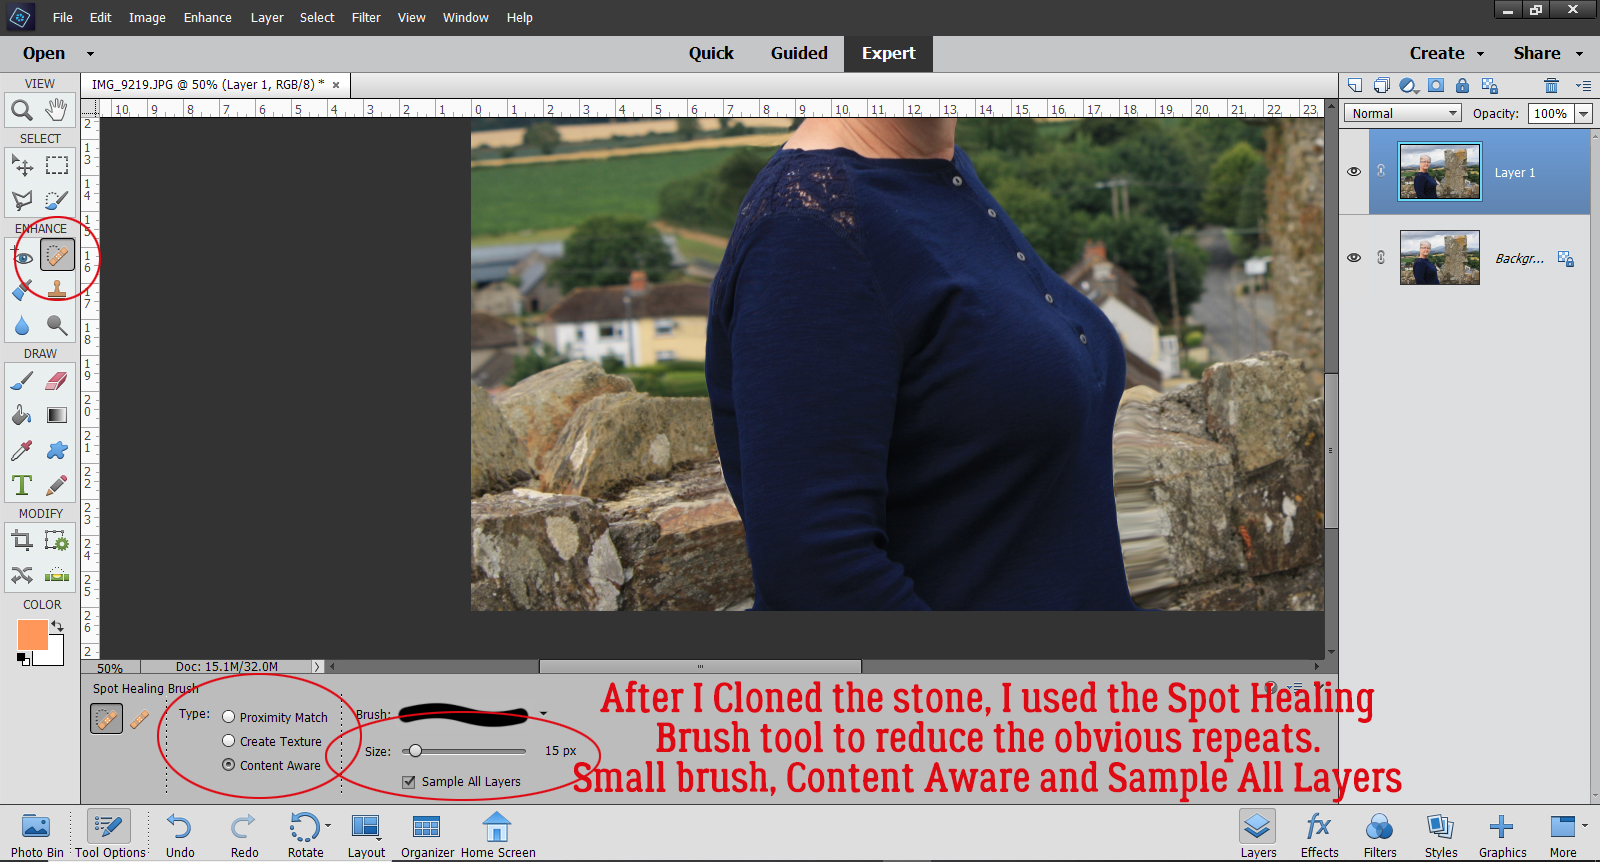
One disadvantage to using the Clone Stamp tool is that it reproduces patterns exactly, so as you move along, you’ll end up with some visible pattern repeats and that will look unnatural in most cases. That’s where the Spot Healing Brush comes into the game. For this fix, I used a small, hard-edged brush, selected Content Aware and Sample All Layers in the controls and randomly clicked on the stones to break up that repetition. If I noticed that my Spot Healing looked too sharp, I swapped out my brush tip back to a soft one.
I moved on to the blurry stones to my left and followed the same steps. After I’d cleaned that area up, I Zoomed out and looked closely at the entire image to see if there were any glaring areas that still needed retouching. Then when I was satisfied with the whole image, I selected both layers, right-clicked and Merged them. But it’s just as appropriate to right-click and Flatten Image.
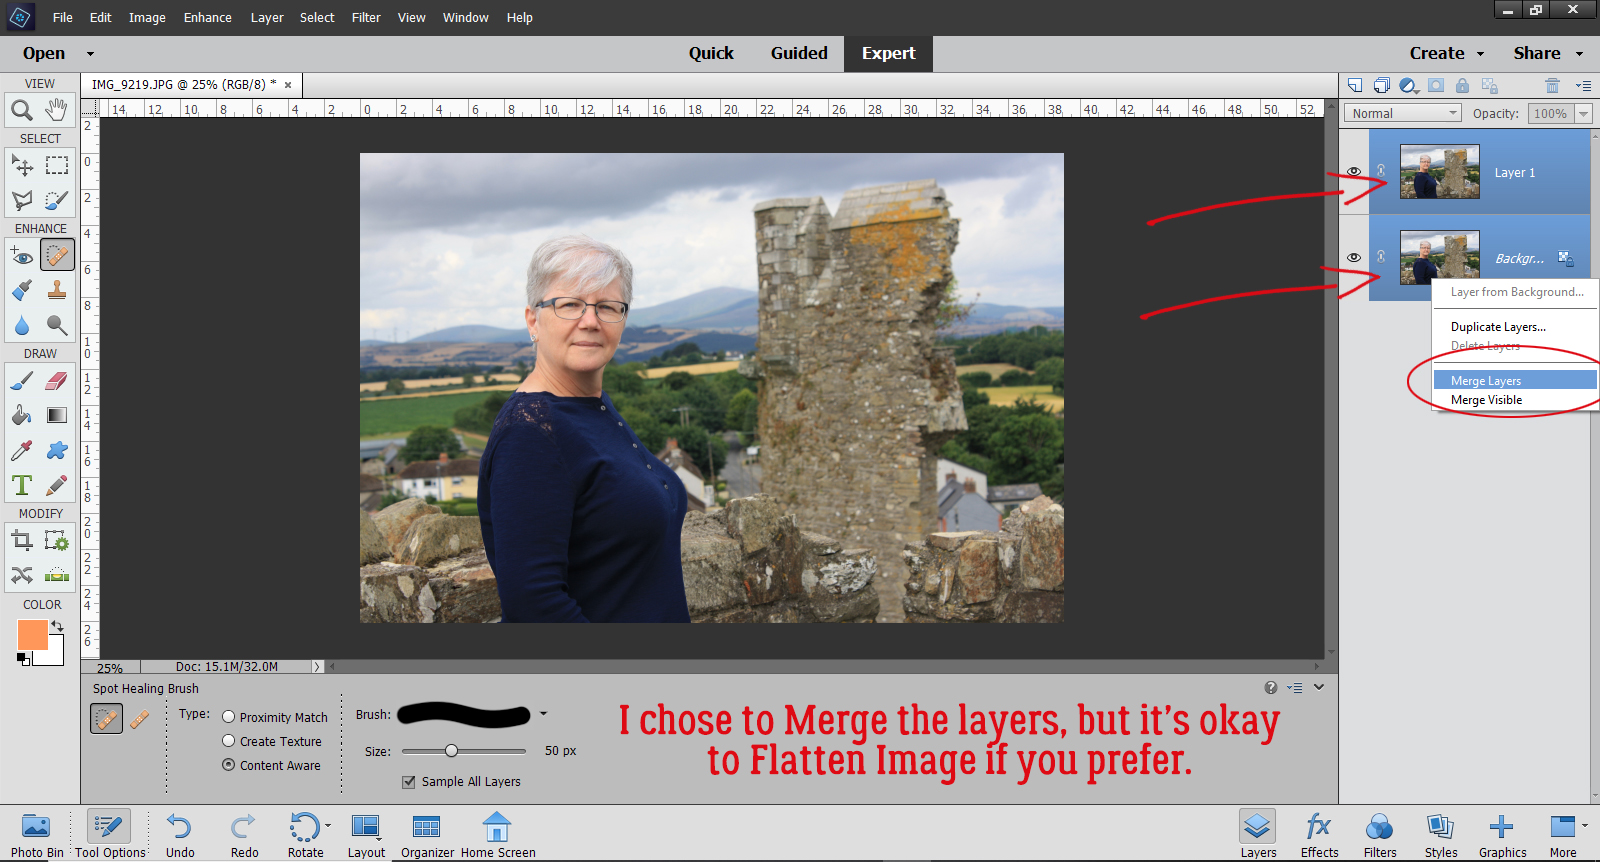
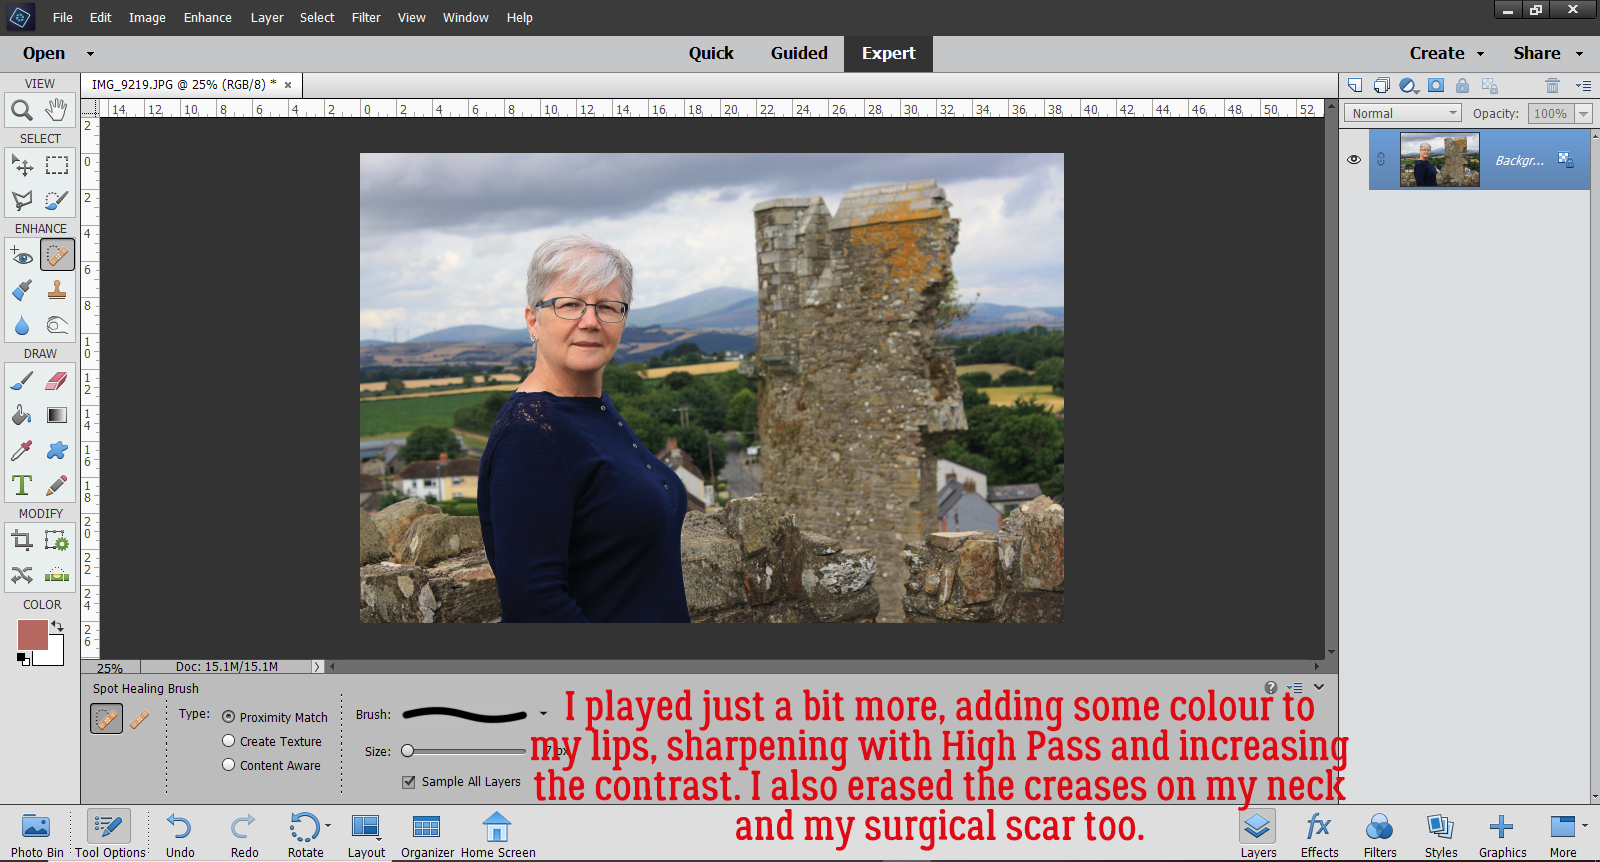
That’s it! That’s how I lost 10 pounds without even giving up jelly beans. My final image got a bit more adjusting: First I smoothed out the wrinkles in my neck and erased the scar from my parathyroid surgery. I Duplicated the image and sharpened it with a High Pass filter. That layer’s Blend Mode was changed to Overlay. I made yet another Copy layer then I changed the Blend Mode on that new layer to Multiply and dropped the Opacity to 25% to add some more contrast to the clouds (both are discussed in a previous tutorial). Overall, I’m really pleased with the way it came out. I look like me, only better!
Mm-kay. Let’s see what else I need to do to this post to get it right. I might even make my deadline! See you next week.