Updating the Custom Cluster
![]()
Regular readers might recall a tutorial from a long while back on interweaving elements into a more complex and natural looking cluster. They may also recall another tutorial about “shaving” drop shadow styles. Somehow it never occurred to me that the two could work together to make the task of customizing clusters much quicker and easier. But here we are! I know this is going to up my game a lot, especially when I’m weaving ribbon into the alphas I use in my signatures. Let’s see what I’m talking about.
Here’s a cluster I tossed together using Aimee Harrison‘s Secret Garden kit. It’s okay, but it could be better.

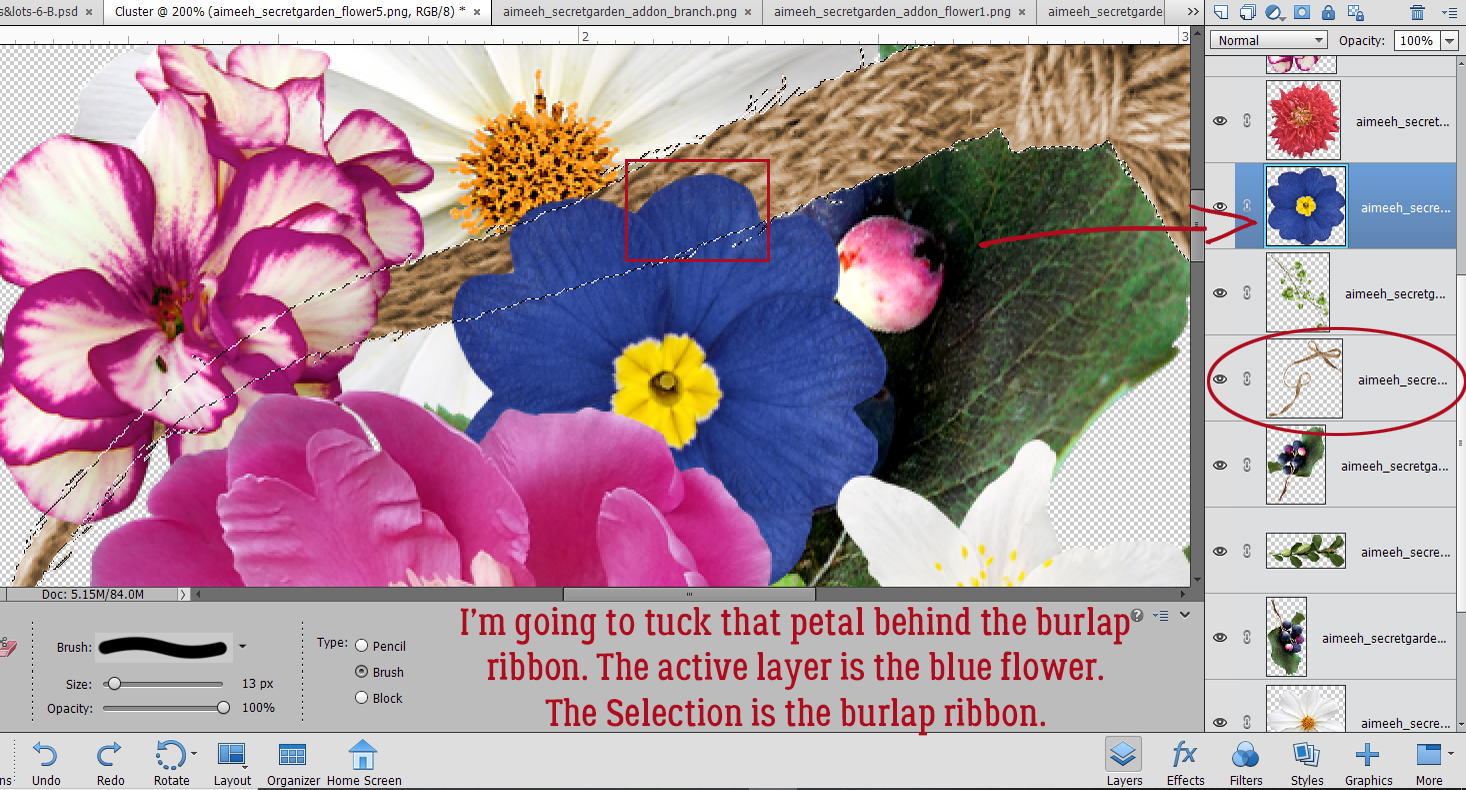
After I took a good look at the various components of my cluster I identified a few spots where I could add some interest. First, I’m going to tuck the burlap ribbon in behind the petal I’ve indicated. The blue flower layer is the active layer. I CTRL/CMD>clicked on the layer thumbnail for the burlap ribbon to Select the edges of the ribbon. Then I double-checked that I’m working with the correct layer, the blue flower layer.
Rather than having to be super-careful about what parts of the blue flower I remove with the Eraser tool, as I would with my previous method, I only have to Zoom in and move cautiously on the area where the blue flower’s petals overlap. With the edges of the ribbon Selected, only those parts of the active layer inside the marching ants will be Erased!
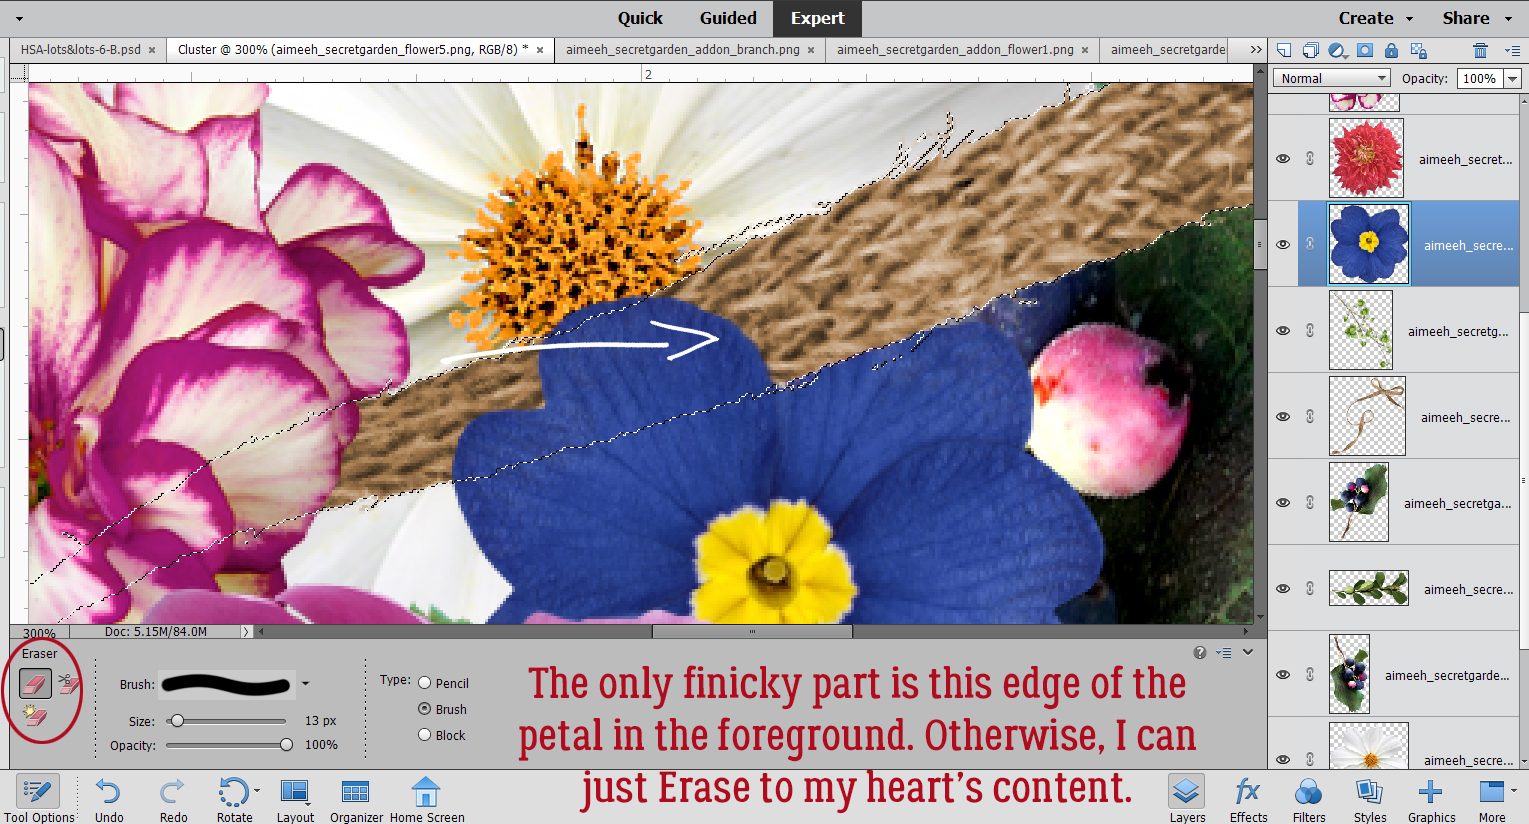
Let’s bring the ribbon in front of these petals. The only sticky spot is right at the intersection of all those petals.

One swipe with the Eraser tool completely revealed the ribbon, putting it on top of the petals.

I’m also going to tuck the ribbon behind the edge of this leaf.

Did you notice that I also put the small white flower’s petal behind the leaf? I just had to change the active layer to the white flower and Erase where the leaf is. There are a few other spots where I’ve made some tucks or lifts. Can you see them?

**So what happens when it’s time to add some shadows? Well… parts of the layers may have been removed and the shadow will look funky, like this one. I’ve used a custom shadow on its own layer here, but this also will happen with drop shadow styles so be aware of it when you’re working.**

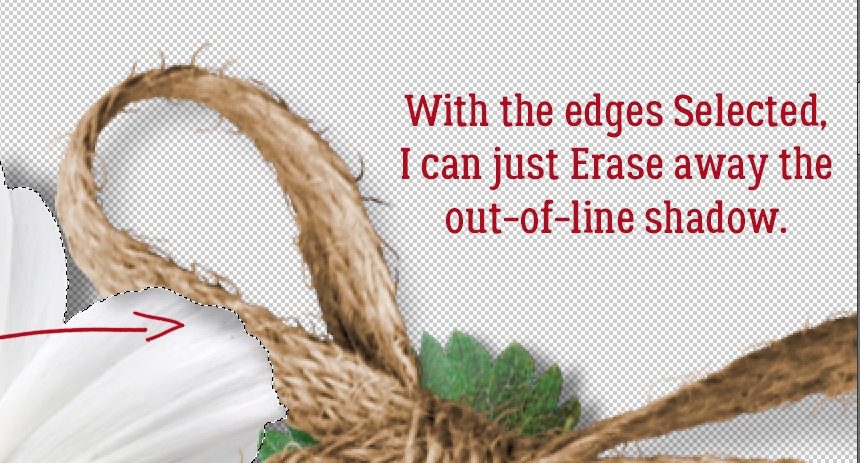
After I’ve Smudged and Blurred the shadow layer, I CTRL/CMD>Clicked on the large white flower layer to Select the edges. Then I Erased the shadow that shouldn’t be overlaying the petals.
With all the elements in the cluster Shadowed, I felt the (very OCD) urge to add a suggestion of a shadow where the leaf overlays the small white flower at the lower left. But it’s probably something no one will notice so feel free to omit this step! What I did was activate the shadow layer for the leaf then used the Marquee tool to enclose the part of the shadow I wanted to move into place. I made a Copy of that part of the shadow (CTRL/CMD>C) then I Pasted it (CTRL/CMD>V) onto the layout, which created a new layer. I moved that layer up the stack of layers until it was on top of the flower layer. Some additional Erasing was needed so I CTRL/CMD>Clicked on the leaf’s layer thumbnail, activated my little new shadow layer and Erased the part that wasn’t in the right place. Easy peasy!!

There are so many ways this will elevate your layouts! Give it a try and let me know how it works for you. And of course, if you have tips for making it easier or better, our readers will be thrilled!
Here is the PDF version of this tutorial: https://bit.ly/3oyB8QR
Link to PDF: https://bit.ly/3gL52On
![]()