More Fun with Blend Modes
![]()
When I started playing with Blend Modes for my Memory Mix It Up challenge layout, I wasn’t sure it would be worthy of a tutorial, but the comments in the Gallery soon changed my mind. Before I start the step-by-step, I want to assure you all that although this layout took me two days to complete, it wasn’t because the technical aspects were time-consuming. I was under the weather – literally AND figuratively – so I took my time. When you see the process, start to finish, you’ll see it’s really a quick but dramatic effect. I must also give credit where credit is due: I modified a technique presented by Nancy Adams, who is a creative team member for Anna Aspnes. Let’s dig in!
First, let’s talk about Blend Modes for a minute. New-to-digiscrapping readers are feeling a little overwhelmed, I can tell. In short, Blend Modes can lighten, darken, or alter the transparency of a layer without changing that layer’s Opacity. To change the Blend Mode, click on the bar at the upper left corner of the Layers panel where it says “Normal” and find the mode you’re seeking. We looked at all the options in this tutorial: Blend Modes? Say What?
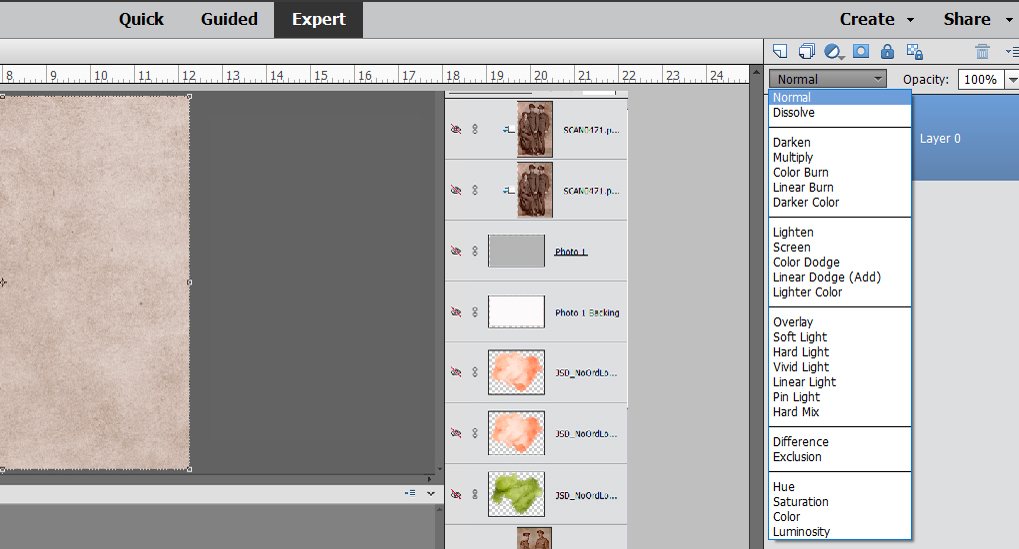
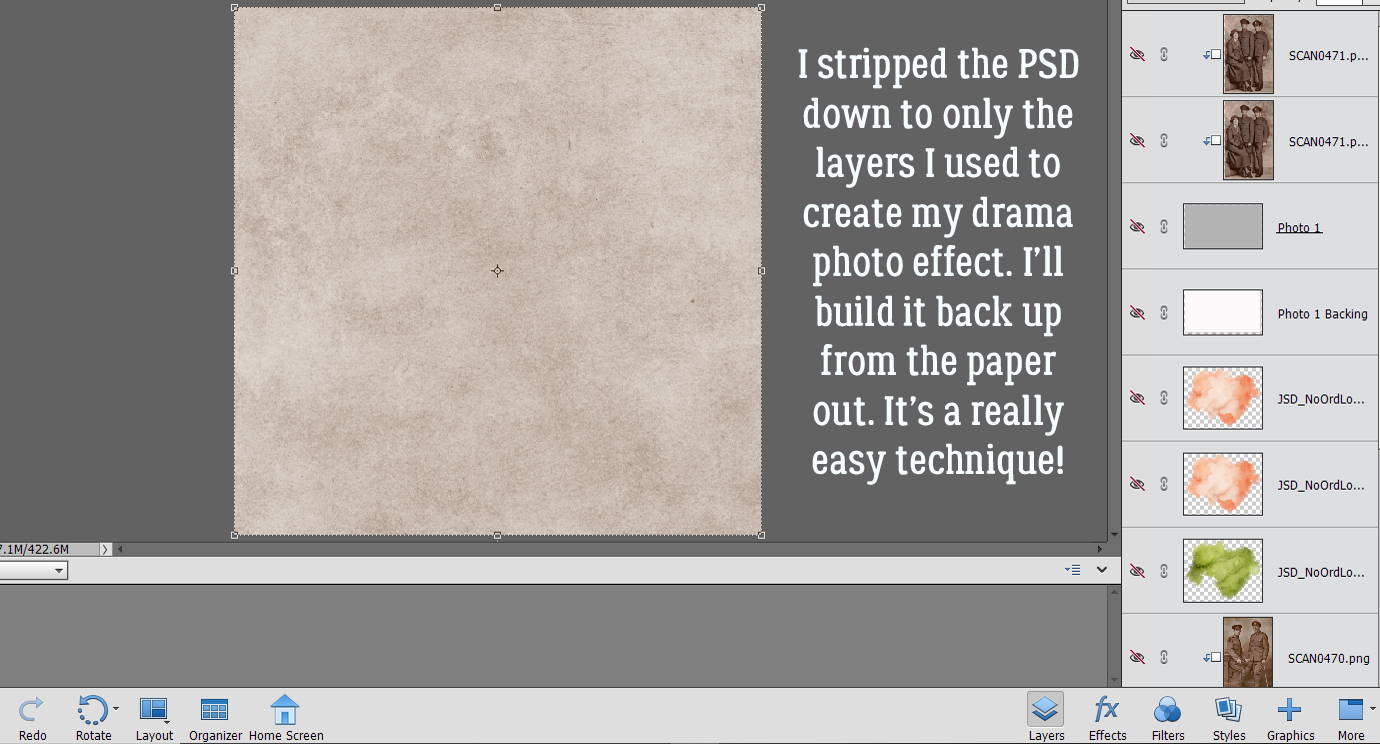
I’m so fortunate to have these professional photos of my great-grandfather Will and his siblings. They were taken shortly after the youngest, Geoff, was inducted into the British Army just after his 18th birthday. I’ve wanted to create a layout with them for awhile, and this challenge template was just perfect for the job. In order to recreate my workflow for this tutorial, I deconstructed my layout, stripping it down to just the layers that create the arty effect. The background paper is a simple “solid” gray from Jumpstart Designs‘ No Ordinary Love collection. Other than the alpha I used for my title, all the elements of this layout are from that collection (because I liked the title!). My title alpha is from the GingerBread Ladies collab Spice of Life. The screenshot shows that all the other layers have been turned off, and I’ll turn them back on one layer at a time, working from the paper layer up.
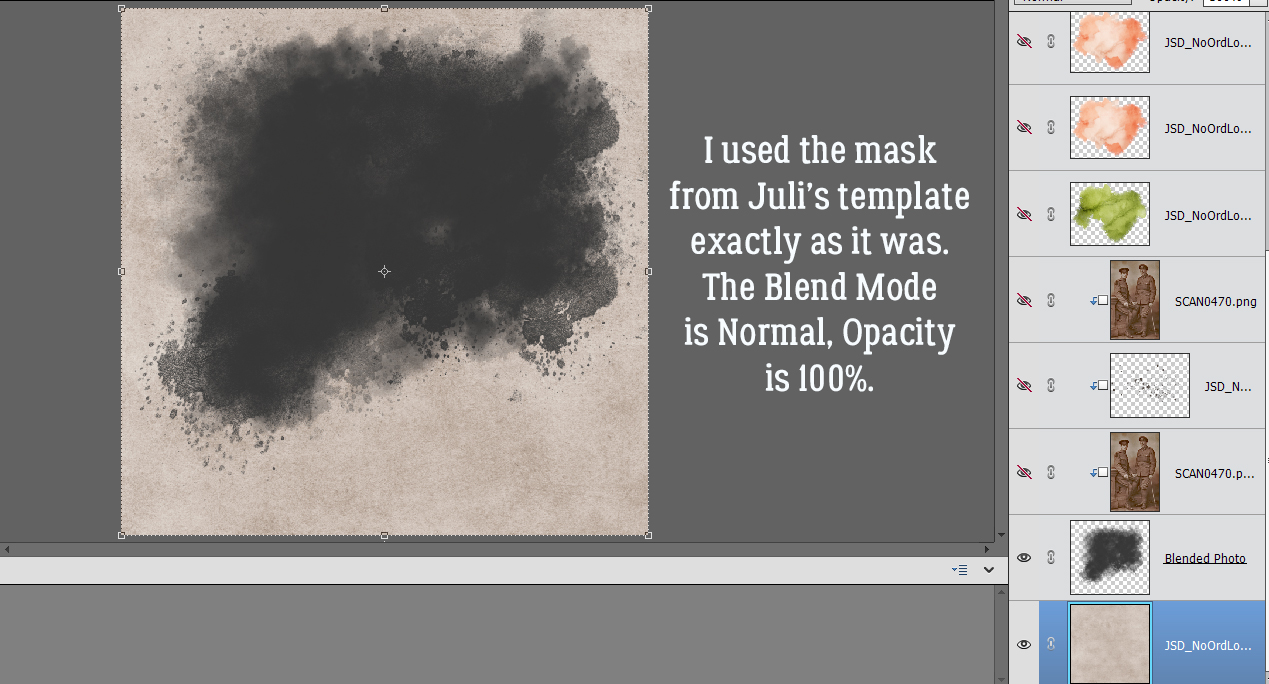
 In the Gallery comments, Jill pondered whether I’d done any (labour-intensive) extractions or other witchery to obtain my results, but I didn’t. I used the mask exactly how Juli (Miss Fish) designed it, in the exact spot she’d put it on the template. The Blend Mode was left at Normal, Opacity at 100%.
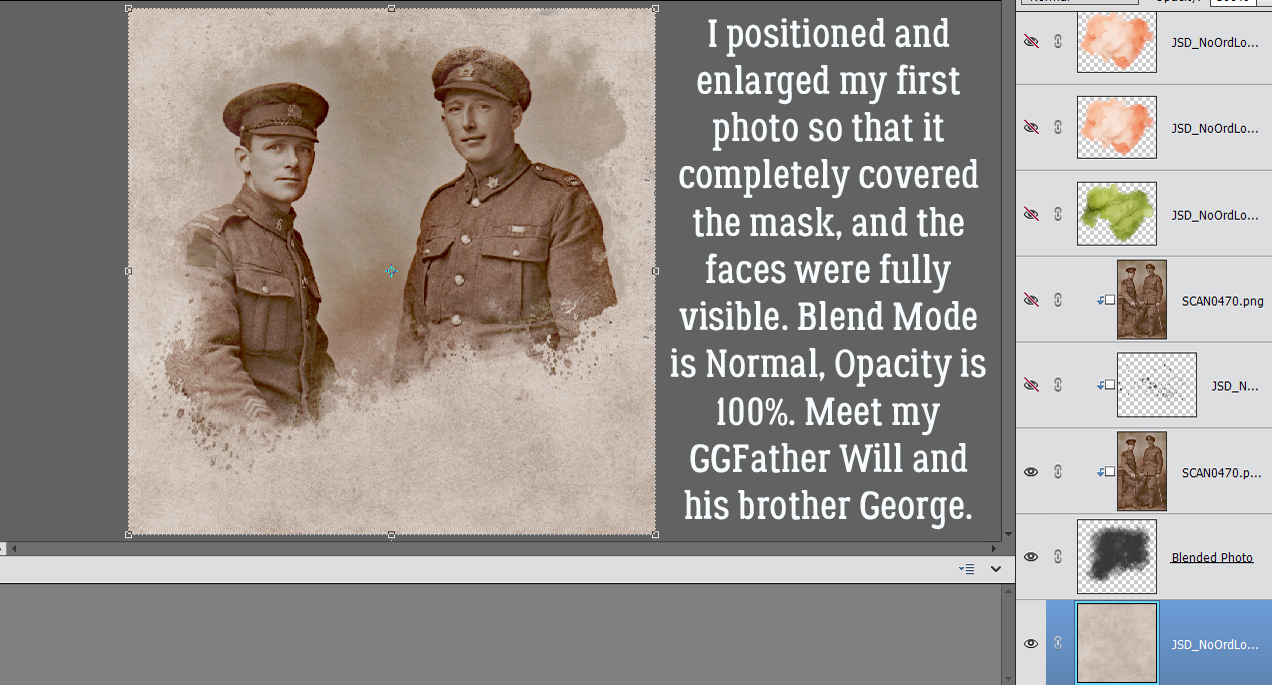
I positioned my large photo of Will and George over the mask layer, resized it to be sure it completely covered the mask and repositioned it so their faces were clearly visible. Then I clipped it to the mask. [Right-click on the photo layer and select Create Clipping Mask or CTRL/CMD>G for versions prior to PSE 15 or CTRL/CMD>ALT>G for later versions.] The first photo layer is Normal at 100%.
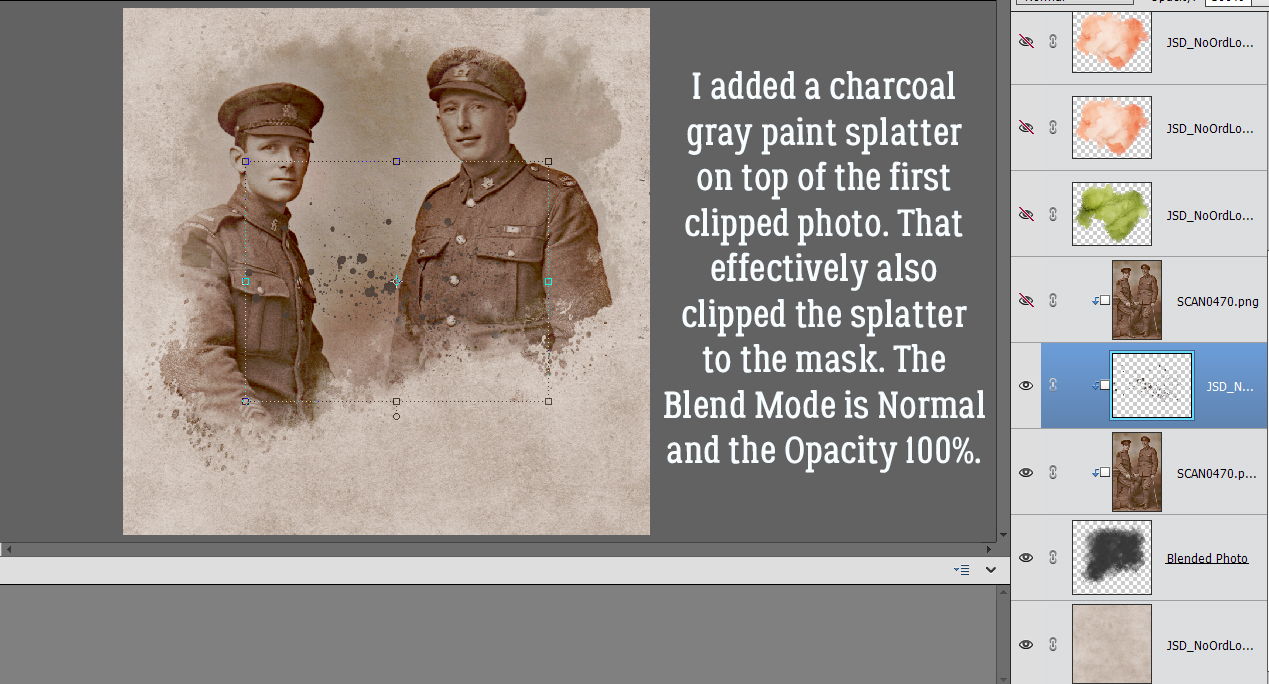
Next, I dropped a gray paint splatter on top of the photo layer, clipped to it. I left this layer’s Blend Mode and Opacity at the default, Normal and 100% as well.
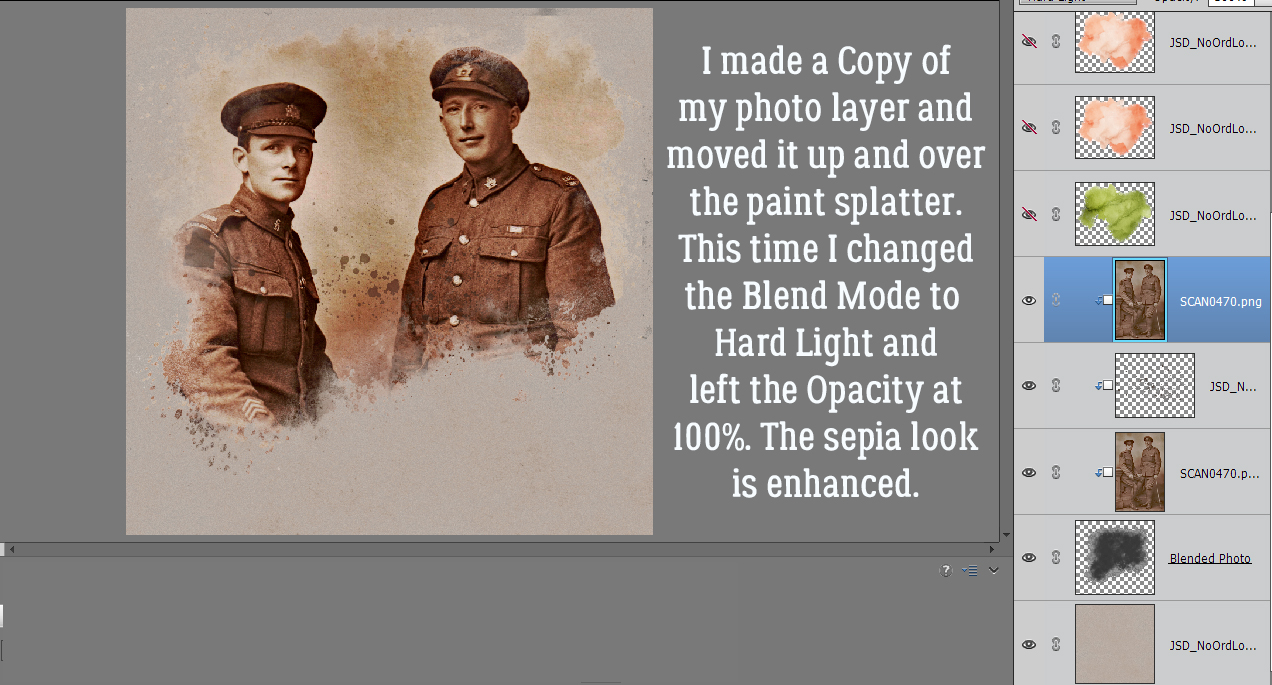
I made a Copy [CTRL/CMD>J] of the photo layer, ensuring it was clipped to the mask as well. This time I changed the Blend Mode to Hard Light and left the Opacity at 100%. It makes the sepia tone even more vivid. Also, see how this layer brings more of the variations in the background paper into view.
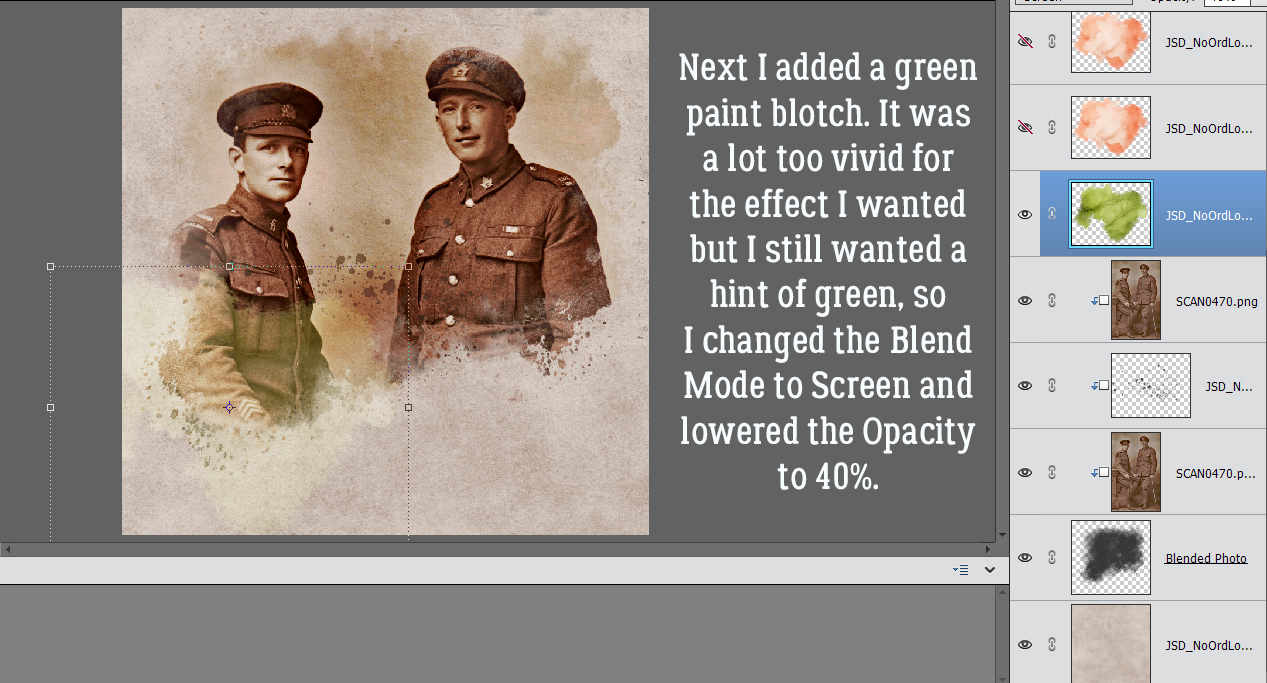
I wanted to add some green hints to the layout, but not bash-you-over-the-head-visible. The uniforms in the photos were a khaki colour, not really brown, not really green. I added a green paint blotch on top of the second photo layer, but not clipped. I wanted it to extend onto the background paper too. Then I changed the Blend Mode to Screen (which lightens) and dropped the Opacity to 40%. Now the green looks more khaki, and it’s transparent so the detail in the photo shows through beautifully.
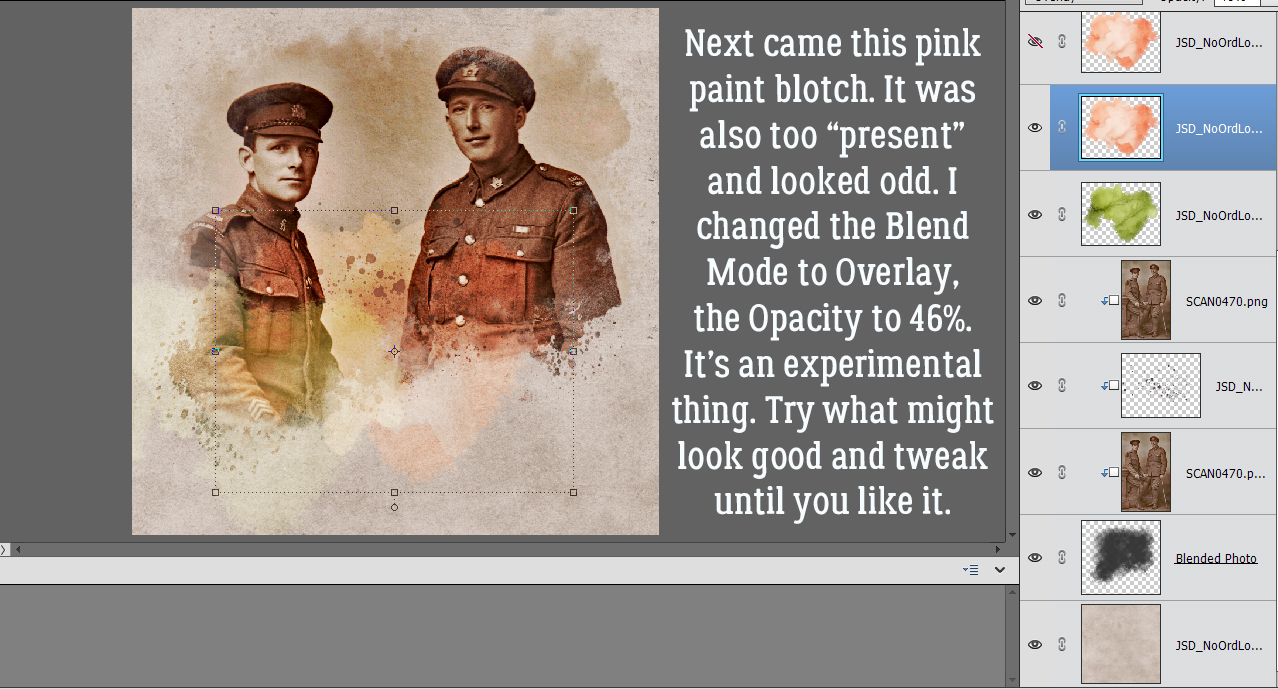
Adding a pink paint blotch layer on top of both the photo layer and the green paint layer without resizing, I changed the Blend Mode to Overlay (which lightens and increases transparency) and decreased the Opacity to 46%. See how the tonal changes make the photo more visually interesting? If the changes I make seem random, it’s because this is a very experimental process. I tried more than one Blend Mode and tweaked layer Opacity until I liked the way it looked. So it IS random! Don’t be afraid to play with your software. It’s how you figure out what you like and how to achieve it!
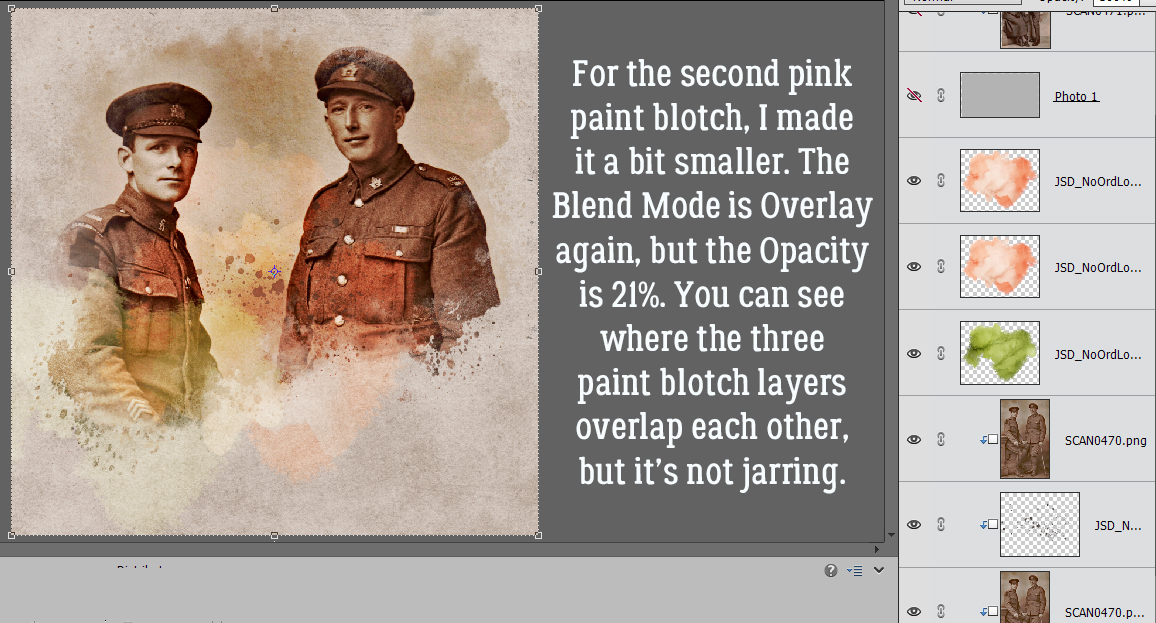
I made a Copy [CTRL/CMD>J] of the pink paint blotch layer and repositioned it. I made it quite a bit smaller than the first pink blotch, left the Blend Mode at Overlay and really decreased the Opacity to 21%. There’s a hint of colour, and the two other paint layers blend into the whole.
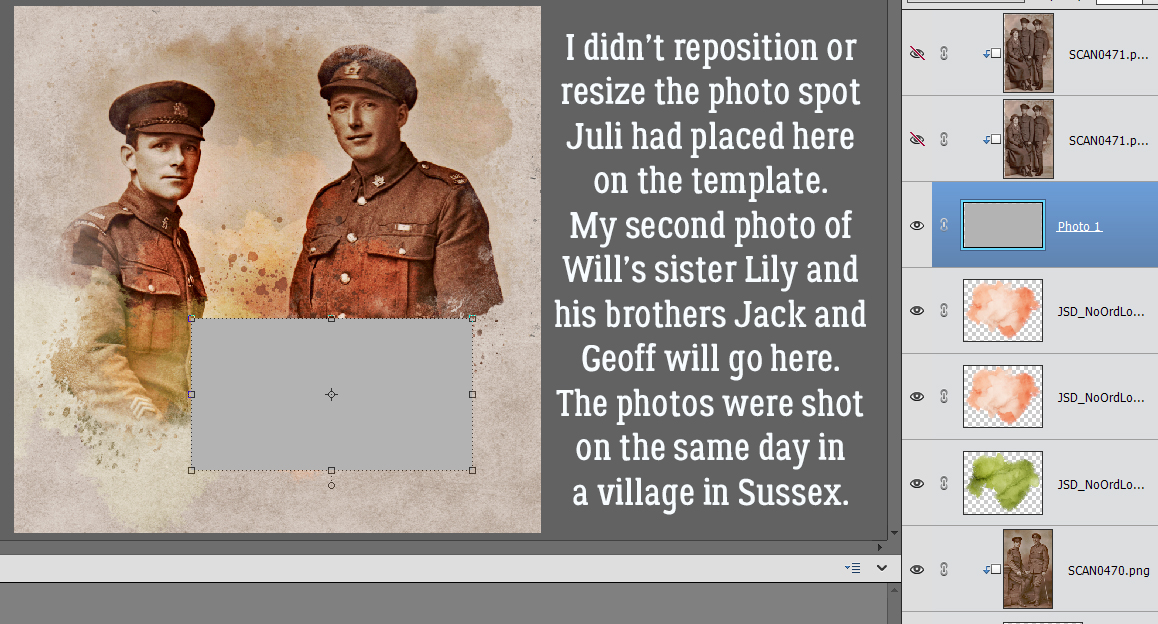
I was satisfied with the way the masked photo was looking so it was time to add in the second photo of Will’s siblings. I left the photo spot in precisely the place Juli put it, made no changes to it at all.
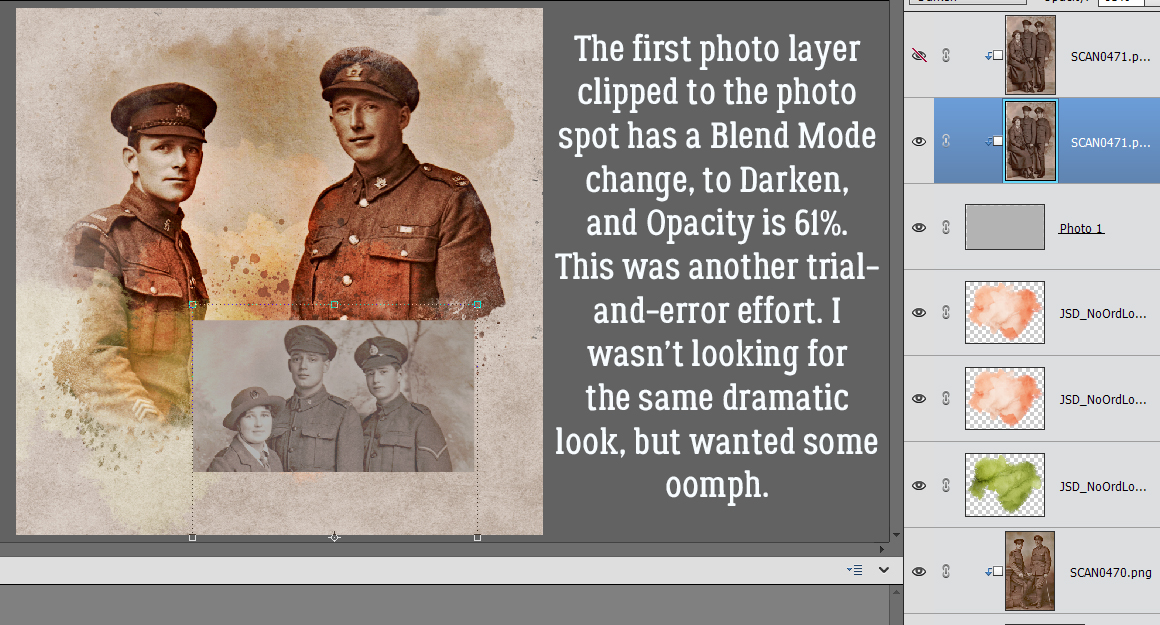
I clipped the photo to the spot and adjusted it to fit. I wish I could’ve gotten a bit more of Lily’s shoulders in there, but it wasn’t a big deal. For this layer, the Blend Mode is Darken and the Opacity is 61%. I played with the order of the layers a little; this one originally was the top photo layer, but it looked better as the bottom one.
This Copy layer of the second photo ended up with the same tonal quality as my large photo totally because of the Blend Mode change to Hard Light. With the Opacity at 100%, it’s tack-sharp and the sepia in the photo’s backdrop pops. From there, I finished my layout, adding in the other elements and applying custom shadows to each layer.

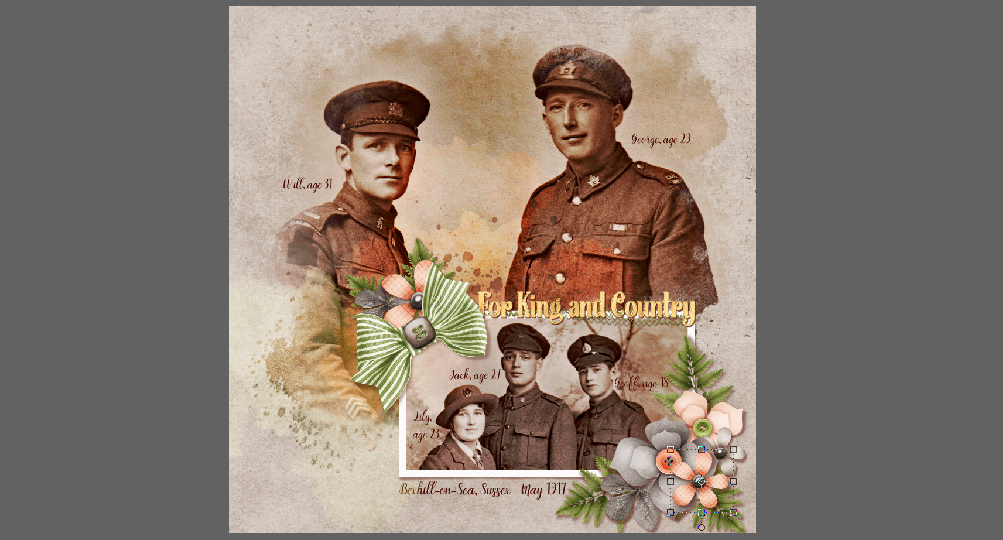
This is my finished layout. I LOVE how it turned out. The title reflects how although the three older brothers enlisted in the Canadian Expeditionary Force, Canada’s involvement in WWI was automatic when Britain declared war on Germany on August 4, 1914; George V was the titular head of Canada at the time. They all spent a significant part of their time overseas in Britain, which made their parents – who were still living there – ecstatic. Lily and Geoff served with the British Army; Lily became a nurse and Geoff was part of the Short-Service branch. Geoff enlisted at 17 1/2 and was forced to wait until after he turned 18 to be inducted. He looks like a baby to me… Okay, enough with the history lesson!
There may not be a tutorial next week; my dad is unwell again and is undergoing a procedure on Monday. I may be tied up for a few days… and I know all of you won’t mind if I’m MIA. Have a good week, stay safe and stay healthy!
PDF Version: https://bit.ly/3x0382c
![]()