DIY Worn Wood
![]()
Last week I asked for some tutorial suggestions and you came through for me. There are some interesting topics coming up, ladies! This week, I went for a quick trick, since I’m super-busy with other things right now. (I bet I’m not the only one, either!!)
Before we get going, I want to thank Lee for the idea of creating custom worn wood papers. I played around and was shocked at how easy it can be. A few tips though… 1. Choose your woodgrain paper carefully. It should have some visible texture and its underlying colour family should work well with the paper you want to rough up. 2. Choose your second paper carefully too. It’ll look best when it’s got a highly-contrasting pattern or when it’s a solid. Some of my examples will show you why. 3. Practice using Undo! (CTRL/CMD>Z) If you pay attention to where the marching ants are you shouldn’t need it a lot, but there will be times when you just have to back up. Let’s get started!
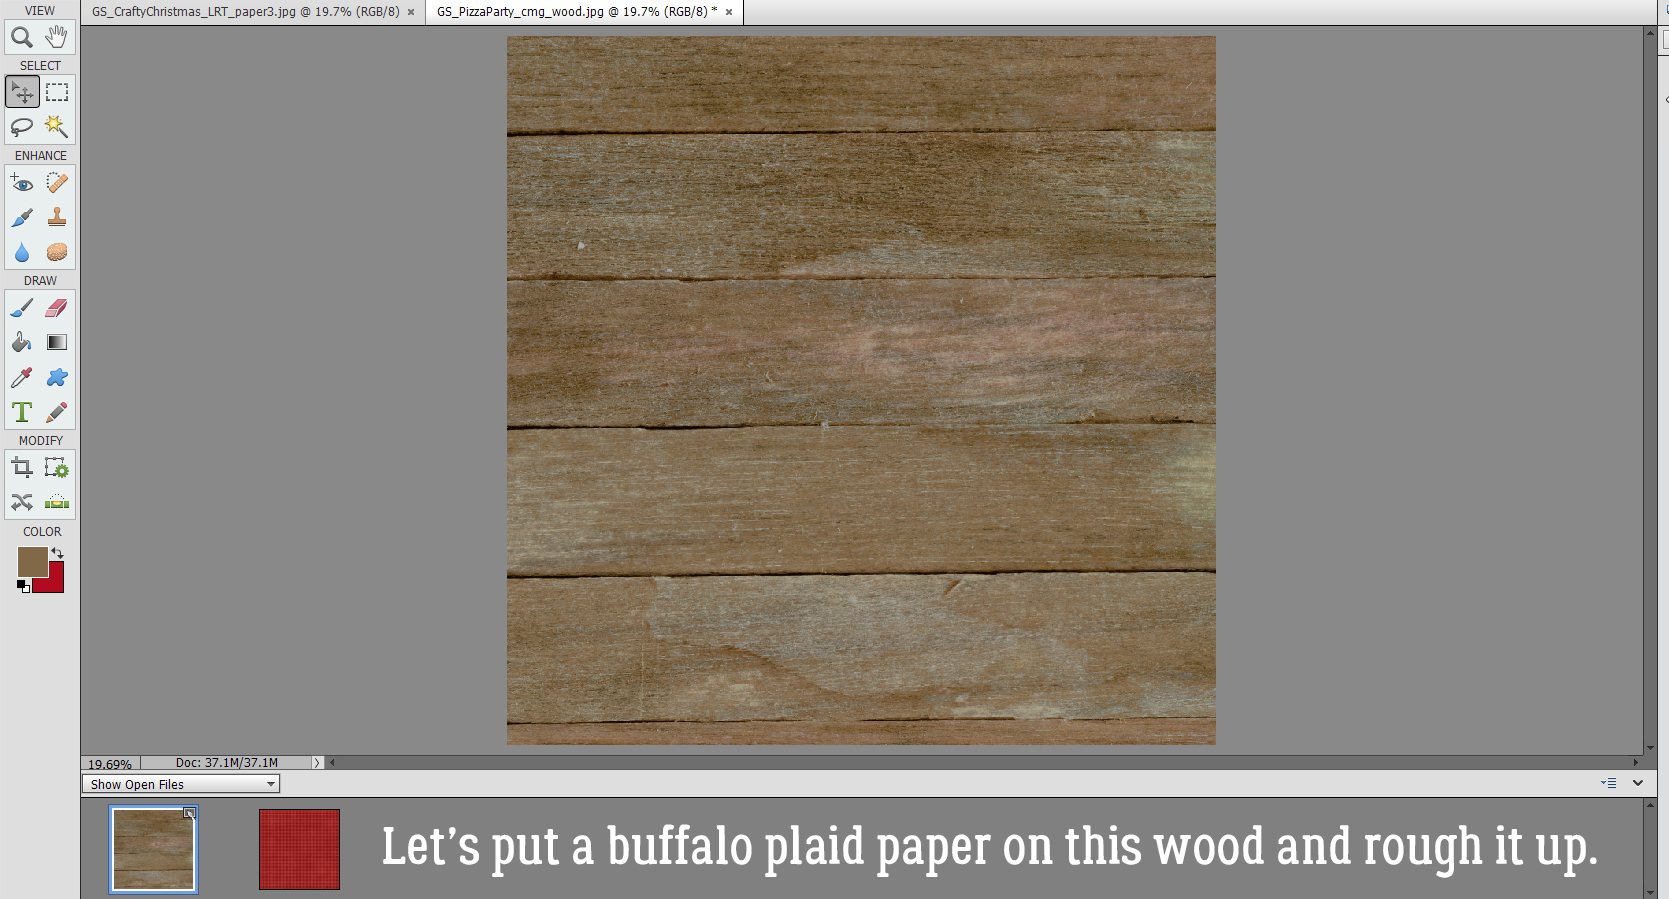
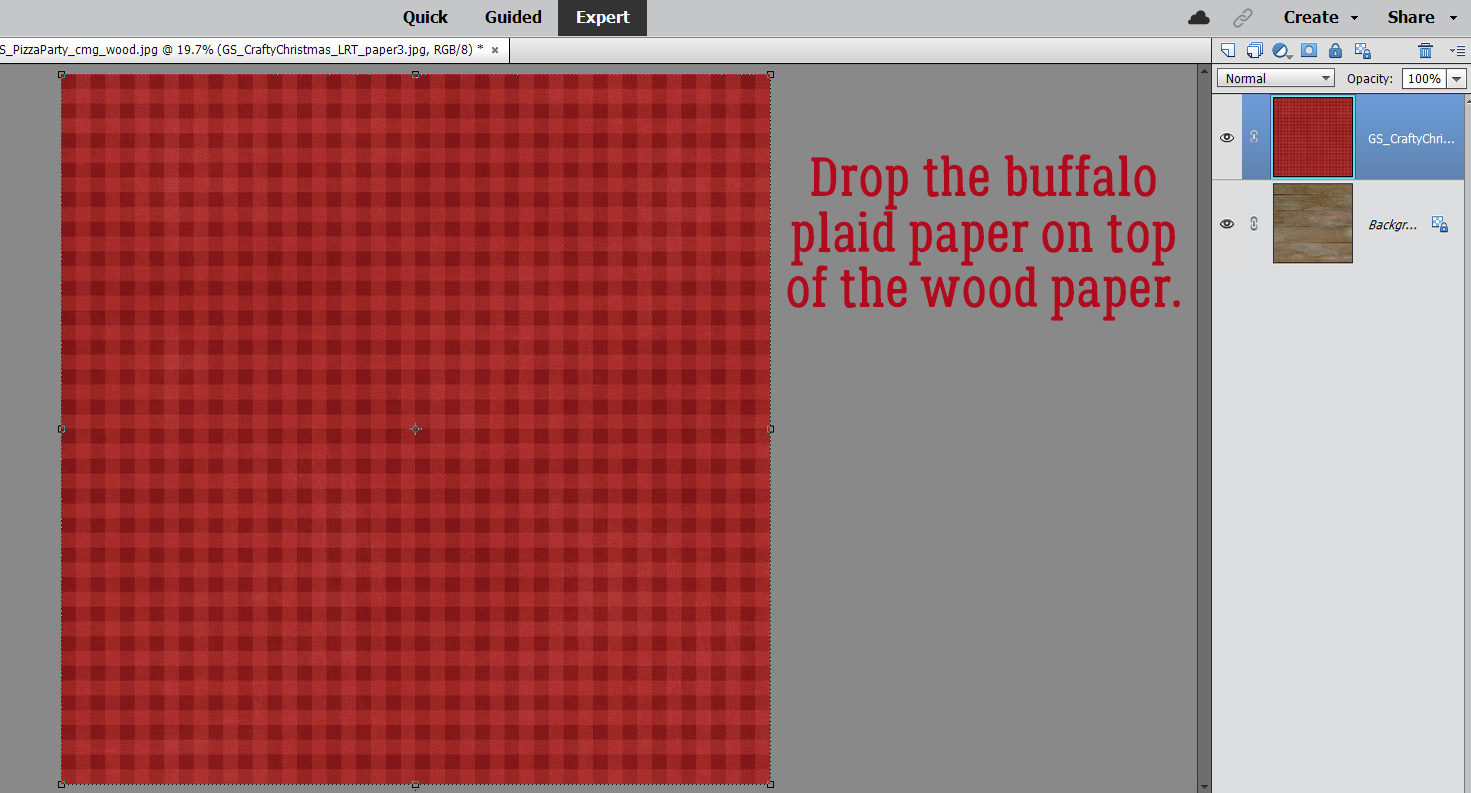
This wood paper came from the GingerBread Ladies‘ collab Pizza Party. I recoloured it because the original is really yellow and it looked AWFUL with the buffalo check paper on it. But it has some good texture and the planks are well-defined. The buffalo check paper is from GingerBread Ladies‘ Crafty Christmas.
So go ahead and drop the patterned paper on top of the wood paper. The following steps may not ALL be required, so take a good look at the result after each Cut stage to see if you’re satisfied with the outcome and stop when you are!
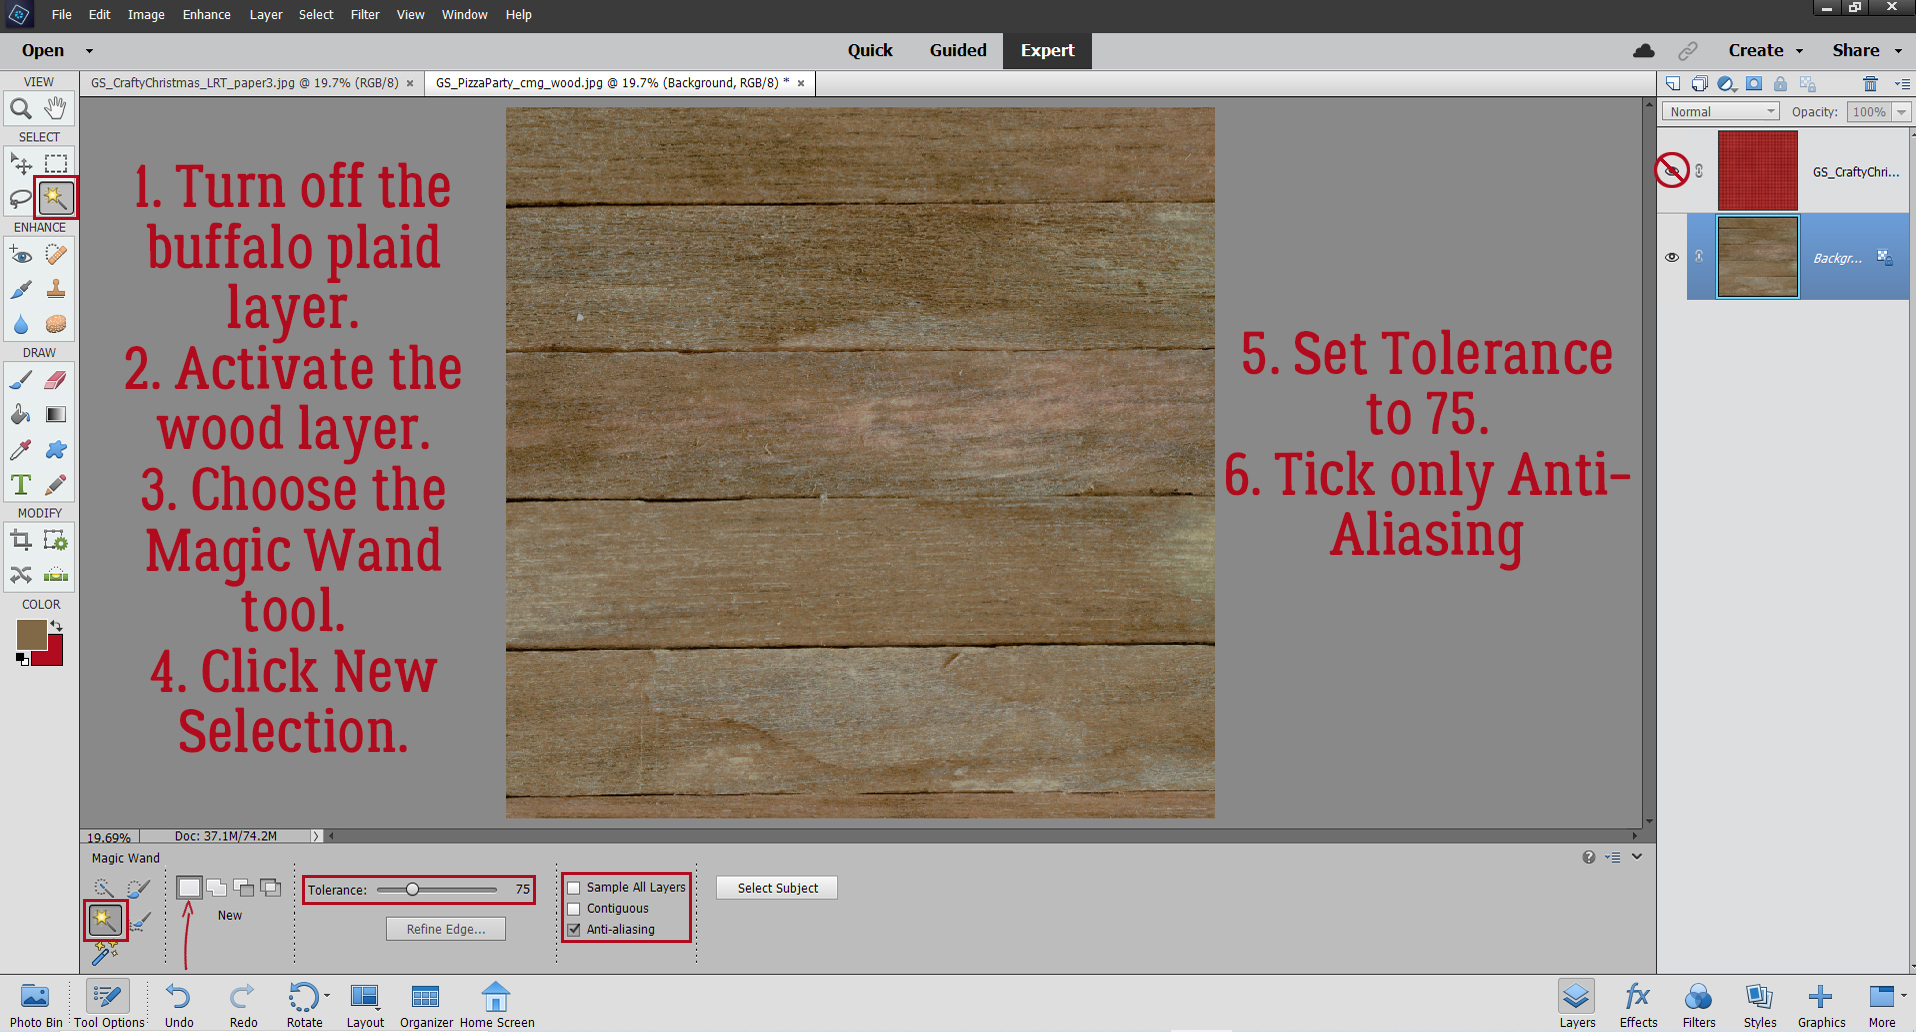
You want the patterned paper on top of the stack, but you don’t want to see it for this part. So turn Visibility off. Make sure the active layer is the wood paper layer. Then click on the Magic Wand Tool. Select the mode that looks like a sparkler. The default for this tool is New Selection, but if you’ve used the tool recently, it may be on the last setting you used, so make sure you’ve got New Selection on. Set the Tolerance slider to 75 and only tick the Anti-Aliasing box.
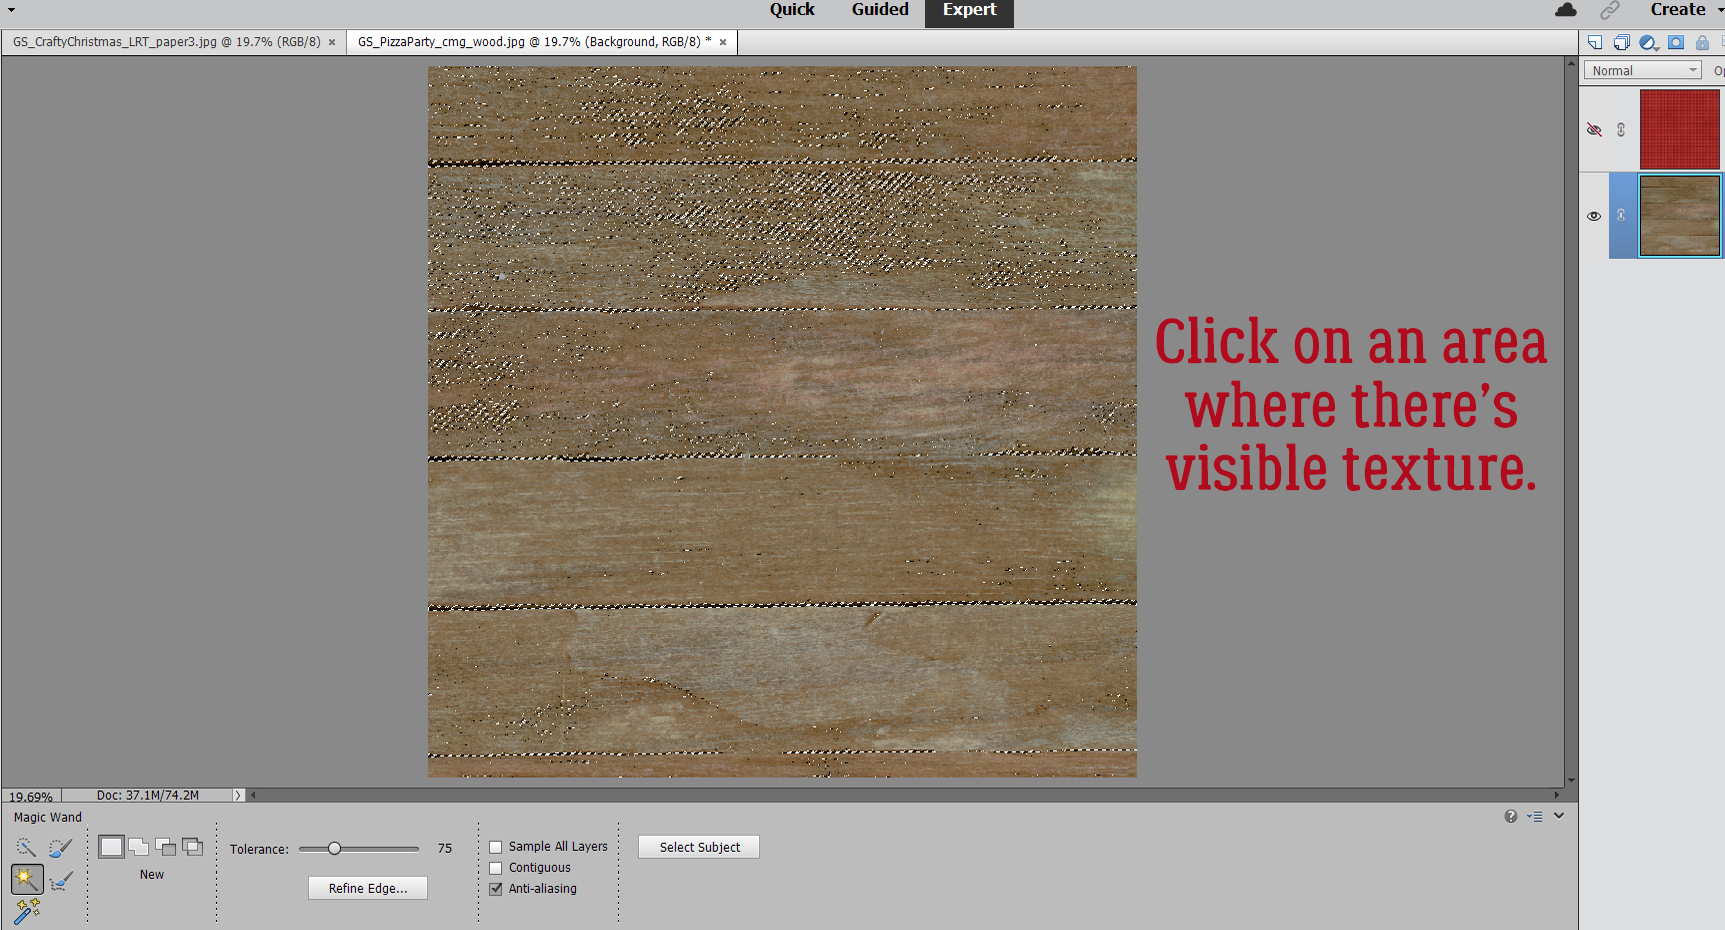
On the wood paper, click your Magic Wand on an area where there’s visible texture. The marching ants will appear.
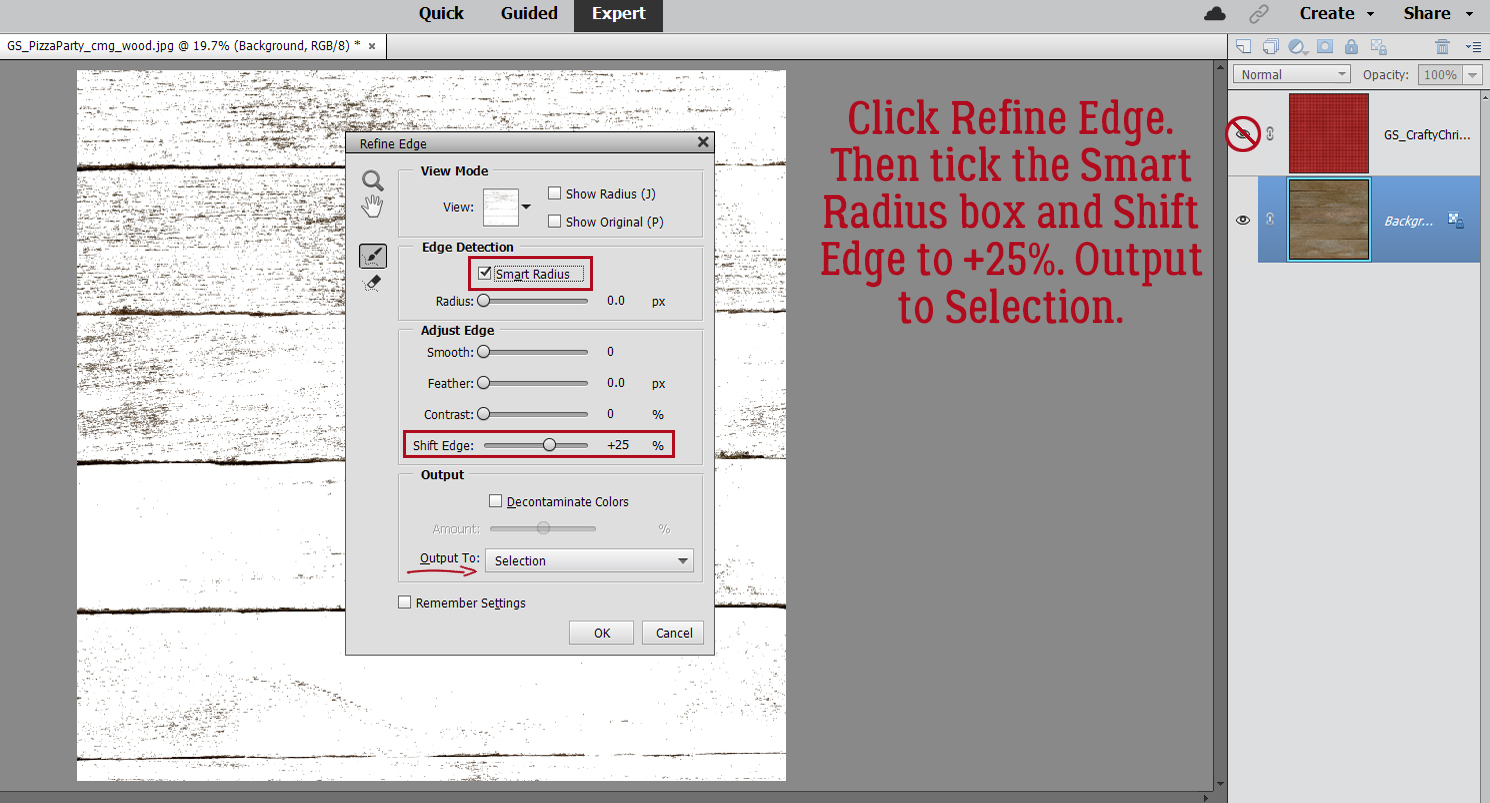
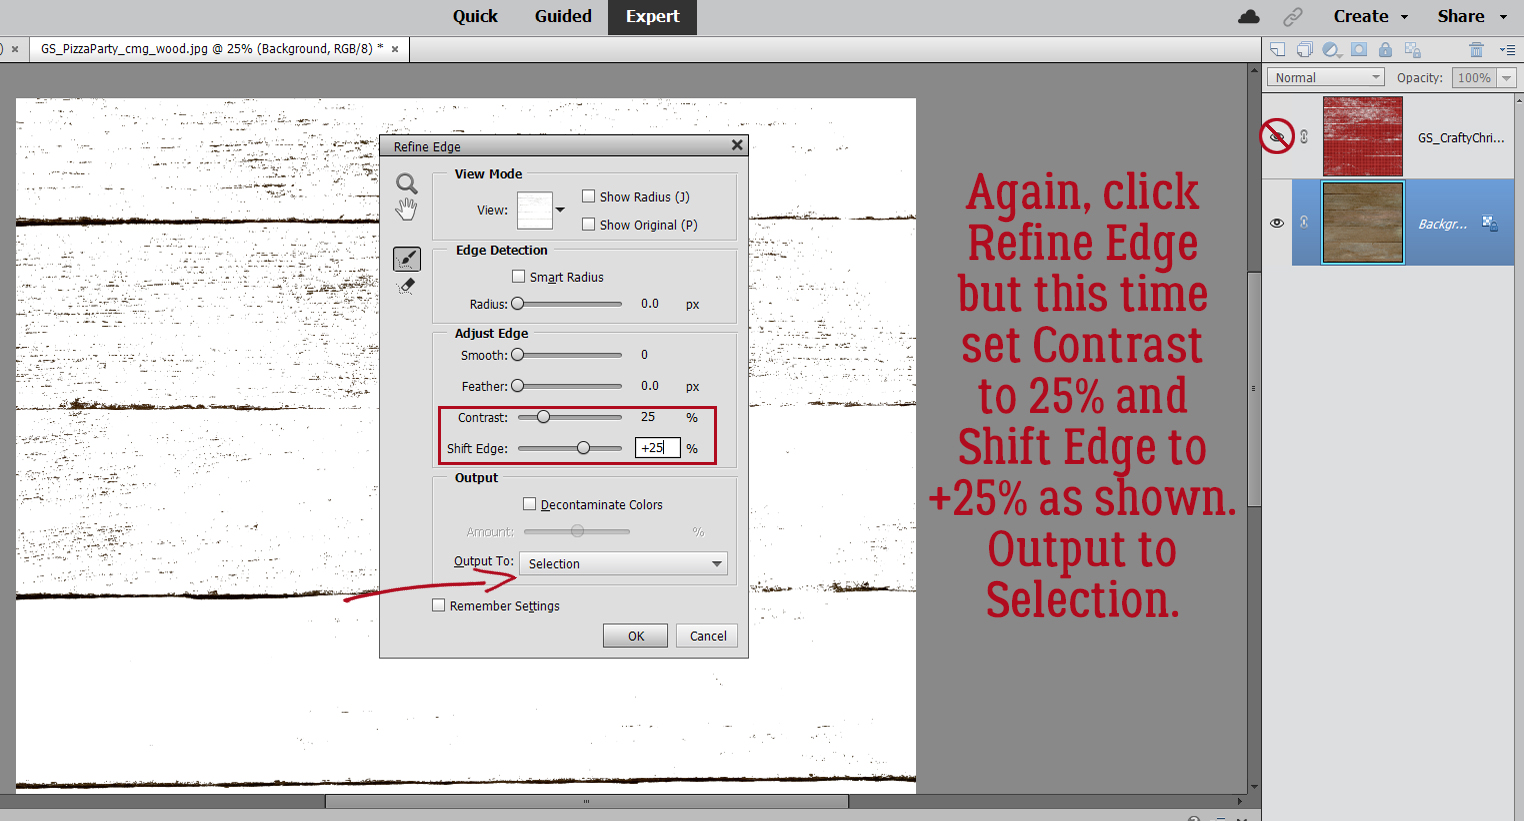
Click on the Refine Edge button and when this menu appears, choose these settings: Edge Detection to Smart Radius, Shift Edge to 25% and Output to Selection.
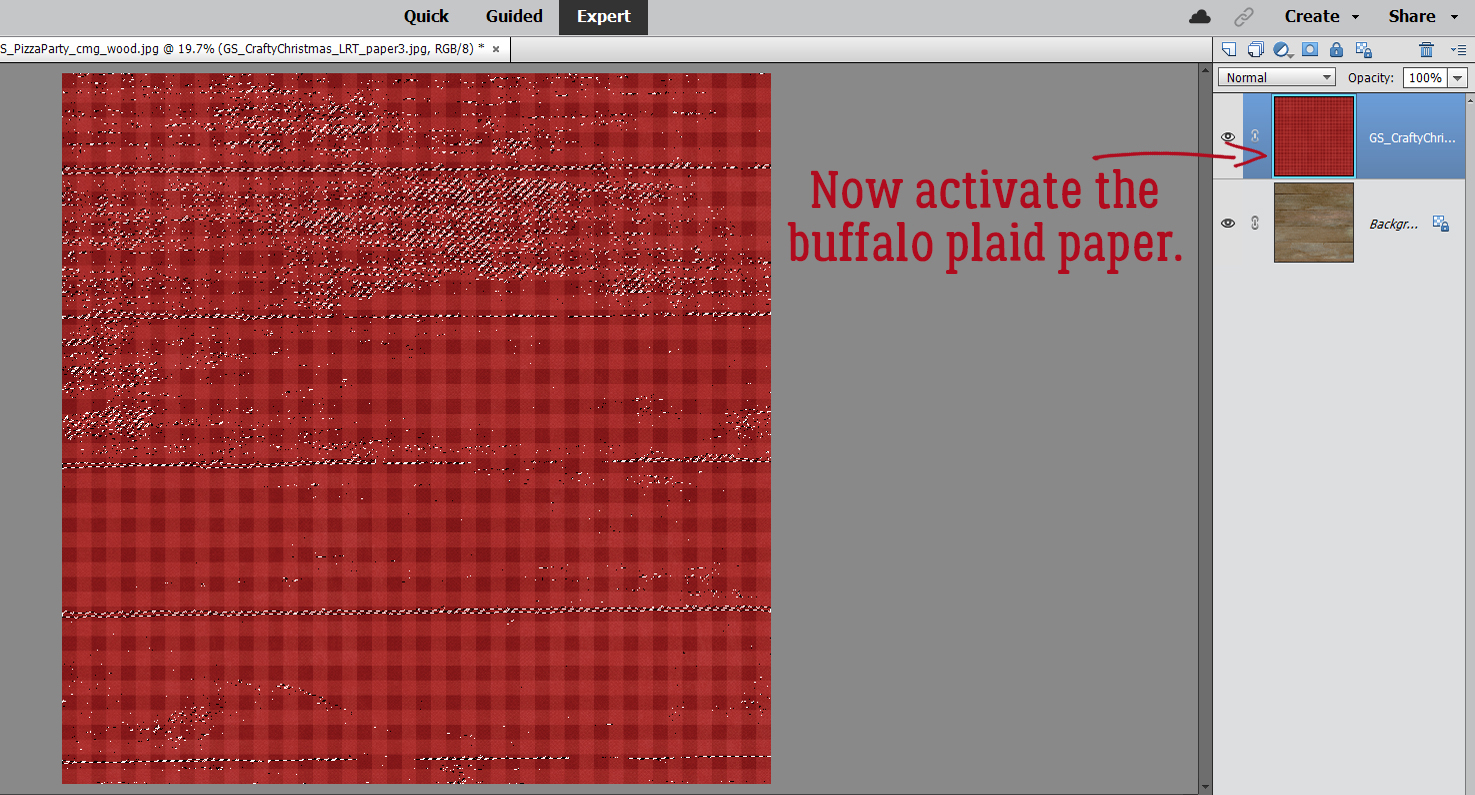
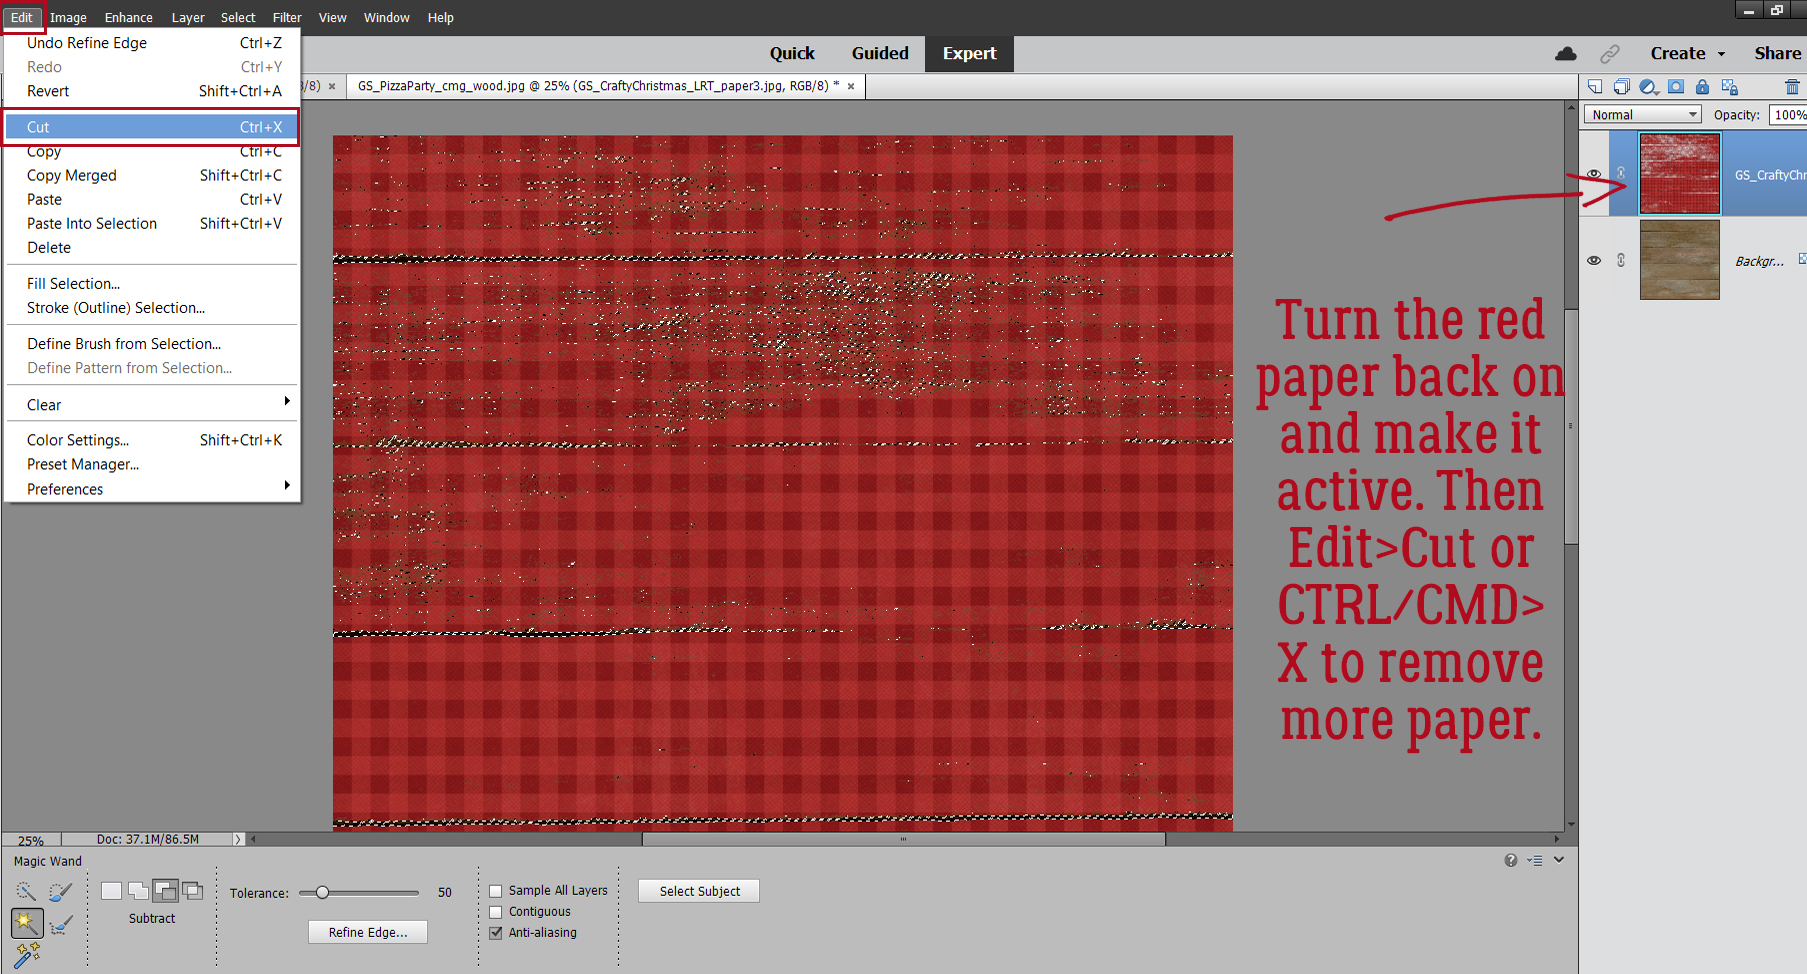
Now turn the patterned paper layer back on and make it the active layer.
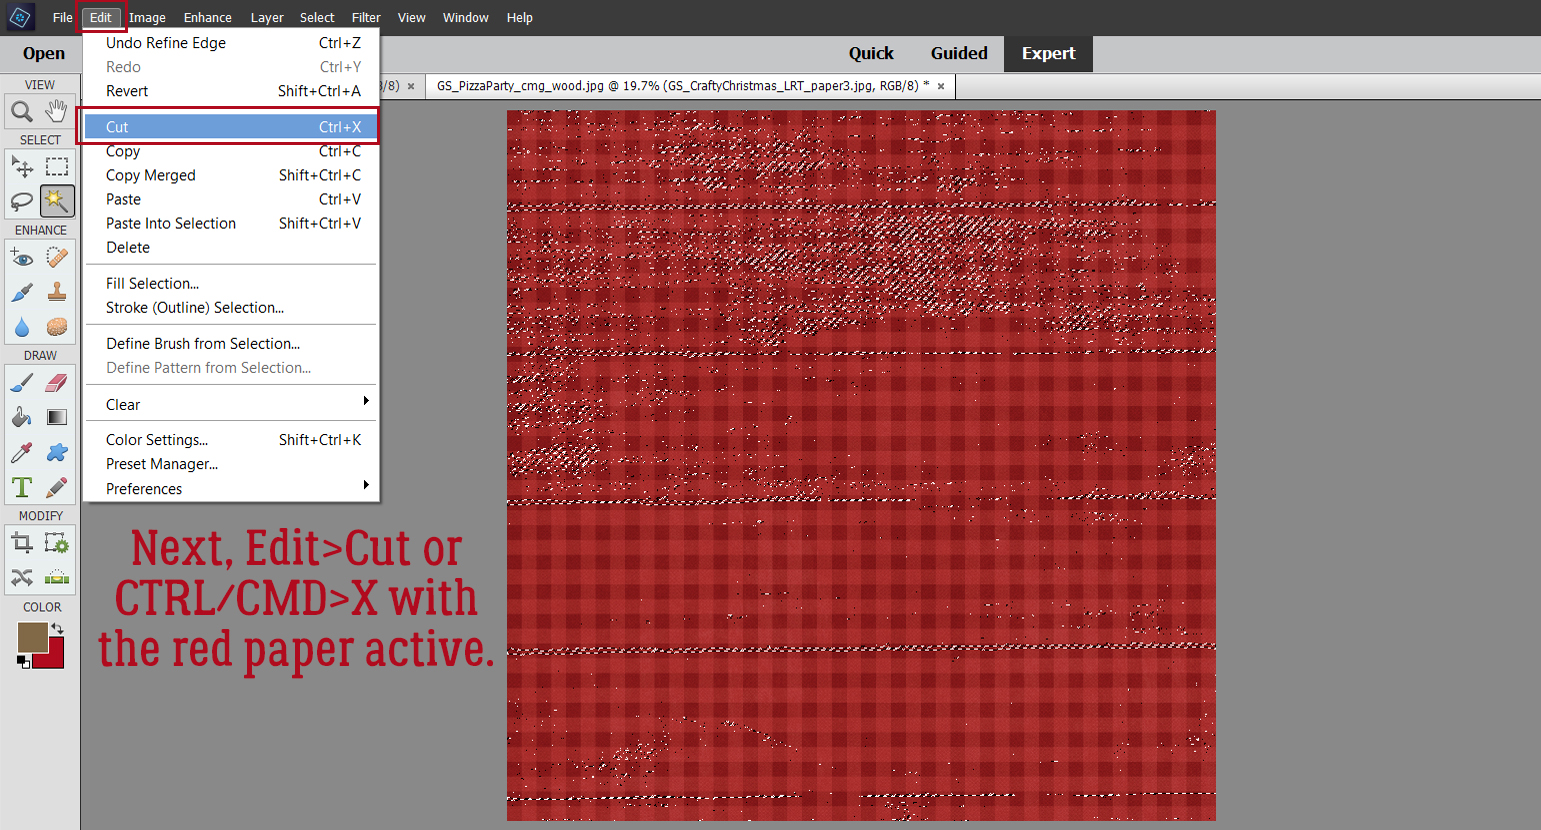
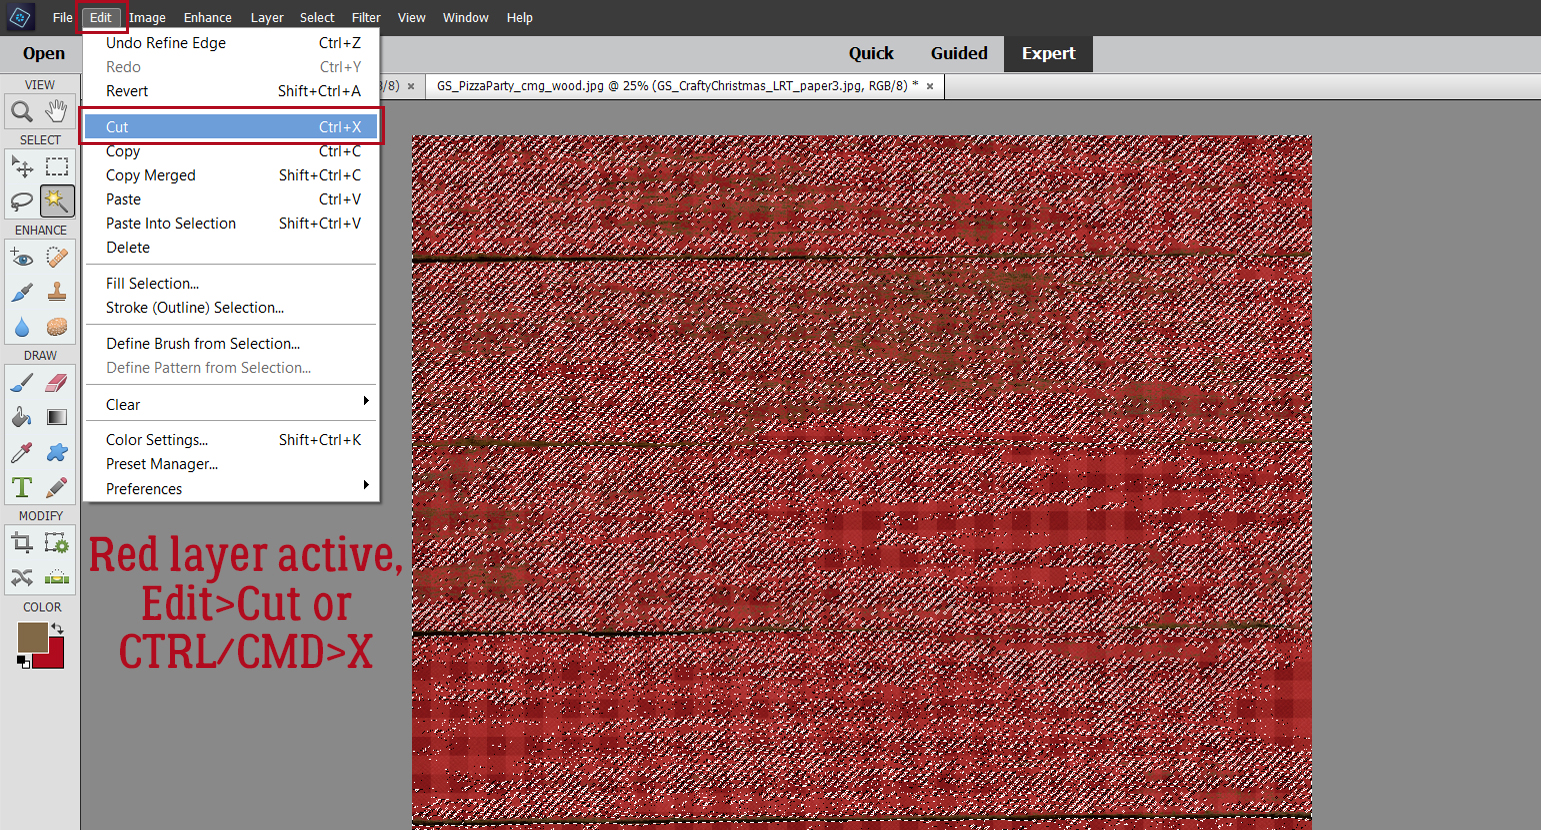
To rough up the red paper, Edit>Cut or CTRL/CMD>X will remove the red paper where the marching ants are.
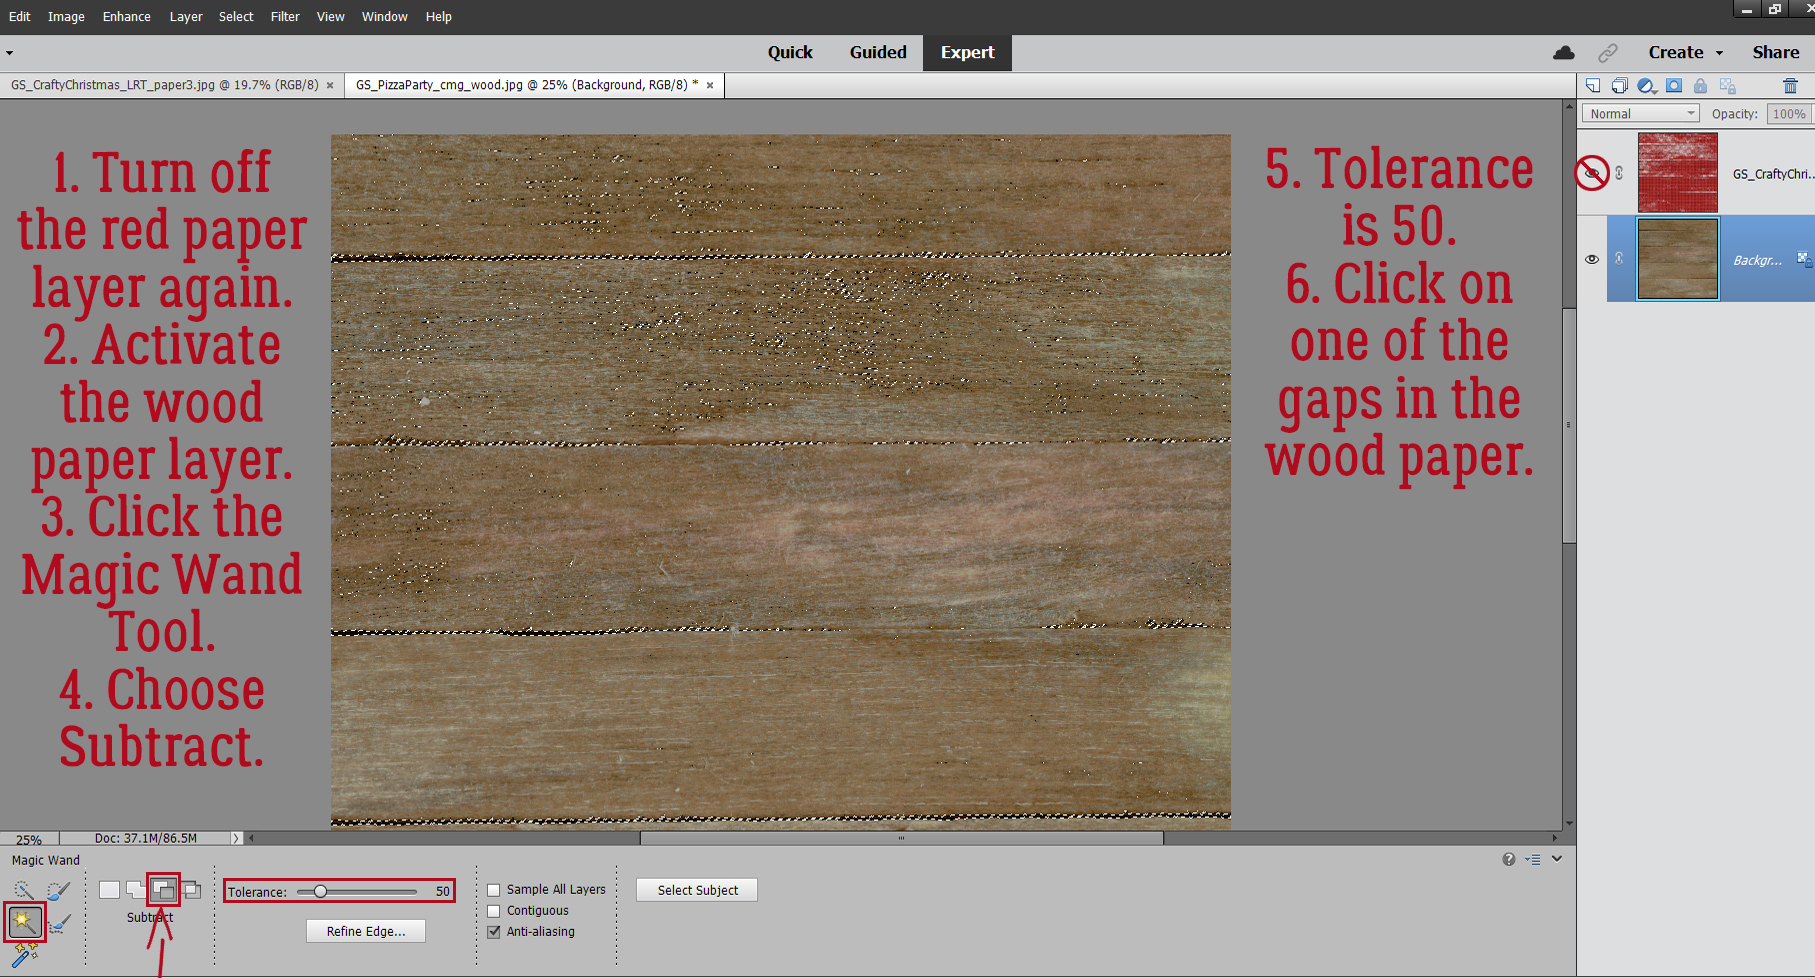
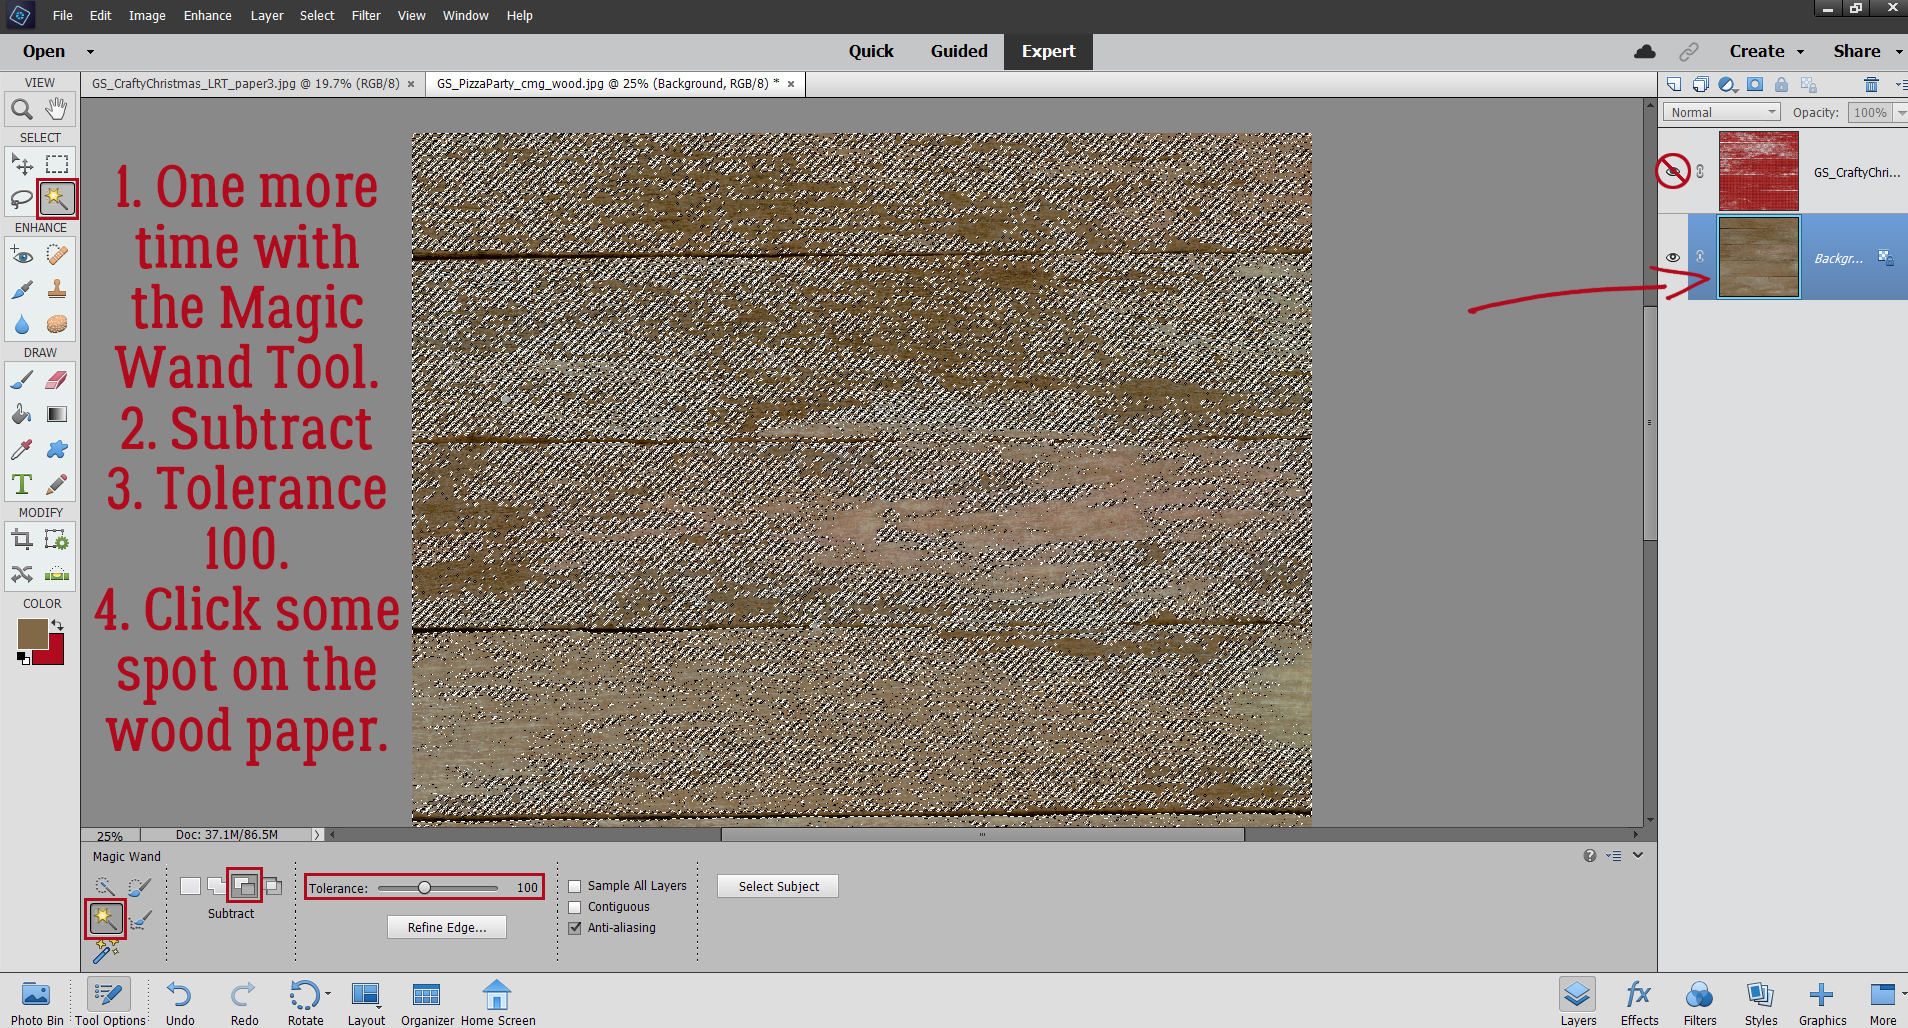
I found that there was still too much red paper visible, so I went back to the first step, turned the red paper off and activated the wood paper layer again. With the Magic Wand Tool, I chose Subtract and set the Tolerance to 50. Then I clicked the Wand on one of the gaps between the planks.
This time, in the Refine Edge menu, I unticked the Smart Radius then adjusted the Contrast slider and the Shift Edge slider to 25%. Output to Selection.
Then I repeated the Edit>Cut (CTRL/CMD>X) step.
I still wasn’t happy. In this situation there’s no substitute for trial and error, so I went back to the Magic Wand Tool, Subtract, Tolerance 100. This time I see a lot of marching ants, so it might be the ticket.
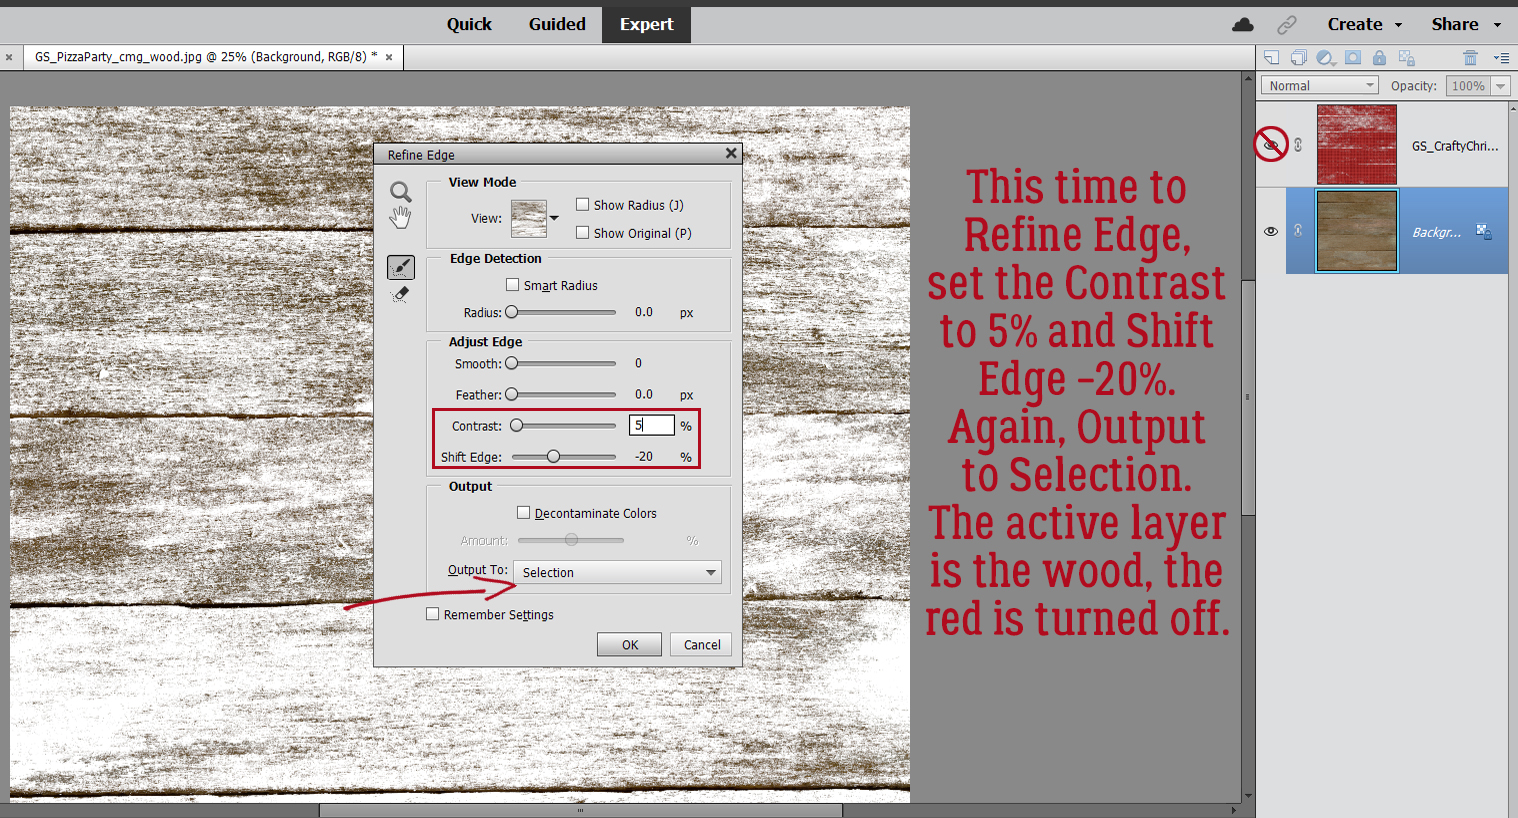
But I still decided to Refine Edge with these settings: Contrast 5%, Shift Edge -20% and Output to Selection.
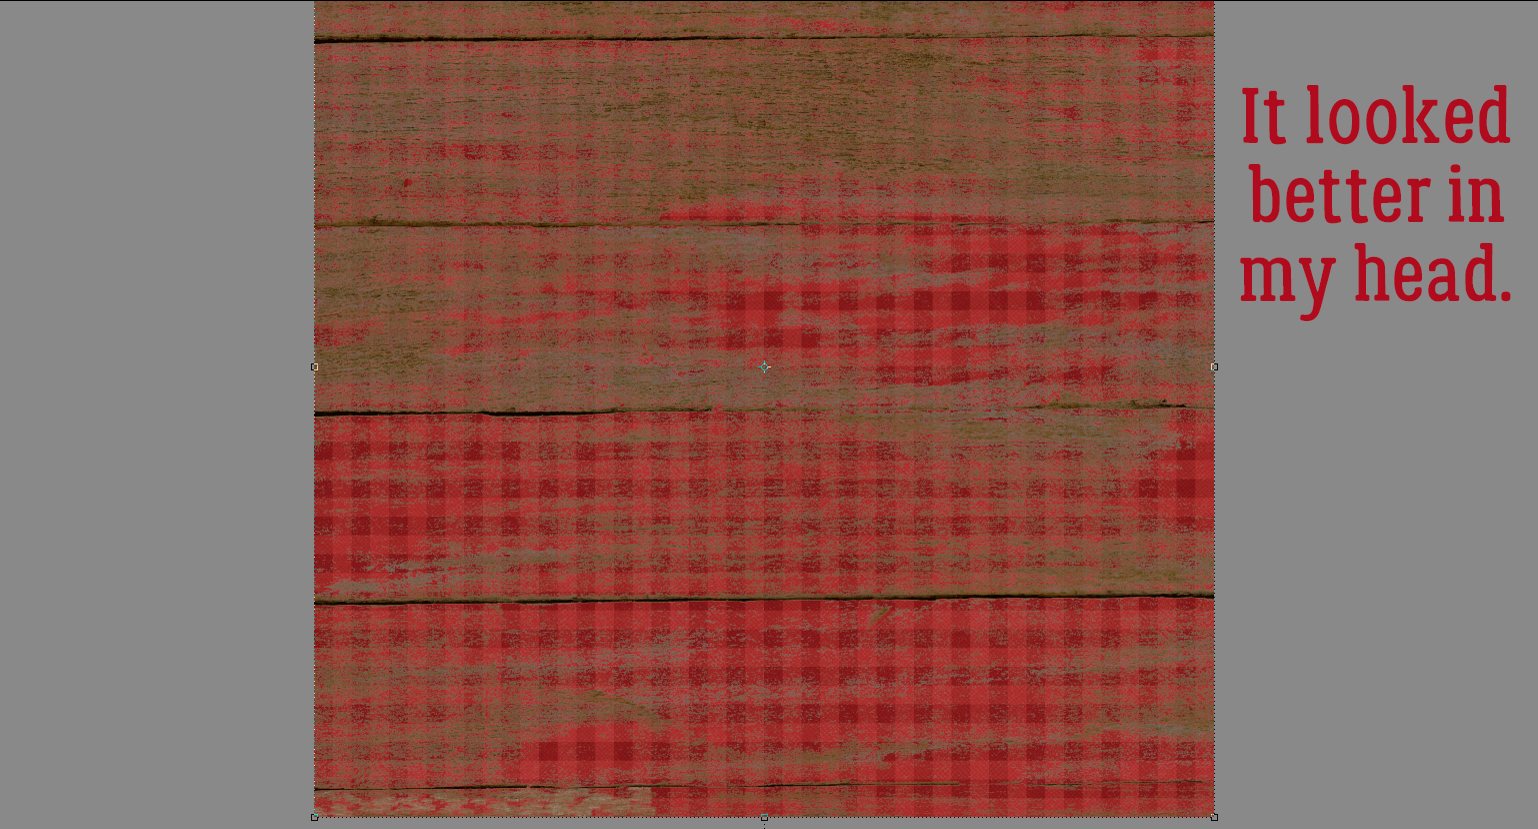
And then I Cut the selection away from the patterned paper again.
It isn’t all I’d been hoping for, although it is very rustic-looking.
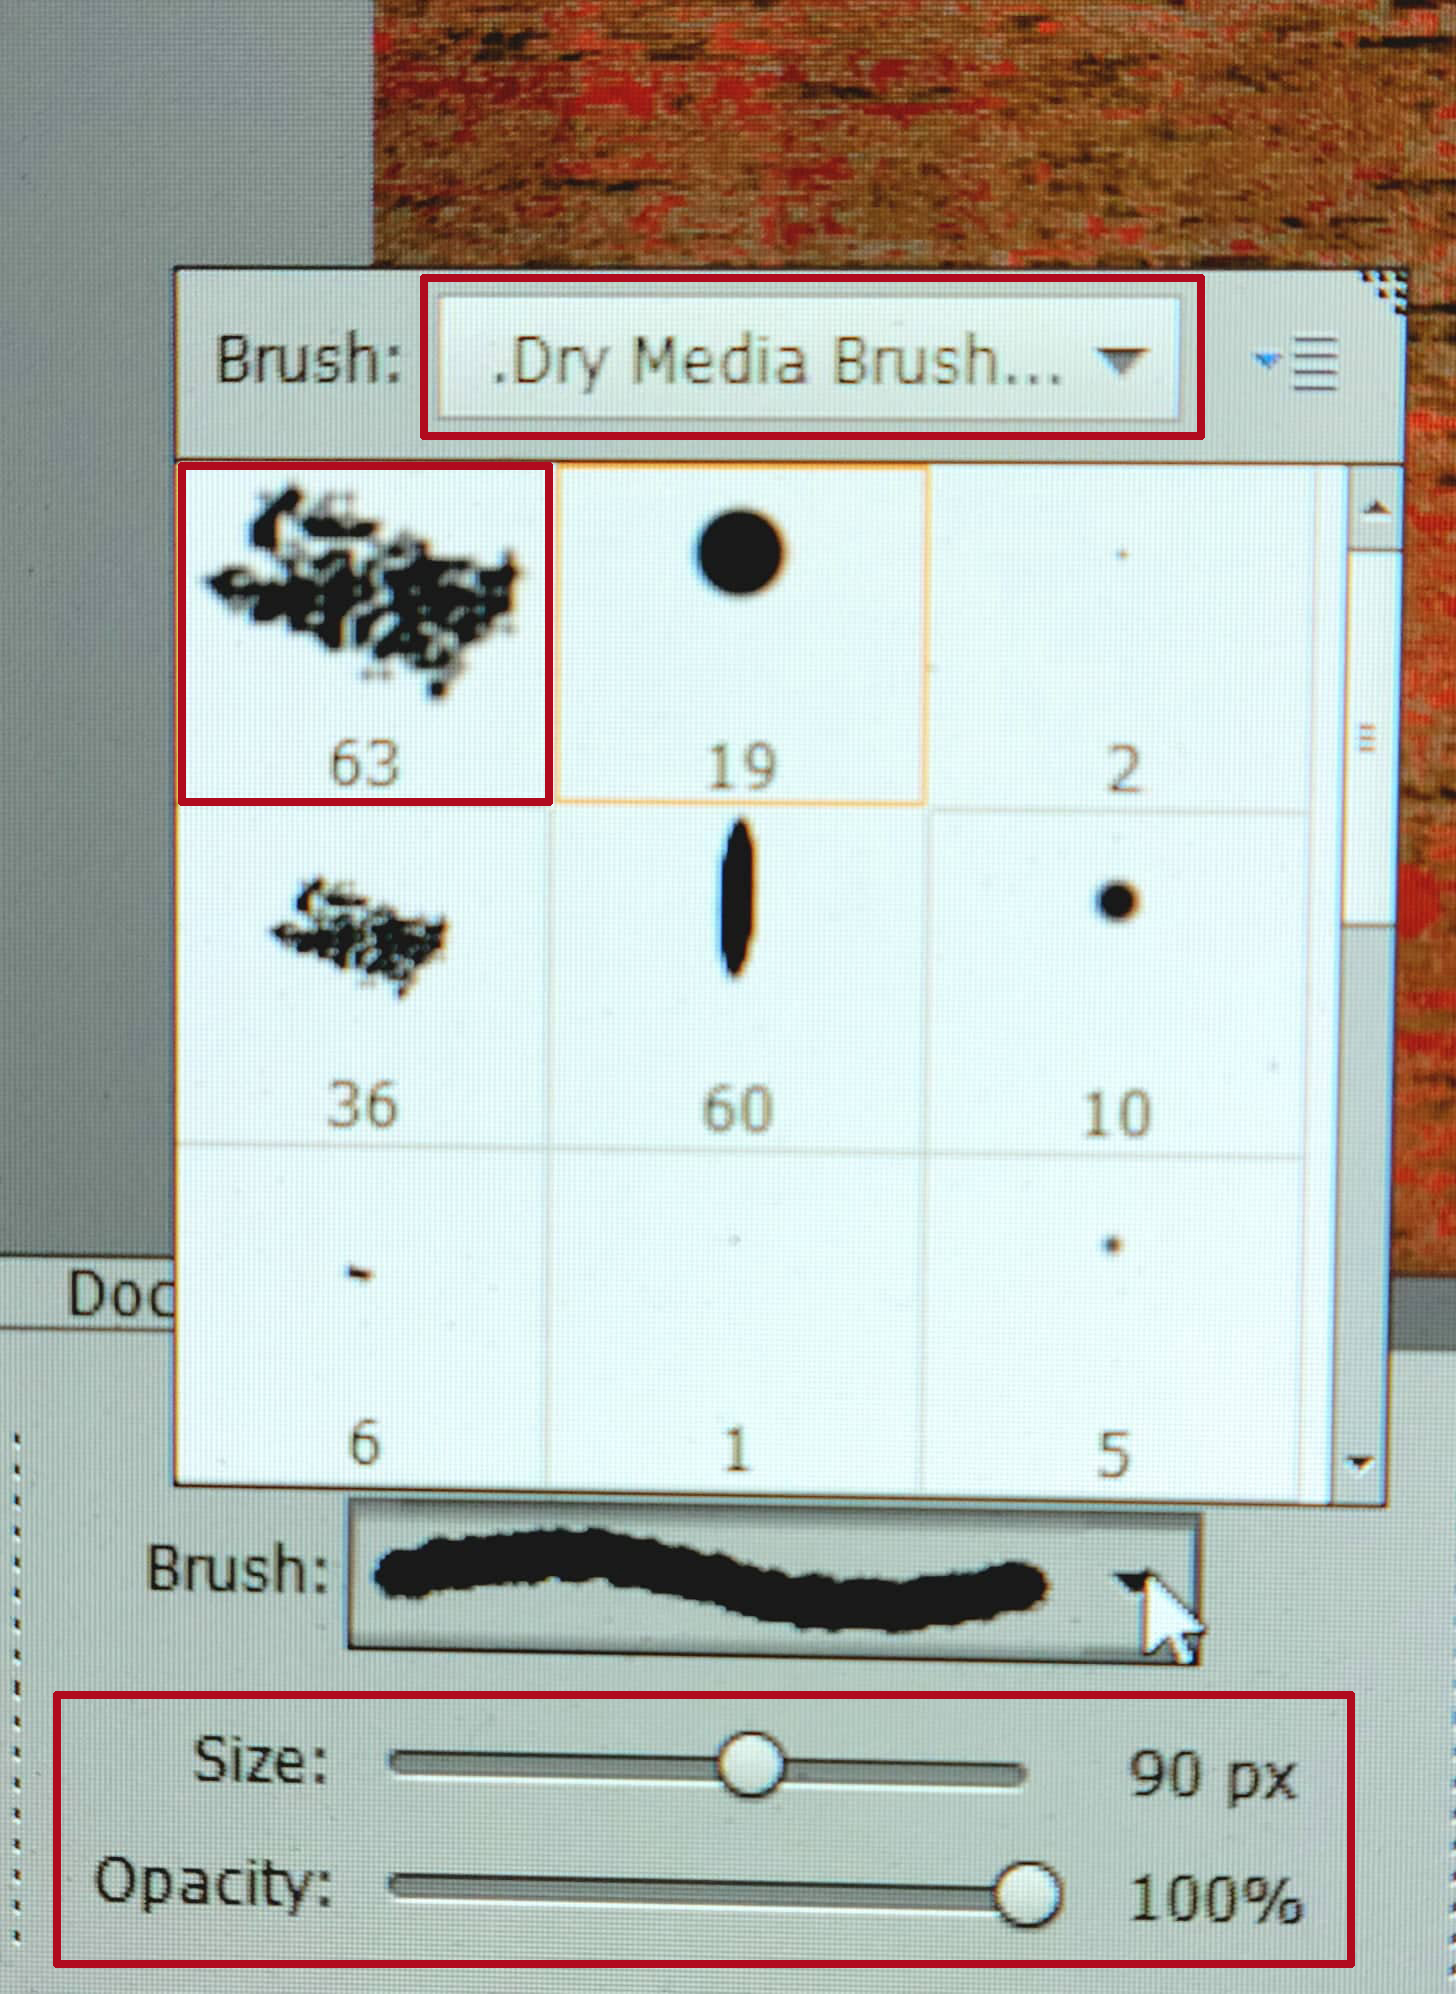
Because I’m always trying to “get it right” I thought I’d see what happened if I played with the Eraser Tool to enhance the worn look. I tried a LOT of brushes before I found one that worked the way I wanted it to. I used a (PSE default) Dry Media Brush, the one inside the box (sorry for the cell phone photo but it was the only way I could capture the menu).
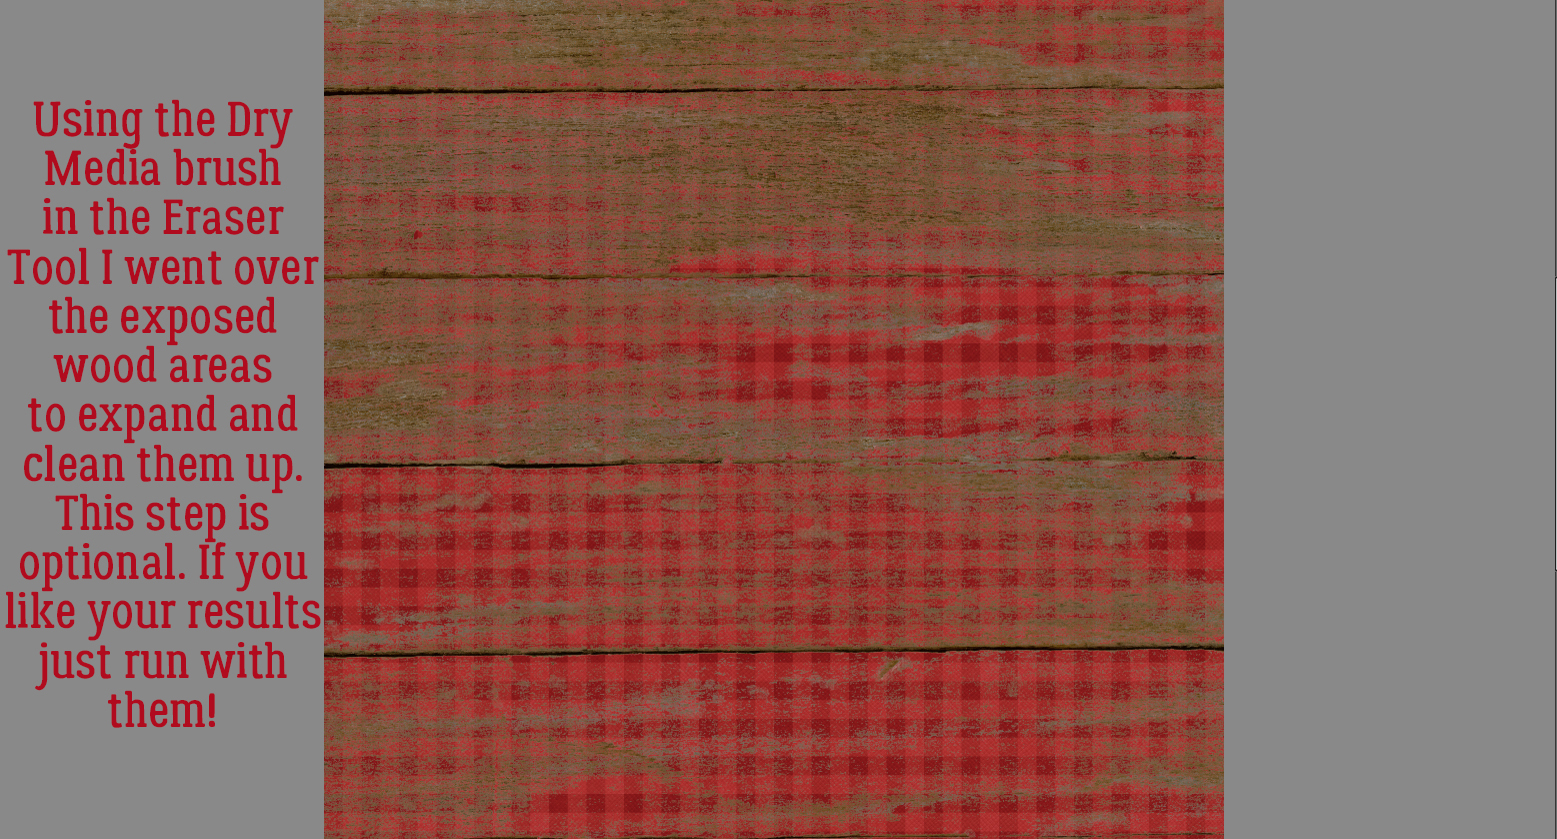
Then I randomly followed the contours of the exposed wooden areas to tidy it up a bit. I do think it looks a bit more worn.
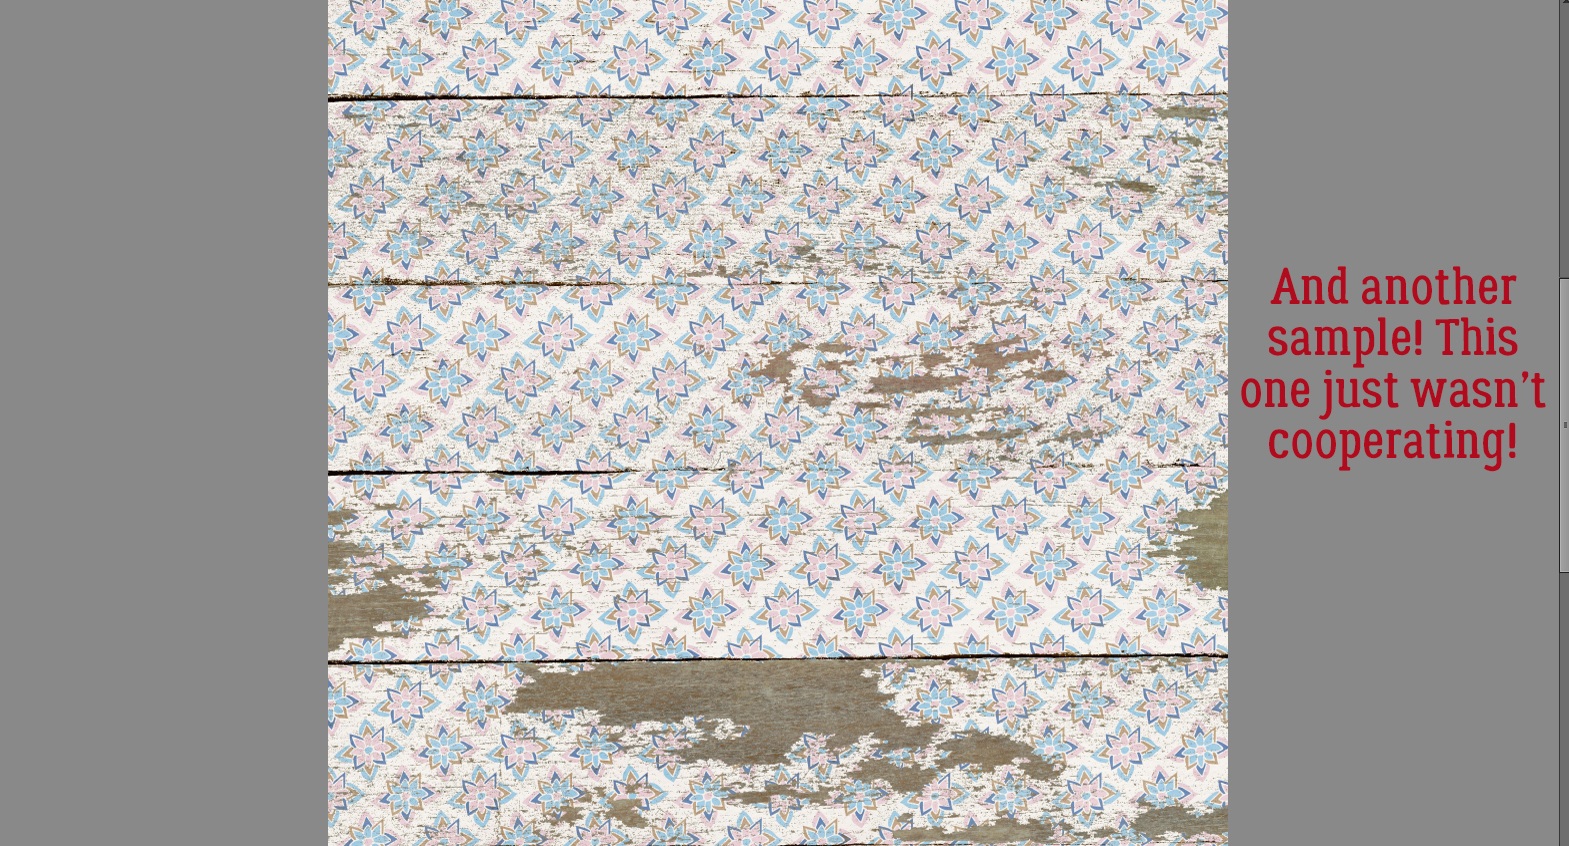
But did I really need to do that Eraser step? I tried a few more papers to see if just the Magic Wand steps would be good enough. Interestingly, I got different results each time. For this example and the next I’ve used papers from GingerBread Ladies‘ A Holiday in the Baking.
This sample gave me a headache. It just wouldn’t cooperate! I had to CTRL/CMD>Z so many times!!
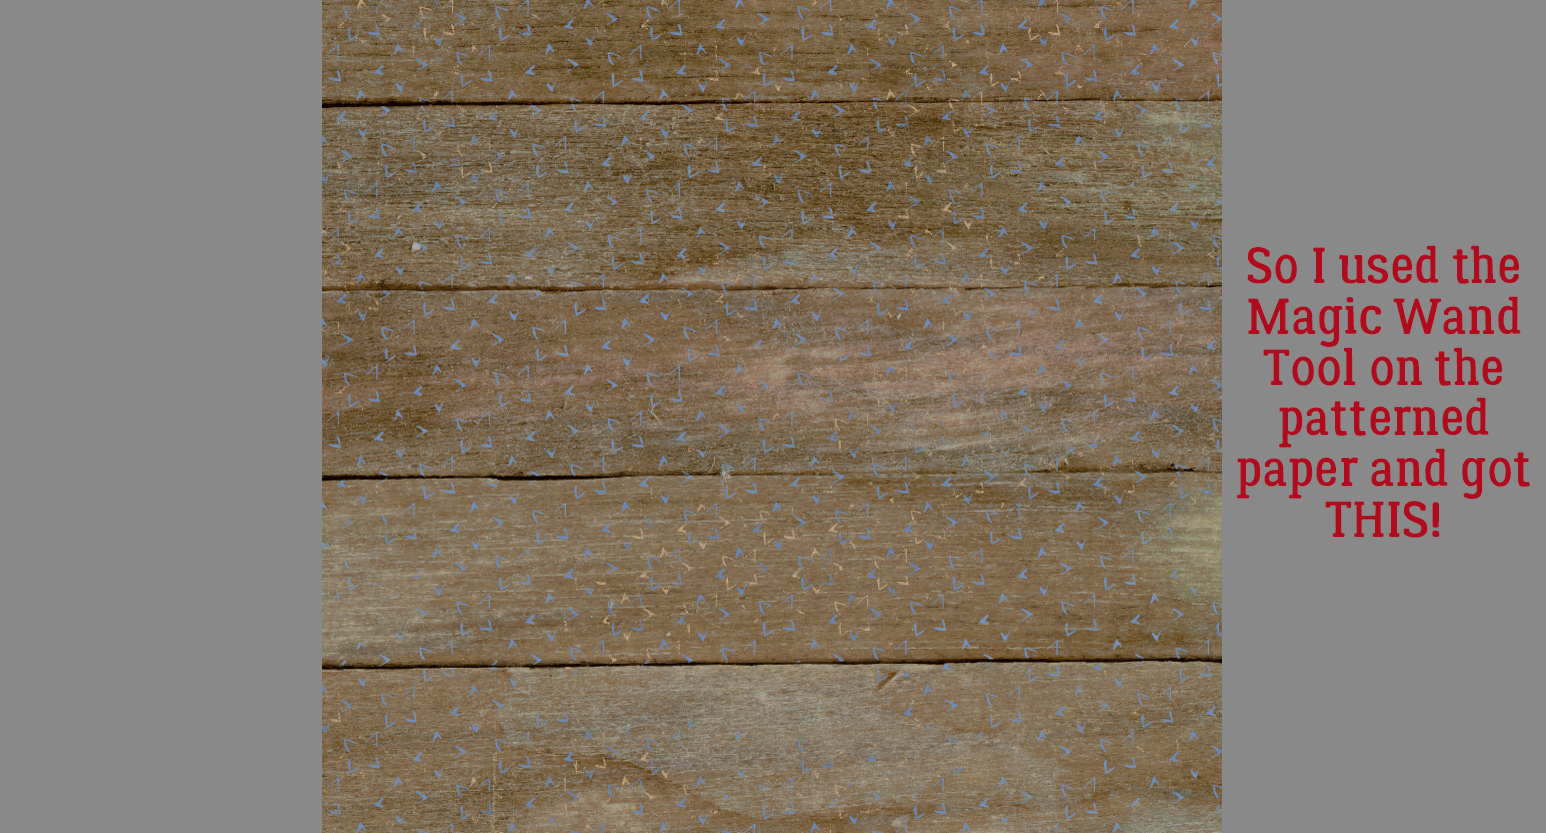
In one of my OOPS moments, I forgot to switch between patterned paper and wood when I used the Magic Wand, and had this happy accident when I used the Wand on the patterned paper instead.
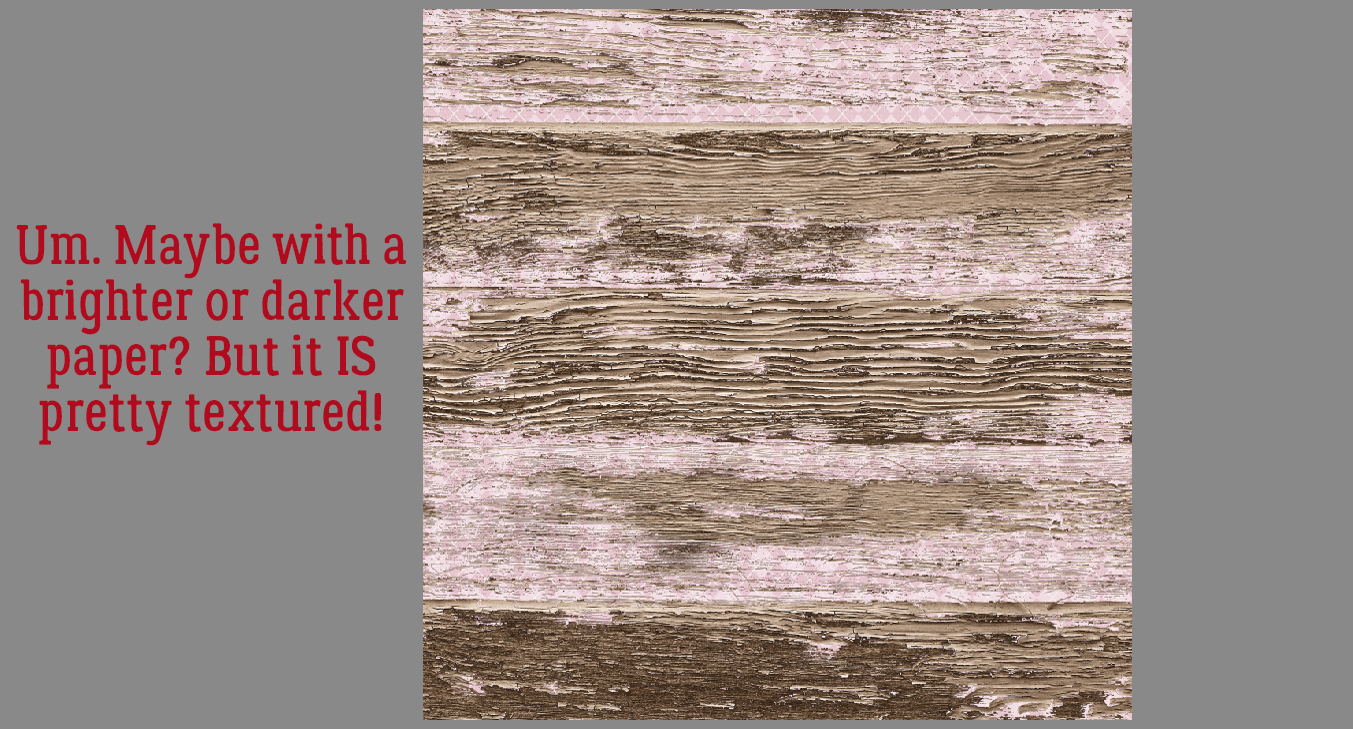
I changed up the wooden paper for this one from GingerBread Ladies‘ Sweater Weather. It has some roughed-up paint on it and oodles of texture.
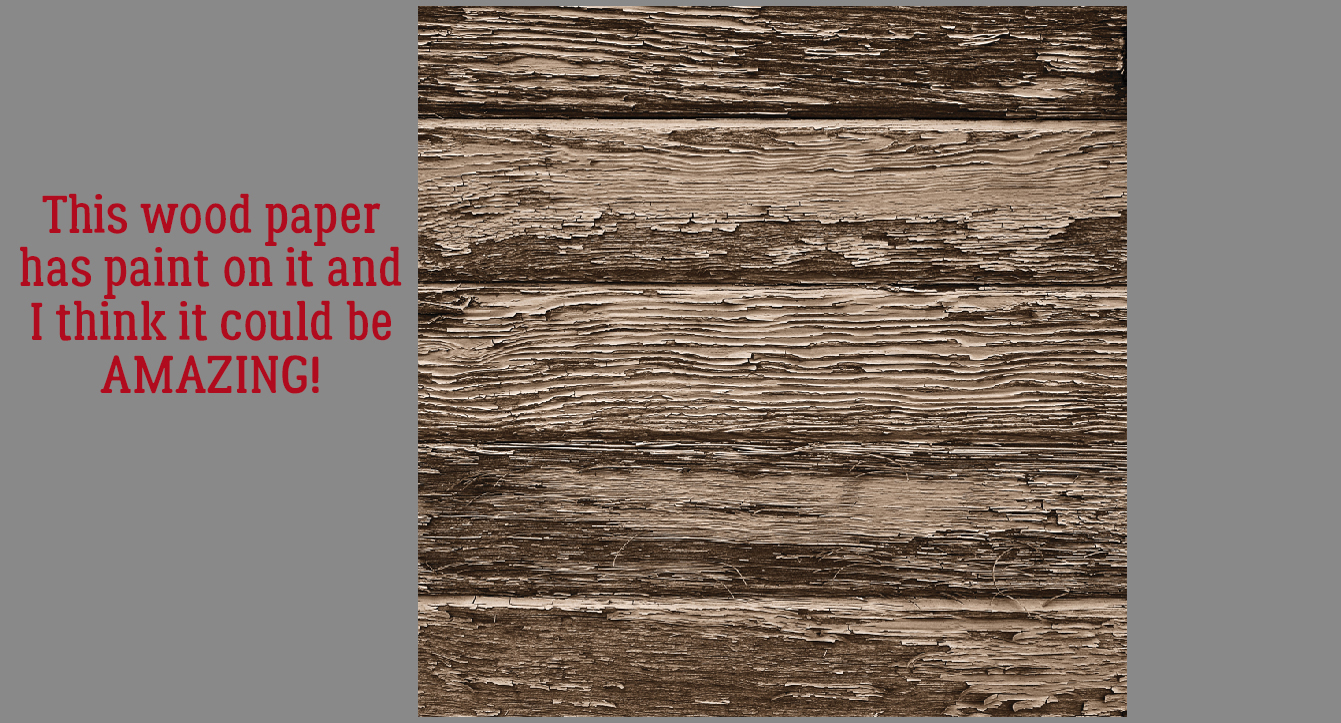
It looks really insipid, but I think with a brighter paper it could be amazing!
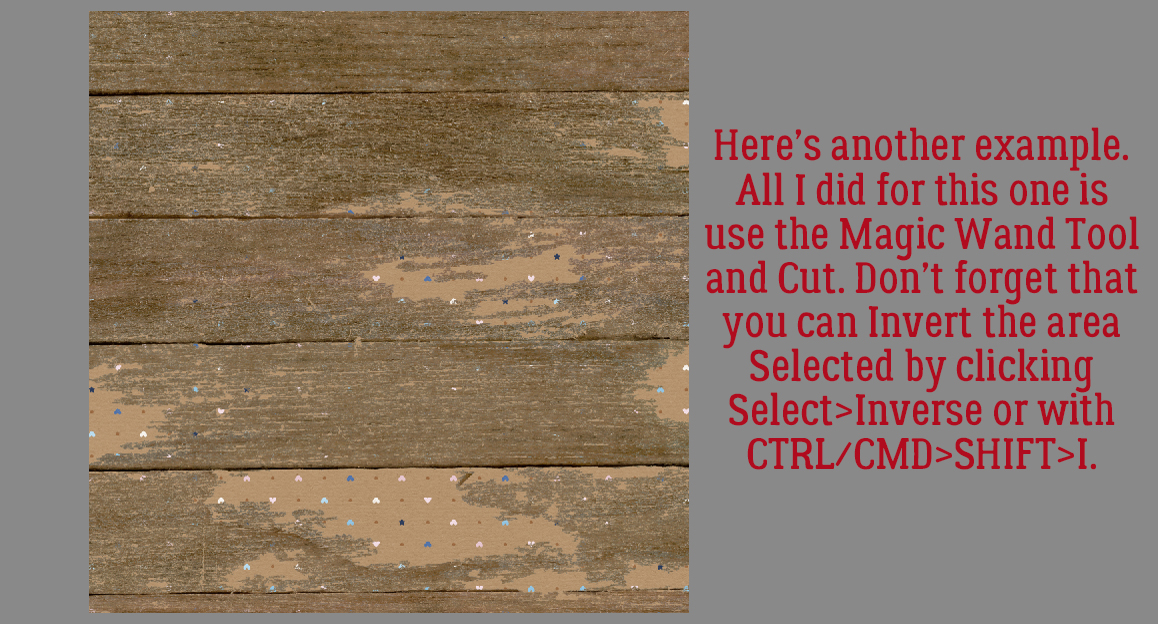
Let’s see what happens when I use a plaid paper from Sweater Weather.

Or… If I Invert the selection? Magic Wand>[click on the rough part]>Select>Inverse (CTRL/CMD>SHIFT>I)>[activate patterned paper]>Edit>Cut (CTRL/CMD>X) and I’m in love!!

Who knew it could be so easy to get such interesting results?
Next Tuesday is the third Tuesday of December so I’ll be dissecting one of the monthly Challenges. It’ll be a little light reading just a few days before Christmas. Stay tuned!
[PS… remember, the coloured bold text contains embedded links that will take you right to the shop!]
PDF Version: https://bit.ly/33vL9rE
![]()