Quick Trick: Gradient Titles
![]()
PDF Version : https://bit.ly/45ljkOv
Are you up for another way to use Gradients in your scrapbooking? Let’s apply one to some text to create a title. (I’m showing it on a photo, but it’ll be great as a layout title too. You could even create your own Gradient papers and alphas with this Trick!!) It’s a really quick way to elevate our layouts. Let’s use this photo.

Did you recognize the Joshua tree? Trajan Pro 3 is an Adobe font; I used it for its clean lines. It may be a system font on your computer. But any font you like will be perfect.

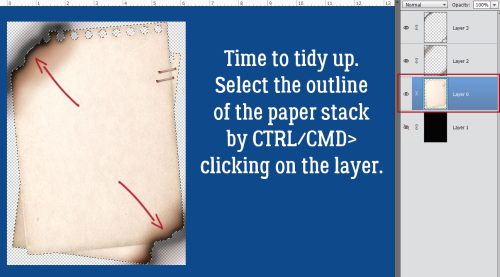
I don’t think I’ve ever mentioned what happens when you Simplify a text layer. It basically converts the font to pixels, which then allows us to modify it however we want to – but it’s no longer editable. Here’s a tip: If you think there’s any risk of needing to edit that text, make a Copy of it and make it invisible, like I’ve done here.

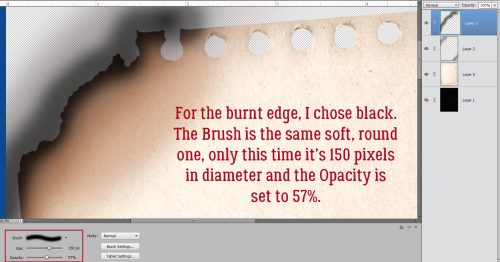
This next step is absolutely essential. Click on the Lock Transparent Pixels button, show in the box, so that the Gradient is applied ONLY to the text.

I want to use colours from my photo for the Gradient, so using the Color Picker (Eyedropper), I first selected a spot in the sky for a bright blue. Then I held down the ALT/OPT key and clicked the Eyedropper on the darker shadow area of the photo just above the “U”. That way, I didn’t have to switch the target swatches, Elements did it for me.

This technique’s path is much shorter than the one in our last Gradient tutorial. Click on the Gradient Tool (looks like a… dark-to-light gradient across a sheet of paper) in the Control Panel. To keep this really basic, we’ll use the default settings for the Tool. But there’s a LOT that can be done down there in the Tool Options panel to create a truly unique effect.

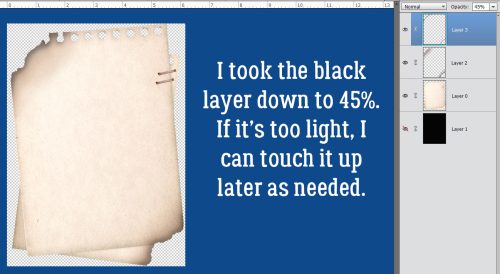
To duplicate the photo’s palette, with blue above and tan below, I clicked my cursor above the text and dragged a straight, vertical line to below the text. The Gradient will go in the direction you drag your cursor; I tried upper-left-to-lower-right too, just to see what it looked like. You do you! 😉

To bring the text up out of the sand, I added a slight Drop Shadow and a bit of a Bevel. That’s all there is to it!

For this sample, I went to the invisible, unSimplified text layer and put it all one a single line. Then I followed the preceding steps again to get this effect.

With the identical Shadow and Bevel, this look is much more subtle. Hmm. Which way do I like it better?

Here’s one last look at options. This time I pulled the Gradient up from below, creating a mirror version. I can’t decide!!!!

See you all in June!
![]()