March Feature Designer – Mags Graphics

Welcome to March. This month our Feature Designer is Maggie from Mags Graphics. She was wonderful about answering my questions so that all of you could get to know her a little better.

How did you get started in digital scrapbooking?

I’ve been scrapbooking in some form or another since I was 15 years old. My very first albums were made with construction paper albums, Elmer’s Glue, and quotes from magazines. When I went to my first Creative Memories party, I bought just about everything, ripped apart my old albums, and re-made them in acid-free, lignon-free, Creative Memories products!

In 2001, I became a stay-at-home-Mom. I started learning Paint Shop Pro to make animated graphics and stumbled upon the now-defunct Digital Scrapbooking Place and realized that I could merge my computer skills with scrapbooking!

What made you decide to design?

Once I realized that I could use Paint Shop Pro to make layouts, I wanted to figure out how to make the kits that I needed for my own layouts. Those early “kits” were, honestly, TERRIBLE, but I kept at it, joining small stores to get better and better. I’ve been designing as my “job” since 2009.

What do you use to create your designs (program, additional tools, etc.)?

I use Paint Shop Pro and CS2 to design. I use MyMemories Suite 8 for my own personal layouts – because it’s fast.

Describe your design workplace.

Why don’t I show you… I have my office in our basement – filled with my favorite NERD TOYS!

What is your favorite thing about designing?

I scrap with the kits I make so I love to be able to know that when my kids look through their albums, that most of the kits in there were created by me.

What is your favorite kit currently in your GS store and why?

I love the “NERD” kits – “Across The Galaxy” is a Star Wars-themed kit, “Wizard World” is a Harry Potter-inspired collection, and “Go! Catch ‘Em All” is a Pokemon Go set!

What was your first job?

Technically, I started babysitting when I was 9 years old. I made most of my spending money babysitting all the way up through high school and college.

How many languages do you speak? What are they?

Just English

What’s your favorite holiday?

Christmas. I could listen to Christmas music and watch Hallmark Christmas movies all year around.

What is your favorite family holiday tradition?

I love celebrating Christmas with my family.

What three things do you think of most each day?

My family, my scrap business, and whether I can take nap.

If you had a warning label, what would yours say?

WARNING: UNFILTERED!

Is there anything you wished would came back into fashion?

Peg-rolled jeans, and big 80’s hair 😉

Do you collect anything?

Um… Yeah! I’m a HUGE Buffy the Vampire Slayer Fan as well as a fan of Harry Potter, The Walking Dead, Outlander, Orphan Black, etc. I have over 100 Funko Pop characters and was one of Funko’s Fanatics of the week back in November.

IMAGES of my collection:

If you were a super-hero, what powers would you have?

Telekinesis and I want to be able to fly.

Aside from necessities, what one thing could you not go a day without?

My cell phone.

How would your friends describe you?

Loyal, quirky, definitely unfiltered!

If you were a fruit or vegetable, which one would you be?

Neither. I’d be dessert!

What would you prefer as a second home: Mountain cabin, beach house, or big city condo?

Mountain House

Thanks Maggie. These answers are just delightful and make me smile reading them.

Make sure to check out her GS Store, her FB page, and her FB group. Also, make sure you are grabbing the daily download from the blog each day. She has a few coordinating packs in the store that go with the daily download.

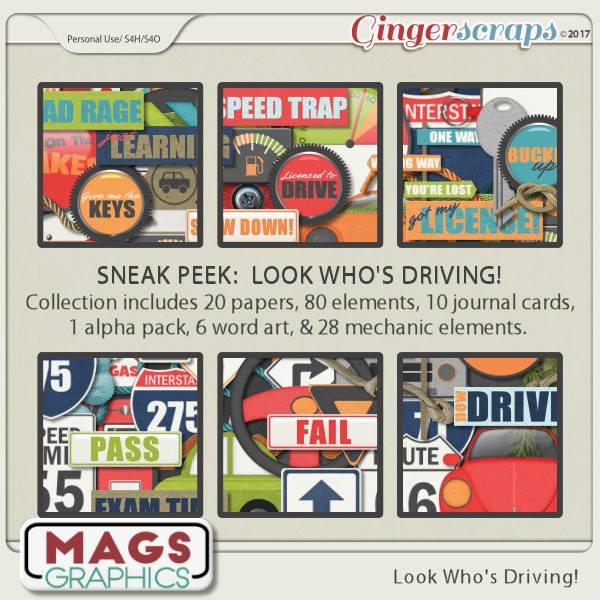
And – now that you’ve read this far, I have a treat for you. Her store is on sale plus she is sharing a coupon with us.

I hope you have enjoyed getting to know Maggie as much as I have. Happy Scrapping!

Creative Style | The Color Green

GS_blog_CreativeStyle_Header

Hello scrappers. Today we are going to take a look at a creative style. Well, let me honest. It isn’t really a style so much as getting some inspiration from color.

There are many things that can make a layout stand out in the gallery. What grabs one person’s attention might not grab another’s. I could write multiple blog posts about what grabs mine. That being said, seeing a layout that has predominantly one color always grabs my attention.  Since we are edging up on St. Patrick’s Day, I thought it would be fun to get some inspiration from the color green.

We are going to take a look at some pretty green images, some great digital scrapbooking layouts done up in green, and round it up with the latest green filled goodies from the store.

Now, here are some lovely images to get those creative juices flowing. Did you know there was a place you could get pretty nice stock photos for free? These images are from Pexels. (All photos on Pexels are licensed under the Creative Commons Zero (CC0) license. This means the pictures are completely free to be used for any legal purpose.) I use them on my personal blog. I thought I would share with you guys while we get some inspiration for scrapping with green.

Fantastic right? I find inspiration for layouts in all kinds of places. Looking at beautiful photos are one of them. Want a bit more inspiration? Here are some layouts that are predominantly green. You know, to help get those ideas flowing! (all images are linked to their counterpart in the gallery. Go leave some loving!)

by meagan43


by LindsayJane


by pixleyyy


by Jill

Are these not some lovely layouts! I know part of that is the great designers we have here at GingerScraps. These layouts are beautifully scrapped though. I hope you found at least some inspiration from today’s post. I will leave you with some great designs to get those green filled layouts scrapped. As usual, all images are linked to their counterpart. We actually have an entire location in the store just for GREEN items.


If none of these are what you are looking for when it comes to scrapping green, make sure you check out the section dedicated to it. There are hundreds…literally hundreds of pages of choices. Have fun!

GS_footer_LaShawn

Fresh Baked: March 03, 2017

Spring is coming soon. You can feel it in the air!  The designers are enjoying the soon to be crisper and warmer air! They have some gorgeous designs out this week!

Remember when you spend $10 in the store, you get a great new collab!

fwp3 https://store.gingerscraps.net/GingerBread-Ladies-Collab-United-We-Stand.html [Read more…]

Sneak Peeks March 2, 2017

Happy Thursday! Are you ready for the weekend? I am! I can’t wait to scrap my Survivor Layout! If you still haven’t completed the LO yet, check out some of the awesome new releases. Maybe they will get your creativity flowing!

From Craft-tastrophic

From Dagi’s Temp-tations

From Tinci

From Lindsay Jane

From Blue Heart Scraps

From Pretty in Green

Fresh Baked: March 01, 2017

The month of pinks and reds has completed and it’s time for the month full of sunshine and rainbows. And little green leaved items decked with gold. March is here, and it’s time to celebrate!

It is the First of the month, and that means the revel of our new Buffet!!

Don’t forget to check out the Buffet Bundles, one easy click to add bundles of Buffet goodies to your cart, and an amazing value too!

buffet

The designers all had their own take on what the colors and theme said to them! I love the variety!

The designers definitely each made the palette their own and came up with some gorgeous designs, each unique but working so well with the other designers’ creations

The CT did such a great job showing how well all of the kits blend. They all did wonderful work!

This is just a few of the layouts. Keep an eye out in future newsletters to see more. Maybe even one of yours, if you make sure you put it into the Buffet section of the gallery!

Remember when you spend $10 in the store, you get a great new collab!

fwp
https://store.gingerscraps.net/GingerBread-Ladies-Collab-United-We-Stand.html

This month’s Monthly Mix is called “Let Spring Begin”! It is a gorgeous kit created by Just So Scrappy, JoCee Designs, Seatrout Scraps, Laurie’s Scraps and Designs. Go have fun in the snow!

mm 
https://store.gingerscraps.net/Monthly-Mix-Let-Spring-Begin.html

The new daily download is here!

Before I show it, here’s last month’s:

dd-feb
https://store.gingerscraps.net/Get-Well-Soon-full-kit.html
And here’s this month’s:

dd
https://gingerscraps.net/gsblog/2017/03/dd-mar-01-3/

This month’s is fitting as the winter is the time when everyone gets sick!

dd
https://gingerscraps.net/gsblog/2017/02/dd-feb-01-4/

Remember, the download is kept up for 5 days, and then it is taken down. If you miss pieces, the kit will be available for purchase on the first day of the following month.

Remember, if you complete 10 challenges, just ten, you get a free kit as well!!

cr

I know I’m going to make sure I do my 10 challenges for THIS, that’s for sure

DD: Mar 01

The new month is upon us! The new daily download is here!

Before I show it, here’s last month’s:

dd-feb
https://store.gingerscraps.net/Get-Well-Soon-full-kit.html
And here’s this month’s:

dd
https://bit.ly/2lE7JV5

Remember, the download is kept up for 5 days, and then it is taken down. If you miss pieces, the kit will be available for purchase on the first day of the following month.

Tutorial Tuesday (Photoshop Elements)

Blend Modes? Say What??

Photoshop Elements is considered the poor gal’s Photoshop because it has its limitations; there are lots of things Photoshop does that can’t be easily done in Elements. But that doesn’t mean Elements isn’t a powerful tool. I’ve mentioned Blend Modes before, mostly in passing; today we’re going to take a deeper look at them, but I’ll admit I’m still figuring out how to make them more useful to me, and to you. If you’ve ever used a photo-editing action set, like those available free from The Coffee Shop or for purchase from Paint the Moon, you might have noticed there are dozens of layers created by the action as it alters your photo. Many of those layers use Blend Modes to create their magic. So let’s go down the list.

In the image below, I’ve opened the Blend Mode menu in the Layers panel. It’s the oblong button at the upper left, underneath the icons and next to the Opacity slider, and it defaults to Normal. Take note of the divisions in the menu… they’re grouped according to the effects the modes have on an image. Modes in the first box don’t really visually alter your image. In the second box, they DARKEN something; white is the neutral point in this mode. In the third, the LIGHTEN something; here it’s black that is the neutral point. The fourth group produces effects on CONTRAST; it uses 50% gray as the neutral point. That fifth group is the INVERSION group, they cancel out something in the image. And the last grouping is the component section, where a COMPONENT of the image is blended in some way. All of these modes affect the layer IMMEDIATELY BELOW IT. The Opacity of the Blend Mode layer will also affect how the resulting image looks. In the demonstrations below, the opacity of each mode has been left at 100%. (WSNH tip: You can quickly scroll through all the modes by holding down the Shift key and clicking either + or . Try it! It’s fun to watch the way the image changes.)

As you can see in the screenshot below, Dissolve produces a slight change in the image, and softens it a bit. If you were to copy your image and apply Dissolve to the copy, there would be a bit of pixelation created.

Darken is in that second box, and it does create a slightly darker image, but with a bit of lost contrast.

Multiply definitely darkens the image and improves contrast. This is a good mode for those cast shadows we’ve played with in other tutorials. Another really easy but very useful application for this mode is to improve those slightly overexposed photos we all have. Duplicate your photo, switch the Blend mode on the upper version to Multiply and then tweak the Opacity and you’ll be astounded at how much it improves your photo. When you love it, merge the two layers.

In the old days when photos were on film, post-processing was an art, and a science. Magic was created in the darkroom through manipulation of light. By hand. When an underexposed area of the photo needs to be made more visible, the photographer “burns” the area by holding a piece of cardboard with a hole in it over the photo paper, projecting the image through the film, through the hole and increasing the amount of light falling on that area. To keep the shape of the hole in the cardboard from being obvious, the cardboard has to be kept moving. It’s a labourious process, one that has been drastically improved with software like Elements. The Color Burn mode takes all the guess work and technical difficulty out of darkening areas of an image.

Linear Burn darkens the image even more, slightly changes the colour and maintains contrast. When you see “burn”, always think “darker”. This mode isn’t particularly useful for scrapbooking although it’s an option for those shadow layers.

Darker Color doesn’t produce a dramatic change at all. The colour is slightly darker and contrast is preserved.

Now we’ve moved into the third box, where the modes all lighten something in some way. Lighter Color does just that, it brings out the lighter shading in the image.

Screen mode produces a much less saturated image and lightens the colour as well, while preserving contrast.

Another darkroom trick photographers use to lighten up areas of over-exposure is called “dodging”. A circular piece of cardboard is held with tongs over the area that is too dark while the image is projected through the film and onto the paper. And of course, the cardboard has to be kept moving so there’s no visible image of the disc. Color Dodge takes away all the finickiness of that process. It also dramatically changes the colour.

Linear Dodge produces even more lightening, with a change in colour and a loss of contrast.

Lighter Color simply does that. It doesn’t produce a huge change, and it does soften the image slightly.

Overlay is one of my favourite modes. It lets the texture of the background show through when used on text. It also sharpens the details a little. BUT… it changes the colour of whatever it’s applied to, so if you use it for text so you can see the paper texture, you might be unhappy with the colour you end up with. We’ll talk about Overlay again in another lesson when we get into photo editing.

Soft Light mode brightens the image a little, while slightly darkening the colour and shifting the hue a smidge.

Hard Light is just that… hard. It makes the image darker, deepens the colour and improves contrast.

Look at how Vivid Light changes EVERYTHING!

Linear Light produces a brighter, more saturated image with greater contrast.

Pin Light creates a softer image with no obvious change.

This mode will have very limited utility for the average photographer or scrapbooker and would be more useful to the graphic artist whose work involves transforming images completely.

Difference is only used by very skilled Photoshoppers to create advanced edits of images.

Exclusion, when used on photos, will produce a negative effect. Whites become black, blacks become whites and everything else will be grayed shades. The colour wheel is essentially inverted.

Hue mode has very little effect on the layer below. It may be useful when blending in textures from an overly or a paper layer.

Saturation behaves in a similar manner and really doesn’t alter the layer below much unless that overlying layer is not a copy of the layer below.

Color mode improves contrast over Saturation and slightly darkens the underlying layer, but isn’t really visually striking.

Luminosity brightens.

Now that we’ve looked at each mode individually, let’s see how they can be combined to really improve an image.

The steps I took are listed in reverse order. The base layer is Normal. See how The colour is darker, the detail is preserved, if slightly sharper, and the contrast is somewhat better too?

I hope you take the time to play around with these modes to see what great images you can produce.

Remember, if you’ve used a technique from these tutorials, post your finished layout in the GingerScraps Facebook Tutorial Tuesday Challenge Gallery for an opportunity to have YOUR chance to challenge me. If you’re not a Facebooker, you can post a link to the layout you’ve created with the tutorial you used in the comments section here on the Blog. I’ll get a notification and will then enter you into the draw. The first week of each month I’ll have a random draw of all entries and the winner will be announced at the end of the first tutorial of that month.

Fresh Baked: February 24, 2017

Can you believe that February is nearly over? The month of pinks and reds is nearly to an end and the month of green is nearly upon us. But do not fret, the designers are still creating some beautiful products!

Remember when you spend $10 in the store, you get a great new collab!

fwp3622 
https://store.gingerscraps.net/GingerBread-Ladies-Collab-I-Believe-In-Love.html

[Read more…]

Sneak Peeks February 23,2017

Happy Thursday! There’s lots of awesomeness coming out tomorrow!

From Aimee Harrison

From Dagi’s Temp-tations


From Tinci

From Miss Fish


From JoCee Designs

From Neverland Scraps

From JBS Templates

From Ponytails

From Neia Scraps

Have a wonderful weekend!


GingerBread Ladies Sneak Peeks – 2/24/17

It’s sneak peek time. I don’t know about anyone else, but the last 7 days have been crazy so I thought I would just drop in real quick to show you a bit of what is coming up this week.

Make sure to head over to the store to grab these on Friday!