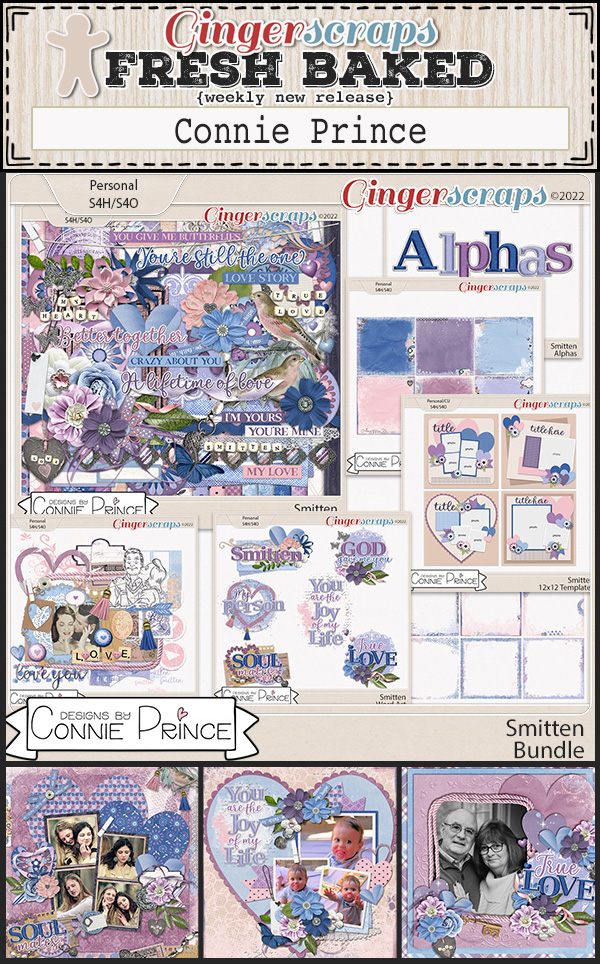
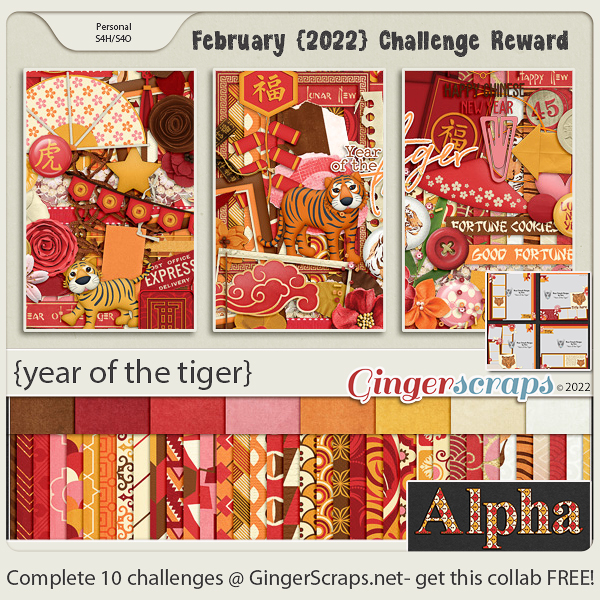
Creating Art with a Photo
![]()
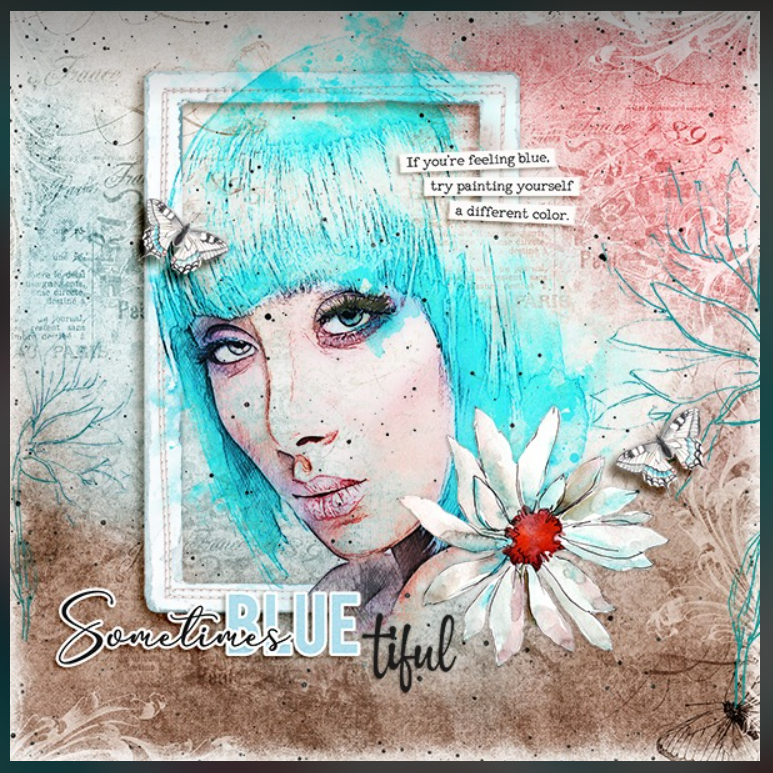
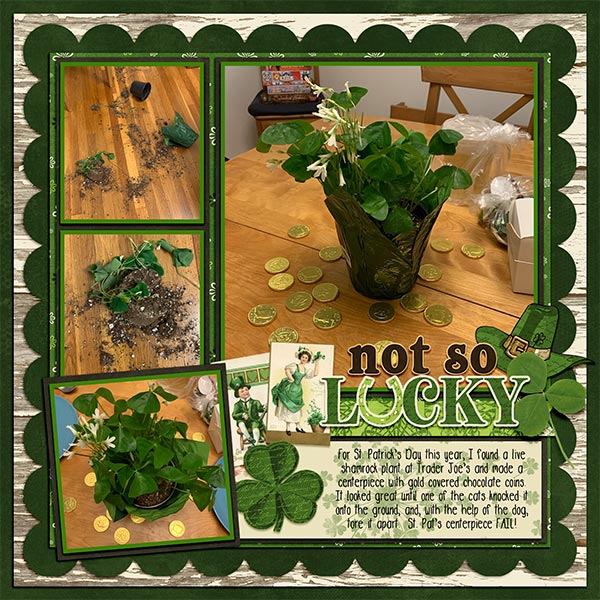
I’ve been procrastinating over this tutorial for awhile… because A) I wasn’t sure I could articulate how I do this and B) other, quicker techniques kept presenting themselves. 😉 But I bit the bullet. Today’s the day! I want to show you how to turn a photo into a watercolor work of art, and it started when Karen asked how the scrapper got the paint effect on this layout, shown below. (Sorry, I’m not sure where the original is posted or who the scrapper is to give them credit… if it’s yours, you did a fantastic job!) Anyway, I want to make one thing clear before we start: this is a labour-intensive technique, and much will depend on your choice of photo how much work will be involved. But your skills will get a good workout!
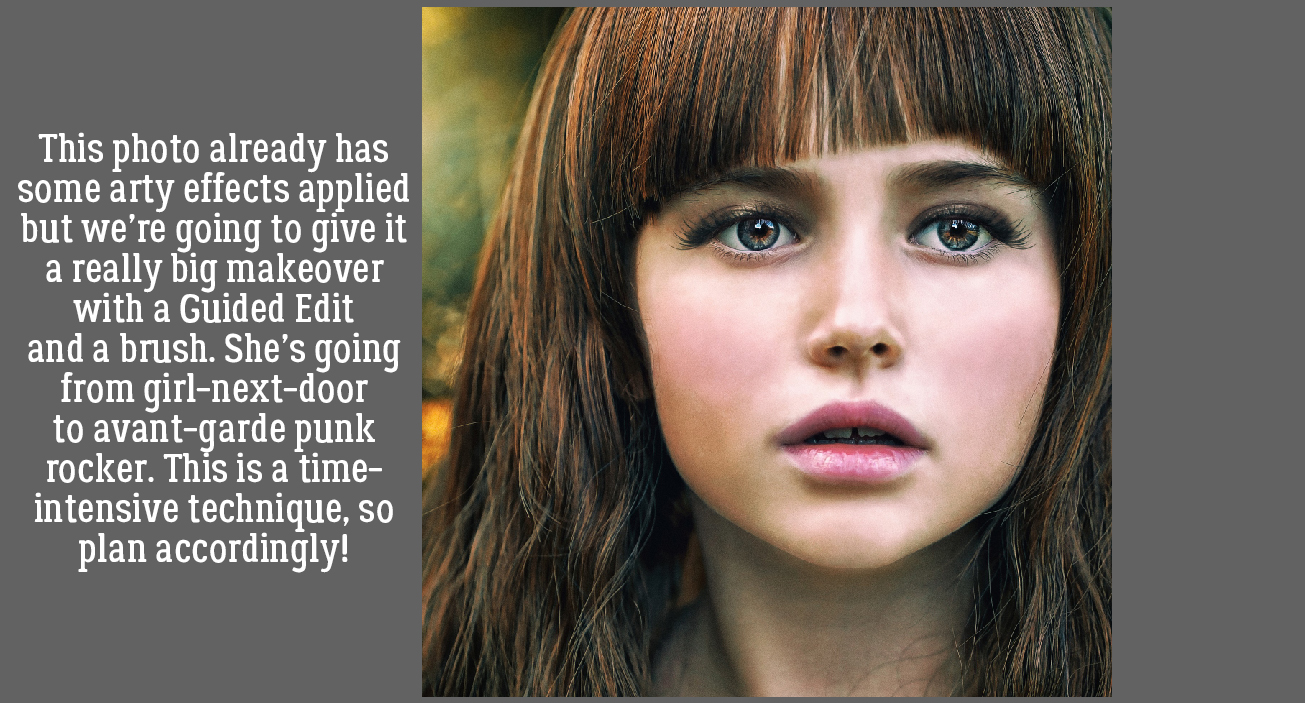
I chose this photo from Pixabay as my canvas. It already has a bit of an arty look to it, but when I’m done with it, it’ll be very different. It was already a square so that helped, although you can do this technique on any photo.
First, I’m going to use a Guided Edit. This one was introduced with Elements 2019. If you’re working with an earlier version, you can follow this tutorial, or this tutorial for the sketchy part. I’ve also used the Guided Edit we’ll be working with for a previous tutorial back in July 2019, so if it looks familiar that’s why. The outcome today will be very different from that other though.

Choose Pencil Sketch from the options in this menu, the one in the upper left corner there. Then drag your cursor over the parts of your photo you want to be sketchy. The cursor can be sized to fit the area you’re including, and you’ll have the ability to “unsketch” parts if you go too far.
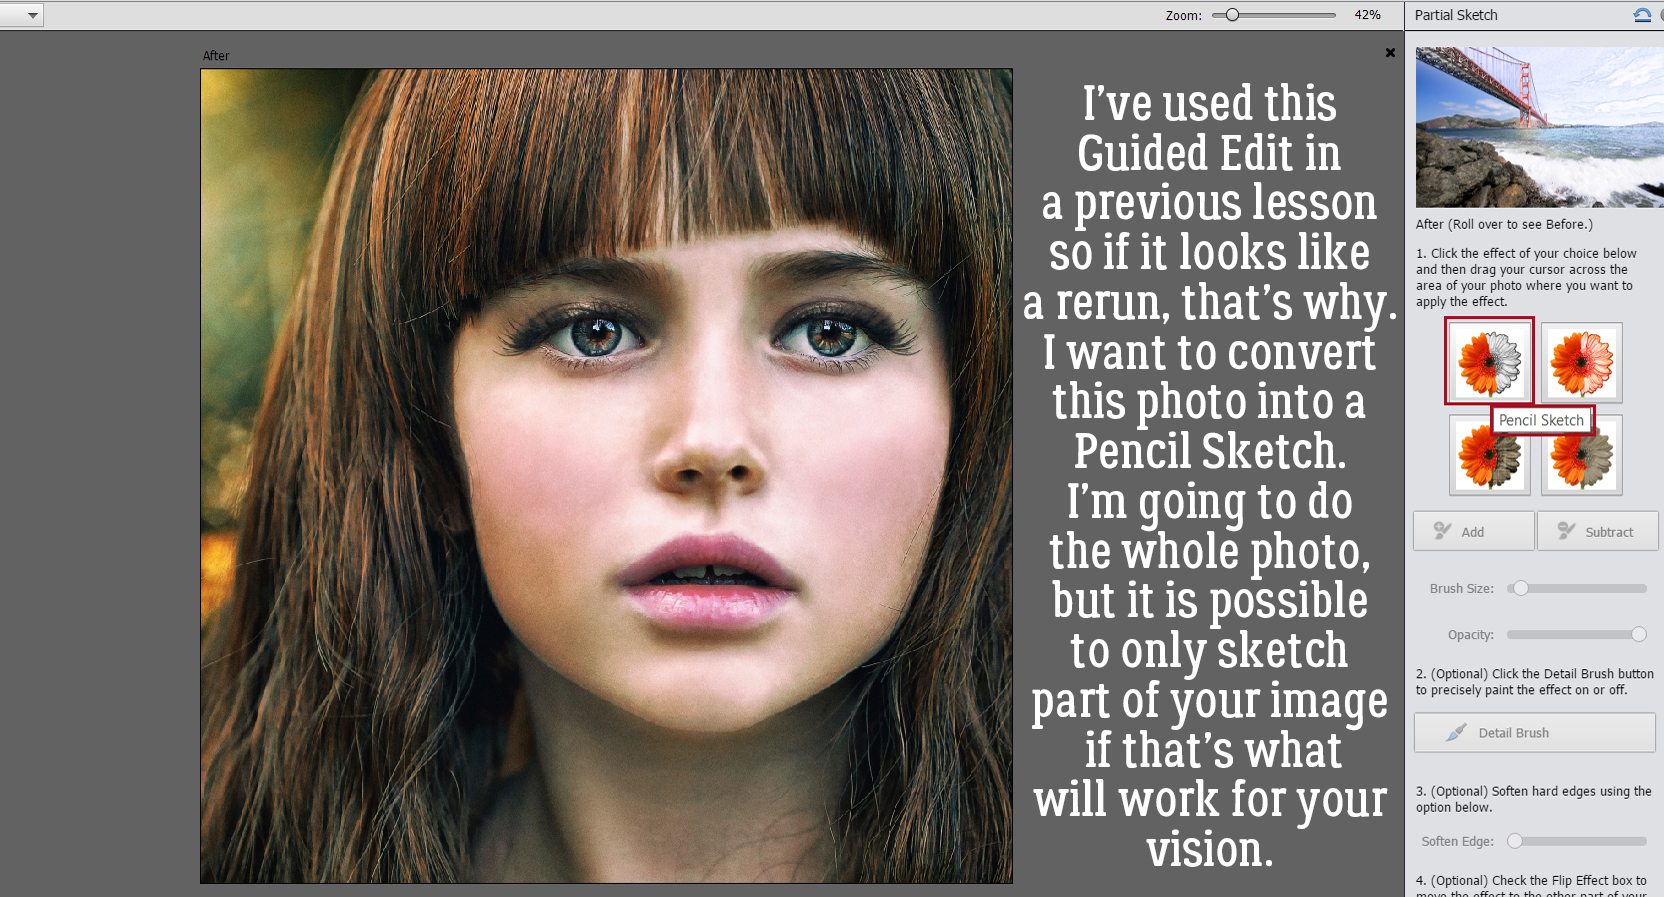
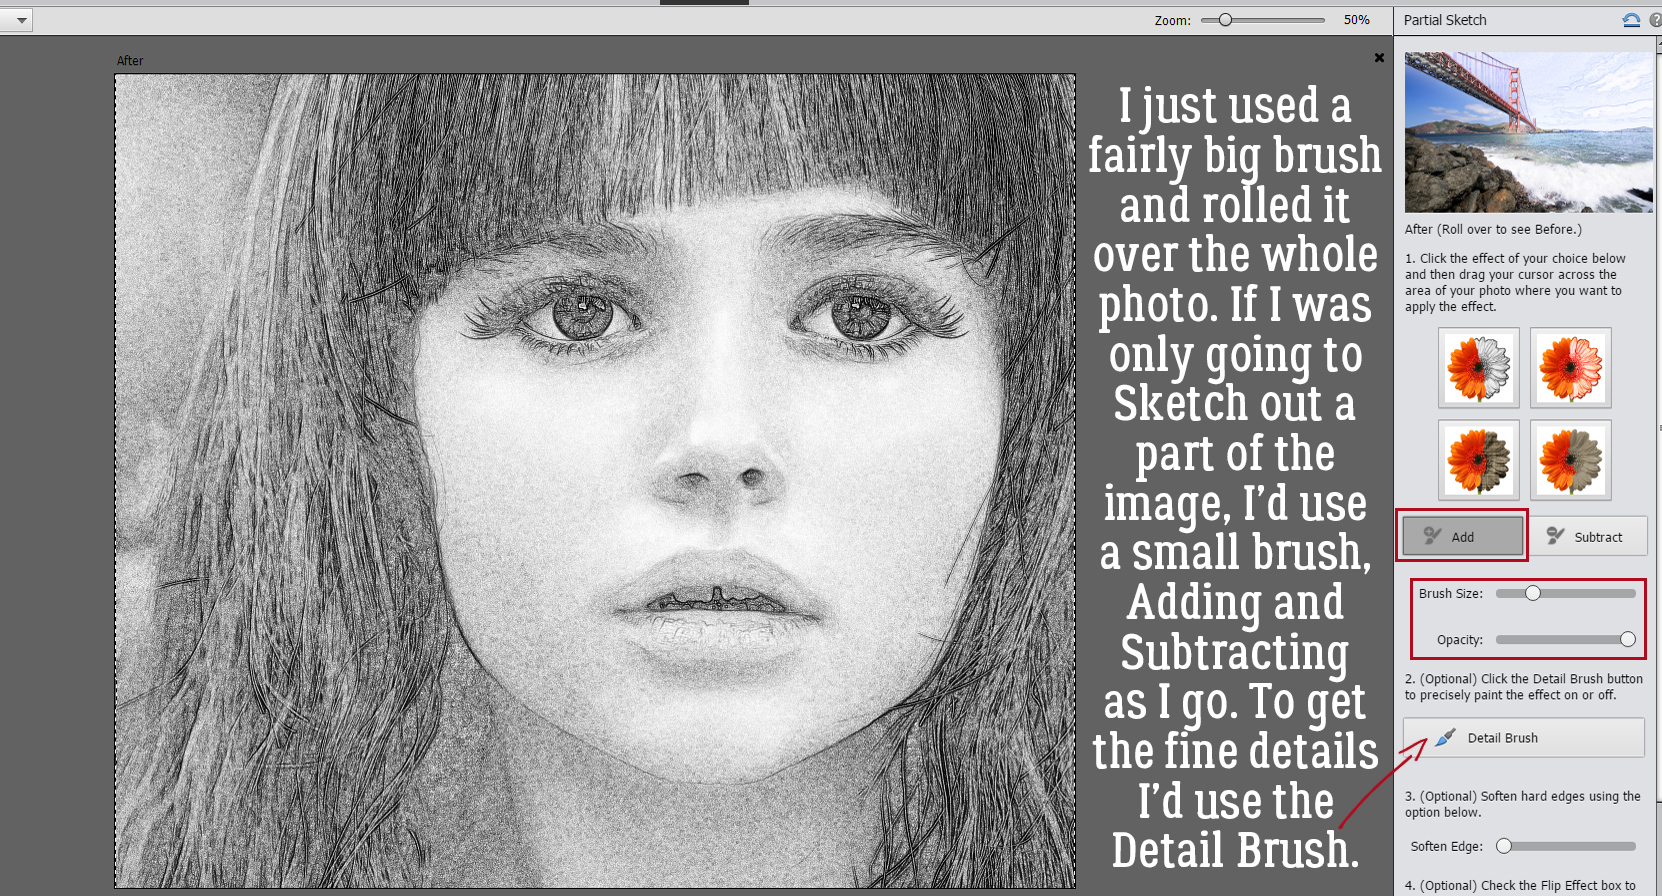
I decided I wanted the WHOLE photo to be sketchy, so I made my cursor brush huge and rolled it over everything. But let’s say you only want part of your photo sketched. In my experience, it’s easier to ADD an area to my selection then SUBTRACT with a smaller brush where the details are. You’ll see what I mean a bit later. In this step, it’s also possible to decrease the Opacity of the effect so more of the original shows through. But not today!
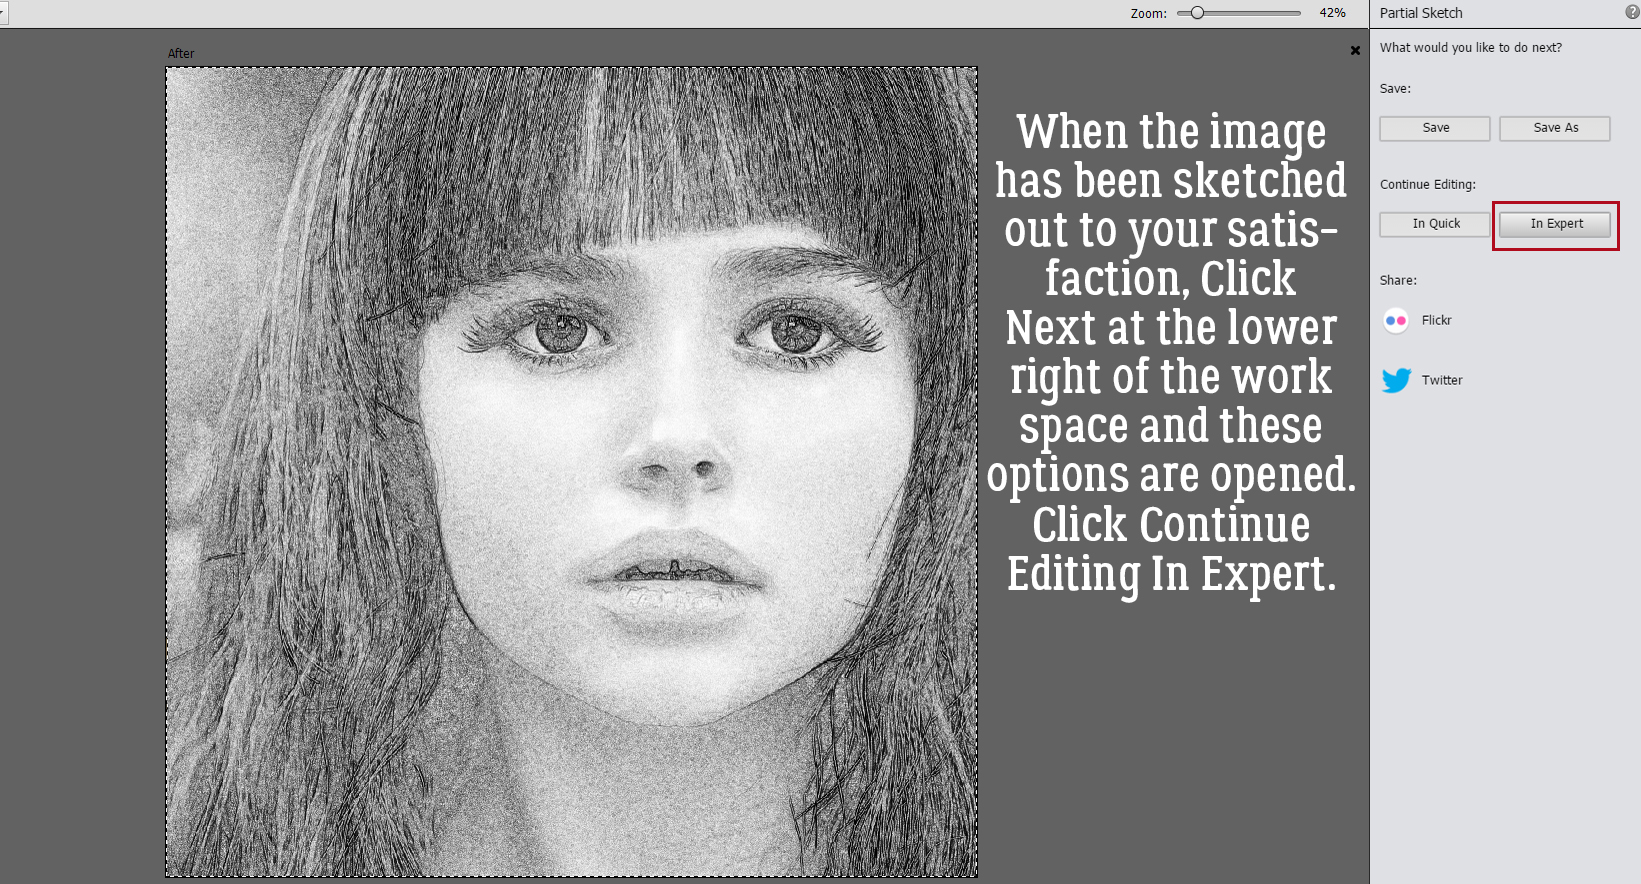
Once I had my sketch the way I wanted it, I went to the lower right corner of the workspace and clicked Next. (Be careful you don’t click Cancel, because that’ll undo everything you’ve done and take you back to the starting gate.) Then I chose Continue Editing In Expert.
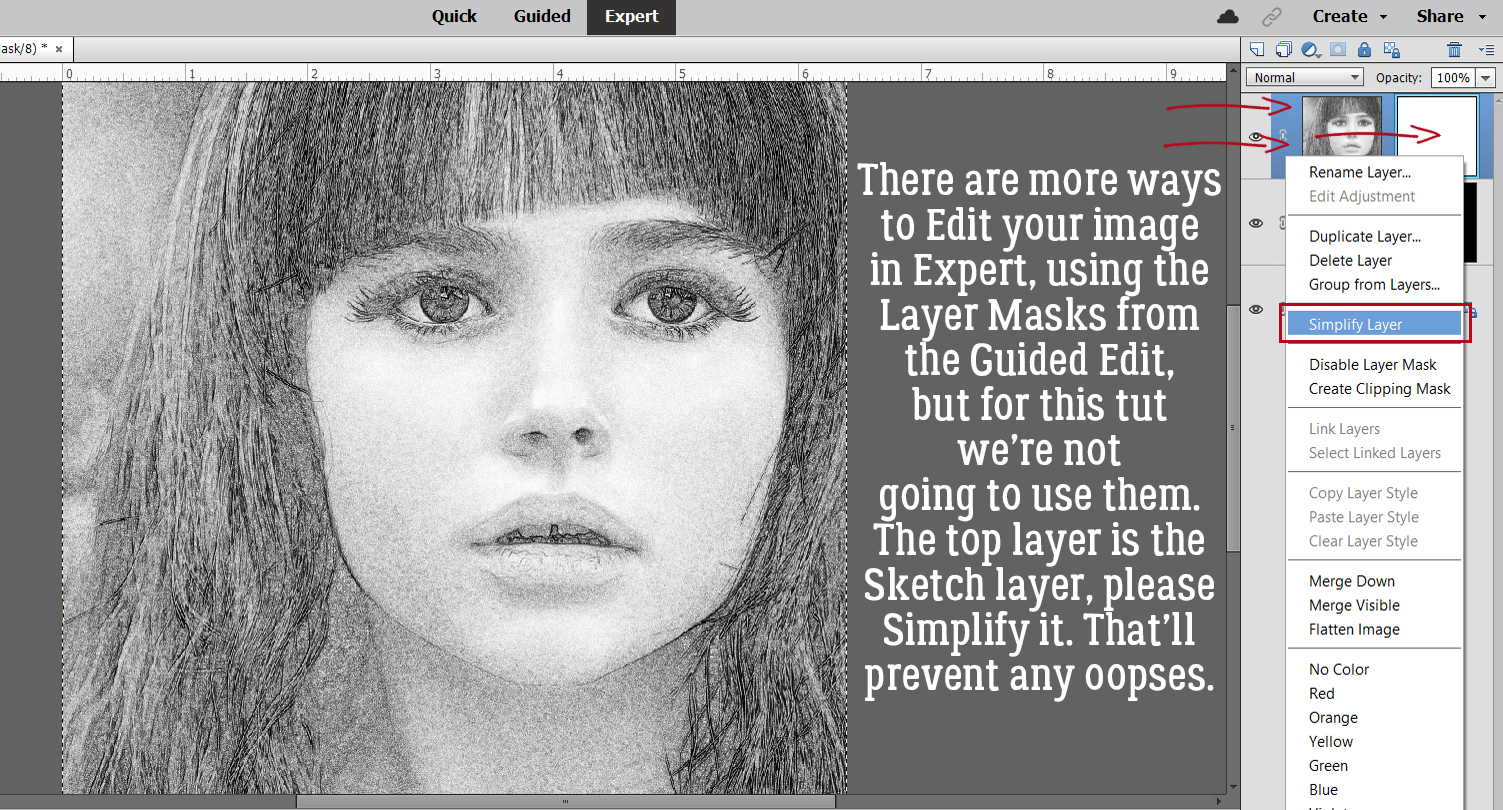
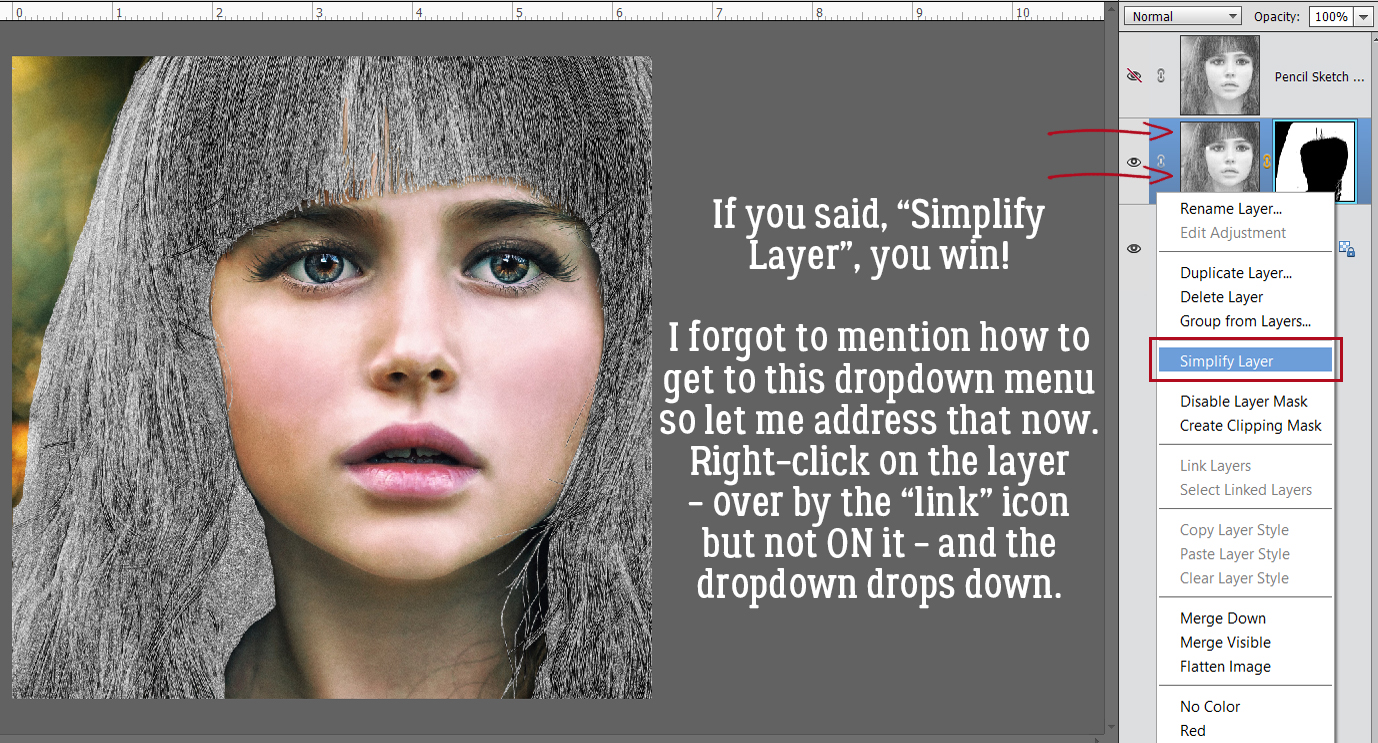
 Now it’s possible to see what Elements was doing in the background while we were busy and oblivious. Now I have 3 layers: the original, a sketch layer with a black Layer Mask and a sketch layer with a white Layer Mask. It’s possible to do the following steps using these two masked layers, but it’s a bit more challenging than my approach, so we’re not going to do that. The layer that I want to work with is the one with the white Layer Mask, but I need to Simplify it. Right-click on that layer – over on the left of the layer near but not ON the link icon – then choose Simplify Layer.
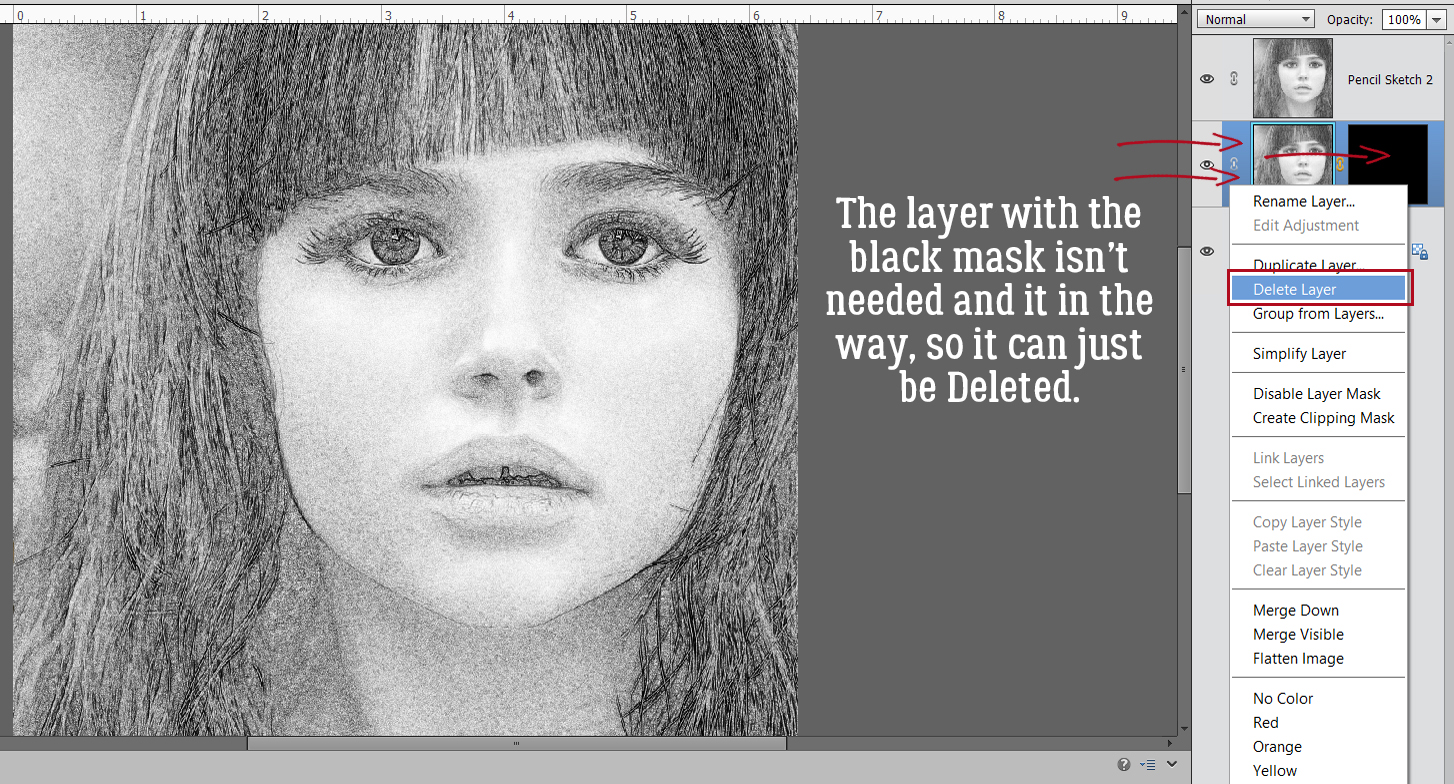
Then I Deleted the layer with the black Layer Mask.
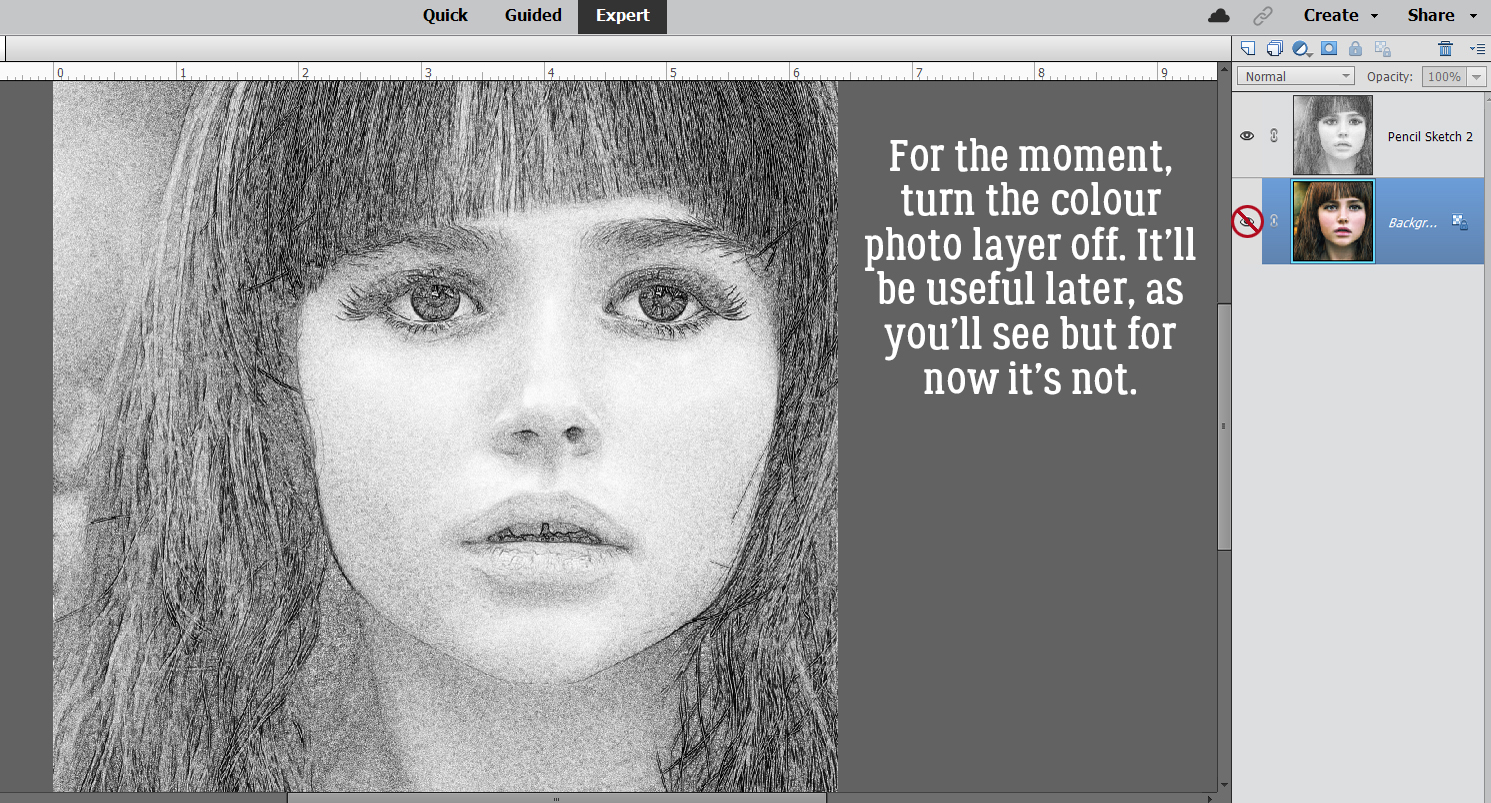
You can turn visibility for the colour layer off if you like, or leave it be.
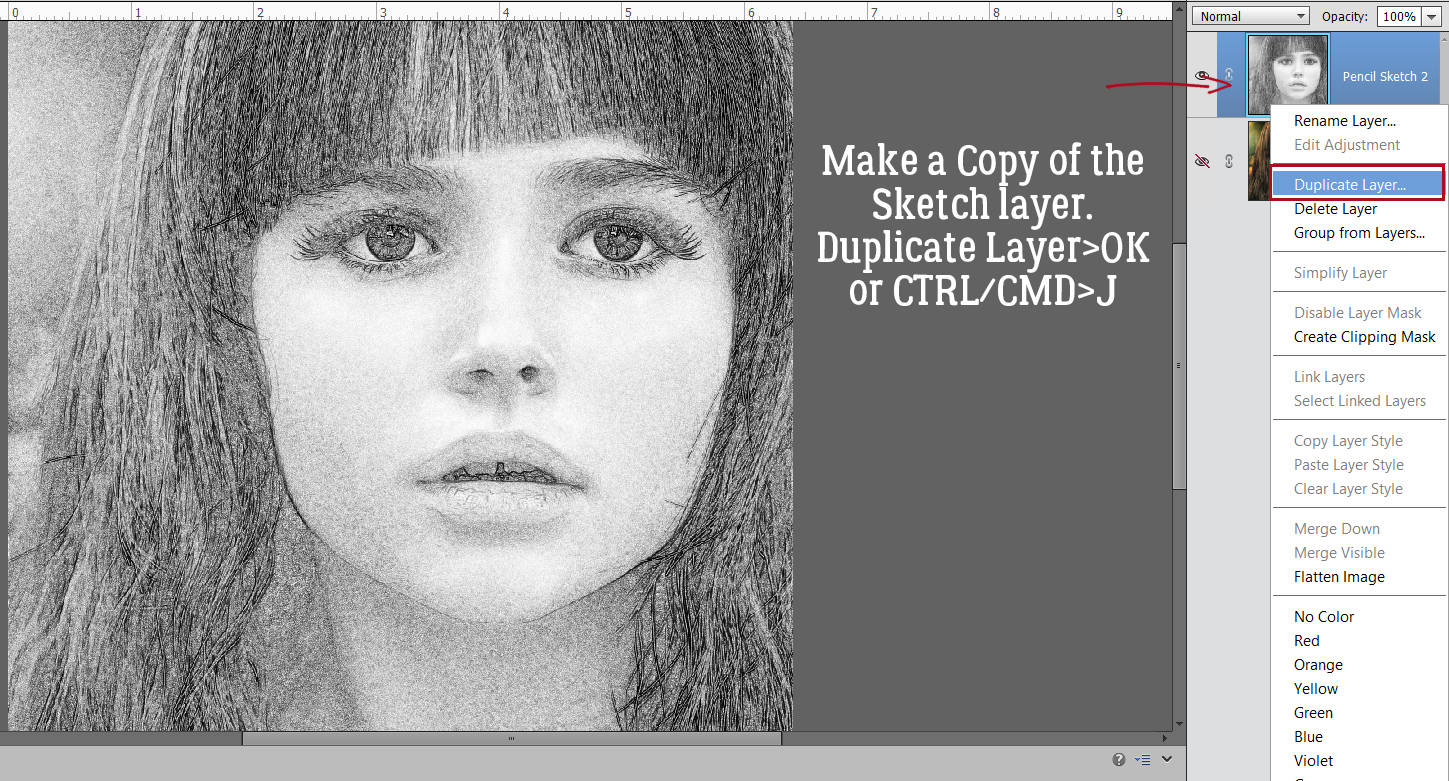
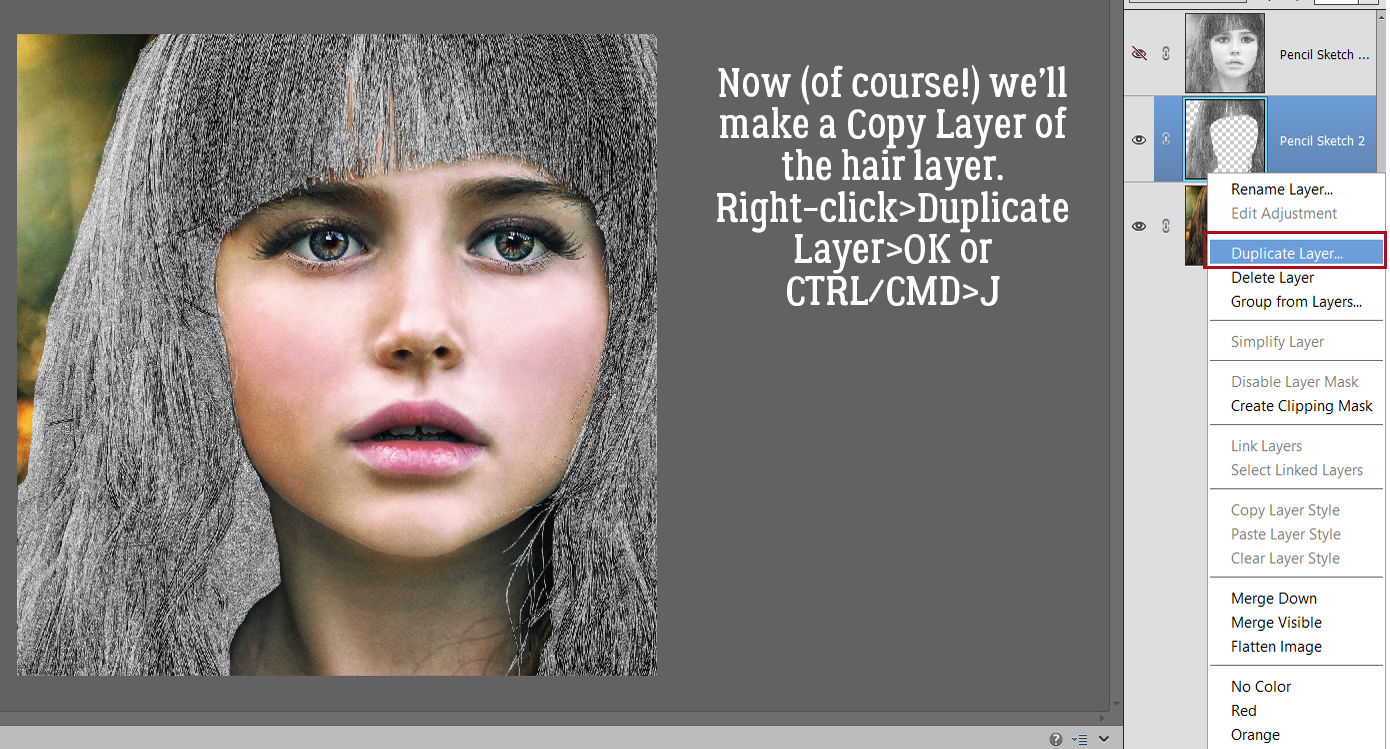
Next, I made a Copy Layer of the sketch. You can right-click on the layer then choose Duplicate Layer>OK. Or use the keyboard shortcut CTRL/CMD>J.
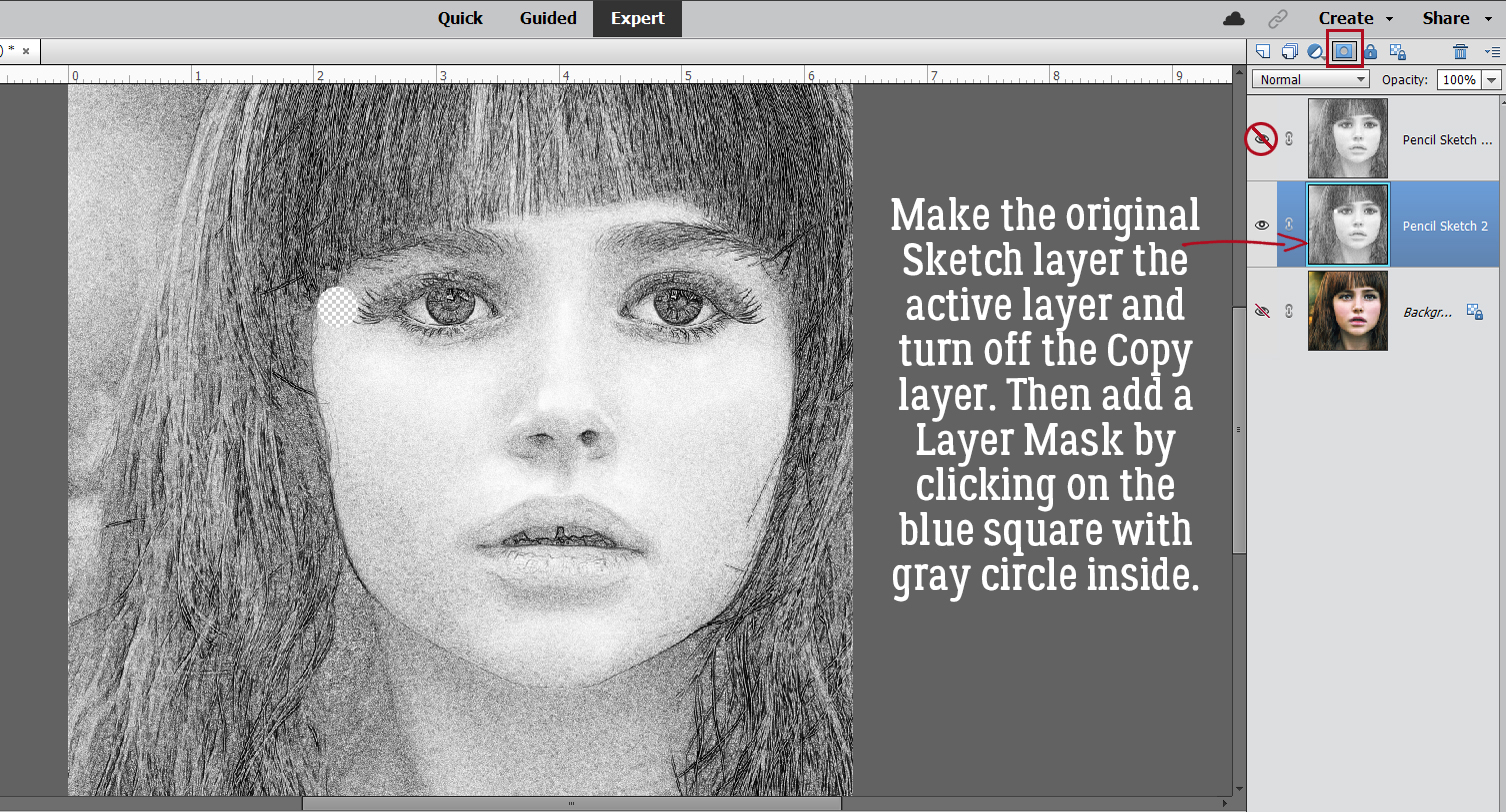
I put the Copy Layer in my back pocket for later and made the first sketch layer my active layer and added a Layer Mask to it… I know what you’re thinking – but I’m really not making work for myself. I tried it with the previously masked layers and it didn’t do what I needed it to do.
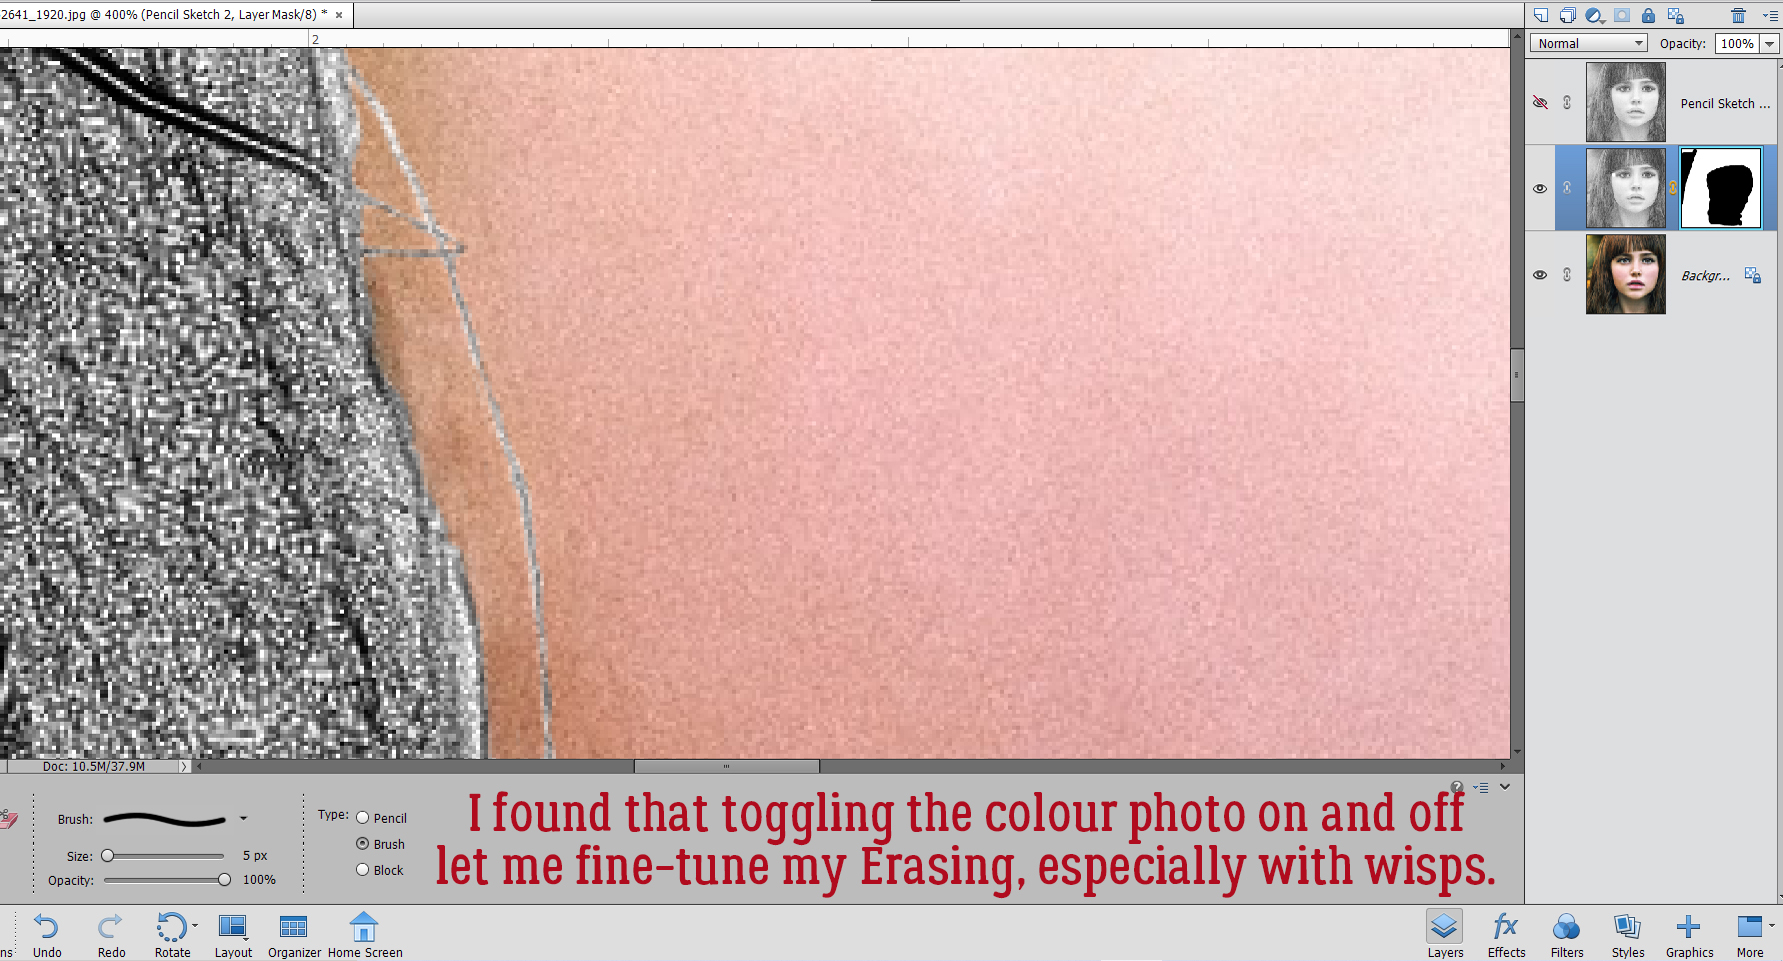
For those not familiar with Layer Masks, they allow removal of part of a layer in a “non-destructive” way, meaning that if I erase part of the image that I didn’t really want gone, I can just paint it back in. See the colour picker? The Eraser Tool is active with a white foreground and a black background. When white is the foreground colour, whatever the Eraser rolls over with be revealed – in this case it’s the transparent background. When black is the foreground colour, it conceals – the transparent background in this case. Toggling back and forth between removing and replacing parts of the image plays a big role in getting this technique nailed. I started by Erasing her face and neck as well as the green in the upper left corner. As I mentioned, I find it easier and quicker to Erase (white) past fine details like wispy hairs, and then paint them back (black).
 I also discovered that toggling the colour layer on and off makes it easier to see edges of things better.
 Aaaaaand toggling the sketch layer on and off helped me see where and what needed more help.

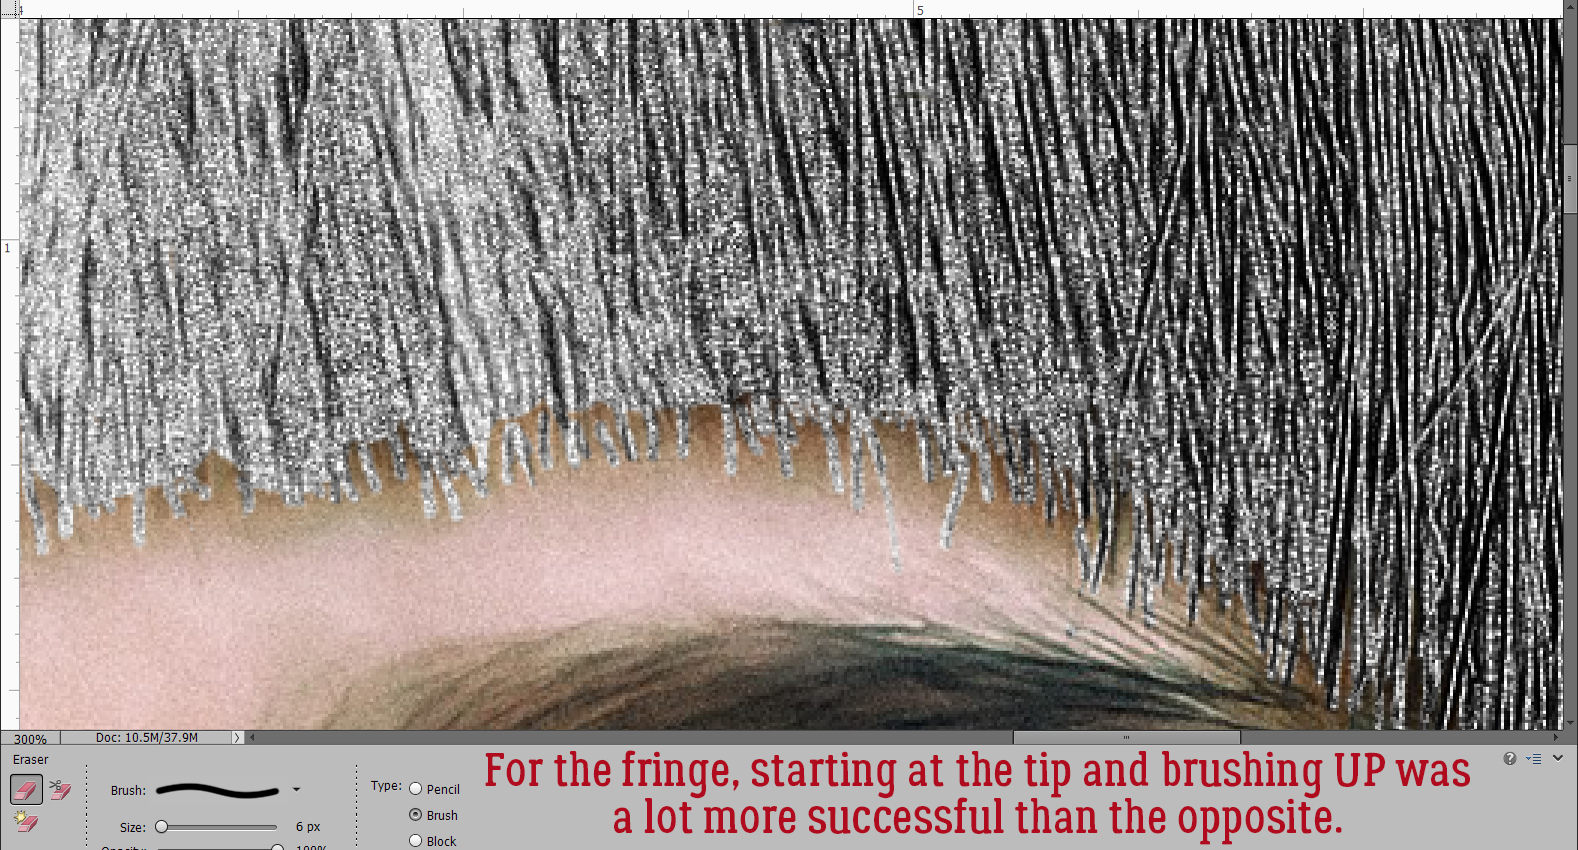
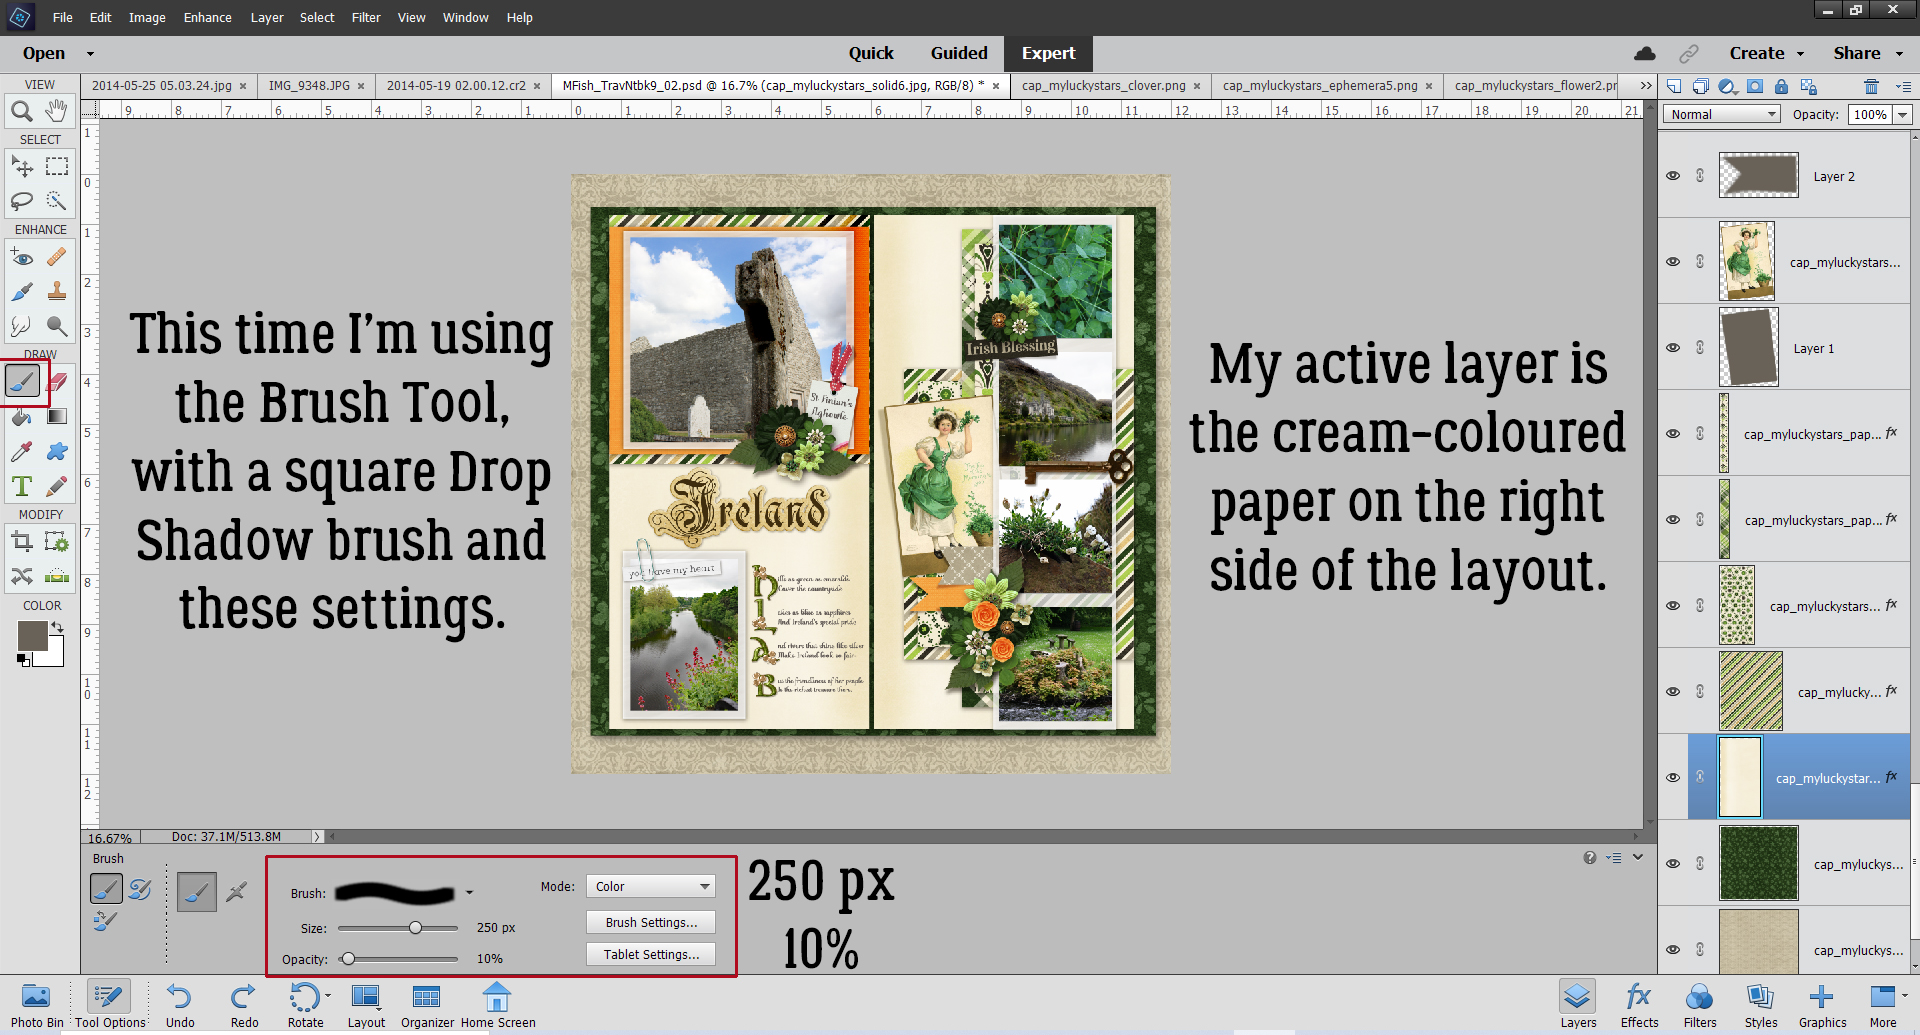
Her fringe didn’t seem too important when I first got going, but to be really successful, I figured I needed to make it as sharply detailed as possible. I work on a laptop with a trackpad, and lemme tell ya… it’s a SKILL!! I found I got better results when I started at the tip of a strand of hair and dragged the cursor back toward the fringe than when I tried to go from fringe to tip. Try it both ways and see which works best for you. This is where most of the time expenditure happens. If you’ve chosen a less detailed image to work with, it’ll go a lot quicker.
So, I’m happy with how I’ve isolated her hair. What do you think the next step will be?
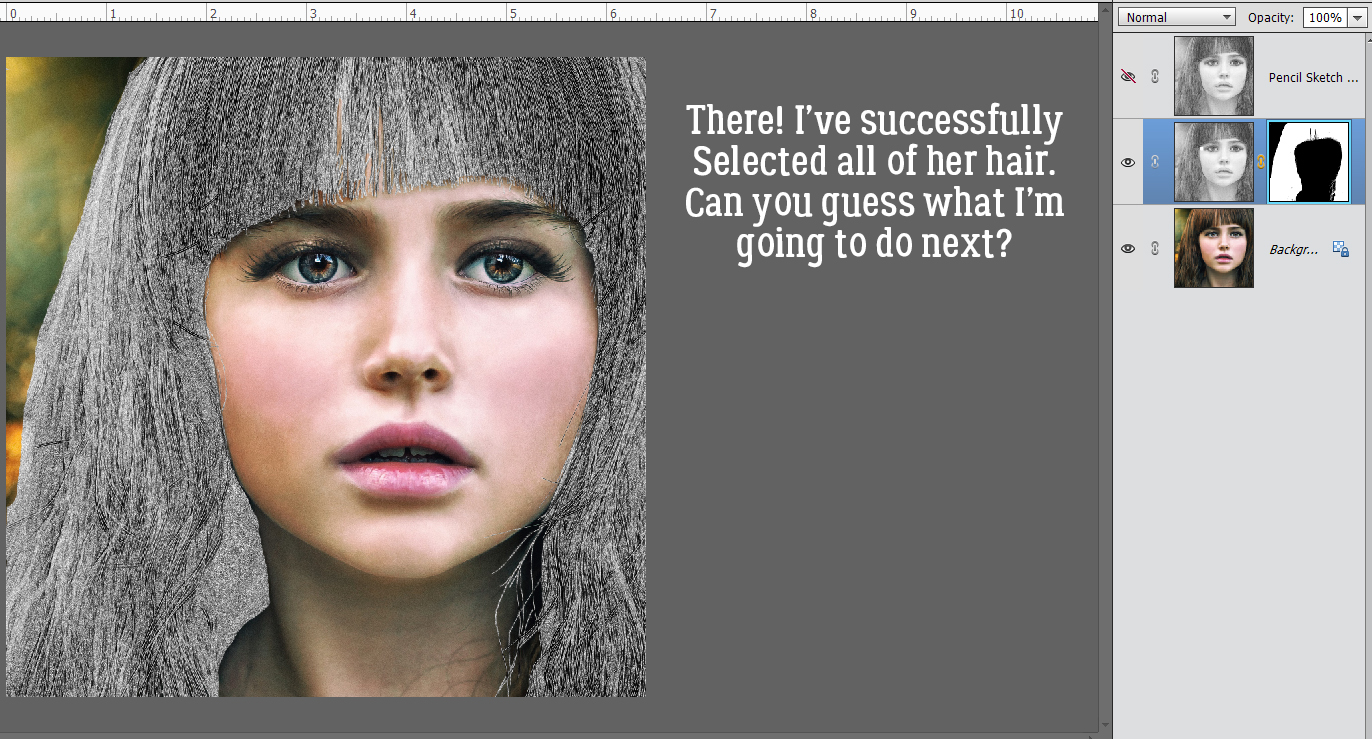
Did you guess right? If you’ve read a lot of my meandering tutorials, you probably did!
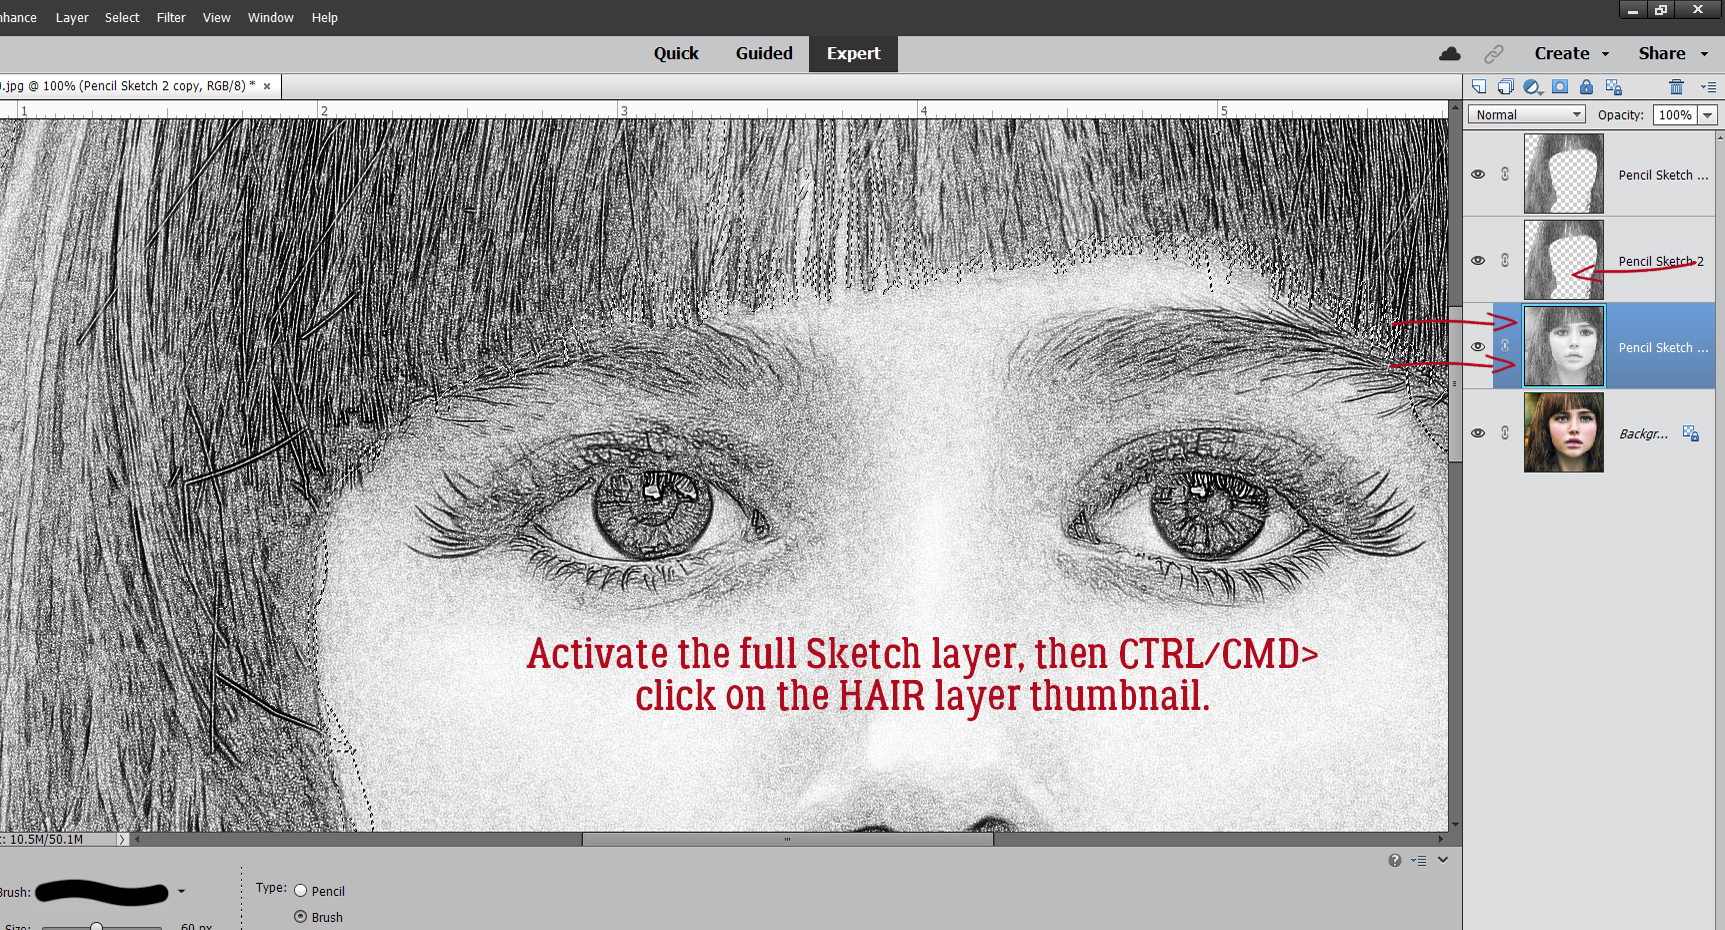
And you probably knew this step was coming too. Make a Copy Layer of the hair. ALWAYS have a copy of something you’ve done a lot of work on, just in case you need it!! Now I have a Copy of the whole sketch and a Copy of just her hair.
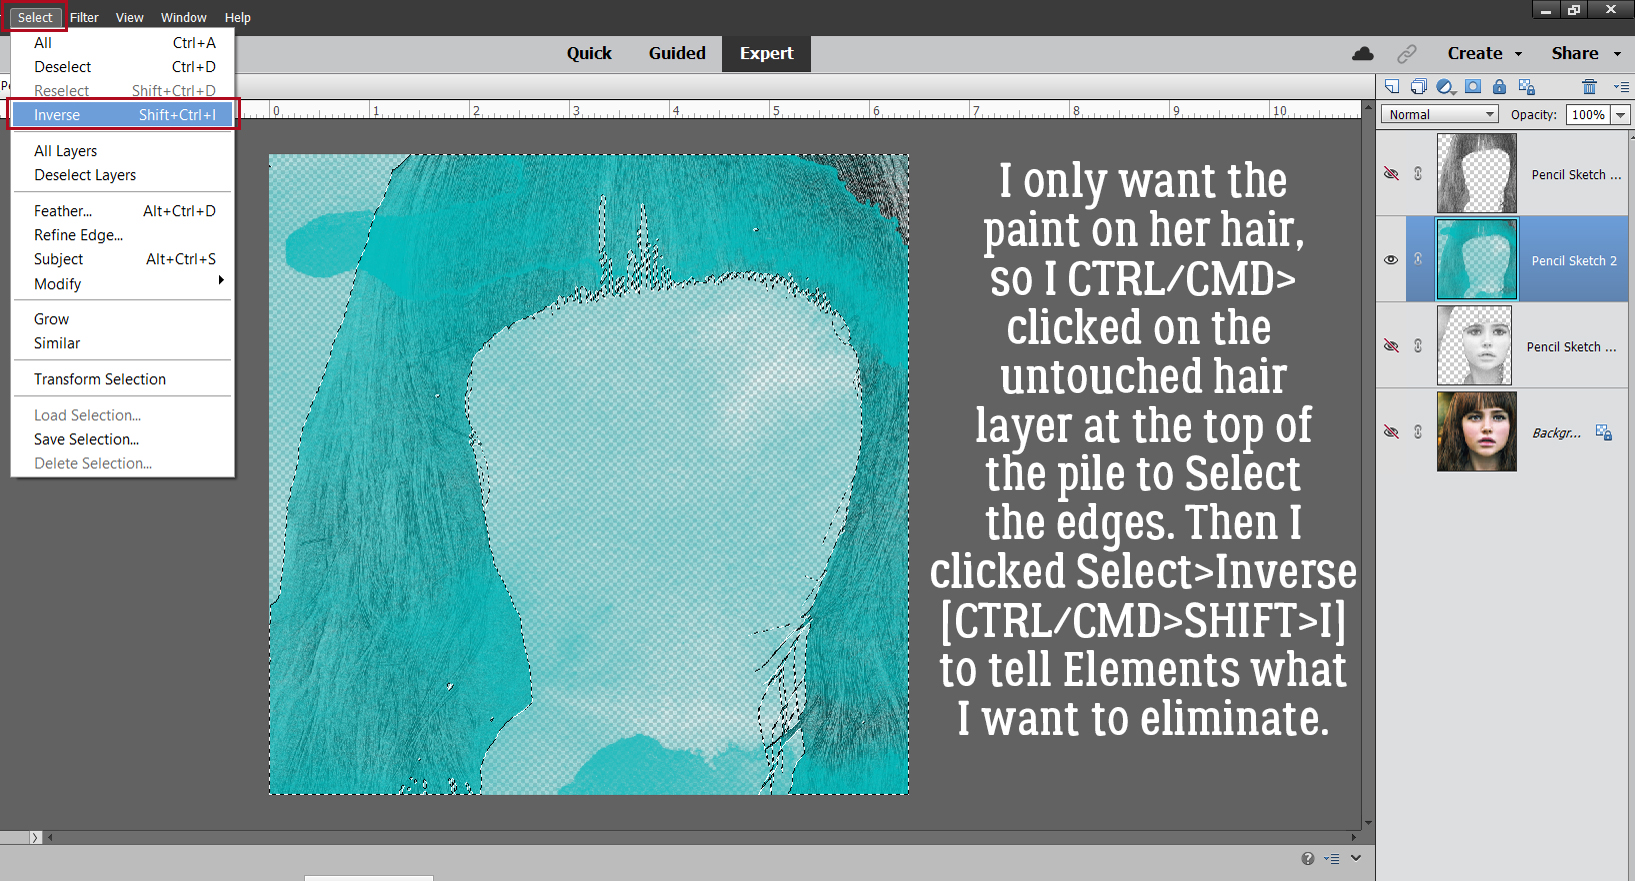
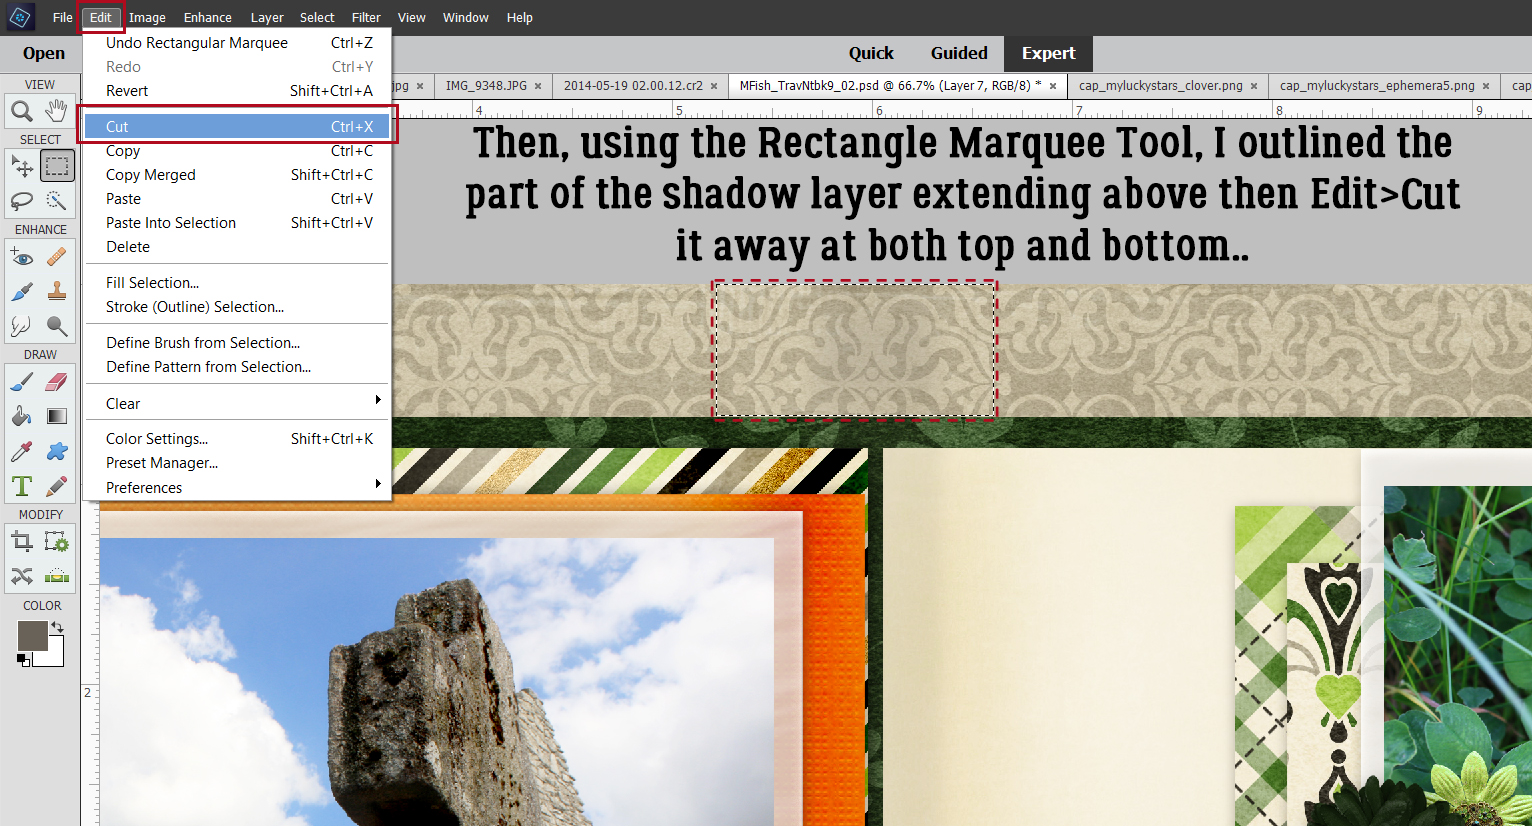
It’s really hard to see the marching ants in this screenshot, but they are there. I activated the whole sketch layer then CTRL/CMD>clicked on one of the hair layers to Select the edges of the hair on the whole sketch.
I want everything BUT the hair so I clicked Select>Inverse. (In reality, I used the keyboard shortcut CTRL/CMD>SHIFT>I…)
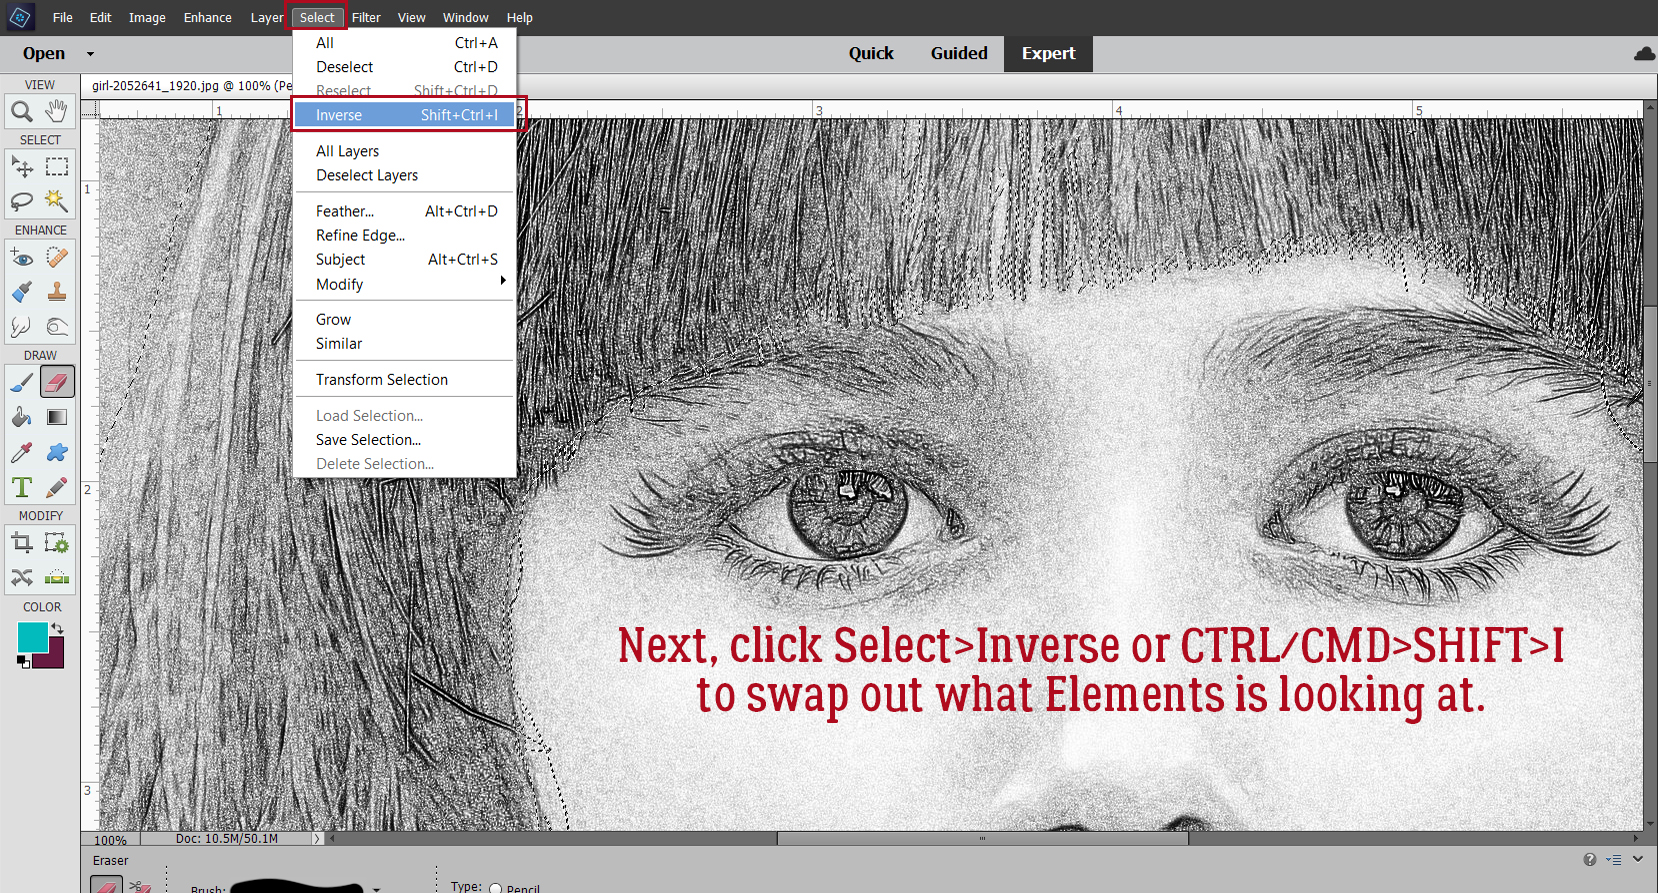
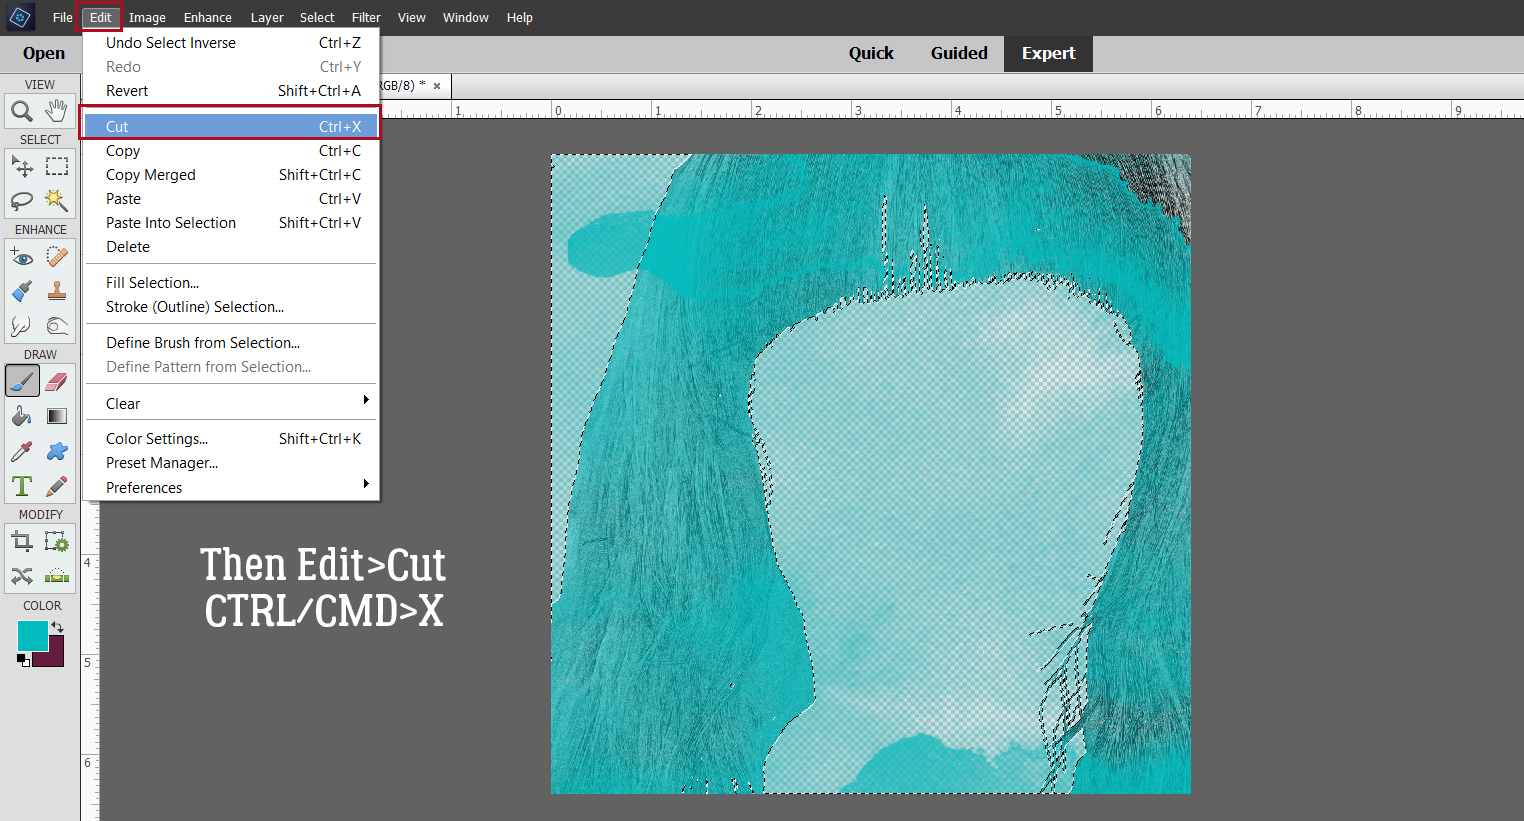
Then I clicked Edit>Cut (CTRL/CMD>X).
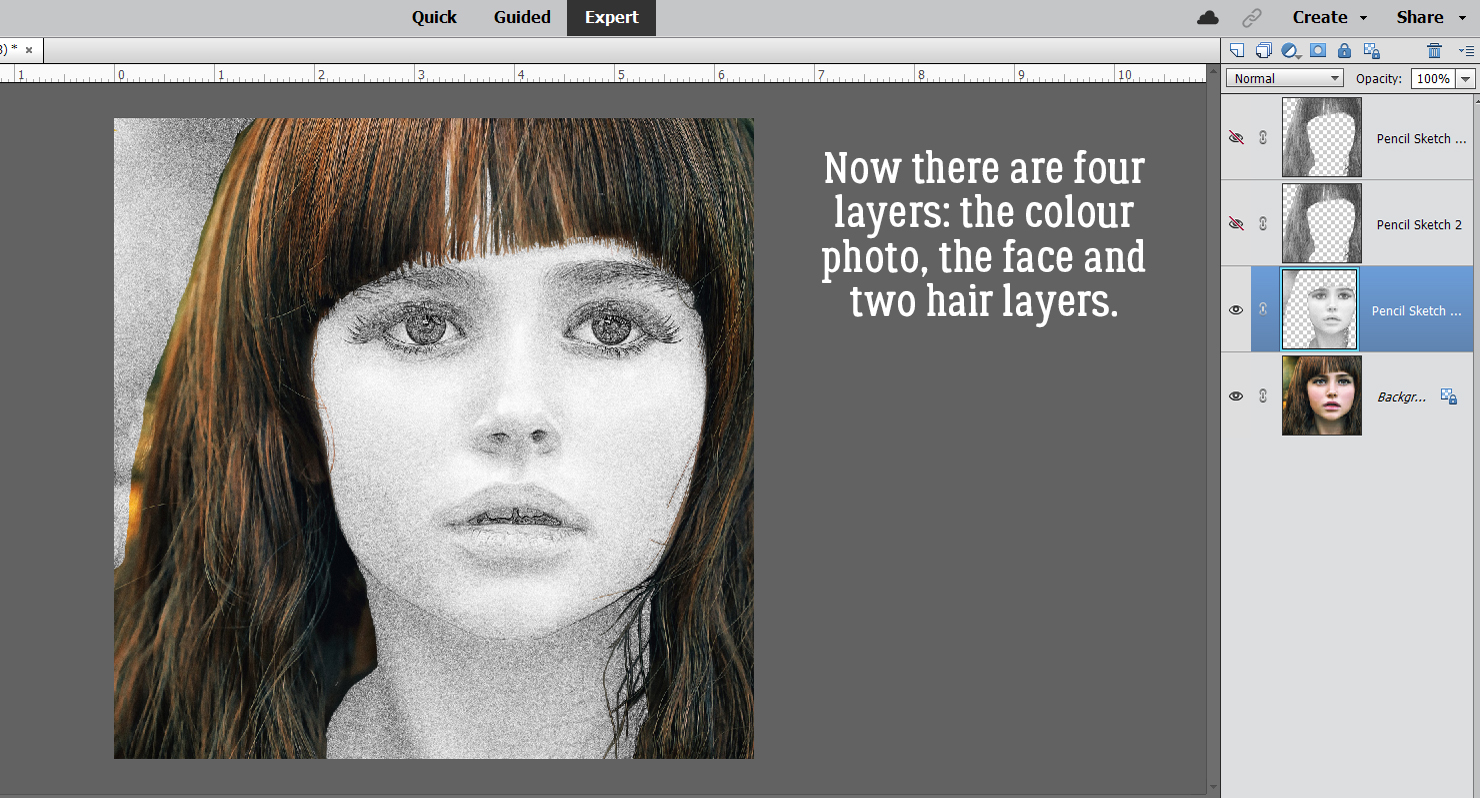
At this point I have four layers, one colour, one just her face and the green in the corner and two hair layers.
Now I took some time to experiment with my watercolor brush collection. The ones that worked best are the ones that are a square swatch, like the ones you can grab here for free. I resized the brush so it filled the whole photo so I could see where the colour was most opaque and how it looked overall. Because I was just looking at options. I didn’t create a new blank layer for the brush, although in retrospect I should have.
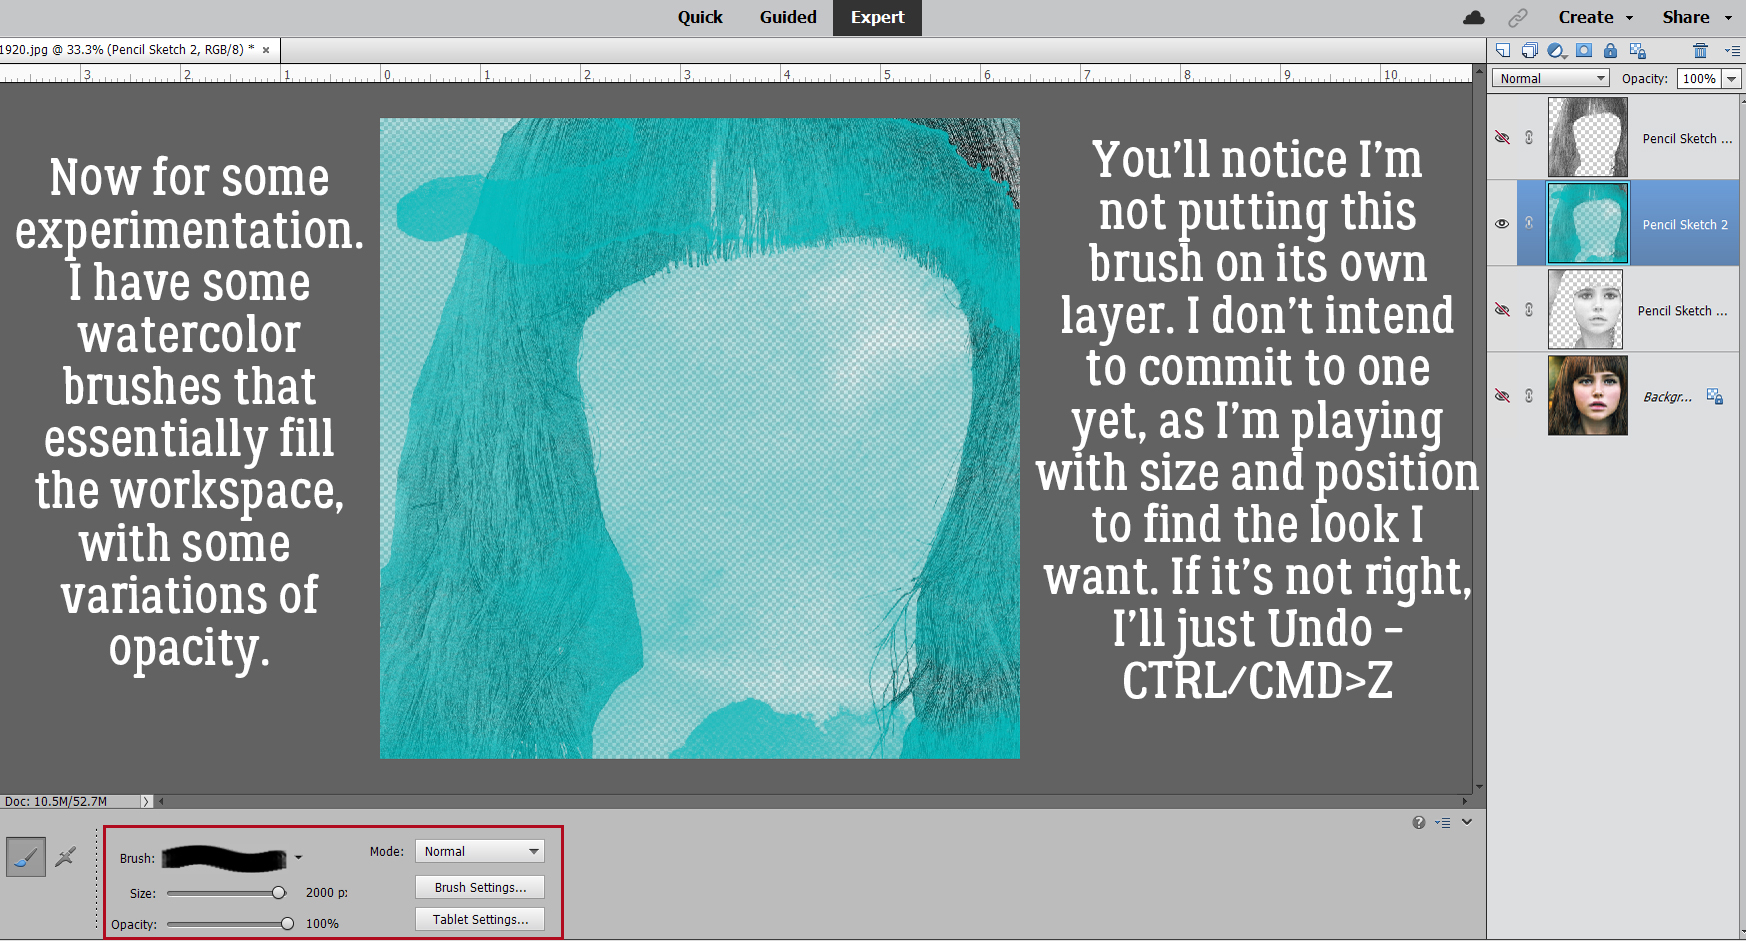
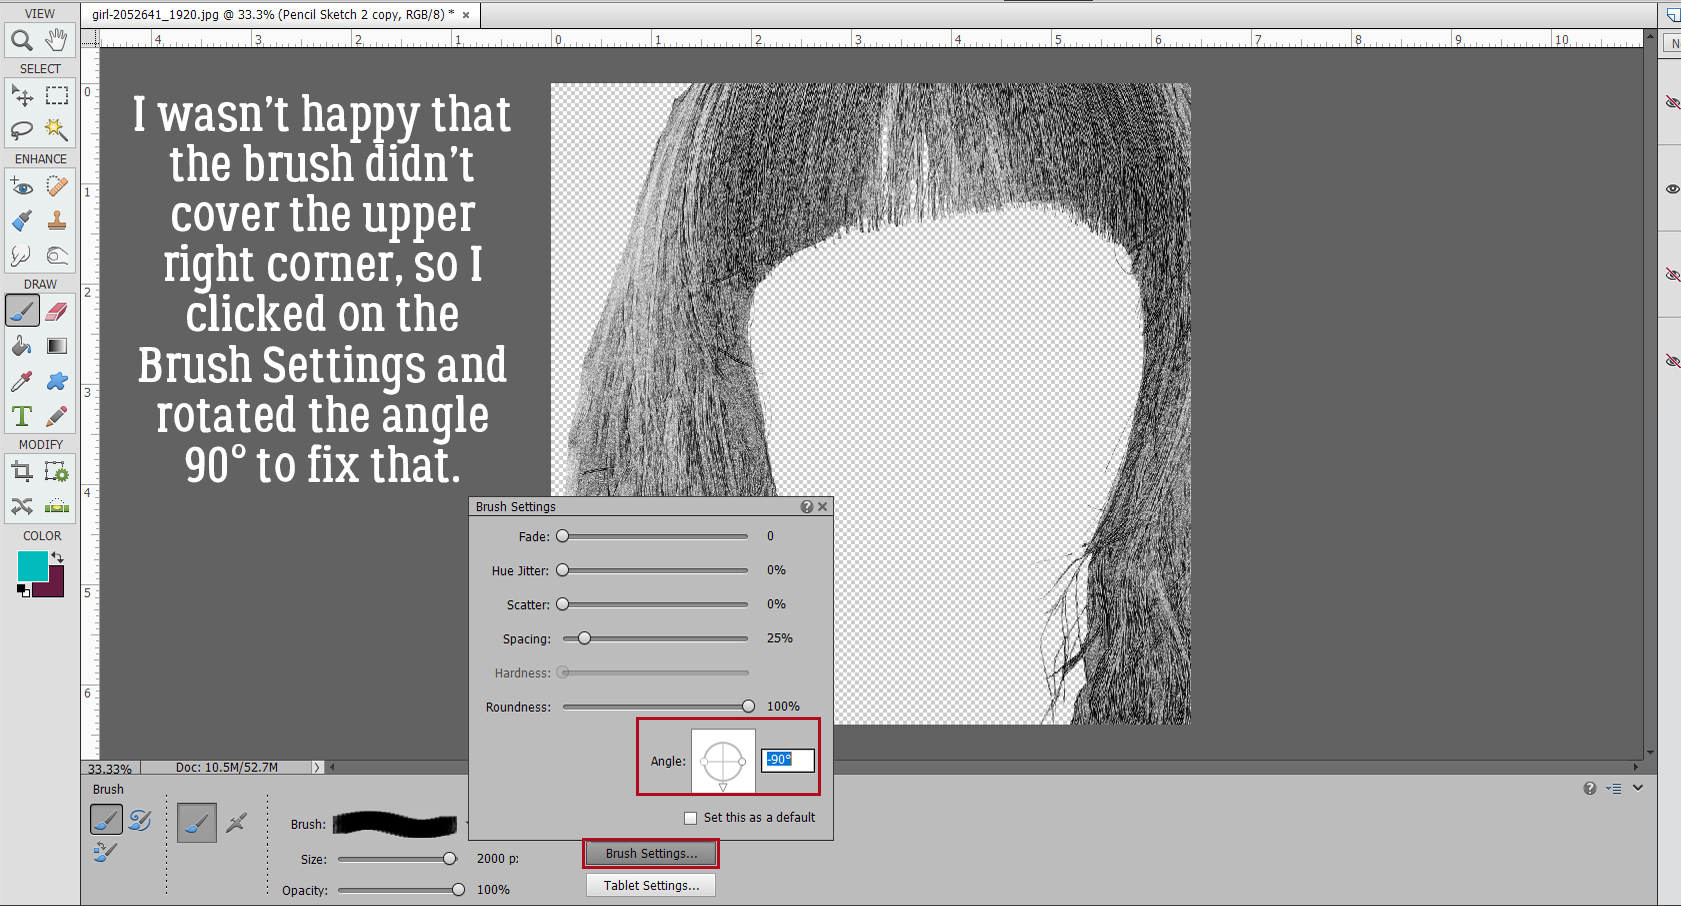
Did you know you can make lots of adjustments to your brushes? Click on Brush Settings and you’ll see this. I wasn’t happy that the brush I chose didn’t cover all of her hair, so I rotated the brush 90° to the right and fixed it.
The next two screenshots are still part of my experimentation, but the process you’ll follow after you’re settled on your brush and have it on its own layer is the same as I’m showing.
After the hair is Selected and Inverted, I’ll Cut it away to see what effect I have.
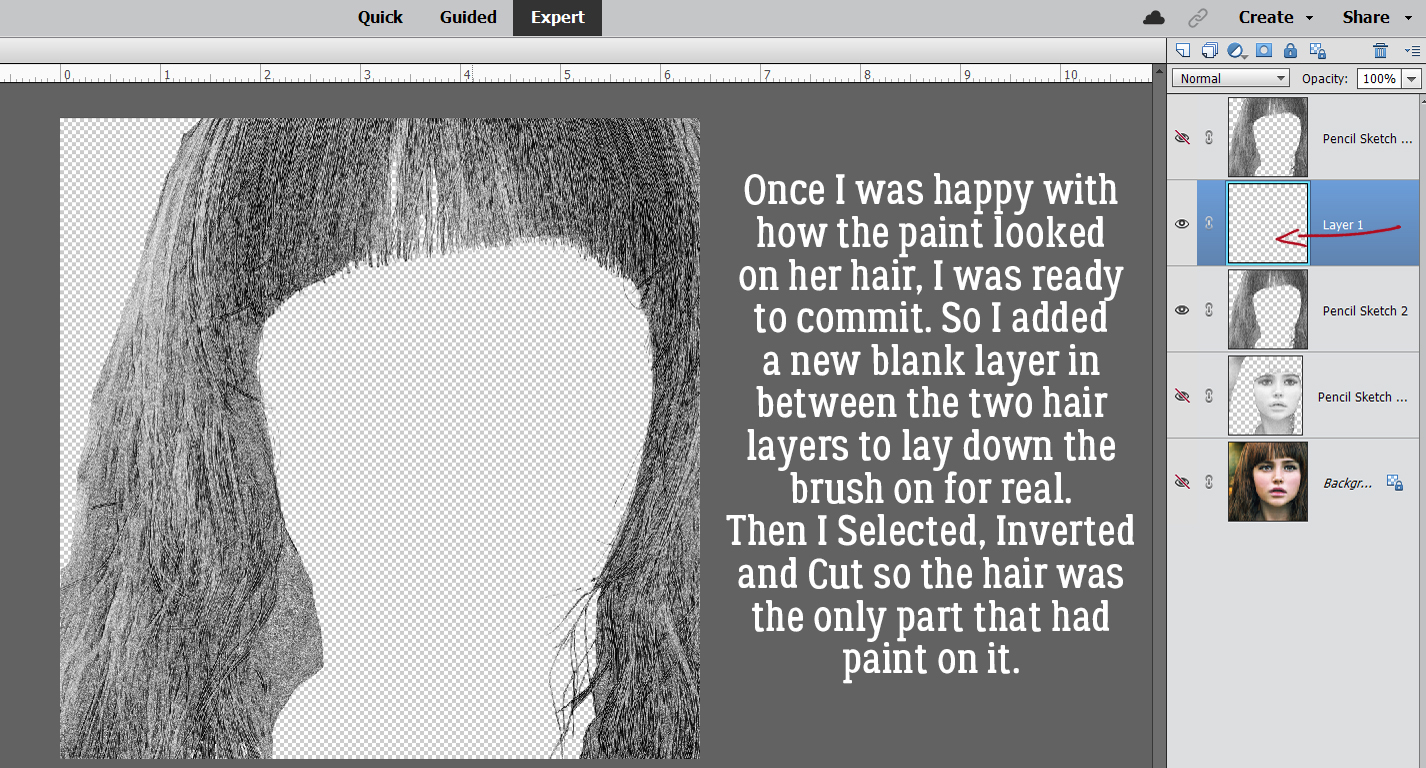
Alrighty! I’m ready to commit. I have a brush and a colour I like, it’s positioned well and I can go ahead with the brush on its own layer. I put the new, blank layer in between the hair layers by clicking on the sheet of paper icon at the upper left of the Layers Panel.
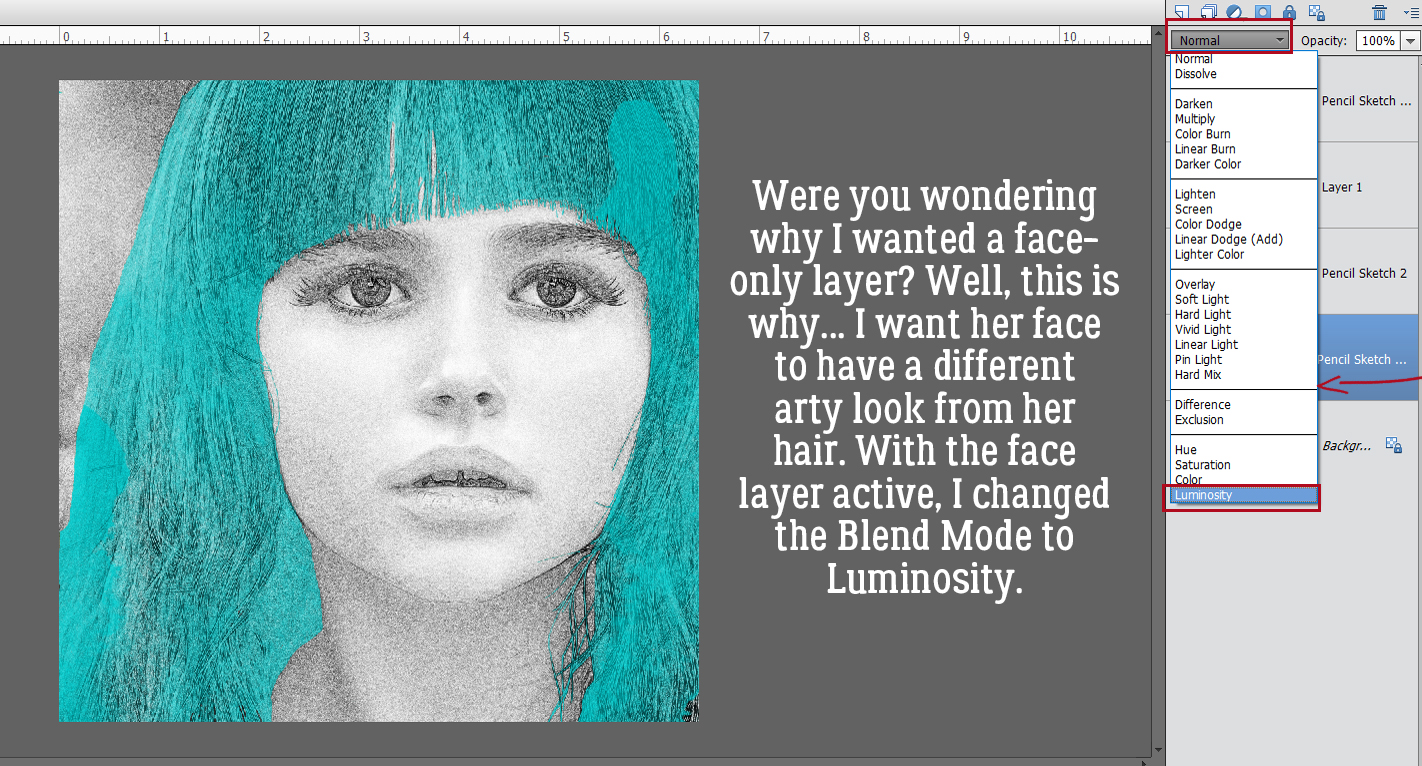
I really wanted the ability to manipulate her face separate from her hair, as you can see here. That’s why I went to all the work of Layer Masking her hair. I’ll change the Blend Mode on the FACE layer to Luminosity.
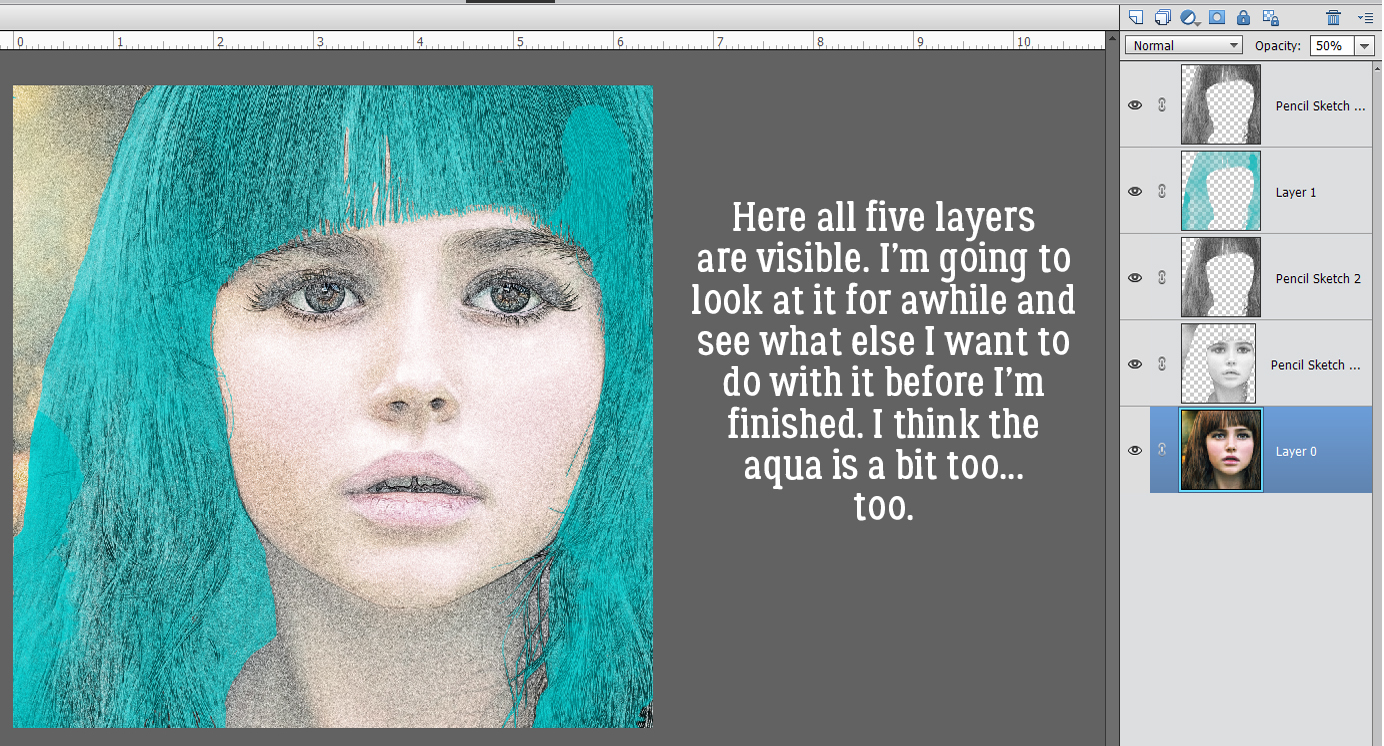
I’m almost happy now. But I’ll look at it for a bit to make sure.
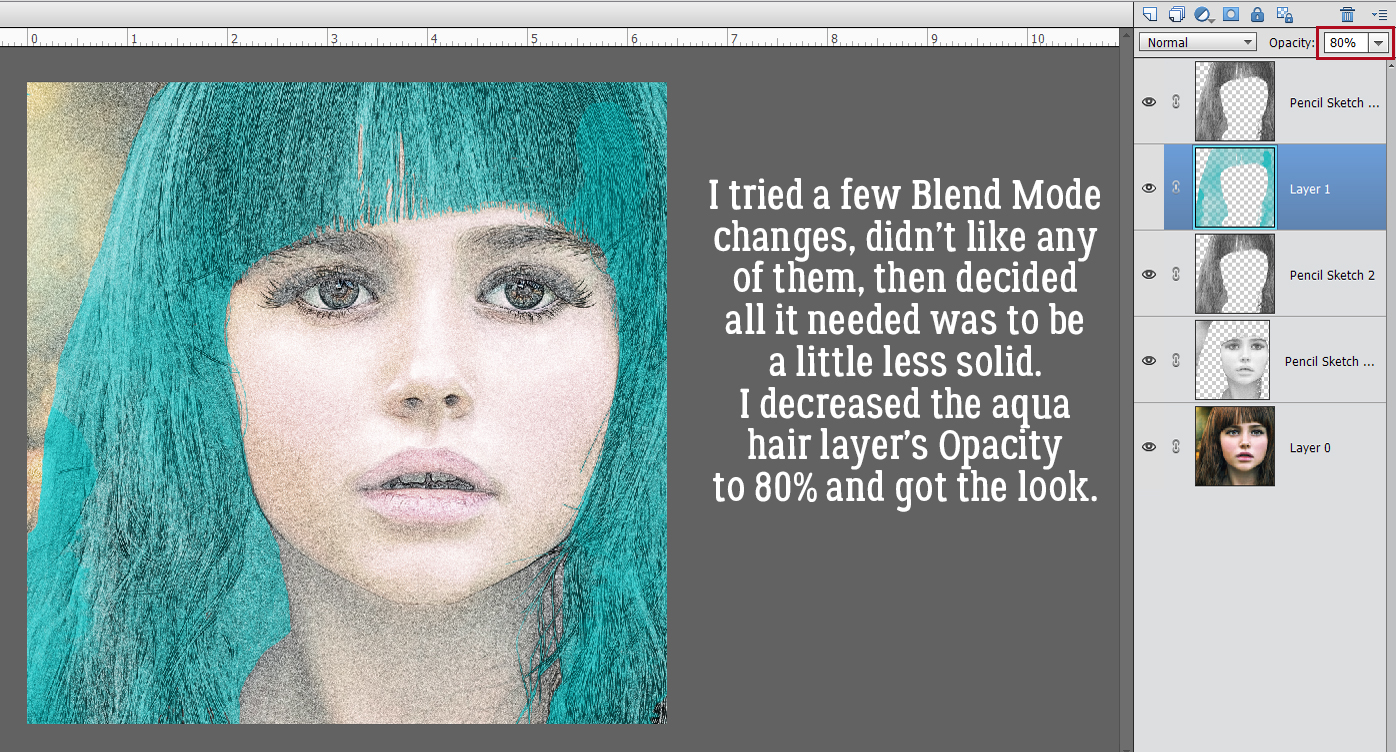
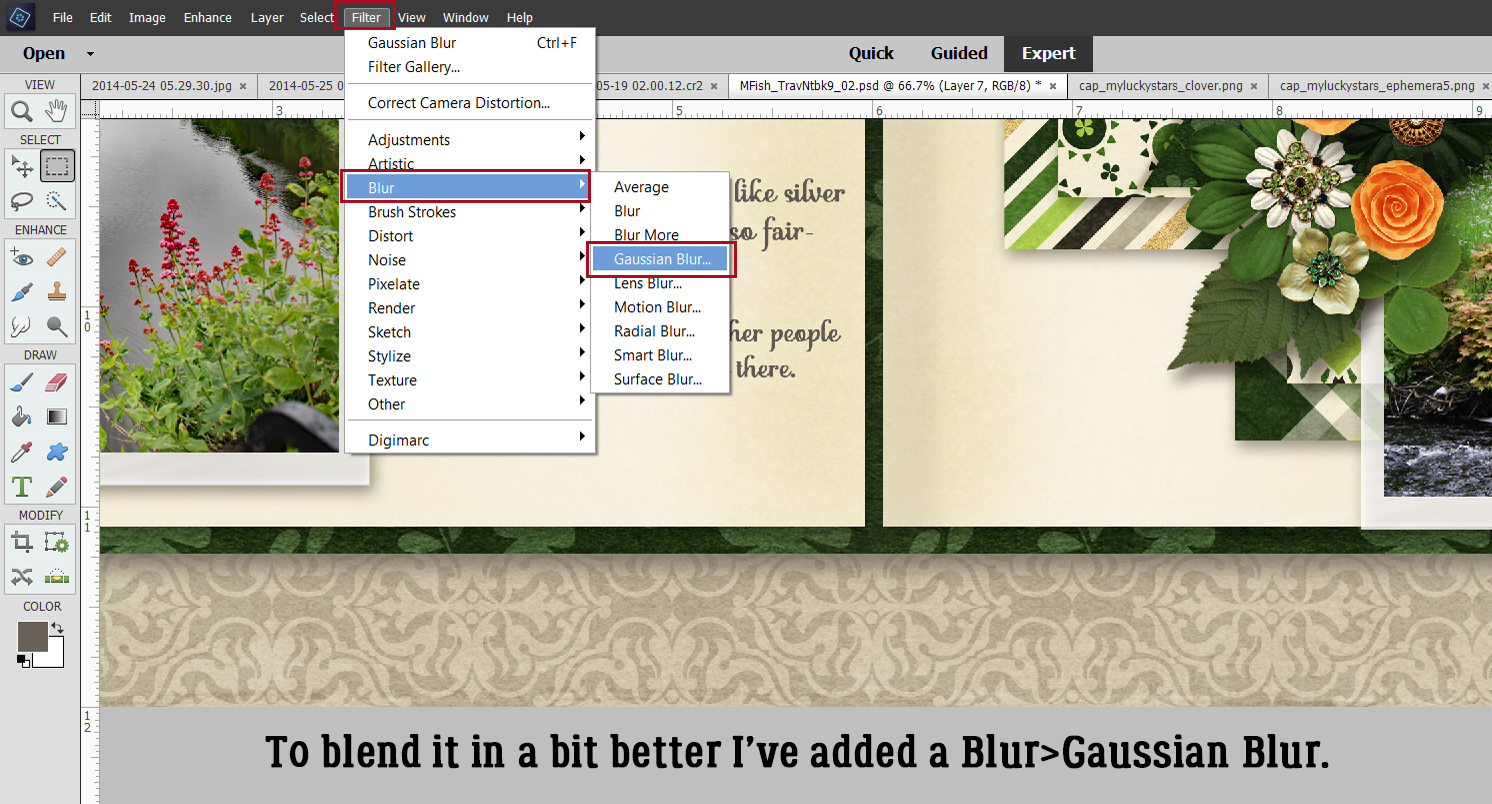
So I played with some Blend Modes and decided all I needed to do was decrease the Opacity of the painted hair layer to 80%. It looks pretty good, even if I say so myself. The untouched hair layer adds some necessary detail back to the hair, and the effect can be enhanced with Blend Modes if desired.
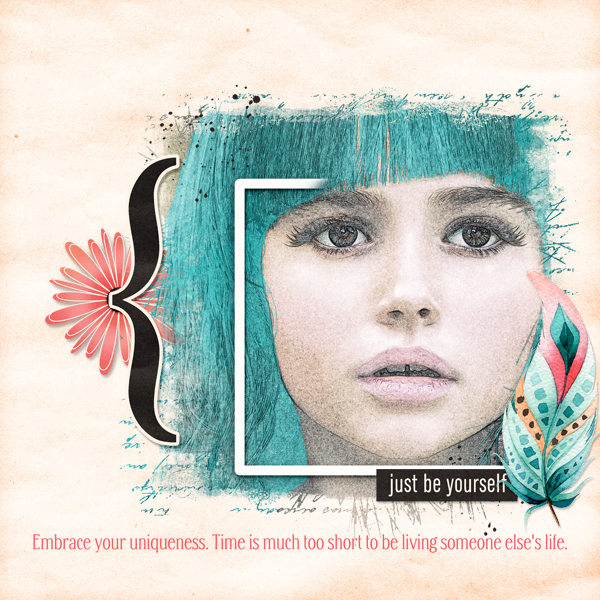
Here’s what it looks like on a layout. I used a mask-and-frame combo in PSD form so that I could move the frame around. I’m really pleased.
Again, I apologize for the formatting mess I’ve made here. I haven’t figured out how to make spacing adjustments in WordPress when I’ve had to move an image around. Or when I’ve made a booboo after I’ve added the images. It’s a problem!
Sherri, I haven’t forgotten about your paper-punch-tear but haven’t figured it out yet. It’s a work in progress…
PDF Version : https://bit.ly/3wy8xkz


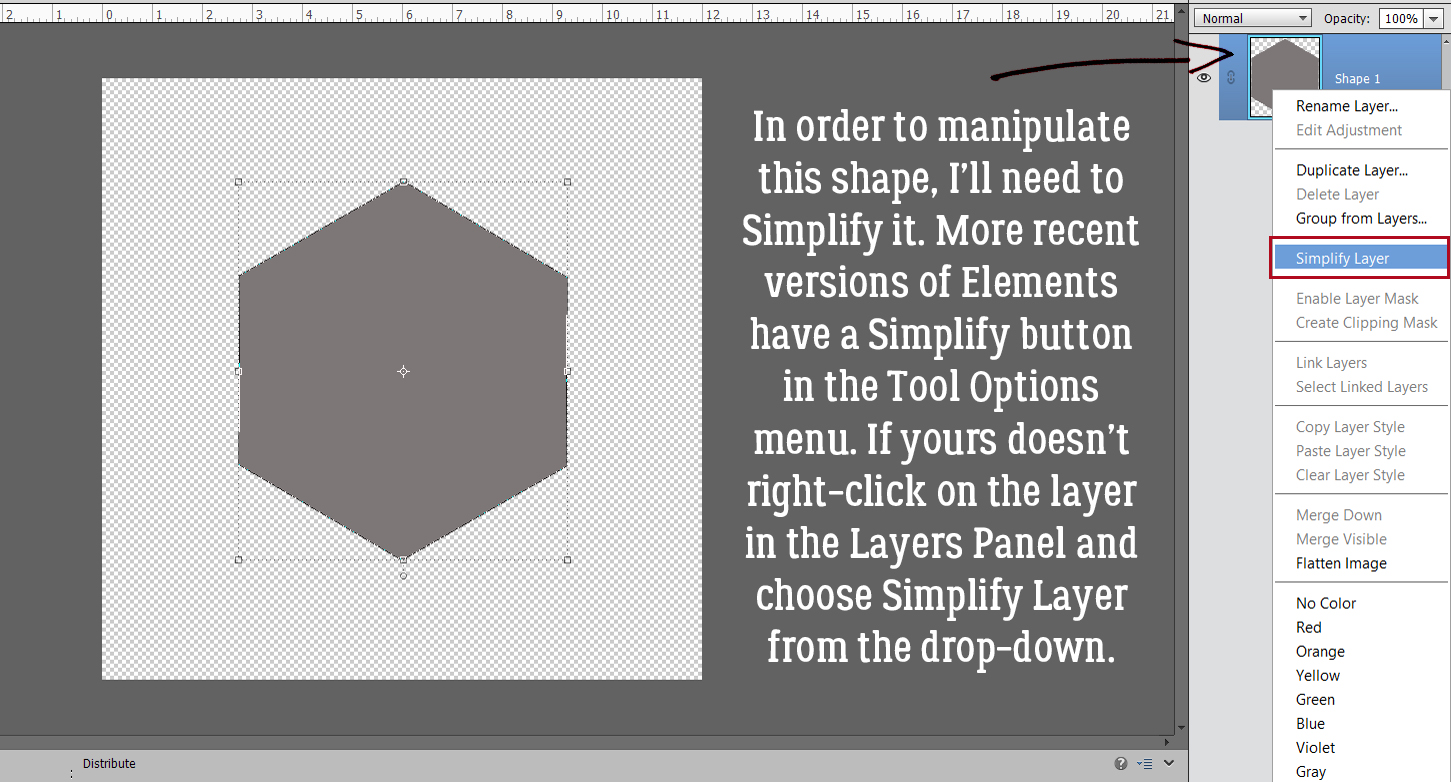


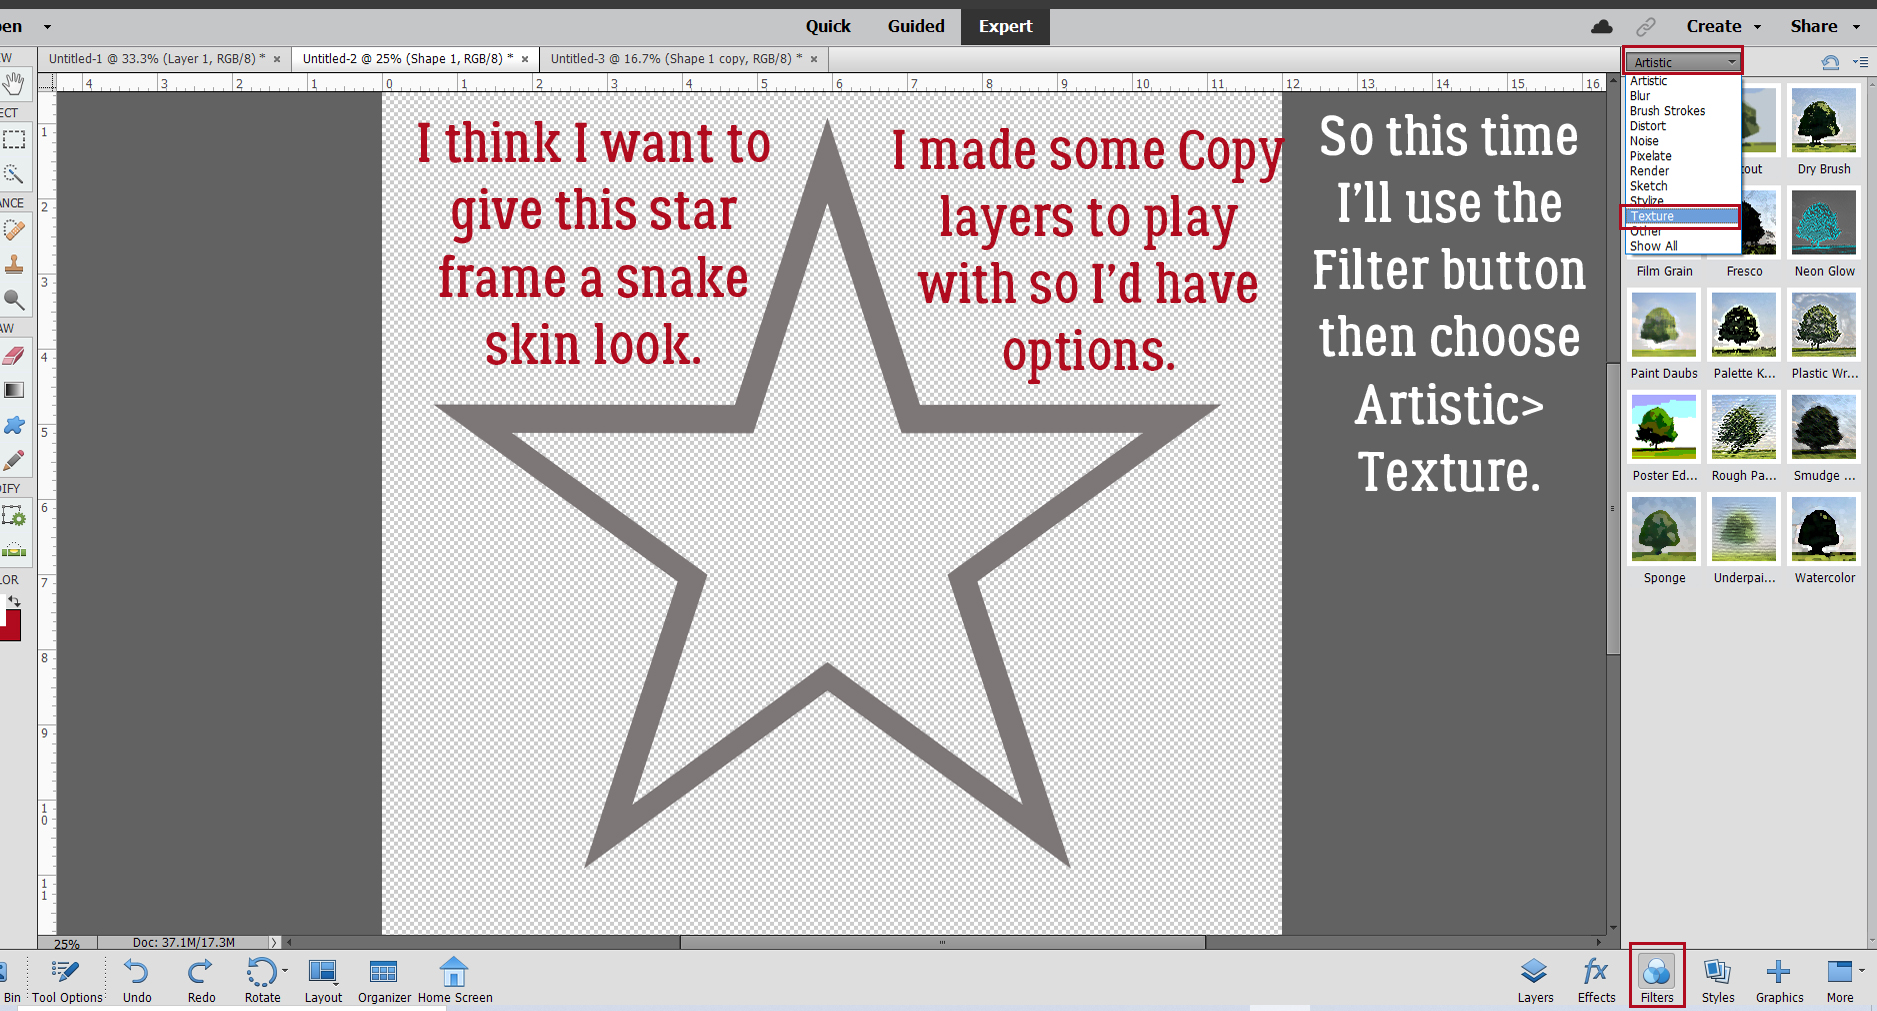
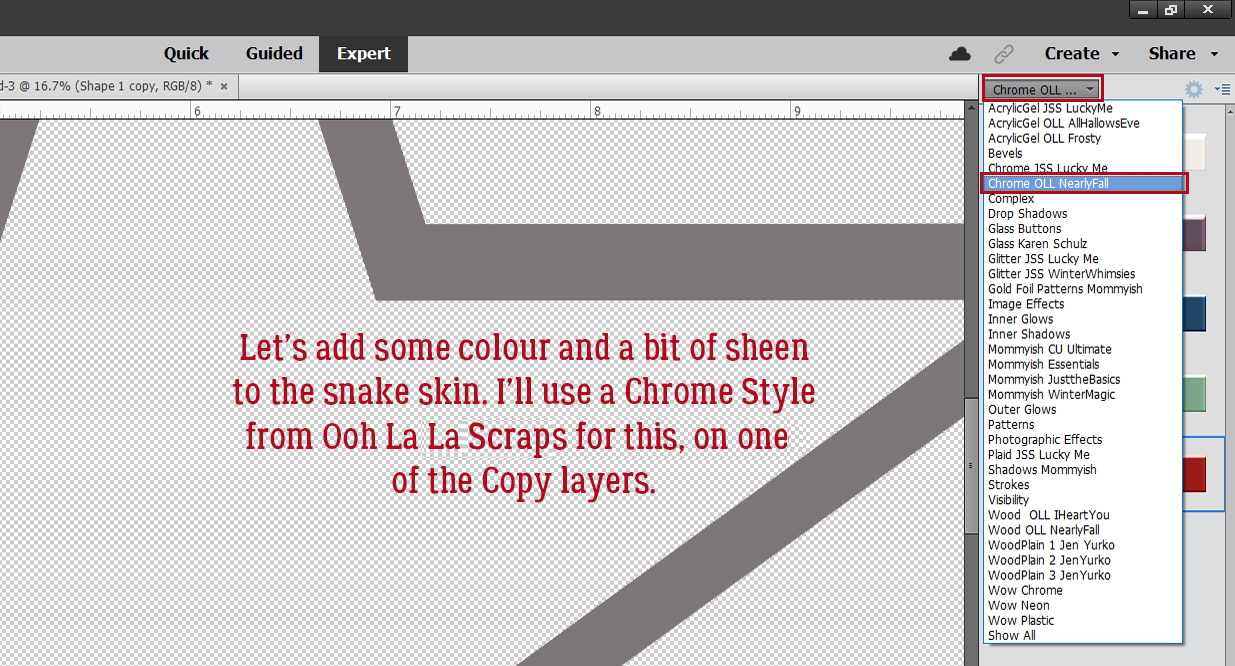
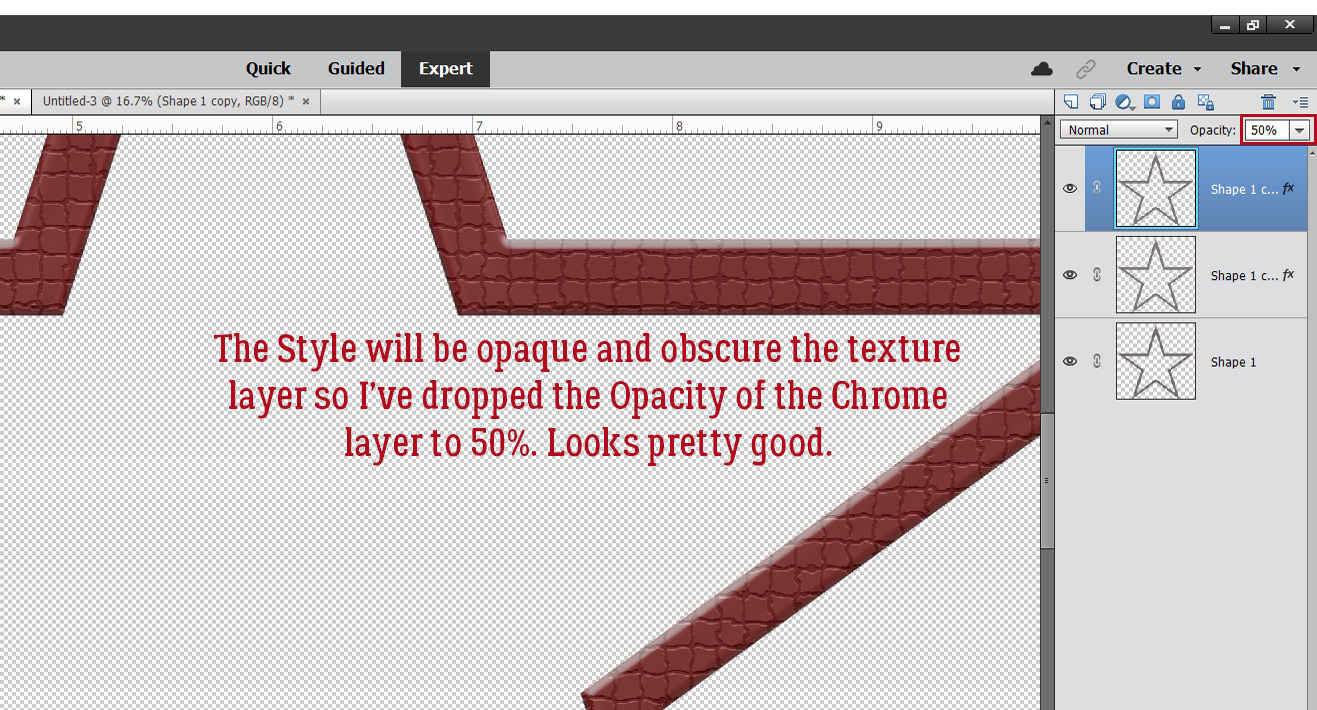
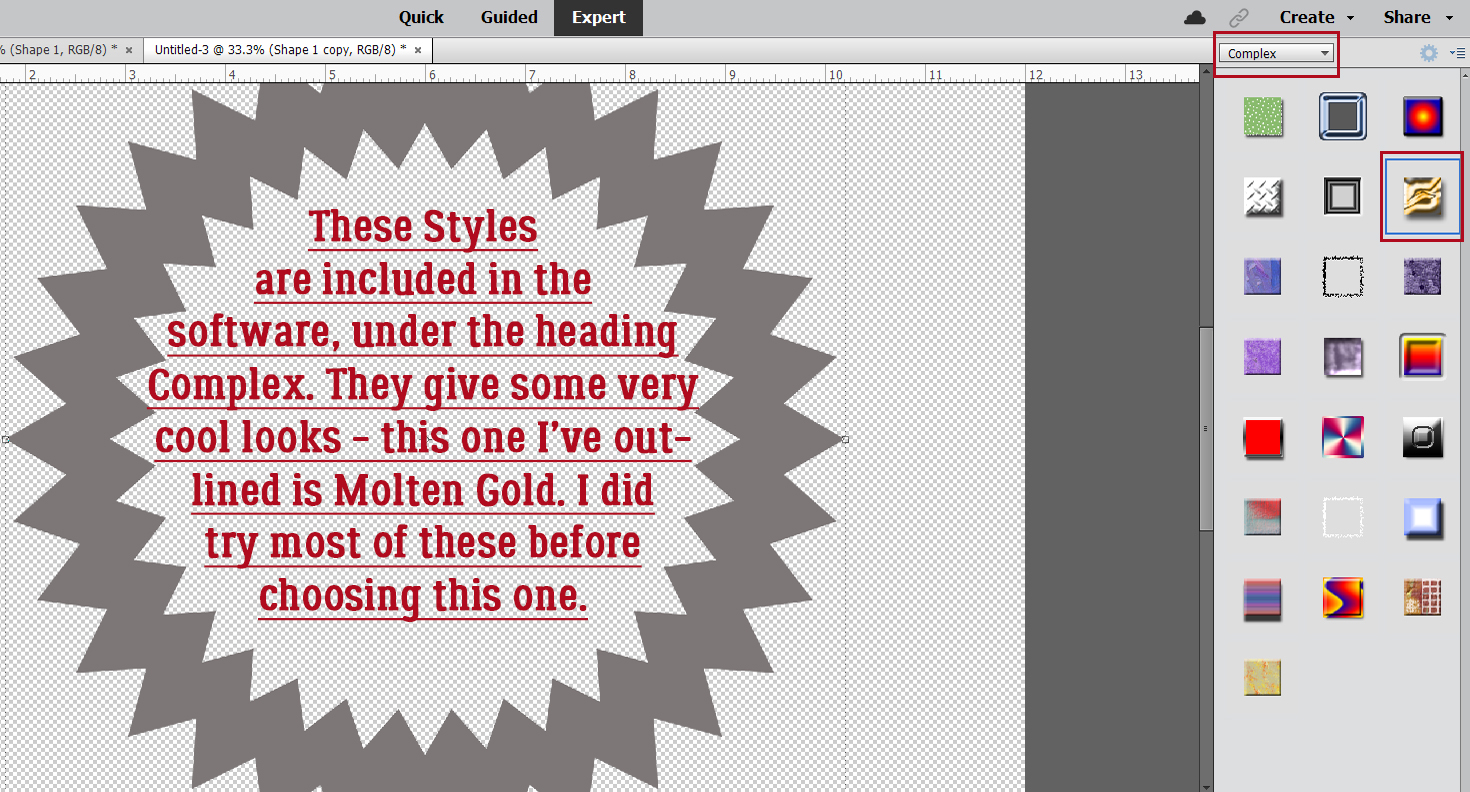
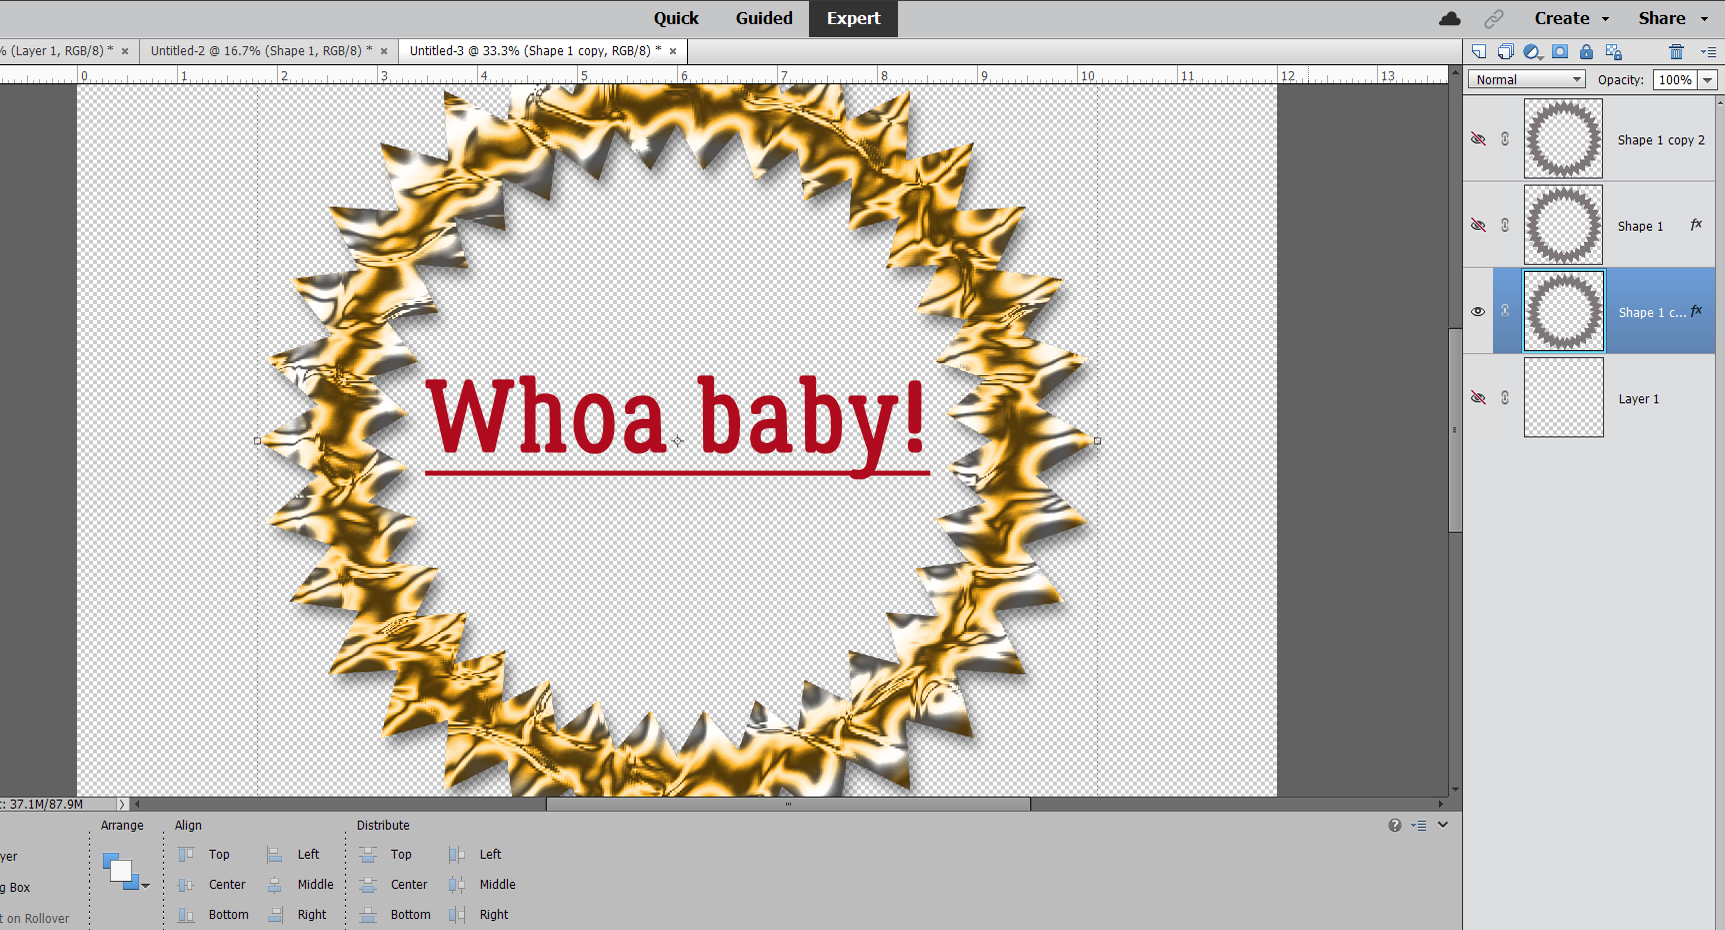
 We’ll come back to the hexagon in a minute. What if you chose a more complicated shape, like this seal? You can use all the controls in the Tool Options, like using Defined Size, and if you tick the From Center box, Elements will put the shape right in the centre of the canvas. Here, I’ve shown the Simplify button (the one you may not have). Experiment with your software; the more you play with it, the better you’ll understand what it can do and what it can’t. (And these tutorials will make more sense…) You’ll find a system and a rhythm that works for you.

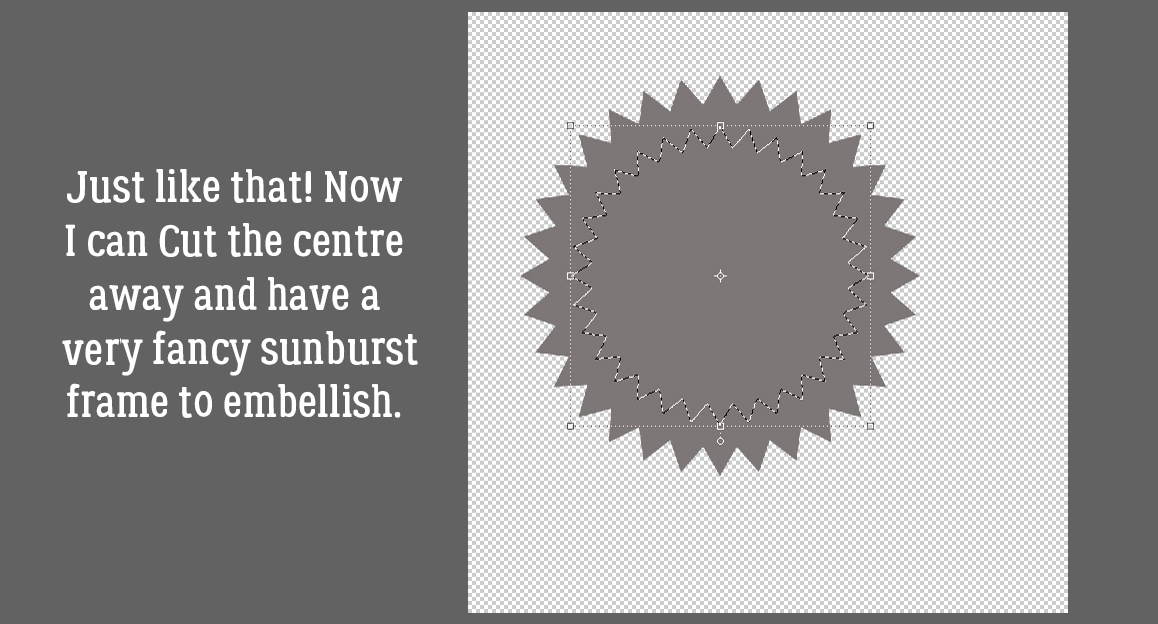
 Quick-and-easy border making uses the Stroke Edit. CTRL/CMD>click on the Layer Thumbnail to “Select” the edges of the hexagon, inside and out. Make sure you’re on the blank layer, then Edit>Stroke (Outline) Selection.