Archives for January 2018

Fresh Baked: January 12, 2018

Another week down. Kids are back in school, and schedules are returning more to normal. All the slowdown means is that there’s more time to scrap the memories. And this week, the designers have some amazing kits and templates to help you create the perfect layout!

Remember when you spend $10 in the store, you get a great new collab!

fwp_thumb3_thumb
https://store.gingerscraps.net/GingerBread-Ladies-Collab-Stick-To-It.html

just01
Collection: https://store.gingerscraps.net/Hot-Cocoa-Bundled-Collection-by-JB-Studio.html
Stickers: https://store.gingerscraps.net/Hot-Cocoa-Stickers-by-JB-Studio.html
Masks: https://store.gingerscraps.net/Hot-Cocoa-Masks-and-Overlay-by-JB-Studio.html

krist01
https://store.gingerscraps.net/CU-Heart-Box-Layered-Templates.html

krist02
https://store.gingerscraps.net/CU-Hexagonal-Box-Layered-Template.html

lauries01
https://store.gingerscraps.net/Explore-The-Stars-GrabBag.html

lauries02
Bundle: https://store.gingerscraps.net/Say-Ahhh-Bundle.html
Kit: https://store.gingerscraps.net/Say-Ahhh-PageKit.html
Flairs: https://store.gingerscraps.net/Say-Ahhh-Flairs.html
Grunge: https://store.gingerscraps.net/Say-Ahhh-Grunge.html
Ombre Papers: https://store.gingerscraps.net/Say-Ahhh-OmbrePapers.html
Titles: https://store.gingerscraps.net/Say-Ahhh-Titles.html
Journal Cards: https://store.gingerscraps.net/Say-Ahhh-JournalCards.html

lindsay01
https://store.gingerscraps.net/Stacked-Pieces-17-Templates-by-Lindsay-Jane.html

lindsay02
https://store.gingerscraps.net/Stacked-Pieces-18-Templates-by-Lindsay-Jane.html

luv
https://store.gingerscraps.net/Be-A-Unicorn-by-Luv-Ewe-Designs.html

mags01
https://store.gingerscraps.net/Best-Gift-of-All-Mini-KIT-by-MagsGraphics.html

missfish01
https://store.gingerscraps.net/The-Odds-and-Evens-Template-Bundle-by-Miss-Fish.html

neia
https://store.gingerscraps.net/Neia-Scraps/

ponytails
https://store.gingerscraps.net/Silver-and-Gold.html

scraps01
https://store.gingerscraps.net/The-Sound-of-Music-by-Scraps-N-Pieces.html

tinci
Clustered: https://store.gingerscraps.net/Precious-album-5.-Clustered.html
Basic: https://store.gingerscraps.net/Precious-album-5.-Basic.html

whimpy
https://store.gingerscraps.net/Wimpychompers/

aimee01
https://store.gingerscraps.net/Word-Up-2-Templates-by-Aimee-Harrison.html

aimee02
https://store.gingerscraps.net/Shape-It-1-Templates-by-Aimee-Harrison.html

aimee03
Mega Collection: https://store.gingerscraps.net/Ode-to-Joy-Mega-Collection-by-Aimee-Harrison.html
Kit: https://store.gingerscraps.net/Ode-to-Joy-Page-Kit-by-Aimee-Harrison.html
Alphas: https://store.gingerscraps.net/Ode-to-Joy-Alpha-Sets-by-Aimee-Harrison.html
Add-On: https://store.gingerscraps.net/Ode-to-Joy-Christmas-Eve-Elements-Add-on-by-Aimee-Harrison.html
Borders: https://store.gingerscraps.net/Ode-to-Joy-Borders-by-Aimee-Harrison.html
Journal Cards: https://store.gingerscraps.net/Ode-to-Joy-Journal-Cards-by-Aimee-Harrison.html
Gift Tags: https://store.gingerscraps.net/Ode-to-Joy-Gift-Tags-by-Aimee-Harrison.html
Greeting Cards: https://store.gingerscraps.net/Ode-to-Joy-Greeting-Cards-by-Aimee-Harrison.html
Ombre Papers: https://store.gingerscraps.net/Ode-to-Joy-Ombre-Papers-by-Aimee-Harrison.html
Stamps: https://store.gingerscraps.net/Ode-to-Joy-Stamps-by-Aimee-Harrison.html
Messy Edges: https://store.gingerscraps.net/Ode-to-Joy-Messy-Edges-by-Aimee-Harrison.html
Glitters: https://store.gingerscraps.net/Ode-to-Joy-Shimmers-by-Aimee-Harrison.html

blue
https://store.gingerscraps.net/Hello-2018.html

boomers
https://store.gingerscraps.net/Better-Together-BGD.html

cathyk
https://store.gingerscraps.net/Formal-Night-Mini-Kit.html

connie01
Word Art and Flair Pack: https://store.gingerscraps.net/Travelogue-Montana-Word-Art-and-Flair-Pack-by-Connie-Prince.html
Bundle Pack: https://store.gingerscraps.net/Travelogue-Montana-Bundle-Pack-by-Connie-Prince.html
Kit: https://store.gingerscraps.net/Travelogue-Montana-Kit-by-Connie-Prince.html
Word Bits: https://store.gingerscraps.net/Travelogue-Montana-Word-Bits-by-Connie-Prince.html
Templates: https://store.gingerscraps.net/Travelogue-Montana-12×12-Temps-CU-Ok-by-Connie-Prince.html

connie02
https://store.gingerscraps.net/January-2018-Template-Bundle-by-Connie-Prince.html

craft
https://store.gingerscraps.net/Craft-Templates-Seasons-Winter2.html

dandelion
https://store.gingerscraps.net/Winter-Wonderland-Digital-Scrapbook-By-Dandelion-Dust-Designs.html

daydreams
Bundle: https://store.gingerscraps.net/New-Beginnings-Bundled-Collection-by-Day-Dreams-n-Designs.html
Kit: https://store.gingerscraps.net/New-Beginnings-Kit-by-Day-Dreams-n-Designs.html
Glitter Papers: https://store.gingerscraps.net/New-Beginnings-Glitter-Papers-by-Day-Dreams-n-Designs.html
Extra Papers: https://store.gingerscraps.net/New-Beginnings-Extra-Papers-by-Day-Dreams-n-Designs.html

heather
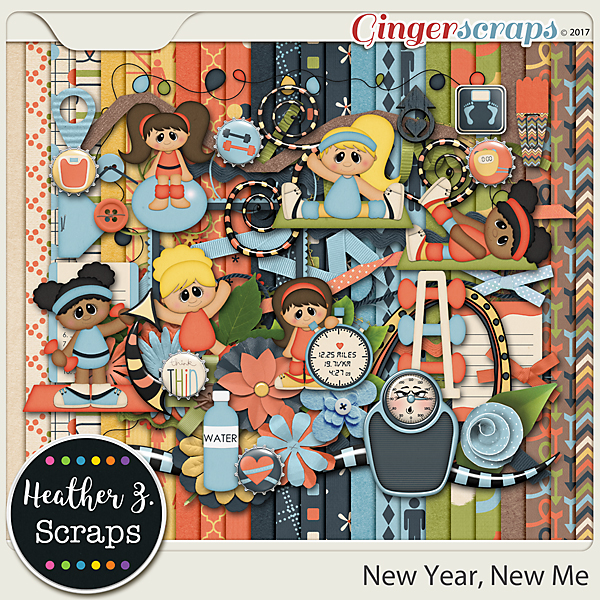
https://store.gingerscraps.net/Woodland-Winter-KIT-by-Heather-Z-Scraps.html

jocee
https://store.gingerscraps.net/selfie-time-kit.html

ad03_thumb
https://store.gingerscraps.net/Miss-Fish-Templates/

ad06_thumb
https://store.gingerscraps.net/Heather-Z-Scraps/

ad01
https://eepurl.com/o9Aa1

Remember, if you complete 10 challenges, just ten, you get a free kit as well!!

cr_thumb3_thumb
Get ready to get yourself a pen pal for this kit!

Sneak Peeks January 11th, 2018

Happy Thursday!! How is 2018 treating everyone? Our Designers have a ton of great new releases debuting tomorrow! Lets take a look!

From Craft-tastrophic

From Ponytails

From Aimee Harrison

From Heather Z

From Neia Scraps

From JoCee Designs

From Tinci

From Luv Ewe

From CathyK

From JB Studio

From Miss Fish

Check back tomorrow to see all the awesomeness our designers have created!

Tutorial Tuesday (Photoshop Elements)

Like Snowflakes… No Two ALIKE

Hey GingerScrappers! Are you ready for another technique (or two)? This week’s tutorial shows two ways of using the Custom Shape tool and reviews customising shadows in Elements. The inspiration for it came from comments in the Gallery on two of my layouts, each with a paper snowflake. I used templates for both of them but that doesn’t mean I can’t show you how the effects were achieved. For the examples I used the January Buffet collection from Just So Scrappy called Bundle Up. I started with a 12×12 page on my workspace. For the first part of the tutorial the background paper is a darker blue one with white spots and the gray stripe for the snowflake.

After I moved the blue spotted paper onto the page, I chose the Custom Shape tool, the one that looks like an amoeba. I also chose a light colour to create my shape so my tired old eyes could see it.

There are a number of options in the tool menu. I selected the Nature folder from the drop-down default shapes, chose a hefty snowflake from the folder and set it to Defined Proportions. This makes sure that my shape is as tall as it is wide. Symmetry is important in a snowflake!

There are two ways to Simplify shape layers. Don’t forget this step. It’s what gives you the upper hand over the snowflake. You can do it right from the Shape tool menu or you can right-click on the layer and select Simplify Layer as shown.

Then you’re going to clip a paper to the shape. The keyboard shortcut is CTRL/CMD>G for versions below 14 and CTRL/CMD>ALT>G in versions above 14.

Now let’s give our paper snowflake a custom shadow. You might recall a previous tutorial on this subject, so this will be a review. The full set of steps is described in the second technique. (After I made all my screenshots I decided I should reverse the order of the two techniques and didn’t want to go back and redo it all… Sorry!)

The steps are: New Layer below the cutout, Select the shape by CTRL/CMD>clicking on the shape layer thumbnail and filling the selected area with your shadow colour with the Paint Bucket tool. Then you want to move the shadow layer over and down in the direction your light source is coming from.

To really customise it and make your paper snowflake look 3-D, use the Smudge tool to gently move the shadows around. Think about how much light will get underneath the paper and nudge the shadow closer where the paper will lay flatter, farther away where it might lift.

If you’re working on a darker background and it’s too hard to see what you’re doing, turn the background layer(s) visibility off.

Aha! A typo!! That should say Gaussian BLUR! It’s found in the Filters menu. It softens the edges of your shadow to make it look more realistic. Change the Blend Mode to Linear Burn and decrease the Opacity until it looks like a nice shadowy bit.

There it is! A paper snowflake sitting pretty on your background paper.

But let’s add some pizazz! For this step I used a wrinkled fabric brush I picked up free from Brusheezy. The brushes in this set have a maximum size of 2500×2500 pixels so I had to make my paper snowflake and its shadow small enough to completely cover it with the brush. To make sure the brush only covers the snowflake, I Selected the edges of it (CTRL/CMD>click on the layer thumbnail) then created a New Layer on TOP of the snowflake layer. I ALWAYS put my brushes on their own layer so I can play with them without affecting anything else.

I used the same colour as my shadow. It looks a bit too dark and opaque, but I’m going to change that.

As you can see in the screenshot below, you CAN use two different Blend Modes on one brush. I used Color Burn when I put the brush on the layer and then Multiply afterward. The effect is subtle but pleasing.

Then I pulled down the Opacity of the brush layer so the stripes show through again but the wrinkles are still there. The only flaw is that this technique does change the colour of the paper somewhat.

See? Now it’s so much more interesting to look at than a plain paper cutout!

Now let’s flip this around. Start with the gray striped paper.

Follow the shape-creation steps as before. I used the same snowflake shape.

As mentioned above, do use the Tool options. They make life so much easier. Play around with them to see how they change things.

Look familiar? Only for a few more minutes!

Simplify the shape layer.

Now drop the blue spotted paper on top of the gray striped paper and the shape layers.

Select your shape. Make sure you’re on the BLUE paper layer.

Cut the shape out of your paper. Instead of having a paper snowflake on top of your blue paper, you’ll have a snowflake-shaped hole in it.

And it’ll be the colour of your shape until you delete that layer or turn it off.

Here we are again. It looks a lot like the first one right now.

Select the blue paper layer by CTRL/CMD>clicking on the layer thumbnail, just like before.

Create a new layer underneath the blue paper. Fill it with the Paint Bucket and your shadow colour.

Move it over and down in the direction your light is coming from.

There it is! In this iteration it’s easy to see so you can start Smudging it to make your 3-D effect.

“Lift” the paper where it might curl a bit, anchor it down where it should rest close to the background. Once you’ve done this shadow technique a few times, it becomes very quick and easy. Trust me! I almost never use shadow styles any more.

Here are your detailed instructions for the Gaussian Blur filter.

Clicking on the edge of the shadow somewhere gives you a preview in the adjustment box so you can see how much the edges soften. Don’t go crazy.

Pull down the Opacity

change the Blend Mode to Linear Burn and BOOM! You’re done!

Almost exactly the same steps, but such different looks!!

Next week I think I’m going to show you some photo manipulation tricks that you can use for the Inspiration Challenge. Stay tuned!

Let’s Celebrate – The New Year!

Happy 2018 scrappers! Here we are at the start of a new year. Let us hope that this year doesn’t blow past us like 2017 did. Did you celebrate the new year? Did you stay up until midnight and kiss 2017 goodbye? I didn’t. It was the 1st year I didn’t actually. I was just too tired to stay up. Didn’t even get any photos either. However, I know most of you all did! So today we are going to take a look in the store at all the new New Year goodies. There are a lot of them this year.


There you go. Just a glimpse into the selection of New Year products offered here at GingerScraps.  There are 20 pages of goodies! If none of these are what you are looking for, make sure to check out the New Years section in the store.  I pray that 2018 treats us all kind. That we have a wonderful year full of memories that are scrapped.

We would love to see your layouts with these or any other new year products offered here at GingerScraps. Make sure you upload your layouts in the gallery and then come back here and link us up! We would love to see your creations and leave you some love.

Fresh Baked: January 05, 2018

The first week of January just flew by. So much is happening. Crazy snowstorms. Even the warm areas are getting hit with cold. That’s just a great excuse to stay bundled up inside and get some of those memories from 2017 scrapped! And working on making new ones in 2018!

Remember when you spend $10 in the store, you get a great new collab!

fwp_thumb3
https://store.gingerscraps.net/GingerBread-Ladies-Collab-Stick-To-It.html

kristmess01
https://store.gingerscraps.net/Daze-Page-Kits-Bundle.html

kristmess02
https://store.gingerscraps.net/Daze-Trios-Big-Bundle.html

kristmess03
https://store.gingerscraps.net/CU-Month-Overlays.html

lauries01
https://store.gingerscraps.net/Say-Ahhh-GrabBag.html

lauries02
https://bit.ly/2CrZvH5

lindsay01
https://store.gingerscraps.net/New-Me-Collection-by-Lindsay-Jane.html

lindsay02
https://store.gingerscraps.net/New-Me-by-Lindsay-Jane.html

luvew01
https://store.gingerscraps.net/Document-Life-January-2018-Grab-Bag-by-Luv-Ewe-Designs.html

missfish01
https://store.gingerscraps.net/3-s-Company-Templates-by-Miss-Fish.html

missfish02
https://store.gingerscraps.net/Month-by-Month-January-Templates-by-Miss-Fish.html

aimee01
Collection: https://store.gingerscraps.net/Midwinter-Chill-Collection-by-Aimee-Harrison.html
Kits: https://store.gingerscraps.net/Midwinter-Chill-Page-Kit-by-Aimee-Harrison.html
Alphas: https://store.gingerscraps.net/Midwinter-Chill-Alpha-Sets-by-Aimee-Harrison.html
Borders: https://store.gingerscraps.net/Midwinter-Chill-Borders-by-Aimee-Harrison.html
Blooms: https://store.gingerscraps.net/Midwinter-Chill-Blooms-by-Aimee-Harrison.html
Messy Edges: https://store.gingerscraps.net/Midwinter-Chill-Messy-Edges-by-Aimee-Harrison.html
Stamps: https://store.gingerscraps.net/Midwinter-Chill-Stamps-by-Aimee-Harrison.html
Glitters: https://store.gingerscraps.net/Midwinter-Chill-Glitters-by-Aimee-Harrison.html

aimee02
Collection: https://store.gingerscraps.net/Silver-and-Gold-Collection-by-Aimee-Harrison.html
Kit: https://store.gingerscraps.net/Silver-and-Gold-Page-Kit-by-Aimee-Harrison.html
Alphas: https://store.gingerscraps.net/Silver-and-Gold-Alpha-Sets-by-Aimee-Harrison.html
Borders: https://store.gingerscraps.net/Silver-and-Gold-Borders-by-Aimee-Harrison.html

blue01
https://store.gingerscraps.net/Set-Your-Own-Path-6-Grab-Bag.html

blue02
https://store.gingerscraps.net/Week-By-Week-Journal-Card-Pack.html

boomers01
https://store.gingerscraps.net/Coffee-and-Cocoa-BGD.html

cathyk01
All Products in Collection: https://bit.ly/2zUXLE2
Bundle: https://store.gingerscraps.net/Winterberry-Frost-Bundle.html
Kit: https://store.gingerscraps.net/Winterberry-Frost-Kit.html
Papers: https://store.gingerscraps.net/Winterberry-Frost-Papers.html
Elements: https://store.gingerscraps.net/Winterberry-Frost-Elements.html
WordStrips: https://store.gingerscraps.net/Winterberry-Frost-Word-Strips.html
Masks: https://store.gingerscraps.net/Winterberry-Frost-Masks.html
Extra Papers: https://store.gingerscraps.net/Winterberry-Frost-Extra-Papers.html
Alphas: https://store.gingerscraps.net/Winterberry-Frost-Alphas.html

cathyk02
All Products in Collection: https://bit.ly/2zUXLE2
Kit: https://store.gingerscraps.net/Winterberry-Frost-Kit.html
Papers: https://store.gingerscraps.net/Winterberry-Frost-Papers.html
Elements: https://store.gingerscraps.net/Winterberry-Frost-Elements.html

craft01
https://store.gingerscraps.net/Craft-Templates-Seasons-Winter1.html

dandelion01
https://store.gingerscraps.net/TGIF-Digital-Scrapbook-Kit-By-Dandelion-Dust-Designs.html

daydreams01
Collection: https://store.gingerscraps.net/Snowman-Kisses-Bundled-Collection-by-Day-Dreams-n-Designs.html
Kit: https://store.gingerscraps.net/Snowman-Kisses-Kit-by-Day-Dreams-n-Designs.html
All packs: https://bit.ly/ddnd-GS

dearfriends01
https://store.gingerscraps.net/Wanderlust.html

heartstrings
https://store.gingerscraps.net/Ode-to-Joy-Templates.html

heatherz01
Bundle – https://store.gingerscraps.net/Away-in-a-Manger-BUNDLE-by-Heather-Z-Scraps.html
Kit – https://store.gingerscraps.net/Away-in-a-Manger-KIT-by-Heather-Z-Scraps.html
Word Bits – https://store.gingerscraps.net/Away-in-a-Manger-WORD-BITS-by-Heather-Z-Scraps.html
Embossed Papers – https://store.gingerscraps.net/Away-in-a-Manger-EMBOSSED-PAPERS-by-Heather-Z-Scraps.html

jbstudios01
https://store.gingerscraps.net/Catching-Snowflakes-Digital-Kit-by-JB-Studio.html

jocee01
Bundle: https://store.gingerscraps.net/Year-in-Review-Bundle.html
Kit: https://store.gingerscraps.net/Year-in-Review-Kit.html
Alphas: https://store.gingerscraps.net/Year-in-Review-Alphas.html
Flairs: https://store.gingerscraps.net/Year-in-Review-Flairs.html
Clusters: https://store.gingerscraps.net/Year-in-Review-Clusters.html
Word Grunge: https://store.gingerscraps.net/Year-in-Review-Word-Grunge.html
Word Tags: https://store.gingerscraps.net/Year-in-Review-Word-Tags.html
Titles: https://store.gingerscraps.net/Year-in-Review-Titles.html
Papers: https://store.gingerscraps.net/Year-In-Review-Papers.html

ad01
https://store.gingerscraps.net/Luv-Ewe-Designs/

ad02
https://store.gingerscraps.net/Magical-Scraps-Galore/

ad03
https://store.gingerscraps.net/Miss-Fish-Templates/

ad04
https://goo.gl/UBQg62

ad05
https://bit.ly/ddnd-GS

ad06
https://store.gingerscraps.net/Heather-Z-Scraps/

ad07
https://eepurl.com/o9Aa1

Remember, if you complete 10 challenges, just ten, you get a free kit as well!!

cr_thumb3
Get ready to get yourself a pen pal for this kit!

Sneak Peeks January 4th, 2018

Happy New Year!!!! It’s 2018 and our designers have some great new goodies for this first week of the year!

From Luv Ewe Designs


From Craft-tastrophic

From Lindsay Jane

From Miss Fish

From Aimee Harrison

From Heather Z

From JB Studio


Have a wonderful weekend!

Tutorial Tuesday (Photoshop Elements)

Ahead of the CURVE

Happy New Year, GingerScrappers! I hope you’re all recovered from the holidays and ready to get back to work… at scrapping your memories, of course!

This tutorial was inspired by a comment left by Glee on the layout shown below. Can you guess what she mentioned? Yes, it was that curved, diminishing title.

I haven’t quite decided what the right side of this two-page spread will look like, but I know I won’t be using the same template, just a similar basic arrangement. I created two circles, overlapping but not concentric, with the photo smaller than the paper layer.

Using the alpha that came with the kit my papers and doodled fram

e are from (GingerBread Ladies Winter Fun) I started to add in my title. The letters must be resized to fit into the space between the edge of the paper and the edge of the photo. Having the doodled, glittery frame there might help… or not. The letters also must be tilted to follow the curve of the paper, with the axis of the letter perpendicular to the edge.

I added in each letter and made the same adjustments.

I was eyeballing the gap between the top and bottom of each letter and the edges of the paper and photo.

If you’re not confident in your ability to eyeball the gaps, I have a way to make it easier. Select the edge of the paper circle by clicking on the layer thumbnail in the Layers Panel.

Then click on Select>Modify>Contract… which will move your marching ants toward the centre of the paper circle.

I randomly picked the number 15 for my amount of shift.

There you can see how that 15 pixel shift has moved the edge inward.

Before you go any further, create a new blank layer over top of your paper layer so the outline will be separated from your paper. You don’t want to leave it active at the end so make it stand alone. Then click Edit>Stroke>10>(choose a contrasting colour like red)>Inside and leave the other adjustments at the default settings.

Now there’s a nice obvious line to follow that will help you offset your letters enough to make them prominent.

If you zoom in you can use this guideline to help position your letters.

I like the doodled, glittery circular frame, but it’s making lining up the bottoms of the letters more difficult. I might have to turn the visibility off.

Wait!! Maybe we should have a second guideline to make it easier.

You guessed it!

Click on the photo layer thumbnail, then Select>Modify>Expand>15 and commit the operation. Add your stroke to the outside this time.

And now there are two guidelines with the same distance from the edges of the photo and paper circles.

Once I had my title in the space and positioned just so, I moved the doodled, glittery frame on TOP of the letters, which helped to anchor them to the photo.

In this example, the letters gradually get bigger from beginning to end, whereas in my original layout they gradually got smaller. With the two guidelines deleted, the tops of the letters look sharply positioned. Easy peasy!

I’ll be looking for YOUR curved titles in the gallery!

~~New Challenges for 2018!!~~

Happy New Year!! This is one holiday and season that I know we ALL celebrate. A time for all things new…. new calendar year, new beginnings, and here at GingerScraps – NEW CHALLENGES. Yes… as if there weren’t enough opportunities for you to earn that fabulous reward collab, we have added more.

First up – we have a new Facebook Header Challenge. Do you love to change your Facebook timeline photo? Now you can scrap a new one each month and use it to add to your challenge total. The fabulous Misti of Miss Mis Designs is hosting the January Challenge.

This month, Misti challenges you to making a new header with the following rules:

1. Must include a word you are using to drive you through 2018 – or – your 2018 goal/resolution.
2. One picture that represents that word or goal

Next we have the new GingerScraps: Created with Rewards Challenge. This one will be hosted each month by our very own Ginger.

Each month you can create a LO using the rewards from the previous month! I’m so excited to see you beautiful layouts using our amazing shop collabs!

RULES:

  • Create a layout using the prior month Free With Purchase shop collab OR Challenge Reward Collab.
  • If you did not earn the collabs from the previous they are also available for purchase.

Since this is the January 2018 Created With Rewards challenge you will need to use one of the following collabs:

December 2017 Challenge Reward {Cabin Fever}

OR

December 2017 Free With Purchase {Winter Fun}

How much fun are these?

Remember, in order to get the Challenge collab:

Monthly Challenge Rules – 

  • You will receive the collab of the month in which you COMPLETE your 10 challenges.
    For Example:
    You do 5 in March, 2 in April and 6 in May – you would get the May collab.
    You do 7 in March and 4 in April – you get the April collab
    You do 10 each month you get EACH Collab!! (BEST DEAL!!)
  • Challenge rewards will be sent out after the 5th of the month
  • All challenges layouts must have at least 50% of GS products – Daily Download and Welcome wagon counts. (See individual challenge rules for specific rules on usage such as Designer Spotlight Challenge)
  • Speed Scraps and Chats DO NOT count towards your challenge rewards (of course your host will usually provide fun goodies for all attending their SS or Chat)
  • Every challenge must have a unique LO. Meaning, you can not use the same LO for more than 1 challenge.
  • You are responsible for tracking your completed challenges, find the monthly tracking thread in the “Cookie Jar”, and follow the guidelines.

Challenge Rewards:
Complete any 10 challenges, and you will receive a brand new designer collab!
Each month we will offer a brand new GingerBread Ladies collab as a reward for completing the GS challenges.

Complete any 10 challenges, during the month of January 2018, and receive this collab for FREE!!

Snail Mail: A collaboration from our GingerScraps designers
By Designers: JoCee Designs, Little Rad Trio, LouCee Creations, Neverland Scraps

  • 1 Full Alpha
  • 48 Papers
  • 113 Elements

I can’t wait to see some of the great layouts from these new challenges!!

Happy New Year From Gingerscraps!

Oh. Wow. Where did 2017 go? It’s time to start writing 2018 for everything! Time for fresh starts and more chances for memories!

It is the First of the month, and that means the revel of our new Buffet!!

Don’t forget to check out the Buffet Bundles, onae easy click to add bundles of Buffet goodies to your cart, and an amazing value too!

[Read more…]

DD: Jan 01

The time has come for a new Daily Download! Were you worried there wasn’t going to be one?
Before I show it off, it’s time to reveal the gorgeous one from last year (see what I did there?)!


https://store.gingerscraps.net/Silver-and-Gold-Page-Kit-by-Aimee-Harrison.html

The perfect kit to scrap those memories from the New Year and from the rest of the holidays!

And here is this month’s:

https://bit.ly/2kWxCQC

Time to face the year! Be Fearless!

Remember, the download is kept up for 5 days, and then it is taken down. If you miss pieces, the kit will be available for purchase on the first day of the following month.