Archives for May 2018

Sneak Peeks May 31st 2018

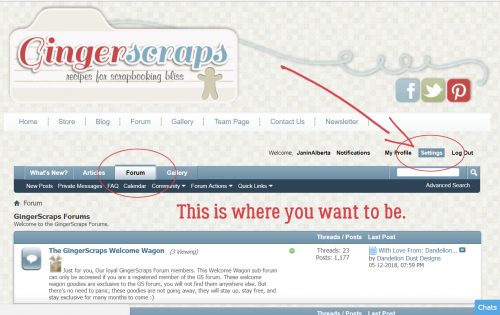
Happy Thursday! I always love when sneak peek Thursday falls before a new buffet! I get to show you all of the awesomeness coming tomorrow for the June Buffet!!


Before I show you all the buffet awesomeness, Clever Monkey Graphics has a new kit releasing tomorrow!

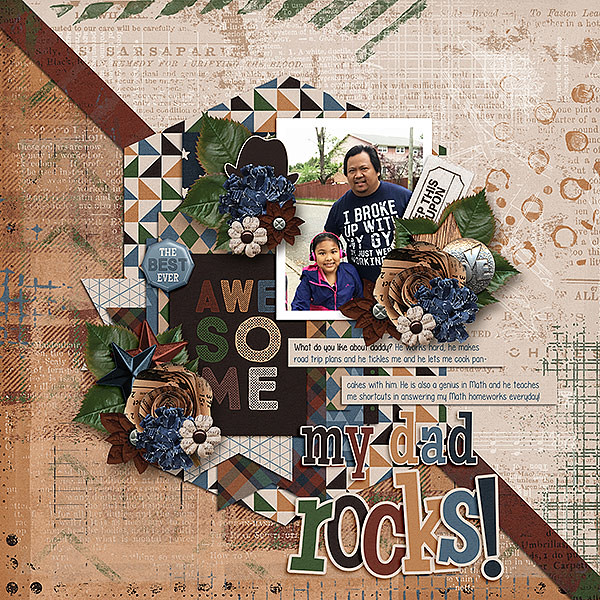
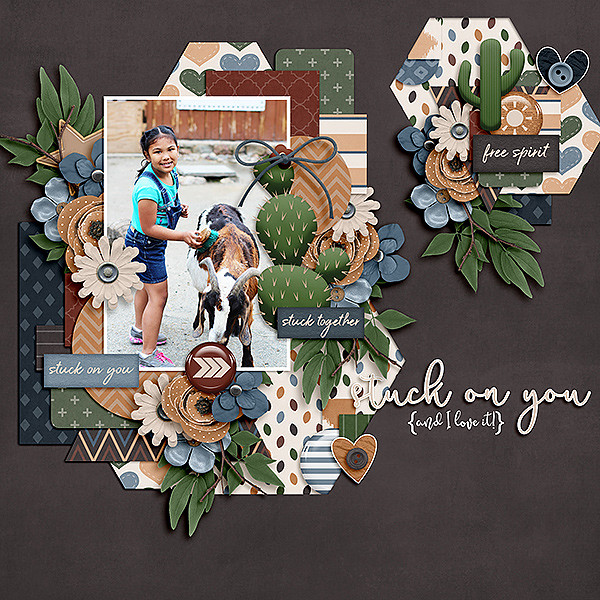
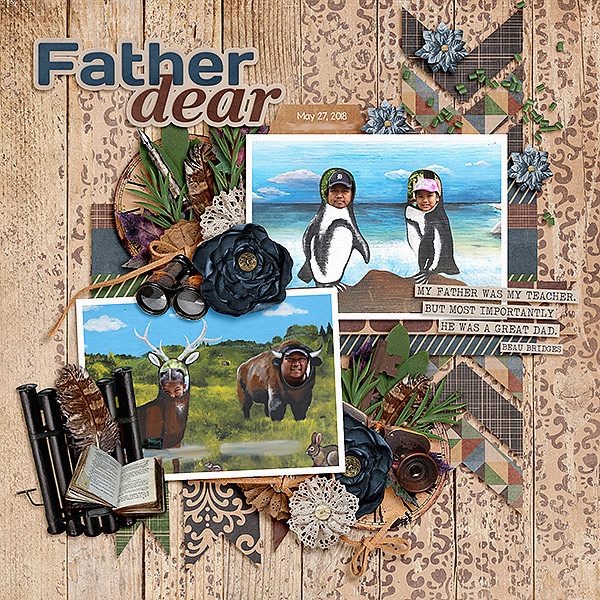
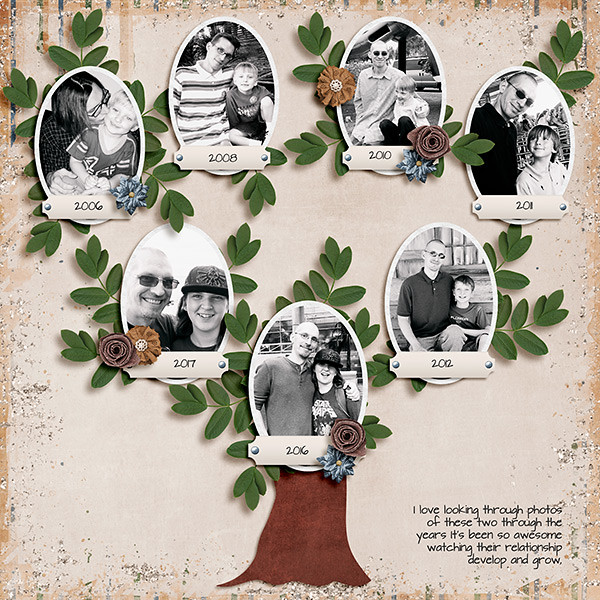
And now a peek of all the awesomeness coming to the Buffet!

Check back tomorrow to see all the new goodies!! Have a wonderful weekend!

Tutorial Tuesday (Photoshop Elements 13+)

Jailbird No More!

I had a crazy week between tutorials, with another hectic week now, so this week’s lesson will be a simple one. But I think you’ll be happy you’ve read it later! I’m going to show you a super-quick Guided Edit to help with those photos you have that would be GREAT if it weren’t for (fill in the photo flaw here) – you know, the ones where the subject is really off to one side, or there are people you don’t want in it but cropping is going to upset the balance, or there’s too much space between the people in the photo and you want them to look like they like each other. Below is the layout I did for this month’s GingerScraps: Created With Rewards challenge. I used the GingerBread Ladies‘ April challenge reward collab Birdsong and a template from Aimee Harrison for my layout. The photos are from Pixabay; Rochelle liked my layout enough that she nominated it for Baker’s Best! But, as you can see from the caption on my screenshot, the layout wasn’t without challenges.

The template was perfect for the layout I imagined creating, and I was on a roll until it was time to clip the photo of the bullfinch to the large photo spot… The following images show you a detailed view of what I’m talking about.

Sometimes life is easy and everything falls into place. Using a template saves a lot of time without taking away the creative part of digiscrapping. But then there’s a moment when it’s not going to save time at all!

When I’m getting ready to clip a photo to a photo spot on a template, I like to be sure it’s completely covering the spot… no little hint of tattle-tale gray peeking out anywhere. If I’m stuck for how much I can resize a photo and I don’t want to change the size or shape of the photo spot, I’ll click on the photo spot layer’s thumbnail so I can see the exact dimensions and location of the spot. If you look really closely at the image below you can see the selection bounding box that action provides.

So I was positive the entire photo spot was covered by my photo and I could go ahead and clip my photo. But holy guacamole… the poor bird looks really uncomfortable! I couldn’t make the photo smaller, so I had to think about how I’d solve this problem.

There’s a Guided Edit called Recompose. It lets you manipulate your photos without messing them up. It’s going to save the day for me.

Just in case you’re wondering, the photo cannot be already on your layout when you deploy this Edit. When you hit the Recompose button on the Edit menu, it’s going to recompose your whole layout. So open up your photo and THEN open the Guided Edit tab. Guided Edit>Special Edits>Recompose

The menu has an assortment of options you can use after you’ve gotten your basic Recompose completed. I’m not going to go into them today; it’s a much more complex tutorial that we’ll save for another day. So I clicked on the Recompose button and got rolling with my super-quick, easy basic Recomposition.

I opted to make the photo a little narrower, in keeping with the orientation of the photo spot I was using. To do that I pushed the bounding box handles IN toward the centre just a bit, as you can see in the photo.

Then I pulled the top and bottom handles OUT from the centre, stretching the background a bit but not distorting the bird in the middle.

At this point, I wasn’t positive I’d made enough of an adjustment to the photo to make it work. It didn’t need a lot of tweaking so I chose to click on the Next button down at the bottom right of the screen, the clicked on Continue Editing In Expert>Done. That took me back to my layout, with the edited photo in the Photo Bin. I dragged the photo back onto the template, resized it to cover the photo spot and clipped the photo to the spot. It was JUST RIGHT!

In a future tutorial I’ll show you a more advanced Recomposition that uses some of the other options with the tool. As soon as I have the right photo….

Fresh Baked: May 25, 2018

Grab a glass and open up a bottle of wine! It’s National Wine Day! While you’re sitting and relaxing, make sure you check out the goodies available now in the store! Summer is coming, schools are letting out, and we all need to just relax a little!

Remember when you spend $10 in the store, you get a great new collab! Boys are awesome and this kit celebrates all things DUDE!

fwp_thumb3_thumb_thumb_thumb
https://store.gingerscraps.net/GingerBread-Ladies-Collab-Dude.html

gingerbread
https://store.gingerscraps.net/GingerBread-Ladies-MEGA-Collab-Heroine.html

heather01
Bundle – https://store.gingerscraps.net/Celebrate-2018-May-BUNDLE-by-Heather-Z-Scraps.html
Kit – https://store.gingerscraps.net/Celebrate-2018-May-KIT-by-Heather-Z-Scraps.html
Expp – https://store.gingerscraps.net/Celebrate-2018-May-EXTRA-PAPERS-by-Heather-Z-Scraps.html
Journal Cards – https://store.gingerscraps.net/Celebrate-2018-May-JOURNAL-CARDS-by-Heather-Z-Scraps.html
Accents – https://store.gingerscraps.net/Celebrate-2018-May-ACCENTS-by-Heather-Z-Scraps.html
Word Bits & Dates – https://store.gingerscraps.net/Celebrate-2018-May-WORD-BITS-and-DATES-by-Heather-Z-Scraps.html

heather02
Cave Family – https://store.gingerscraps.net/Cave-Family-KIT-by-Heather-Z-Scraps.html
Space Family – https://store.gingerscraps.net/Space-Family-KIT-by-Heather-Z-Scraps.html

heather03
https://store.gingerscraps.net/Follow-Your-Arrow-TEMPLATES-VOL.-1-by-Heather-Z-Scraps.html

jocee
Bundle: https://store.gingerscraps.net/Gemini-Bundle.html
Kit: https://store.gingerscraps.net/Gemini-Kit.html
Alpha: https://store.gingerscraps.net/Gemini-Alpha.html
Cards: https://store.gingerscraps.net/Gemini-Cards.html
Glitters: https://store.gingerscraps.net/Gemini-Glitters.html
Basic Papers: https://store.gingerscraps.net/gemini-basic-papers.html

kaklei
https://store.gingerscraps.net/Serenity-kit-by-Kakleidesigns.html

kristmess
https://store.gingerscraps.net/CU-Italy-Layered-Templates.html

lauries
https://store.gingerscraps.net/Sports-Swimming-GrabBag.html

lindsay
Rec 9: https://store.gingerscraps.net/Page-Borders-Rec-9-by-Lindsay-Jane.html
Rec 10: https://store.gingerscraps.net/Page-Borders-Rec-10-by-Lindsay-Jane.html
Rec 11: https://store.gingerscraps.net/Page-Borders-Rec-11-by-Lindsay-Jane.html
Rec 12: https://store.gingerscraps.net/Page-Borders-Rec-12-by-Lindsay-Jane.html

missfish01
https://store.gingerscraps.net/Vacation-Album-SummerAdventure_TemplatesbyMissFish.html

missfish02
Traveler’s Notebook Bundle: https://store.gingerscraps.net/Traveler-s-Notebook-Bundle-1-by-Miss-Fish-Templates.html
Sea Worthy Templates: https://store.gingerscraps.net/Vacation-Album-2-Sea-Worthy-Templates-by-Miss-Fish.html
Vacation Album: https://store.gingerscraps.net/Vacation-Album-by-Miss-Fish.html

scraps
kit – https://store.gingerscraps.net/Proud-To-Be-An-American-kit-by-Scraps-N-Pieces.html
clusters – https://store.gingerscraps.net/Proud-To-Be-An-American-Clusters-by-Scraps-N-Pieces-SNP_PTBAAcl.html

tinci
https://store.gingerscraps.net/Cluster-and-colors-Cherry-garden.html

aimee
Collection: https://store.gingerscraps.net/360-Life-All-About-June-Collection-by-Aimee-Harrison.html
Kit: https://store.gingerscraps.net/360-Life-All-About-June-Page-Kit-by-Aimee-Harrison.html
Alphas: https://store.gingerscraps.net/360-Life-All-About-June-Alpha-Sets-by-Aimee-Harrison.html
Borders: https://store.gingerscraps.net/360-Life-All-About-June-Borders-by-Aimee-Harrison.html
Templates: https://store.gingerscraps.net/360-Life-All-About-June-Templates-by-Aimee-Harrison.html
Date Tabs: https://store.gingerscraps.net/360-Life-All-About-June-Date-Tabs-by-Aimee-Harrison.html
Titles: https://store.gingerscraps.net/360-Life-All-About-June-Titles-by-Aimee-Harrison.html
Quotes: https://store.gingerscraps.net/360-Life-All-About-June-Quotes-by-Aimee-Harrison.html
Messy Edges: https://store.gingerscraps.net/360-Life-All-About-June-Messy-Edges-by-Aimee-Harrison.html
Glitters: https://store.gingerscraps.net/360-Life-All-About-June-Glitters-by-Aimee-Harrison.html

boomers
https://store.gingerscraps.net/Rainbows-and-Unicorns-BGD.html

connie
Bundle: https://store.gingerscraps.net/Hunny-Bear-Core-Bundle-by-Connie-Prince.html
Alpha Pack AddOn: https://store.gingerscraps.net/Hunny-Bear-Alpha-Pack-AddOn-by-Connie-Prince.html
WordArt Pack: https://store.gingerscraps.net/Hunny-Bear-WordArt-Pack-by-Connie-Prince.html
Kit: https://store.gingerscraps.net/Hunny-Bear-Kit-by-Connie-Prince.html
Extra Papers: https://store.gingerscraps.net/Hunny-Bear-Extra-Papers-by-Connie-Prince.html
Templates: https://store.gingerscraps.net/Hunny-Bear-12×12-Temps-CU-Ok-by-Connie-Prince.html
Bouncy Tiger Mini Kit: https://store.gingerscraps.net/Bouncy-Tiger-Mini-Kit-by-Connie-Prince.html
Little Pig Mini Kit: https://store.gingerscraps.net/Little-Pig-Mini-Kit-by-Connie-Prince.html
Old Grey Donkey Mini Kit: https://store.gingerscraps.net/Old-Grey-Donkey-Mini-Kit-by-Connie-Prince.html

dear
https://store.gingerscraps.net/Good-Times.html

ad01
https://goo.gl/UBQg62

Remember, if you complete 10 challenges, just ten, you get a free kit as well!!

cr_thumb3_thumb_thumb_thumb

There’s nothing better than pretty flowers!

Tutorial Tuesday (Photoshop Elements)

Throwing the BOOK at Glee

[This tutorial is for advanced-intermediate and expert users of Photoshop Elements.]

Awhile back I got a private message from Glee asking if I had any tips for making text look more like it’s really sitting on the page when using a book element, rather than floating above it. I didn’t have any tips but thought it might make a good tutorial. Boy, did I bite off a big chunk of what-the-heck-can-I-do-here! The following images represent hours of experimenting and starting over, and I wasn’t completely successful. But I learned a lot in the process so that’s a good outcome, at least for me.

I scoured through my stash for a book that looked similar to the one Glee used for her layout and this was the only one I have. So I went with it, even though the left hand page presents some serious challenges due to perspective.

First things first. You want to choose a font that looks like it would be used on the pages of a book – a typewriter-style font. The colour of your “ink” should be black or dark gray. Adjust the size of the font to be suitable for your pages and your leading should be sufficiently wide to allow all the uppers and lowers to have space. Also, ensure you’ve got your justification set to the left. Justification is the alignment of the first letter on each line. When you choose Center, your text will automatically adjust itself so that each line is centered with the one before. That’s NOT what you want for this purpose. Your text needs to line up with the left edge of the page, or the margin. Please note… I didn’t do that in several of the images to follow and lived to regret it!

Yes… lots of mistakes! But let’s run with it to start off so you can see why it’s important.

The Warp Tool isn’t available until you’ve put your cursor on the page. You can activate it then, or you can type out some text and then deploy it. It’s the right-most little box with the T sitting on top of a curved arrow when you’ve got the Tool Options open. There are several options with little pictograms showing you the basic shape of each Warp.

For the top of this left hand page, the Arch Warp will work. Play with the sliders, moving them to the left and right to see how they work, then decide which ones you need to move to shape your text.

Here’s a tip… when you’re moving across the page toward the spine, perspective demands that the text gradually gets smaller the closer to the spine it gets. To adjust that with the Warp tool you’d move the Vertical Distortion slider to the LEFT. You can also move the text box around using the Move tool, moving it to the angle it needs to sit properly on the page.

Here you can see the way the Vertical Distortion adjustment works. As long as you haven’t Simplified the text layer, you can use the Warp tool as many times as you need to.

The image below shows very clearly why left-justification is important. If you’re using a poem as your text, you can leave it centered and it’ll be fine but for prose, not so much.

My next efforts used a smaller size on my font. It’s still much too big, but it still lets me show you some more tweaking.

I learned that it’s easier to make the Warp adjustments look right if I angled the text box to follow the upper edge of the page first. Please ignore the typo in the red text below…

The Arch Warp worked here, sort of. I used the Vertical Distortion slider too.

It still doesn’t look quite right. There are other tools that can be used to adjust the text’s shape.

I like to zoom in and out while I work so I can see the overall effect of whatever I’m doing. Zooming in tight lets me see it up close for those little tweaks, zooming out shows the whole image and shows where I need to make bigger changes.

So, have I mentioned that I don’t love this left-side page? I played with this area so much and hated everything I did with it.

It looks like the Flag Warp should work. But it’s going to need a lot of massaging.

There are other tools to alter the shape and size of layers. With text layers that aren’t simplified, there are only two ways to Transform the layer, Free Transform (which never seems to do anything I want it to) and Skew. If you’ve never used these awesomely useful tools, I highly recommend them.

I did a little Skewing, but although it looks better, I’m not sure it will make the more… erm… particular scrappers out there happy.

Then I thought, well, it’s not working so great doing big blocks of text all at once, and with two different curves, it would need more than one block of text anyway, so maybe if I did one line at a time…

I was cautiously optimistic when I saw how well the first line worked out. I used Arch and adjusted the Vertical Distortion.

The second line seemed okay too. I selected both layers at the same time so I could skew them at the same time. It was important to keep the space between the lines of text uniform.

Aaaaaaaannnnd then, I abandoned ship. It was taking a lot of time and it wasn’t really working any better. So I typed out some text that filled about 2/3 of the space. I knew I wouldn’t be able to make one single block do all the things I needed it to do.

First I made sure the left-justified text was parallel with the edge of the page.

Then I tried a couple of options in the Warp Text menu. I tried Shell Upper first. Do you see what I see?

Yeah, that didn’t work. So I tried the Wave Warp. Whoa!! That’s BAD!

So I reversed my tactics and SKEWED first and THEN Warped.

That looks okay! Sort of. The bottom is still not making me light up.

As long as I left the text box as a text box and not a Smart Object all I could do with it is Skew it. Already tried that. So I Simplified the layer. Then I went back to the Layers>Transform menu and tried both the Distort and Perspective tools. (See the bounding box?) That made it a lot more right.

Then I added a block of text at the bottom.

By now I was feeling like this just wasn’t going to be good. The Arch Warp looks okay, but still not YEAH!

I tweaked some more. The Skew doesn’t look right either, when I zoomed out.

I did a LOT of things trying to get it right. I even cut and pasted individual words in the last line to see if that would help. Alas, no.

So I surrendered. The other page was always going to be easier, and in retrospect, if I were to do anything with the pages in this particular book, I would put  photo or image on the left-side page (oh wait… a poem could go on this page, couldn’t it?), leaving a big margin around it to disguise the imperfect adjustments, then Skew/Distort it to look okay and leave it alone.

So I filled that right-side page with left-justified text then hit it with the Flag Warp. That was almost enough!!!!

Really, just a wee bit of Distortion almost had it right in just three steps (FlagWarp>Simplify Layer>Distort).

A little bit of a Skew and now it looks great!

The final version isn’t awful, if you don’t look too closely or too long!

I hope I didn’t lose you along the way. That was a complicated one! (I even tossed out about 15 of my screenshots.) I really can’t encourage you enough to experiment with the things Elements can do. You might discover something no one has ever done before, and then you can teach the rest of us!

Fresh Baked: May 18, 2018

Time to get up, get moving, and put on a helmet! Get those bikes out, because it’s time to bike to work! Today is National Bike to Work Day! And when you get home, it’ll be the perfect excuse on why you have to just sit in front of the computer! You’ve already got your workout!

Remember when you spend $10 in the store, you get a great new collab! Boys are awesome and this kit celebrates all things DUDE!

fwp_thumb3_thumb_thumb
https://store.gingerscraps.net/GingerBread-Ladies-Collab-Dude.html

heatherz
https://store.gingerscraps.net/Thru-Time-GRAB-BAG-by-Heather-Z-Scraps.html

lauries
https://store.gingerscraps.net/Lauries-Scraps-And-Designs/

lindsay01
https://store.gingerscraps.net/your-birthday-collection-by-Lindsay-Jane.html

lindsay02
https://store.gingerscraps.net/your-birthday-collection-by-Lindsay-Jane.html

luv
https://store.gingerscraps.net/Flamazing-by-Luv-Ewe-Designs.html

missfish
https://store.gingerscraps.net/Foursome-Templates-by-Miss-Fish.html

missfish02
https://store.gingerscraps.net/Outsiders-Templates-by-Miss-Fish.html

tinci
https://store.gingerscraps.net/Summer-project-1..html

aimee
Collection: https://store.gingerscraps.net/My-Everlasting-Collection-by-Aimee-Harrison.html
Kit: https://store.gingerscraps.net/My-Everlasting-Page-Kit-by-Aimee-Harrison.html
Alphas: https://store.gingerscraps.net/My-Everlasting-Alpha-Sets-by-Aimee-Harrison.html
Borders: https://store.gingerscraps.net/My-Everlasting-Borders-by-Aimee-Harrison.html
Blooms: https://store.gingerscraps.net/My-Everlasting-Blooms-by-Aimee-Harrison.html
Frame Clusters: https://store.gingerscraps.net/My-Everlasting-Frame-Clusters-by-Aimee-Harrison.html
Titles: https://store.gingerscraps.net/My-Everlasting-Titles-by-Aimee-Harrison.html
Messy Edges: https://store.gingerscraps.net/My-Everlasting-Messy-Edges-by-Aimee-Harrison.html

aimee02
Collection: https://store.gingerscraps.net/Tidepooling-Collection-by-Aimee-Harrison.html
Kit: https://store.gingerscraps.net/Tidepooling-Page-Kit-by-Aimee-Harrison.html
Alphas: https://store.gingerscraps.net/Tidepooling-Alpha-Sets-by-Aimee-Harrison.html
Titles: https://store.gingerscraps.net/Tidepooling-Titles-by-Aimee-Harrison.html
Frame Clusters: https://store.gingerscraps.net/Tidepooling-Frame-Clusters-by-Aimee-Harrison.html
Extra Papers: https://store.gingerscraps.net/Tidepooling-Extra-Papers-by-Aimee-Harrison.html
Messy Edges: https://store.gingerscraps.net/Tidepooling-Messy-Edges-by-Aimee-Harrison.html
Glitters: https://store.gingerscraps.net/Tidepooling-Glitters-by-Aimee-Harrison.html

boomers
https://store.gingerscraps.net/Honey-Bees-BGD.html

dandelion
https://store.gingerscraps.net/Spa-Day-Digital-Scrapbook-Kit-By-Dandelion-Dust-Designs.html

ad01
https://goo.gl/UBQg62

Remember, if you complete 10 challenges, just ten, you get a free kit as well!!

cr_thumb3_thumb_thumb

There’s nothing better than pretty flowers!

Sneak Peeks May 17th, 2018

Happy Thursday!!! There’s a TON of new releases so lets get to the sneak peek!

From Tinci

From Miss Fish

From Lindsay Jane

From Aimee Harrison


From Ponytails

From Luv Ewe

Have a great weekend!

Tutorial Tuesday (GingerScraps Forum)

A Road Map for Newbies

Pickymom is a new member of the GingerScraps family. She posted a request for help with navigating the various features in the Forum in the Help!! thread and when I read it, I was immediately thrown back nearly a decade to my first feeble attempts at establishing my own online digiscrapping presence. I remembered how it seemed like I was never going to understand how to do things in online forums, despite having been a moderator of an online community for several years already. So, with her permission, I decided it might be a good use of this space to help the new members of our family get their feet wet and start reaping the benefits of our amazing site. Pickymom, this is for you!

You’ll want to have at least two browser tabs open to GingerScraps so you can move between them as we work through the lesson.

My Profile has a series of options for telling others who you are, and it’s pretty straight-forward so I’m going to skip that part. First I’d like to show you the quickest, easiest and least taxing method of adding a photo to your profile. Since I already have a profile photo, the steps show how to change the photo, but they’re exactly the same for getting one out there for the first time, there just won’t be an image there for you to change. Make sure you’re on the Forum page and click on the Settings button.

On the left side of the Settings page is the menu that allows you to customize to your heart’s content.

Under the My Profile heading, click on the Edit Profile Picture button.

I’m going to pretend that the photos you’re seeing are recent. (They’re not. 🙁 ) As I said, I already had a profile photo so I changed it to allow you to see how easy it is. You can use photos from a website by using the first box, labeled Option 1. So if you have a photo you like posted to Flickr, (or FacebookInstagram etc) for example, you could copy the URL (Uniform Resource Locator) where the photo is and paste it into that first box. To do that you would open a browser tab to the place where your photo is, highlight the text in the address box at the top of your browser screen then right-click and select Copy (CTRL/CMD>C); then go back to the tab with your Settings menu open, put the cursor in the first box (If you have a photo online…), right-click and select Paste (CTRL/CMD>V). Alternatively, if you have a photo on your computer that you’d like to use, then you’d use Option 2. Click on Choose File next to that second box (If you’re uploading a photo…), then find the photo on your computer.

I’m giving you a peek into my cluttered mind and messy desktop here. Yep, I have LOTS of browser tabs open, all the time, and I have a long list of links on my Toolbar. I’ve found the folder with my photo in it, then chose the photo I want to use. As the screenshot says, SIZE MATTERS. For profile photos, which are the ones people will see when they look at your PROFILE, not your Forum posts, your photo must be no larger than 300 x 300 pixels or 976.6 kilobytes, whichever is smaller. You can hover your cursor over the image in your folder to see the dimensions of your photo so you won’t make the mistake of choosing a photo that will be rejected.

After you’ve clicked on the thumbnail image of your photo, click on Open.

Once you’ve opened your photo you can see how it’ll appear on your profile. I decided I didn’t like this one after all. But if I had liked it, I would have clicked on Save Changes and carried on.

I just followed that first step again to choose a different photo, Opened it and Saved the Changes.

Yes, that’s what I like!

Now we can work on the photo people see in the Forum when you post questions, comments or layouts. This photo is called an Avatar. It doesn’t have to be a photo of you, it can be anything you want it to be. I’m rather partial to Bitmojis myself.

In the same Settings menu, click on Edit Avatar. Here again, you can use an online image, say from Facebook, Instagram or Pinterest. The steps to do this are exactly the same as for the Profile Picture… with one significant difference.

As you can see in the screenshot, I have photos of me, flowers from my garden and memes I found online and saved for later. The photo I chose to use for my Avatar for this lesson is one that was taken at a wedding in Jamaica 3 years ago. I checked to make sure it would work as an avatar by hovering my cursor over it.

Here’s where that significant difference comes in. The MAXIMUM size for avatars is 150 x 150 pixels, or 1.91 megabytes, whichever is smaller. Since I’d already checked that out, I knew this photo would be fine and I clicked Save Changes.

Let’s do a Signature now. A while back I wrote a tut about creating original signatures for the Forum; you can find it here. I always save my signature files as .pngs so if I have rounded corners, elements extending out from the main part of the siggie or I want a transparent background, it’ll look the way I want it to when I use it. I also save them slightly smaller than the maximum size allowed because I want it to be a footnote, not the focus! For this feature, you will need to post your signature image to the Gallery, where you’ll get the image location data to put it into your profile. Have that Gallery tab open to your siggie. The screenshot below shows the existing signature and the Editor.

I like my signature to be centered at the bottom of my posts, so I click on the icon shown below. To remove my old siggie from March’s Signature Challenge, I clicked on the image that is now blue in the screenshot. Then I hit the Delete button on my keyboard and it went away.

Then I went to my Gallery tab and right-clicked on my May Signature Challenge signature itself. This option box opened up, where I chose Copy Image Address.

Moving back to the Settings menu browser tab, I clicked on the Insert Image link as I’m showing you below.

Then I pasted the data I copied from my Gallery image into the box and clicked OK.

In the screenshot, you can see both the old siggie and the new one. You have the choice of Previewing it or just Saving it.

Here’s a Forum post with both my new Avatar and my new Signature on it.

These methods work identically when you want to post a layout to a Challenge thread in the Forum. I highly recommend having two GingerScraps tabs open in your browser and simply moving back and forth between them, Working Smart, Not Hard. Go to your layout in the Gallery, right-click the image, Copy Image Address then navigate back to the Challenge thread. Select that Insert Image icon, paste the Image Address into the box and click OK. It doesn’t matter if you’re on the first page of a thread or the last, you can compose your post at the bottom of the screen and the site will automatically move it to the end of the thread.

These Tutorial Tuesday Blog posts are all tagged with Tutorial Tuesday. If you don’t want to bookmark them (or aren’t sure how) for future reference, you can always just type Tutorial Tuesday into the search bar up in the right corner of the main Blog screen and the site will find them all for you, in reverse order. If you know a key word that appeared somewhere in the post, you can also use that to find the post again. As with everything else in life, the more you do a task, the easier it becomes and the less thought you have to put into it. Those of us who’ve been at it for a long time sometimes forget how lost we felt in the beginning; as Pickymom said in her initial post, technology is still a challenge for people who grew up without it. But the best part of the GingerScraps community is that help is always a couple of clicks away!

~~May Bake Sale!!~~

It’s time for the May Bake Sale. Wow – the year is just flying by. Each of these kits or template sets are on sale for $1 only from today (May 15) to May 20. Let’s see what goodies we have available this month!

Can’t wait to see what you all create with the goodies.

Fresh Baked: May 11, 2018

I don’t know. I’m hungry. Like, I could eat my way right through a donut shop. Or an ice cream store. Today is National Eat What You Want Day. I’m cool with that. While I’m nommin’ away on some donuts and ice cream, I’m gonna sit here and scrap my heart out! I hope you’ll be joining me!

Remember when you spend $10 in the store, you get a great new collab! Boys are awesome and this kit celebrates all things DUDE!

fwp_thumb3_thumb
https://store.gingerscraps.net/GingerBread-Ladies-Collab-Dude.html

Before I start with the beautiful kits and products that the designers have created for you, I just have to share this awesome news with you, a new Welcome Wagon kit has been released! If you do not know about our Welcome Wagon area, you should go check it out right away! Once you register in the forum, you will have access to the Welcome Wagon area. The designers create wonderful goodies and give them to you for FREE! The Welcome Wagon has been up and running, for over a year, so our designers are changing their goodies! New goodies, Free goodies!

Today, you’re being given a new lovely gift by Dandelion Dust

001
https://forums.gingerscraps.net/showthread.php?42685-With-Love-From-Dandelion-Dust-Designs&p=497938#post497938

dear01
https://store.gingerscraps.net/Moments-Collected-Templates-by-Dear-Friends-Designs.html

dear02
https://store.gingerscraps.net/Spring-Flowers-by-DFD.html

heather
Bundle – https://store.gingerscraps.net/Passport-to-The-Netherlands-BUNDLE-by-Heather-Z-Scraps.html
Kit – https://store.gingerscraps.net/Passport-to-The-Netherlands-KIT-by-Heather-Z-Scraps.html
Accents – https://store.gingerscraps.net/Passport-to-The-Netherlands-ACCENTS-by-Heather-Z-Scraps.html
Journal Cards & Flairs – https://store.gingerscraps.net/Passport-to-The-Netherlands-JOURNAL-CARDS-and-FLAIRS-by-Heather-Z-Scraps.html
Templates – https://store.gingerscraps.net/Passport-to-The-Netherlands-TEMPLATES-by-Heather-Z-Scraps.html
Weathered Wood – https://store.gingerscraps.net/Passport-to-The-Netherlands-WEATHERED-WOOD-by-Heather-Z-Scraps.html
Word Bits – https://store.gingerscraps.net/Passport-to-The-Netherlands-WORD-BITS-by-Heather-Z-Scraps.html

jocee01
https://store.gingerscraps.net/Celebrate-Motherhood.html

jocee02
Bundle: https://store.gingerscraps.net/Taurus-Bundle.html
Kit: https://store.gingerscraps.net/Taurus-Kit.html
Cards: https://store.gingerscraps.net/Taurus_Cards.html
Alpha: https://store.gingerscraps.net/Taurus-Alpha.html
Glitters: https://store.gingerscraps.net/Taurus-Glitters.html
Basic Papers: https://store.gingerscraps.net/Taurus-Basic-Paper.html

kristmess01
https://store.gingerscraps.net/Kristmess/

kristmess02
https://store.gingerscraps.net/Kristmess/

lauries
https://store.gingerscraps.net/Going-Buggy-GrabBag.html

lindsay01
https://store.gingerscraps.net/Page-Borders-33-by-Lindsay-Jane.html

lindsay02
https://store.gingerscraps.net/Page-Borders-34-by-Lindsay-Jane.html

lindsay03
5: https://store.gingerscraps.net/Page-Borders-Rec-5-by-Lindsay-Jane.html
6: https://store.gingerscraps.net/Page-Borders-Rec-6-by-Lindsay-Jane.html
7: https://store.gingerscraps.net/Page-Borders-Rec-7-by-Lindsay-Jane.html
8: https://store.gingerscraps.net/Page-Borders-Rec-8-by-Lindsay-Jane.html

mags
Bundle: https://store.gingerscraps.net/Track-Star-BUNDLE-by-MagsGraphics.html
Kit: https://store.gingerscraps.net/Track-Star-KIT-by-MagsGraphics.html
Journal Cards: https://store.gingerscraps.net/Track-Star-JOURNAL-CARDS-by-MagsGraphics.html
Event Tags: https://store.gingerscraps.net/Track-Star-EVENT-TAGS-by-MagsGraphics.html
Stickers: https://store.gingerscraps.net/Track-Star-STICKERS-by-MagsGraphics.html

miss
https://store.gingerscraps.net/Spring-Flowers-Templates-by-Miss-Fish.html

scraps
kit – https://store.gingerscraps.net/My-Fair-Lady-by-Scraps-N-Pieces.html
clusters – https://store.gingerscraps.net/My-Fair-Lady-Clusters-by-Scraps-N-Pieces-SNP_MFLk1.html

tinci
https://store.gingerscraps.net/Spring-flowers-templates.html

tinci02
1: https://store.gingerscraps.net/One-Two-Three-Four-1.html
2: https://store.gingerscraps.net/One-Two-Three-Four-2..html
3: https://store.gingerscraps.net/One-Two-Three-Four-3..html
4: https://store.gingerscraps.net/One-Two-Three-Four-4..html

aimee01
https://store.gingerscraps.net/Brushed-4-Template-Set-by-Aimee-Harrison.html

aimee02
https://store.gingerscraps.net/Clustered-3-Template-Set-by-Aimee-Harrison.html

boomers01
https://store.gingerscraps.net/Peace-and-Love-BGD.html

boomers02
https://store.gingerscraps.net/Summer-Blooms-BGD.html

cathyk01
Bundle: https://store.gingerscraps.net/Be-a-Cactus-Bundle-by-CathyK-Designs.html
Kit: https://store.gingerscraps.net/Be-a-Cactus-Kit-by-CathyK-Designs.html
Cards: https://store.gingerscraps.net/Be-a-Cactus-Pocket-Cards-by-CathyK-Designs.html
Accents: https://store.gingerscraps.net/Be-a-Cactus-Accents-by-CathyK-Designs.html
Extra Papers: https://store.gingerscraps.net/Be-a-Cactus-Extra-Papers-by-CathyK-Designs.html
Alphas: https://store.gingerscraps.net/Be-a-Cactus-Alphas-by-CathyK-Designs.html

cathyk02
https://store.gingerscraps.net/Be-a-Cactus-Kit-by-CathyK-Designs.html

connie
Bundle: https://store.gingerscraps.net/Star-Fighters-Core-Bundle-by-Connie-Prince.html
Alpha Pack AddOn: https://store.gingerscraps.net/Star-Fighters-Alpha-Pack-AddOn-by-Connie-Prince.html
WordArt: https://store.gingerscraps.net/Star-Fighters-WordArt-Pack-by-Connie-Prince.html
Kit: https://store.gingerscraps.net/Star-Fighters-Kit-by-Connie-Prince.html
Extra Papers: https://store.gingerscraps.net/Star-Fighters-Extra-Papers-by-Connie-Prince.html
Templates: https://store.gingerscraps.net/Star-Fighters-12×12-Temps-CU-Ok-by-Connie-Prince.html
Flowers and Leaves: https://store.gingerscraps.net/Star-Fighters-Flowers-and-Leaves-by-Connie-Prince.html

dandelion
https://store.gingerscraps.net/M-Is-For-Mom-Digital-Scrapbook-Kit-By-Dandelion-Dust-Designs.html

“This is a special ad for a charity kit to raise money for designer Jill, she was a designer here and she is still a friend of mine as well as many digi-scrappers.”

This is a direct quote from Gingerscaps name-sake and owner. When it comes to the digital scrapping world, it’s small but big at the same time. When one of our own is suffering, we band together to make as big of a difference as we can! Here’s a chance for us to offer a little comfort, in a small way, to Jill.

002
https://pickleberrypop.com/shop/product.php?productid=65219

Remember, if you complete 10 challenges, just ten, you get a free kit as well!!

cr_thumb3_thumb

There’s nothing better than pretty flowers!

Sneak Peeks May 10th 2018

Did everyone enjoy last weekend’s festivities? I hope everyone had fun playing games and stocking up on awesome kits and templates from our talented designers! This week, we have a few new goodies to preview!

From Heather Z

From Tinci

From Aimee Harrison

From JoCee

Check back tomorrow to see even more new goodies!