Effect? Affect? What’s the Difference?
![]()
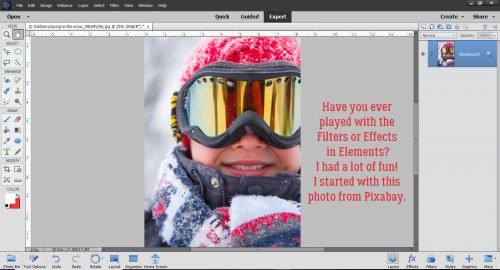
Today’s tutorial has some common elements with last week’s. I’m going to show you how to turn a photo into a work of art, and to blend it into a layout. But that’s where the similarities end! I played around for quite awhile before I got the look I was after, but lucky for you, I kept track of what I did so you can skip the experimentation and go right to the good part.
There are so many ways to make Photoshop Elements do fantastic things. I first played with the Filter Gallery, but didn’t get what I wanted. So then I started looking at the Effects Gallery. There’s where I found the pot of gold.
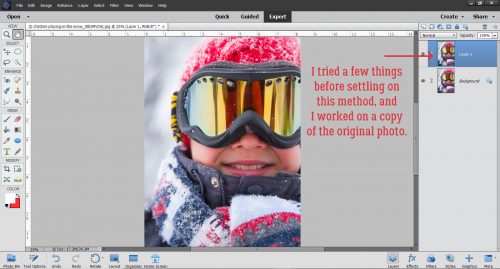
First I made a copy layer of my photo. (I actually tried to work right on the background photo layer but didn’t like where I ended up – no control!)
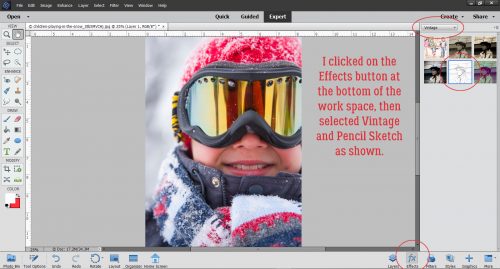
Then I clicked on the Effects button down at the bottom right of the work space. From the Effects Gallery I chose Vintage and then Pencil Sketch. (Yes, I’ve done a couple of sketch tutorials before, but this one is different. And a lot easier!)
One click and this is where I went.
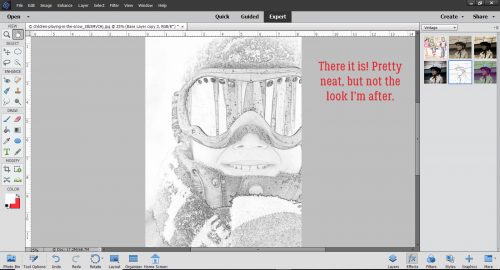
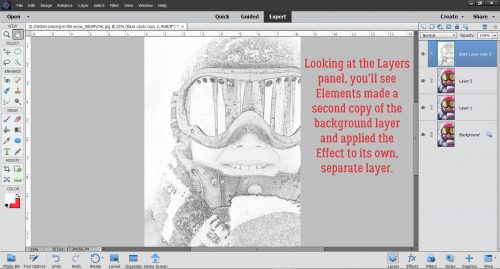
Elements has created another Copy layer and then added the Sketch effect to yet another separate layer.
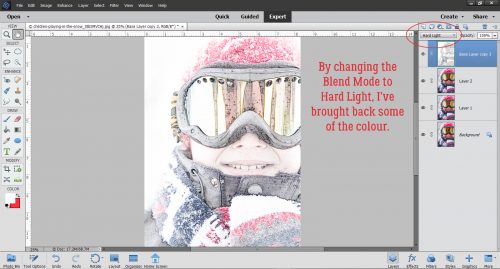
I tried out each of the Blend Modes until I found one I liked – Hard Light. It brought back some of the colour but kept the sketchy look.
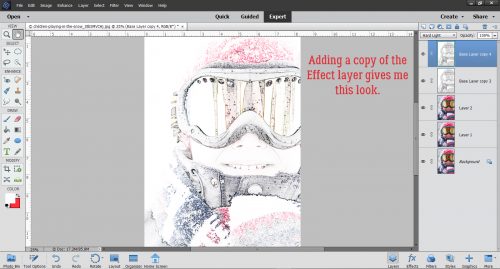
I made another copy, of the very topmost layer and it lightened up the image and blew out some highlights.
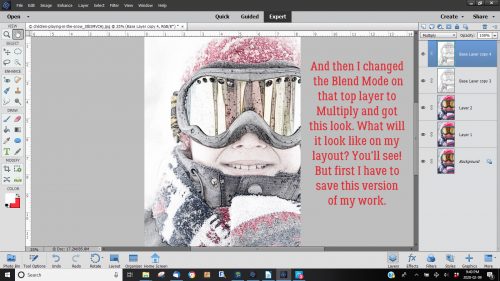
Blend Mode change to the rescue! I changed it to Multiply, and got a really arty looking image. I Merged all the layers and saved my new image as Sketch Edit.
I don’t think anybody can guess what I did when I added the Sketch Edit copy of the photo to this blended template from Heartstrings Scrap Art. I decided to try some Blend Modes and settled on Luminosity. I love how it turned out.

I hope you’re having as much fun as I am when you try my techniques. But I feel it’s only fair that I let you know I may be MIA a bit in the next while. We’re closing on our brand-new house (in another province) next Tuesday!! It’s been a long haul since we signed the construction contract, and in some ways it feels a little surreal now that it’s finally done. We’ll be out of town tying up all those loose ends next week but I’ll try to have something for you for the following week… even if it’s just photos of the new house. We won’t be moving for a few weeks yet, and I’ll make sure you have a heads-up for that. Thank you for supporting me in this amazing hobby we share!
![]()
Very cool effect, Jan! & it looks simple enough to achieve. I’m so glad you kept track of all the steps!
& how exciting that your new home will be ready soon! May the move goes smoothly … & enjoy decorating!
It really is as simple as it looks!
We’re so excited about the house. It feels like forever since we signed that construction contract; our possession date changed twice and we weren’t really trusting it would be ready this month so we aren’t quite ready to move… but I’ve been decorating it in my head for months. Having been a military dependent for so much of my life, it feels quite special to be the very first family to live in any house!
Great tutorial, Jan!
Great news on your new home. All good wishes for the move. I can imagine how exciting it will be to go into a brand new home; I grew up in an air force family, so experienced some of what you went through.
Congrats on your new house!!! Thanks for the tutorial. I never thought about doing a sketch in PhotoShop or GIMP; I’ve always used the settings in my photo editing program. I’ll have to give this a try!
Jan, I like your finished layout but have a few questions to clarify what you showed us:
(1) there were 3 layers with the original photo – or at least two since PS created one for us; did all the layers need to be Merged to get the final result? what would have happened if you only kept one photo layer?
(2) In your experimentation you chose Hard Light followed by Multiply. Did the result occur only because you sequenced these together in this order?
(3) Why didn’t you use the saved colored “sketch edit”on your layout as it was instead of eliminating the color later with Luminosity? Did you have to go through all the steps to end up with a more intense black and white sketch?
Great questions, Lorri! I could have answered them in the tut… don’t know why I didn’t.
(1) The two extra layers aren’t needed and can be deleted.
(2) Yes. As the screenshots show, just applying the Pencil Sketch for the first sketch layer gave me purely a pencil sketch until I changed the Blend Mode. Then when I duplicated the sketch layer, the image was much lighter and the highlights were blown out. So both those steps were needed to get me to the result I showed you.
(3) I was going to use the Sketch Edit image as is for my layout, but decided to tone down the colour after I’d lived with it for a while. I tried a bunch of Blend Modes before I found the one I liked most. But other than changing the Blend Mode on that saved Sketch Edit, I didn’t do anything further to it. So no, I didn’t have to run through the whole sequnece of steps again, which is why I saved it in the first place.
I hope this helps!
Literally one step to get a sketch. Then it’s up to you what else you do with it.
Thanks for the congrats. If I can get over the anxiety of trying to get everything done at this end by Saturday night, I might be excited.
Yes, I guess you’d get it! It isn’t something we ever expected to do, so it makes it that much sweeter that we were able to do it. Our daughter lives 30 minutes away, and my parents (both in their 80s) as well as my brother and one sister 2 hours away. Right now we’re more than 8 hours away, no matter which way we get there. We’re pretty happy all around~
Really fun tutorial , Jan. And the end result is fabulous, Thank you!