Taming the Wild Template
![]()
I know there are many of you out there facing serious challenges with from fire or hurricane, so I want to thank you for popping by to read this Blog post. We’re a long way from the nearest fire in the western part of the continent, but due to an air inversion happening high above the Earth, we’ve been socked in with smoke for three days straight. My throat is sore, I’m coughing, my eyes are burning and I have a headache… and can only imagine how much worse it is for those in much closer proximity. I just saw a news report from Pensacola and am praying hard that those in the path of this storm are safe and dry. As if 202o hasn’t been bad enough…
Onward. After last week’s tutorial went live, DebS posted a comment that I’d like to share with you. “I have a question I’ve been hesitant to share as it isn’t a creative question, but one of organization, that I’d LOVE to see some input on. I’ve always created my own pages from scratch… at the same time, I have collected a rather substantial body of templates over the years (hundreds, in fact!) but not used them… sad, I know!! Some are clearly labeled — such as 2 pagers, some are just a date — Sept 2019 template. Many are completely nondescript — jbrt.08… all stashed in a folder called templates, and many, many others are attached to the bundles they came with, filed by designer or topic. My biggest issue is that if I have a page I want to place say 5 photos on, I can spend more time rifling through templates than I might spend simply creating the page myself from a blank slate, and so I continue to stash templates while creating pages myself. I’m an incredibly organized, detailed person, who is running out of time to create pages myself, and whose lack of a good system for organizing templates for easy access is driving me nuts. I’ve never seen input on this topic, but would love some help!”
Before I launch into a step-by-step guide to my system for organizing templates, I’d just like to say a couple of things. First, there is no such thing as a “dumb” question. Asking questions is how we all learn new things. Asking questions is so much better in a lot of situations than guessing and being really wrong (looking at you, nursing!). Digital scrapbooking is more than just pretty layouts, as her comments show. If we never talk about the logistics, the mundane aspects of it, we might miss out on some good tips for making it more fun and less work. DebS’s problem is one I struggled with too, and led to me looking for solutions. The method I’m going to expand on below is what I came up with; it works really well for me but you might have your own, much better methods. So my disclaimer is this: if you have a system for organizing your templates that works for you, don’t reinvent the wheel! Second disclaimer: I work on a PC, and have ZERO Mac knowledge, so if you’re an Apple fan, this tutorial isn’t for you.
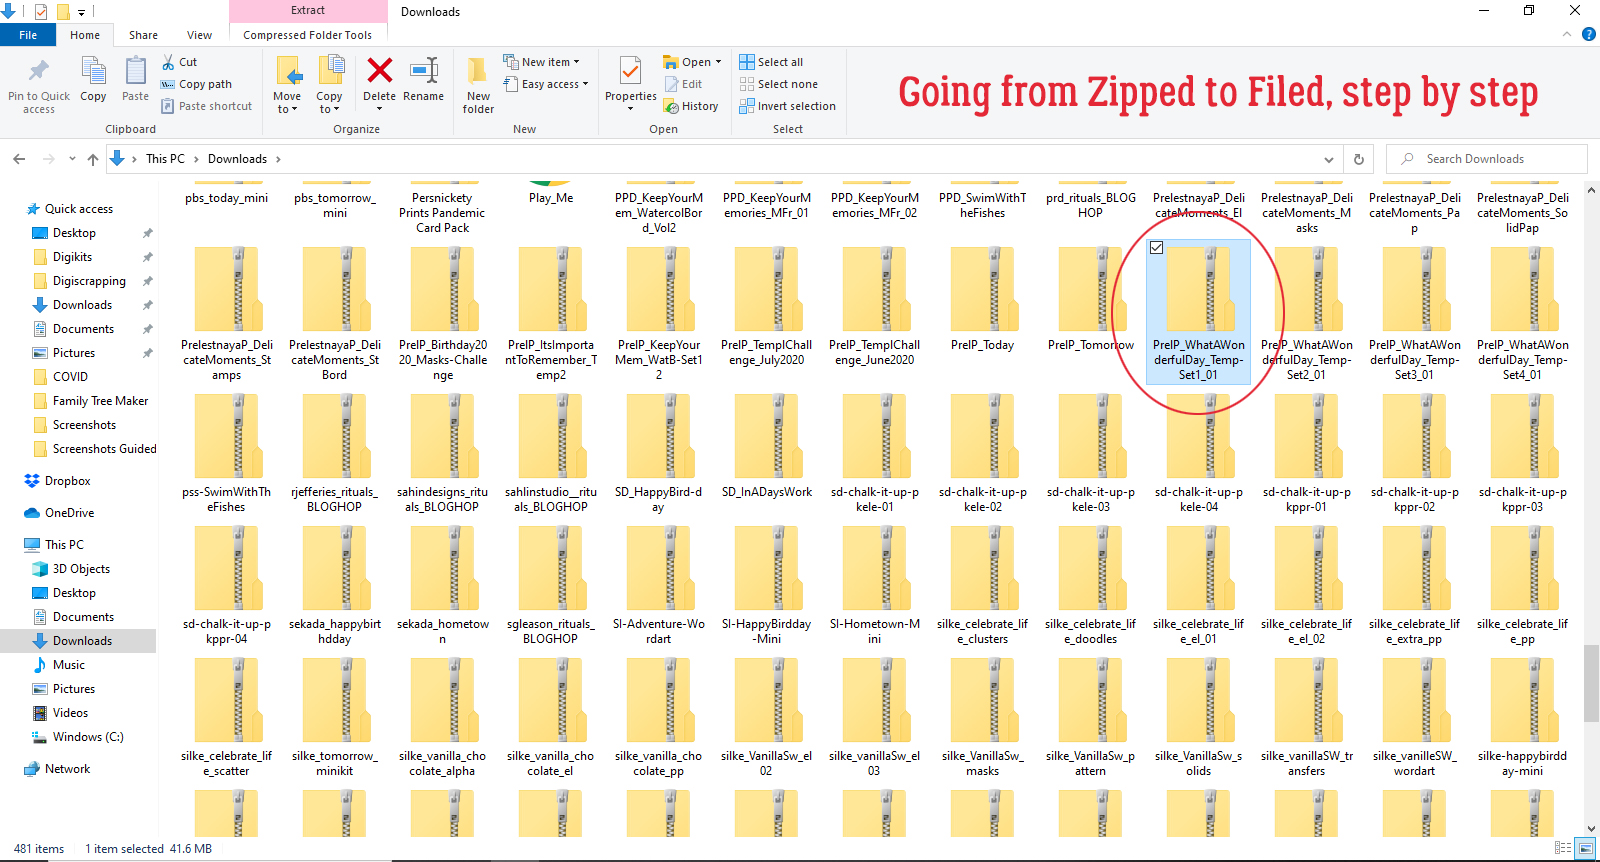
Let’s go! As usual, I’m going to show all the steps, in case there are readers who are very new to our wonderful hobby. Feel free to fly by the stuff you already know/do. I’m going to start with the very basic unzip/extract of downloaded content. (Please ignore the huge collection of zipped folders I have on my laptop… I’ve been busy setting up house. I’ll get all this stuff sorted out soon! 😉 ) The highlighted folder below is one containing templates from the lovely Irina, also known as PrelestnayaP Design. They’re part of her What a Wonderful Day template bundle.
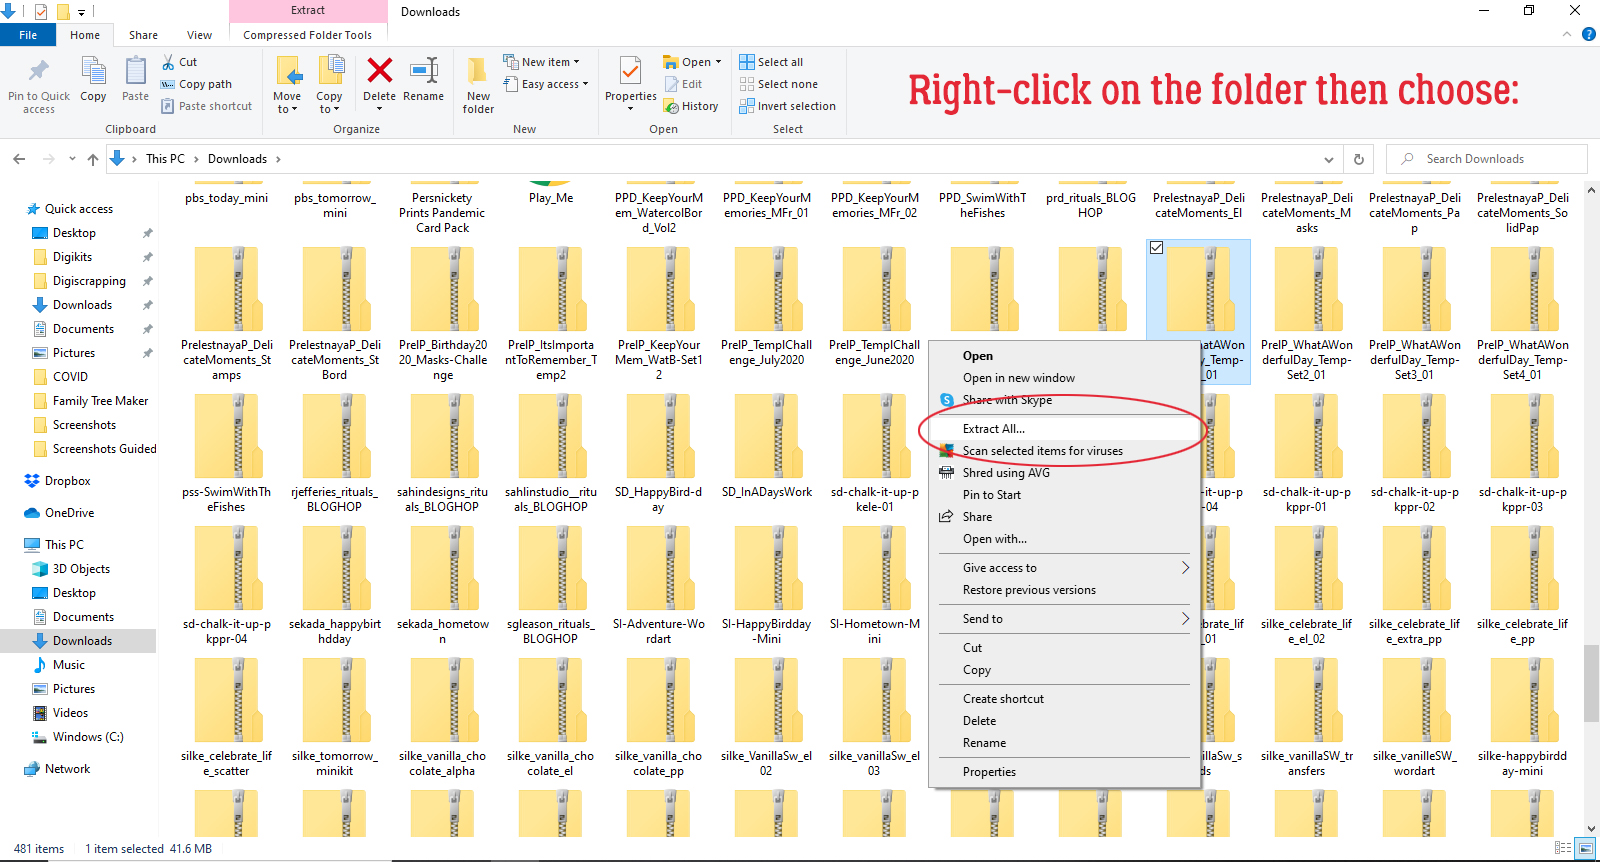
The easiest way to unzip a file in Windows is to right-click on the folder and select Extract All from the pop-up menu. We’ve looked at some software apps that unzip multiple files in a previous tutorial; for the sake of brevity we’re just doing a single folder so we’re using the easiest method.
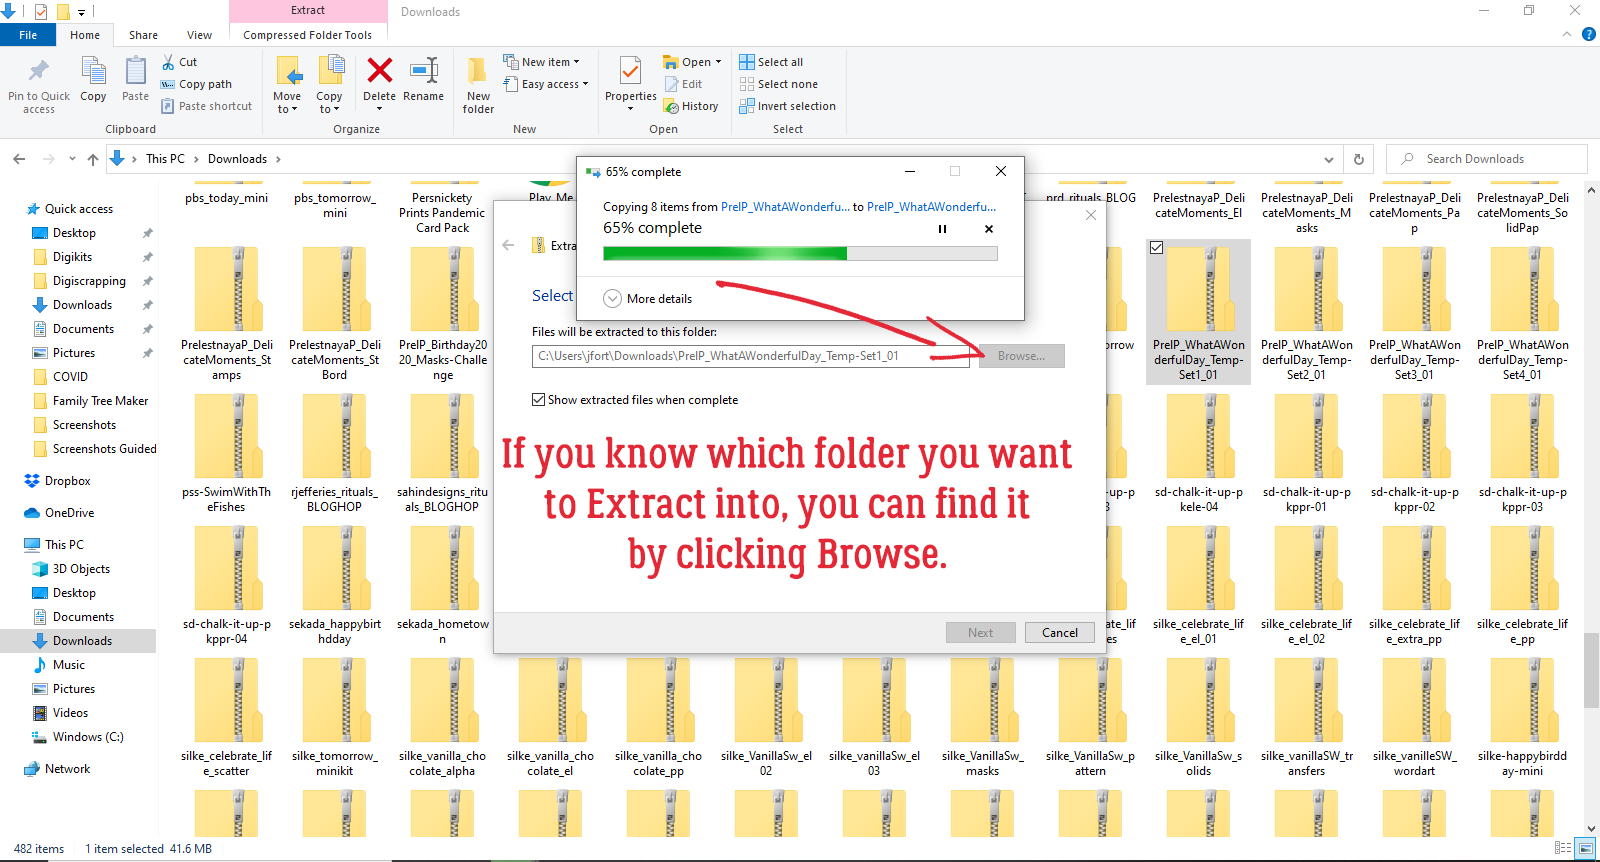
There are so many ways you can make your software do some of the work for you. If you’ve already got a folder ready for the contents of your zipped folder, you can tell Windows to find it for you by clicking on that Browse button. Then you can transfer the contents of that folder right into the target folder. I use this trick all the time when I’ve downloaded brushes, word arts and mini-kits for the GingerScraps challenges. I just make a bunch of folders in my GS Challenges master file and move them into their new homes in one step.
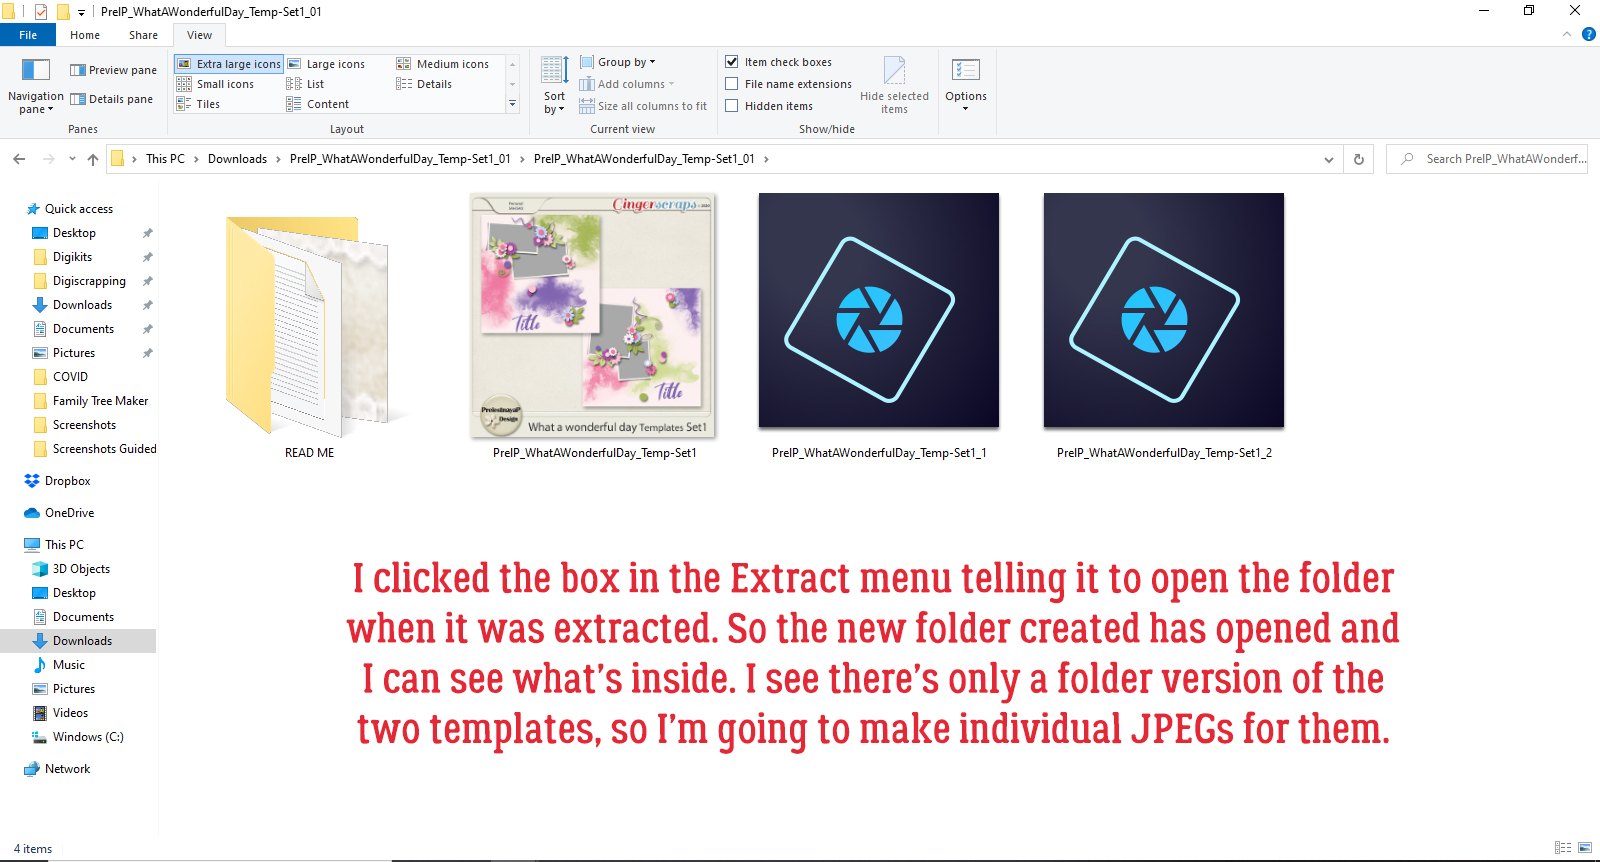
In the Extract menu there’s a box just under the destination folder block that says “Show Extracted File When Complete“. This command opens your newly-extracted folder right after it’s unzipped. I usually leave this box checked all the time, but there are times when you might not want to to that. For example, if you’re manually extracting a bunch of subfolders inside a folder and want it to be done quickly, unclick it. But for this exercise, I WANT the folder to open so I can see what’s in it, since I’m in an organizing mood. This is what was inside my extracted folder. Some template designers create 600×600 pixel preview JPEGs of their templates and some do what Irina‘s done, creating only a folder preview. With time you’ll know which designers have the JPEG previews and which don’t. For my method to work for me, I need to have a thumbnail image, so I’m going to create some.
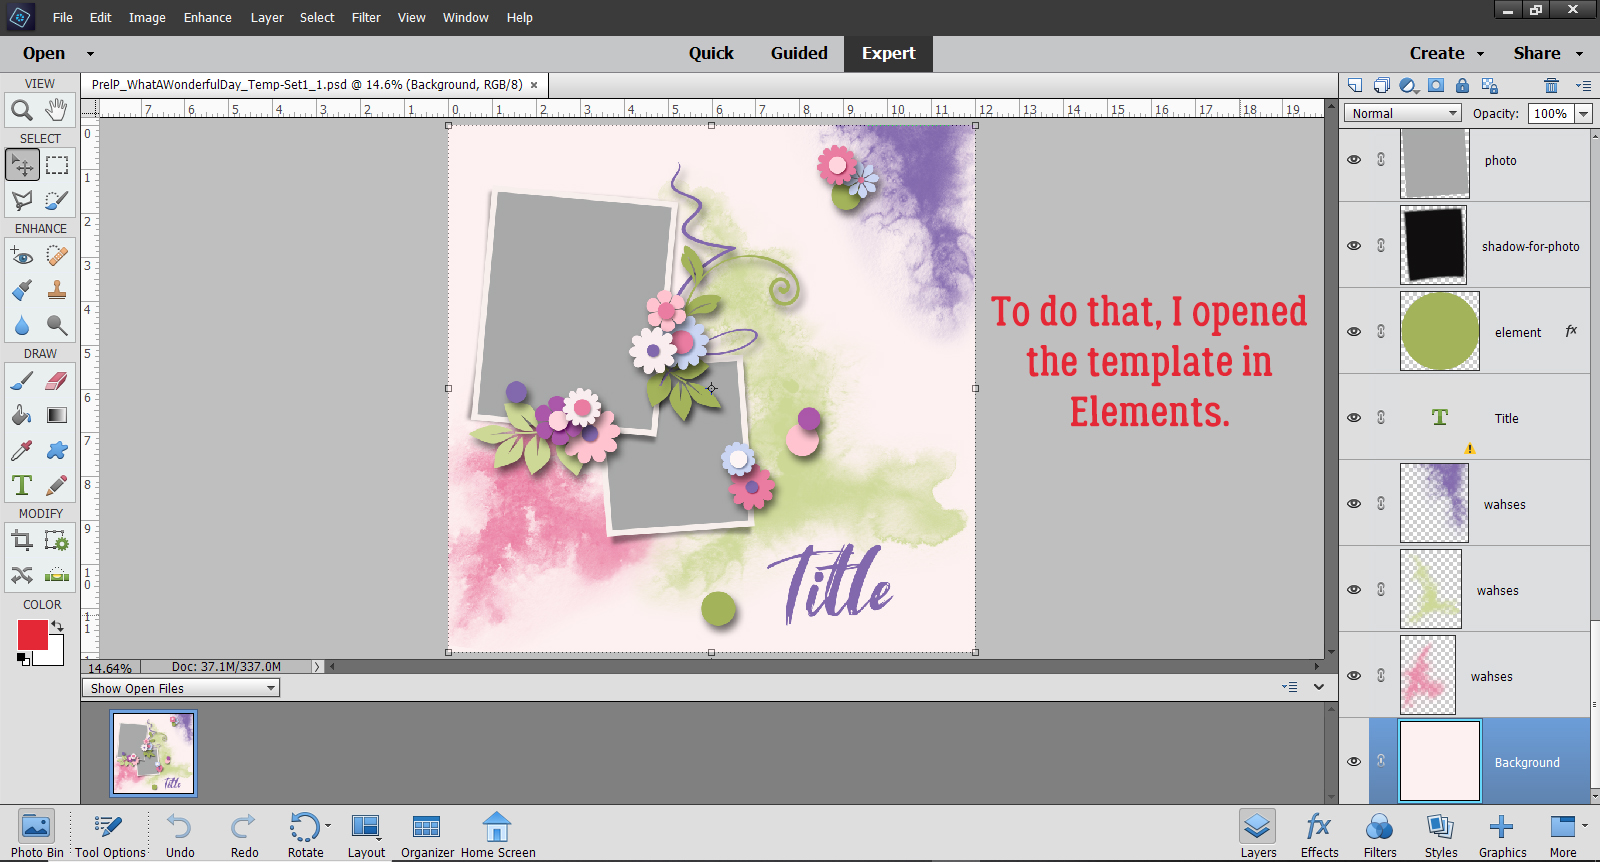
I opened the template in Photoshop Elements so I could create my preview JPEG.
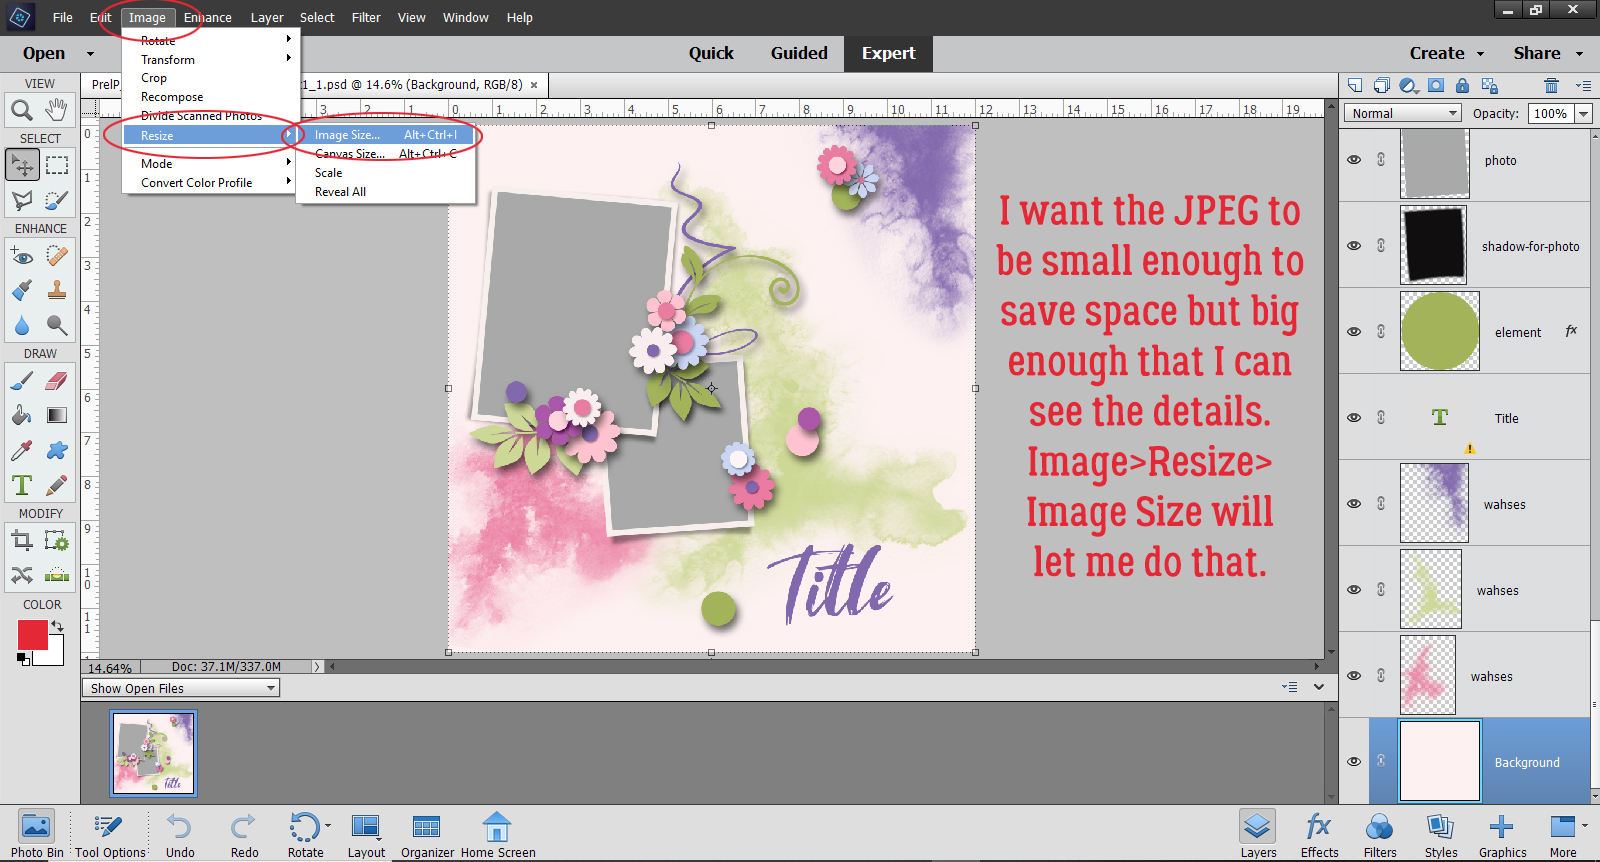
There are a few criteria for these previews. They should be small enough so they don’t eat up hard drive space, but sharp enough that you can easily assess the template’s suitability for your layout. When I’m creating a preview I just resize the whole template to 600×600 pixels, either by clicking Image>Resize>Image Size or by using the keyboard shortcut CTRL/CMD>Shift>I. (Trust me, you’ll get really good at using keyboard shortcuts once you start. For me they’re almost automatic now!)
This is the Image Size menu. The boxes at the bottom are always selected for me, as presets. Having presets makes everything so much less work! I can just change the size of the image from 3600×3600 to 600×600 by typing the digits in. This is exactly how I save my finished layouts for Gallery posting. It’s important to Scale Styles so your shadows and other styles retain the appearance they have on your original layout. But I digress!

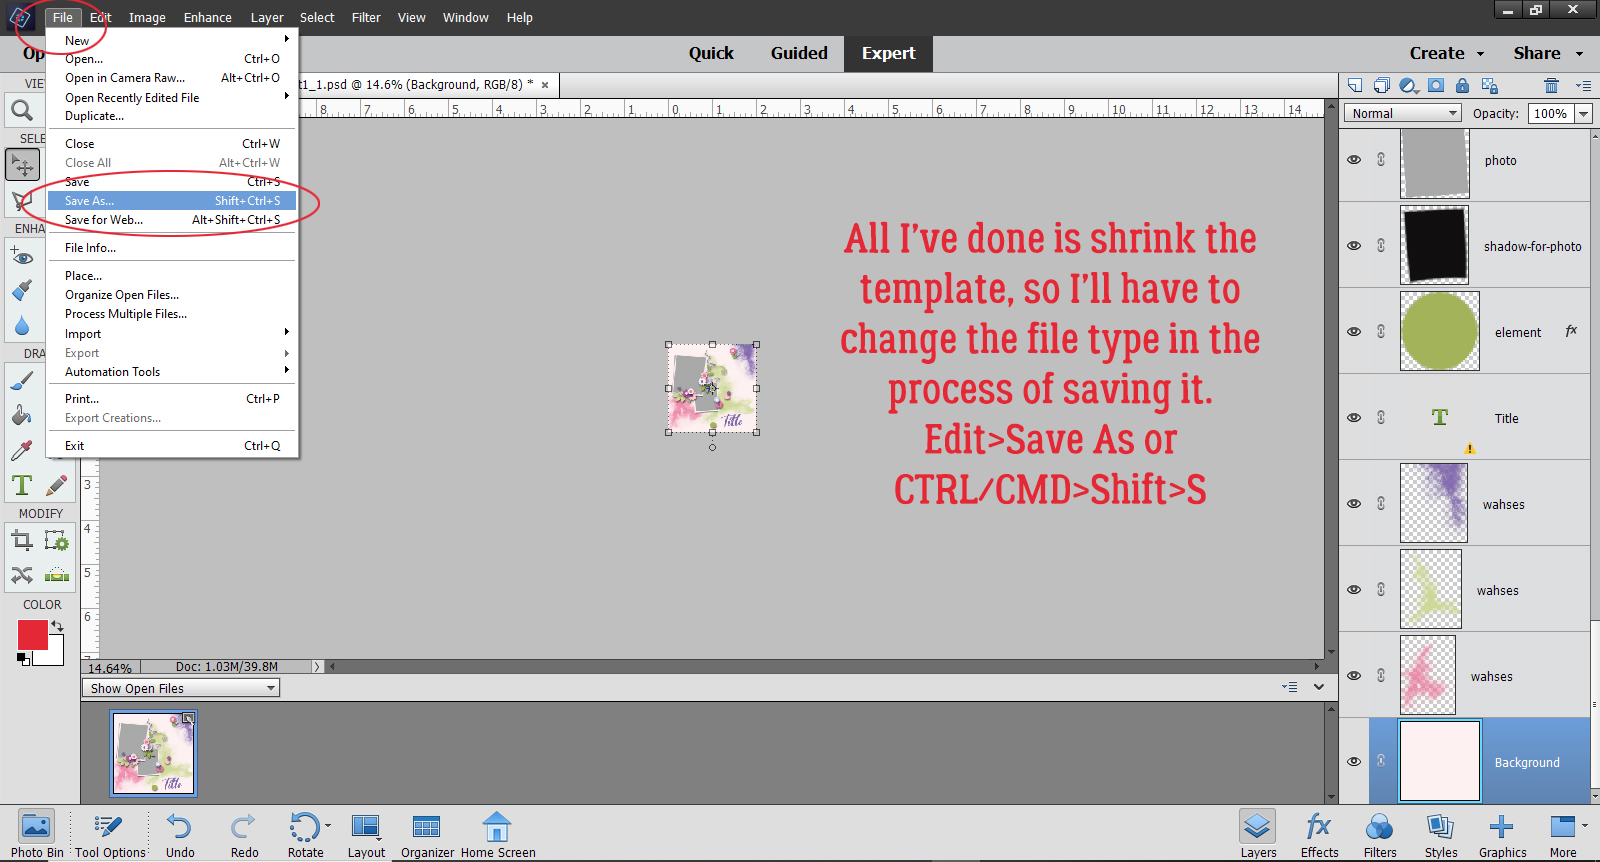
Because all I’ve done to this template is to shrink it, I’ll need to change the file format from PSD to JPEG as I’m saving it. So I’m using Save As, which prompts me. There are two ways to reach this function, either by clicking on Edit>Save As or by CTRL/CMD>Shift>S.
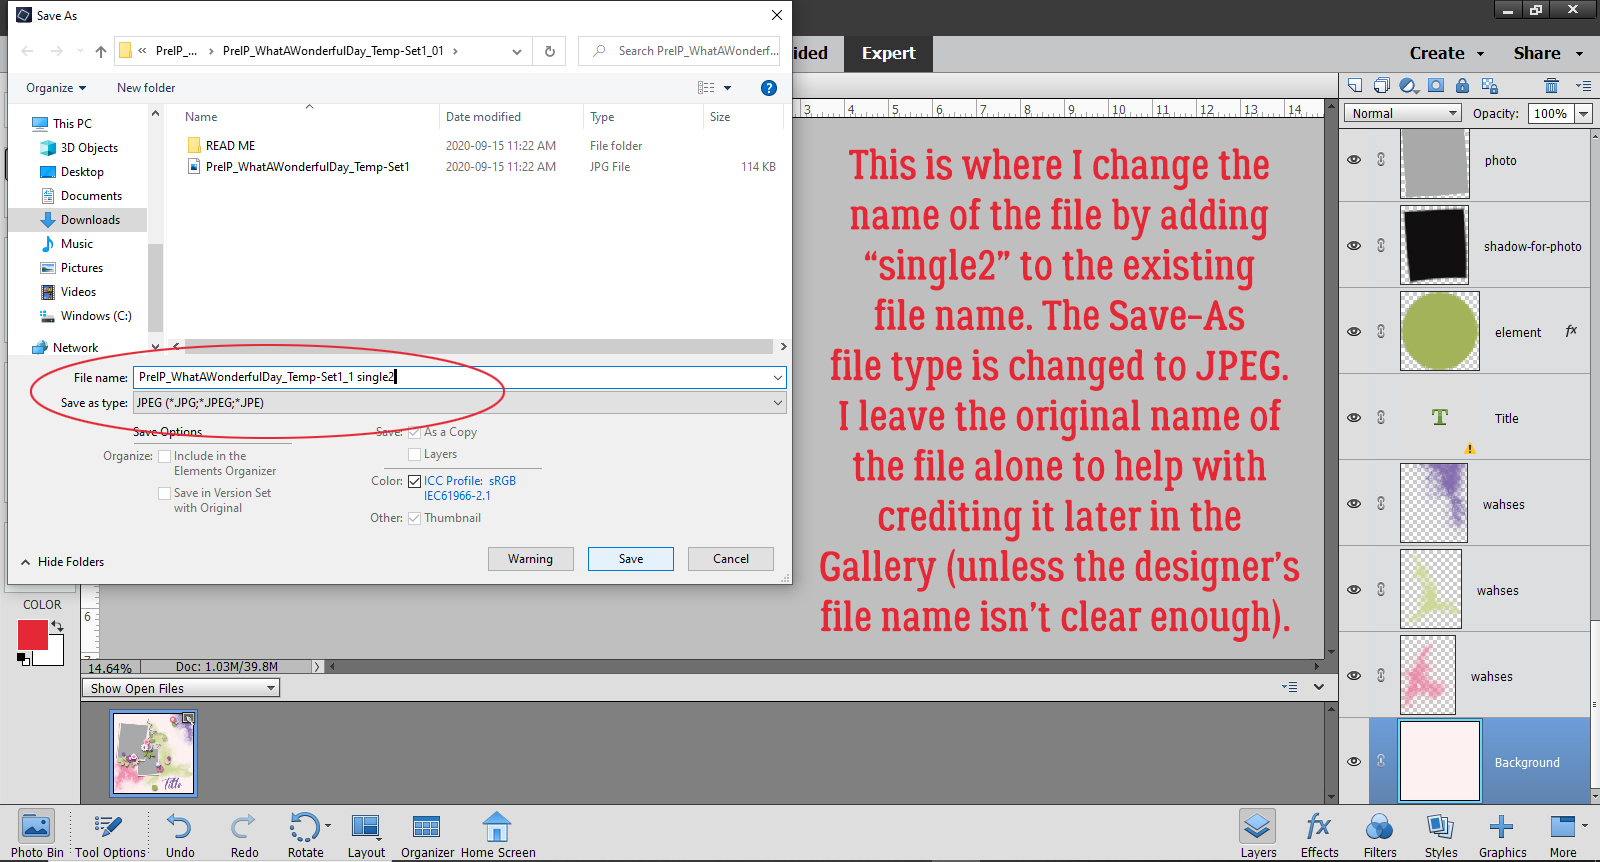
Here is where I change the file format to JPEG. But I also change the FILE NAME. I leave the name the designer gave the template alone, but I add a descriptor to it. This template has 2 photo spots and it stands alone, so it now becomes “PrelP_WhatAWonderfulDay_Temp-Set1_1 single2“. There are other descriptors I sometimes use: if the photo spots are square, for example, or round, or if they’re masked spots. You are welcome to choose whatever descriptors work with your brain.
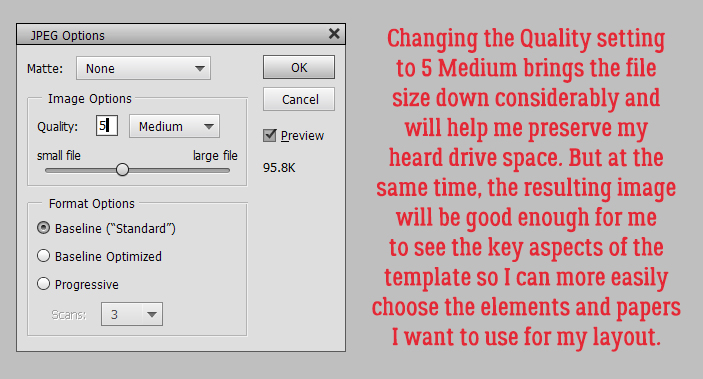
Once I click Save, this menu pops up. Remember, I don’t want my previews to gobble up my hard drive space, so I drop the Quality of this image down to 5. (I usually edit a whole bunch of template folders at a time so I just leave all the settings until I’m done.)
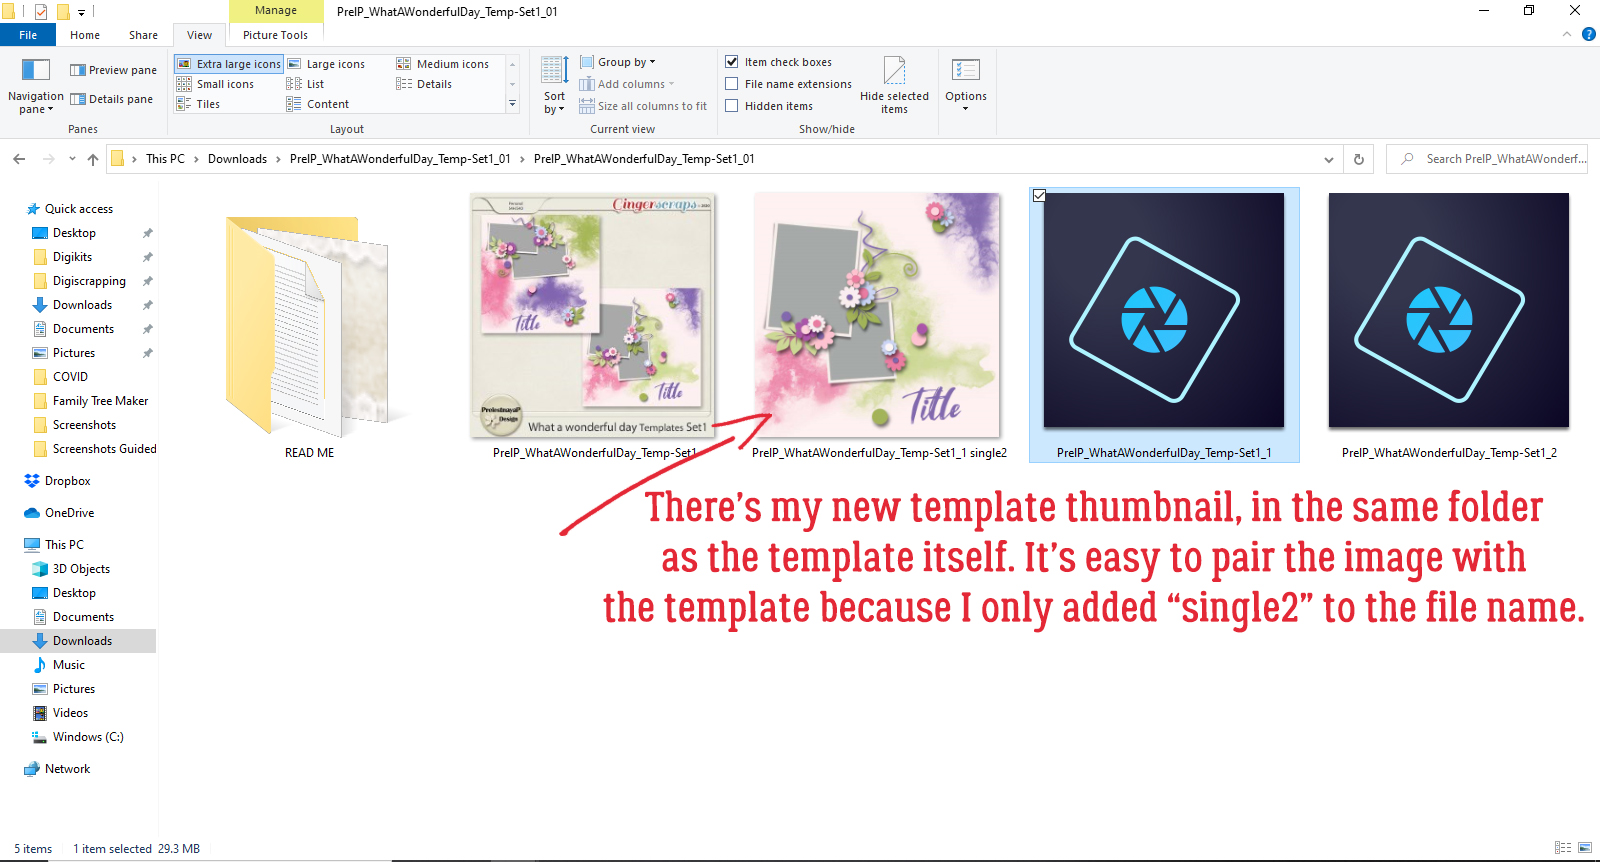
I Saved the preview to the same folder as the template, and there it is!
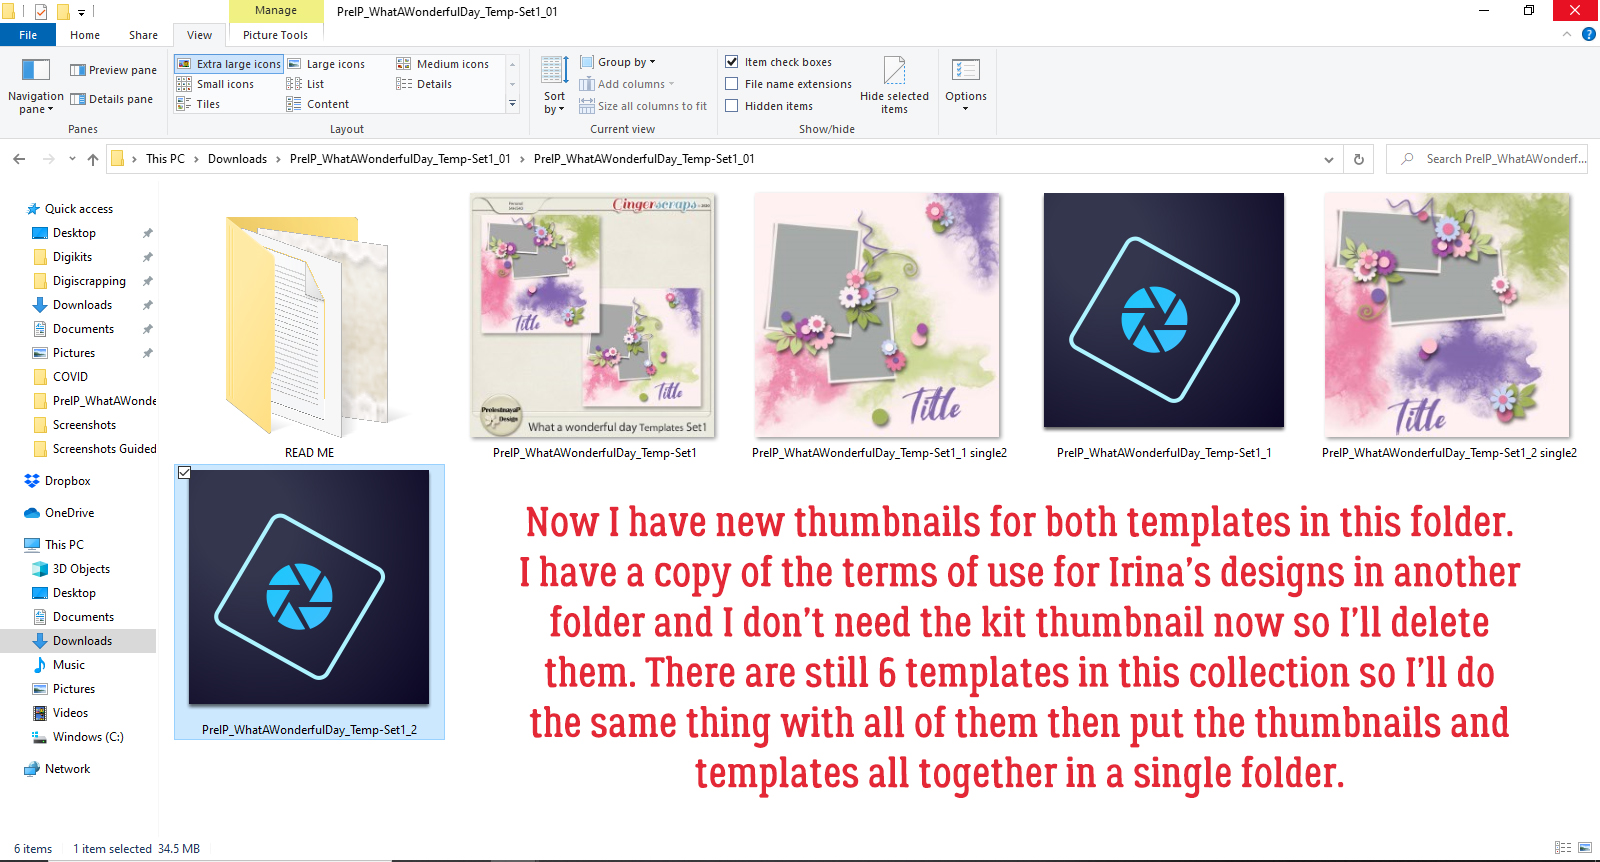
I went through the same process to shrink, rename and save a preview of the second template in the folder. Now both preview thumbnails are in the folder. I don’t save the terms of use more than once, and I have no need for the folder preview that was already in there, so I just delete both.
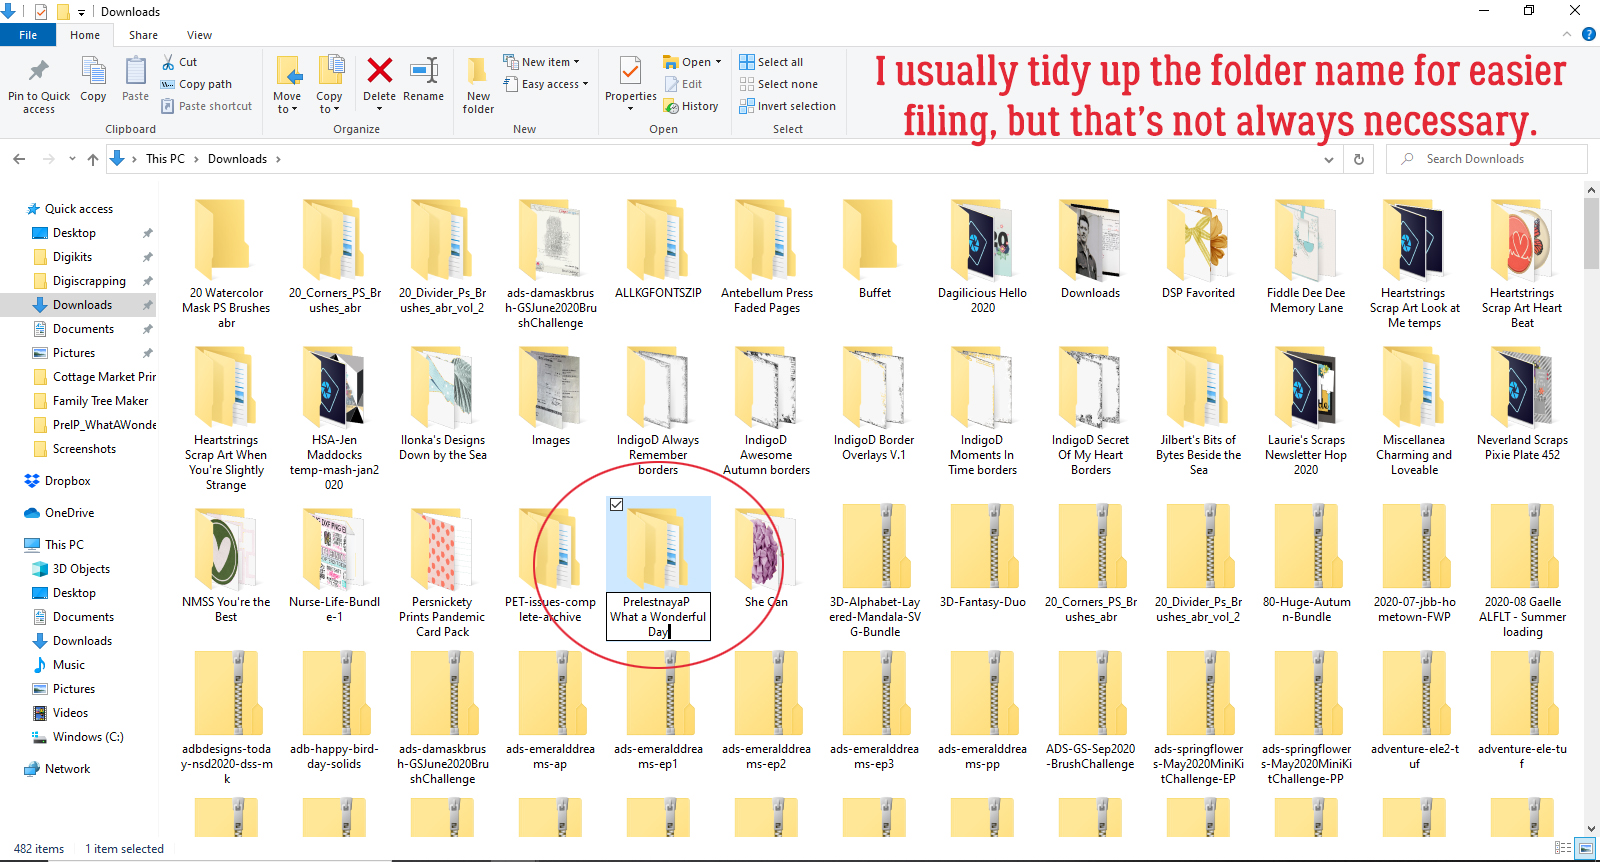
Then I usually tidy up the name on the folder itself before moving it to its permanent home. It isn’t always necessary, but I want to know who the designer is, which store it belongs to and what the kit’s name is. This step is optional – you do you!
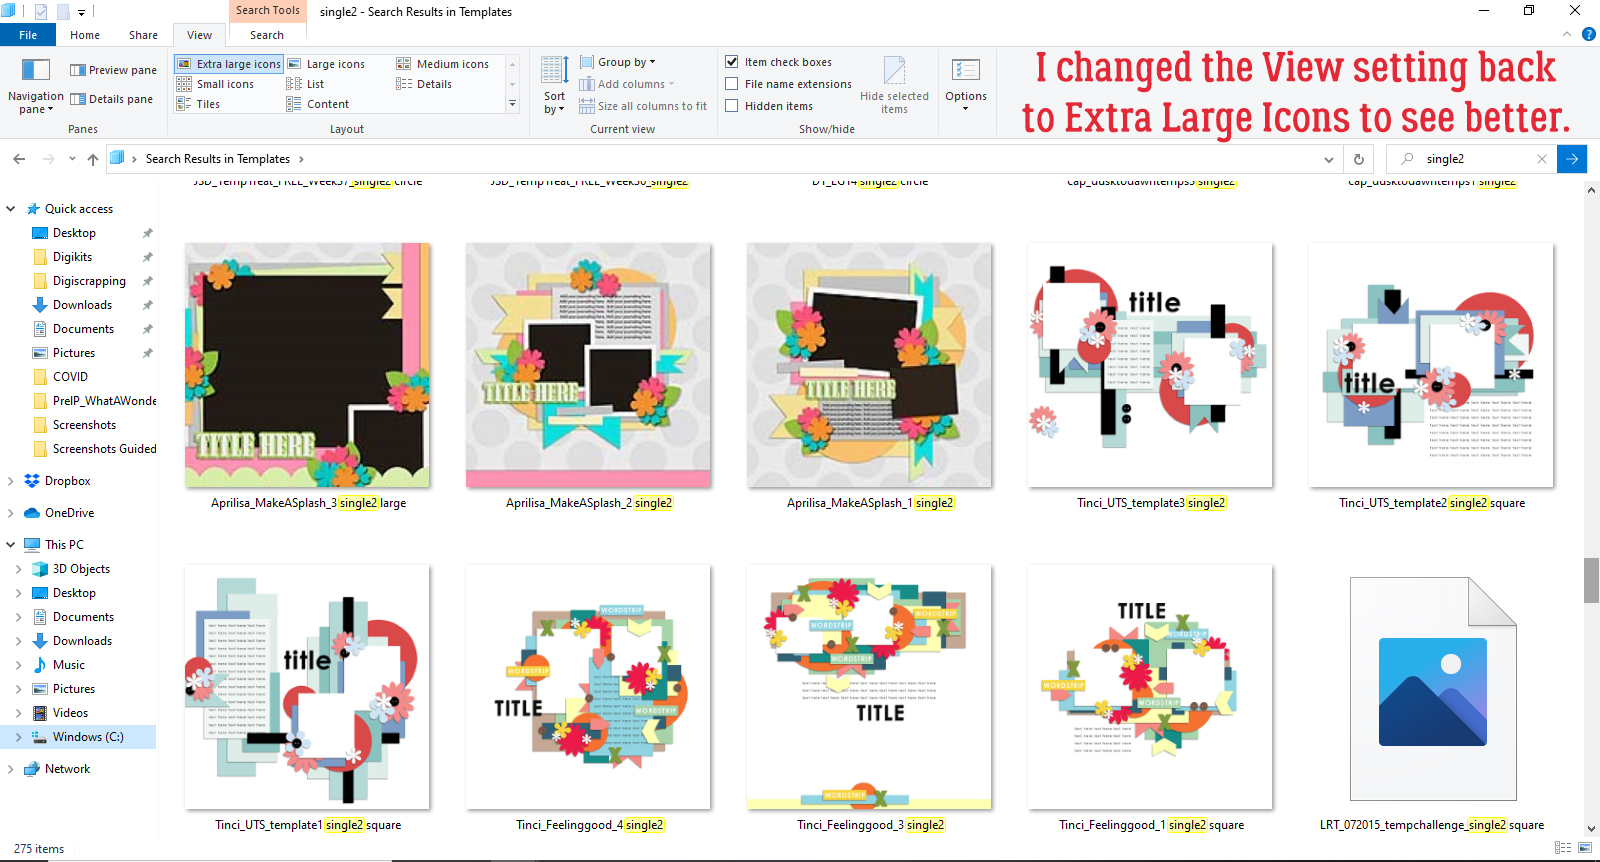
Now to show you how my method works to speed up workflow on top of organizing my stash. I’m going to let Windows Explorer find the templates I just previewed. Over on the right side of the screen there’s a search box. (I’m still in my Downloads folder here, but it works globally too.) I type “single2” into the search box and click the blue arrow.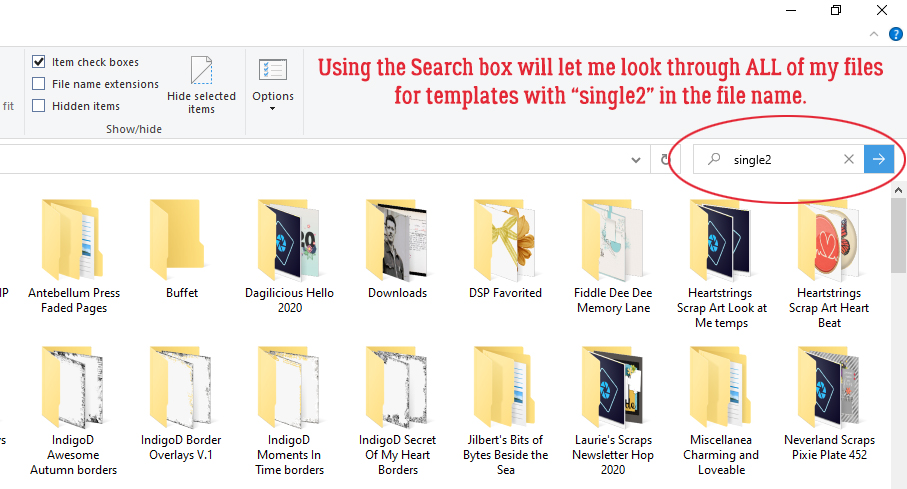
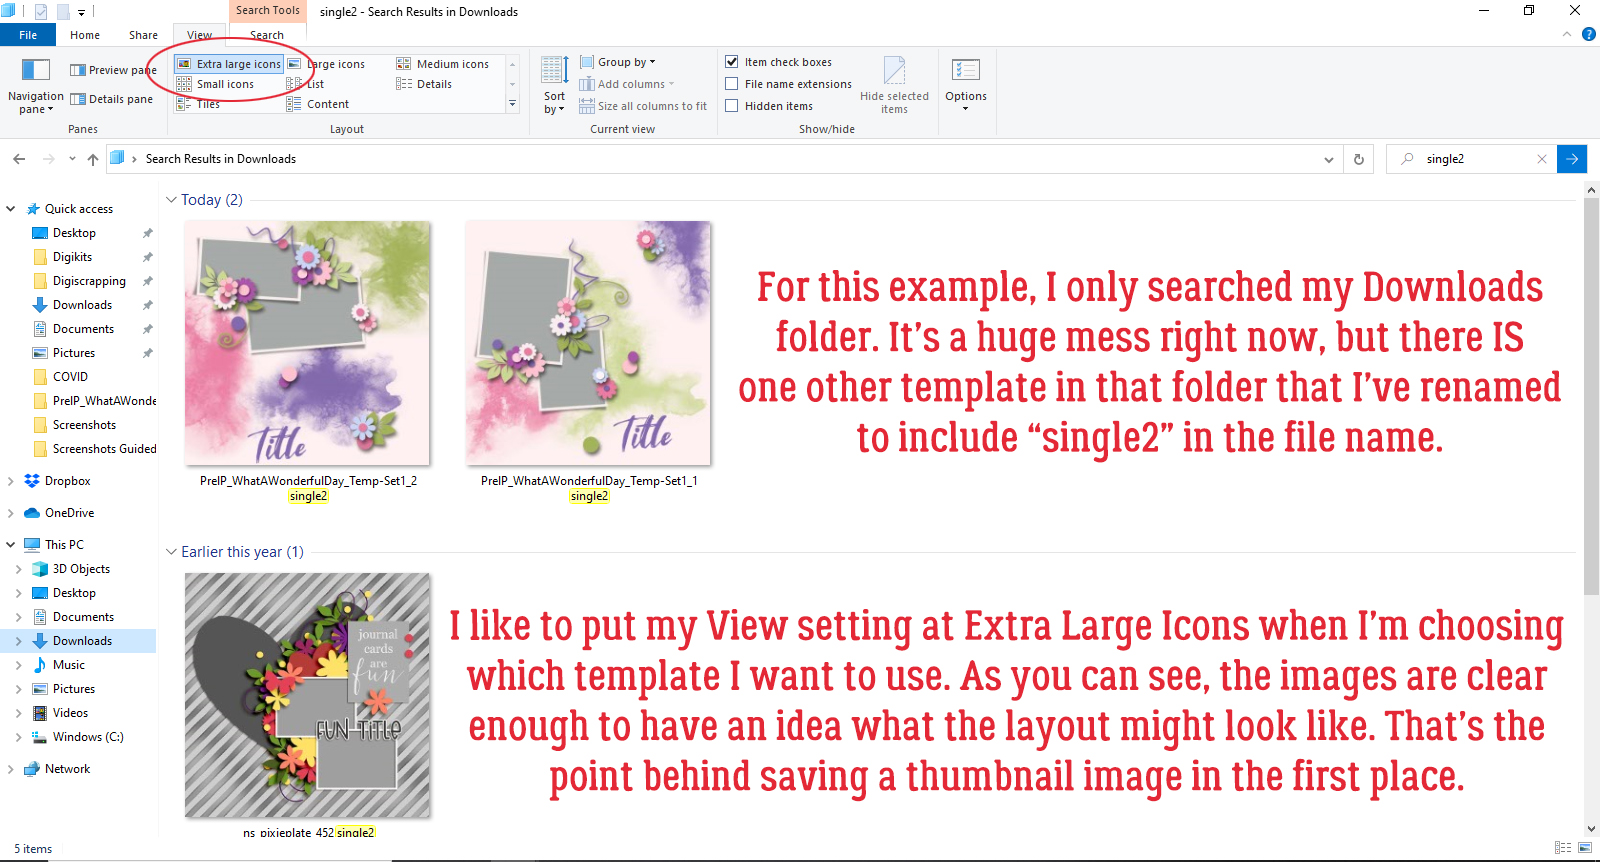
Windows takes a deep breath and goes hunting. Because I’ve only unzipped a handful of zipped files in my Downloads, it didn’t take long to turn up the three previews with that tag on them. With my view setting at Extra Large Icons, I can easily see the basic details of the templates I’ve located. Then I can choose the one I think will work best for the layout I have in mind.
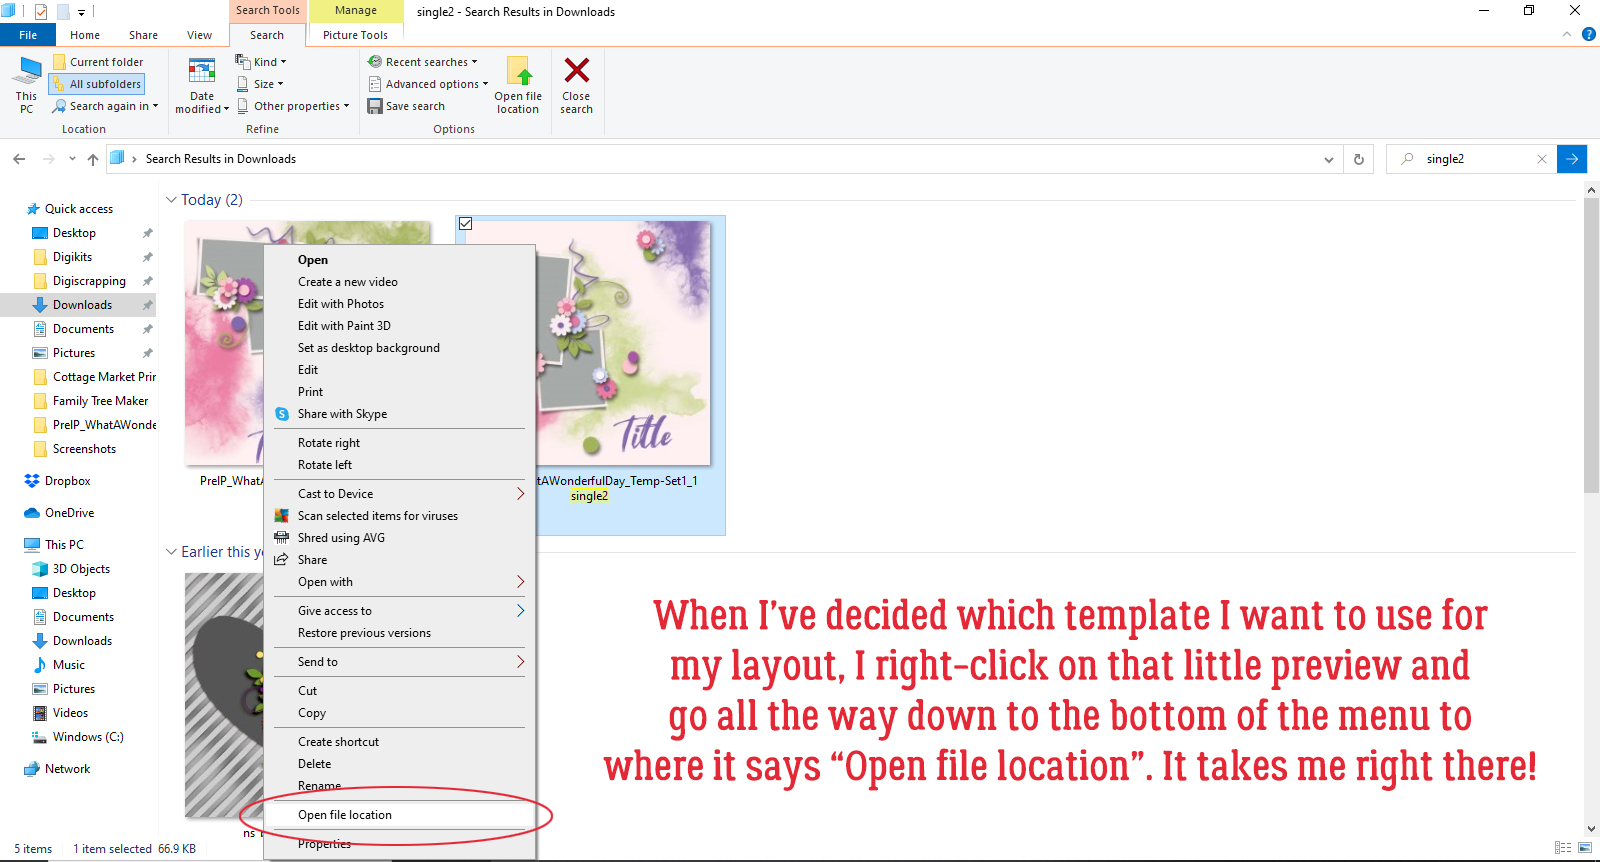
Getting back to the folder with the template I want to use is easy too. I right-click on the thumbnail and roll down almost to the end of the menu to where it says Open file location. Windows will take me right to it! It’s literally that simple.
Just so you don’t think I’ve led you down the garden path, I’ll show you a search in my Digikits>Templates folder, which has thousands of files in it. (I’ve used this search feature to find files anywhere on my 2TB computer.) I used the same search term, “single2” and turned Windows loose.
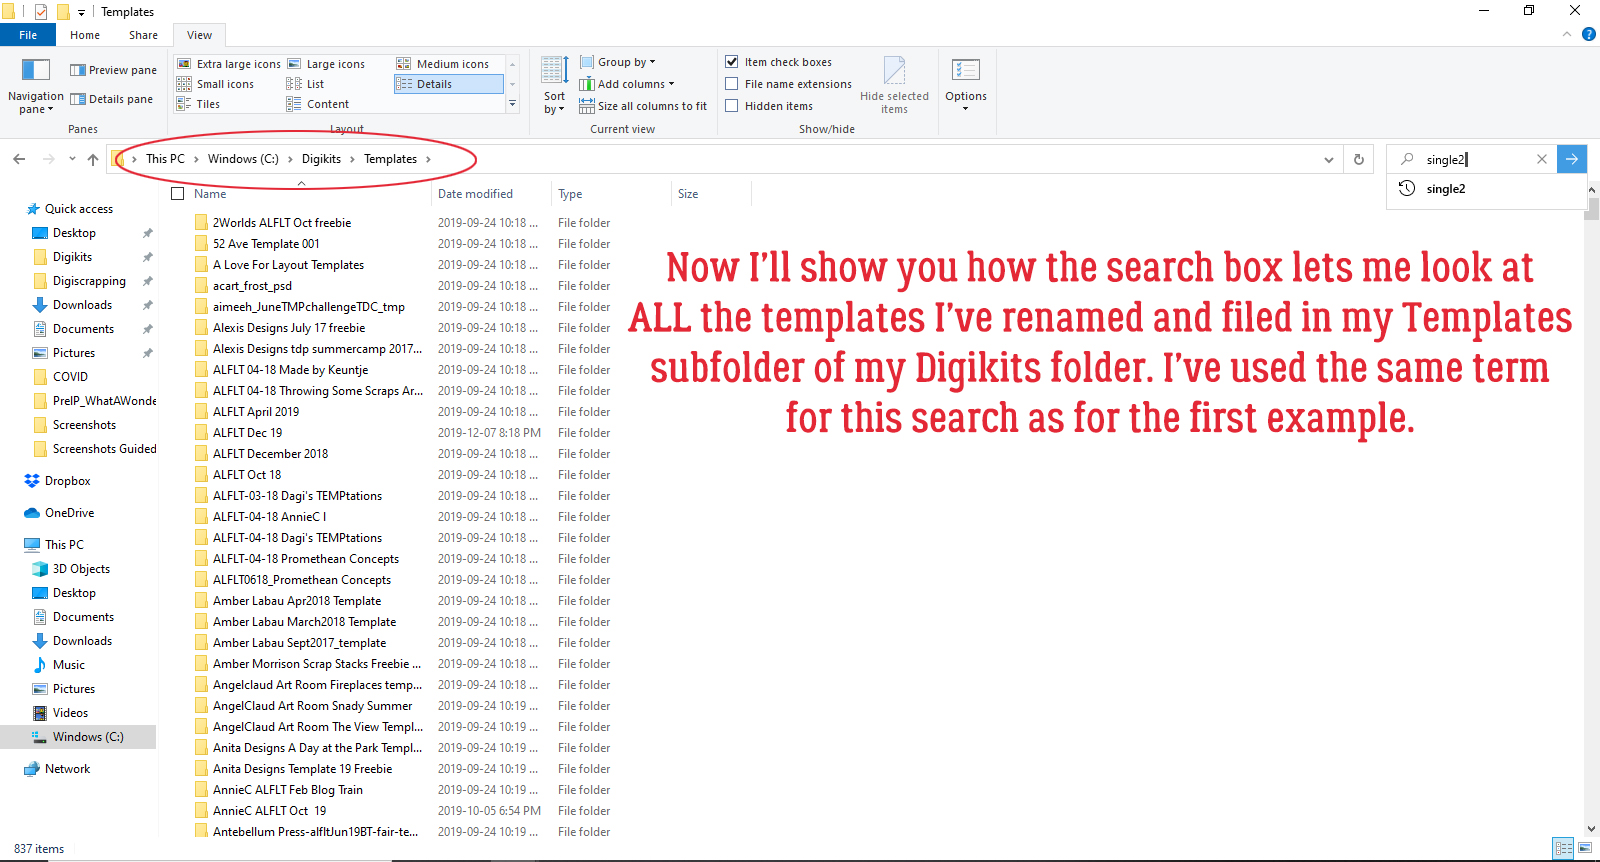
Explorer is still going, but it’s already turned up all these files!
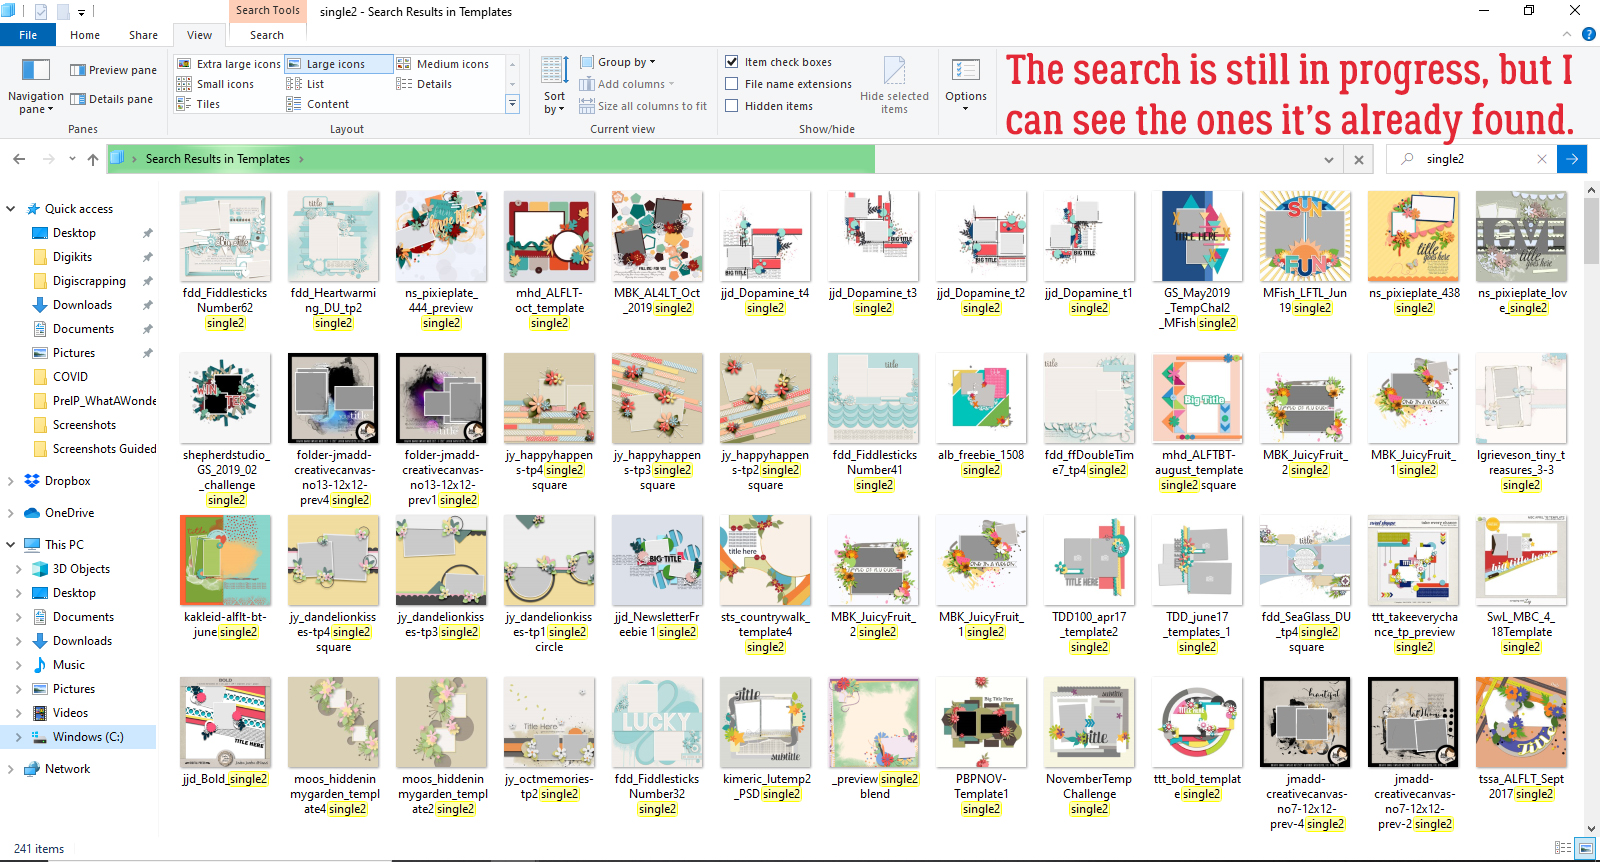
Here are just a few of the “single2” templates I have. Guess I should get some layouts done, eh?
Do YOU have a good way of organizing and finding your templates? When I talked about the topic for this tutorial with Resident IT Guy, he asked why I don’t use a spreadsheet. Humph! I’m not great with Excel or any other spreadsheet software either, for that matter. For me it would be way more work than it would be worth. But maybe somebody out there has one they might share with the class. Please tell us how you manage your templates!
![]()