Curvy Lines/Borders Method #2

PDF VERSION : https://bit.ly/3gdizBK
Hey ladies! I’m running behind today after being awake half the night, so this might break a bit late. I’ll be trying my darnedest to get it out on time. Today I’m going to show you another method for curved lines/borders using Photoshop Elements. This one is pretty easy, but there are a few steps.
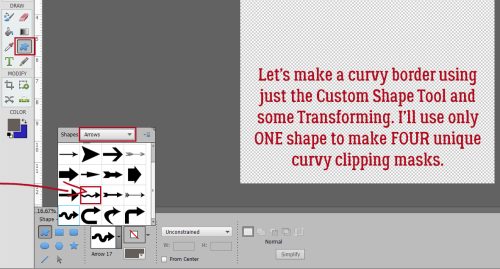
Open up a new canvas on your workspace. Then choose the Custom Shapes Tool. The border I’ll make will have 4 layers, all created with the exact same Shape but looking quite different. [Editor’s note: Jan started out using Arrow 17 but didn’t like how it was turning out. The tutorial uses Arrow 14.]
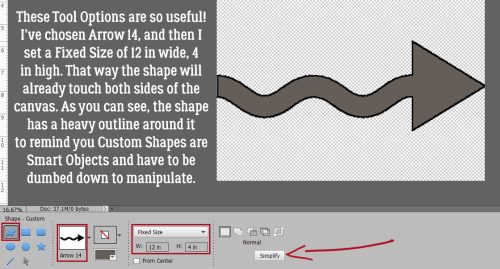
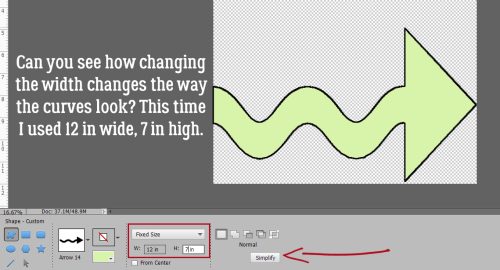
To make a bit less work for us, I set a Fixed Size for the arrow Shape. I went with 12 in for the Width and 4 in for the Height. The easiest way to make sure the Shape ends up actually ON the canvas is to click along the left edge. Note that heavy outline on the Shape; that signifies that the Shape is a Smart Object. To do any of the following steps with it, it needs to be Simplified. If you’re working with Version 15 or newer, you’ll have a Simplify button right there with the Tool Options.
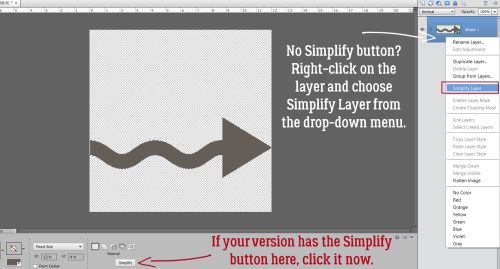
If you don’t see that button, right-click on the layer in the Layers Panel and choose Simplify Layer from the dropdown menu.
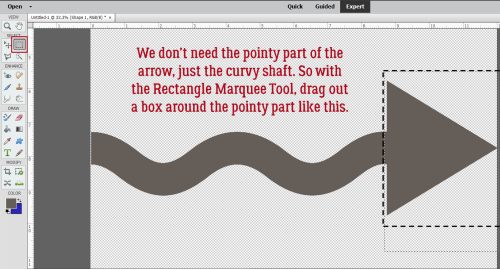
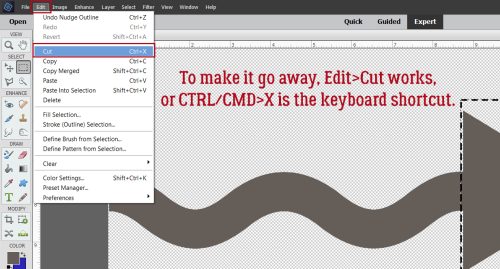
Now to dispense with the pointy part. Drag out a box around it with the Rectangular Marquee Tool.
Now, Edit>Cut or CTRL (Windows)/CMD (Mac)>X.
If you’re making waves and not a side border, you can skip this part.
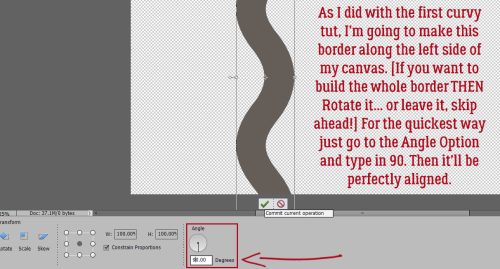
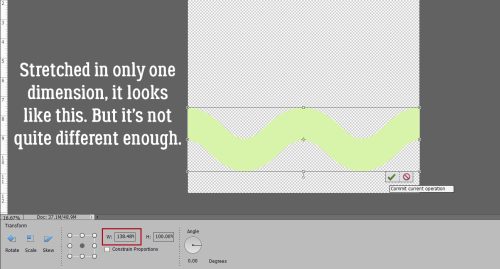
These steps that follow are all subject to interpretation – they’re examples that show you HOW to make alterations, not orders!! Here I’ve Resized the curvy shape and Constrained Proportions so it looked exactly the same as before, only it extends from top edge to bottom edge.

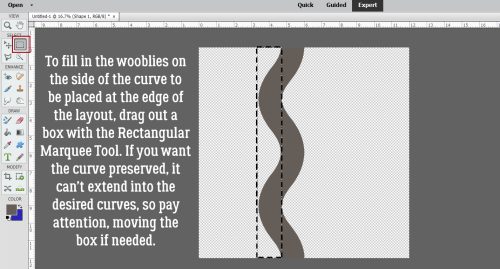
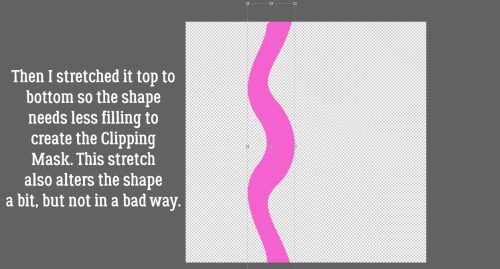
If you want to make your curvy shape into a Clipping Mask, it may be necessary to fill in one side of the curvy part. Drag out a box with the Rectangular Marquee Tool, making sure the edge on the side you want to keep curvy doesn’t extend too far. Otherwise those nice swoops will get squared off.
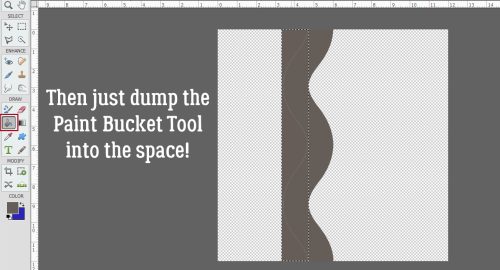
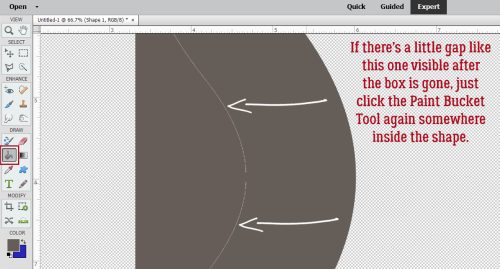
Then just dump the Paint Bucket into the space!
To get rid of the box outline, Select>Deselect or CTRL/CMD>D.

This is just housekeeping.
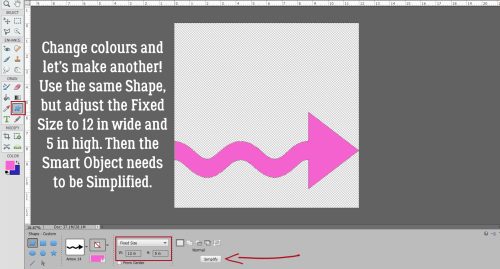
The preceding steps will be repeated for each of the variations to follow. Turn off the finished layer’s Visiblity, change colours and let’s make another curve. I changed the Height to 5 in for this one. the curves come out a little tighter.
Rather than just Resizing it, I’m going to use the Image>Transform>Skew menu. In this option, only the corner ‘handles’ are active. You can move them horizontally or vertically.
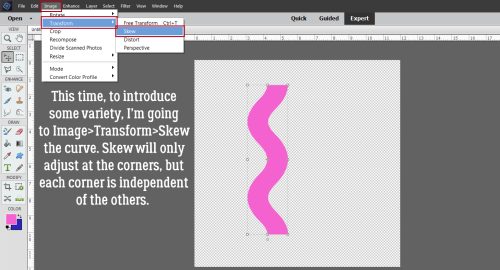
Like this…
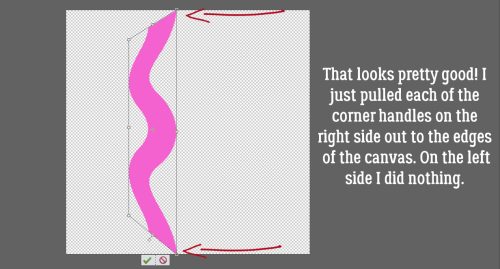
Then I stretched it top-to-bottom (NOT Constrained) so the left edge runs the full 12 in. This also changes the curve a bit.
Here’s how the first two layers look together.
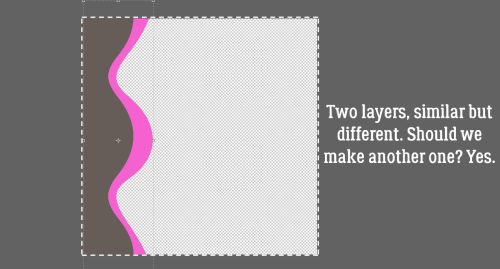
Same shape, slightly different dimensions, very different look!
After beheading the arrow, I stretched the curve across the canvas. But it’s not different enough from the previous two, so…
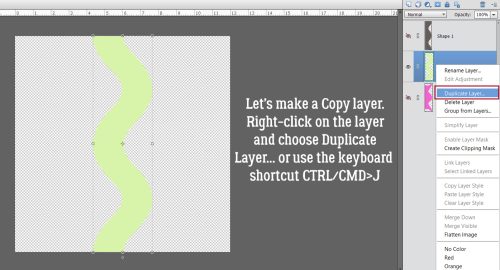
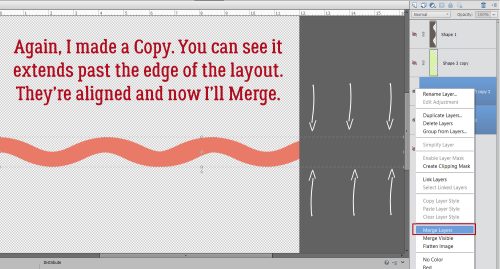
I made a Copy layer: right-click>Duplicate Layer>OK or CTRL/CMD>J.
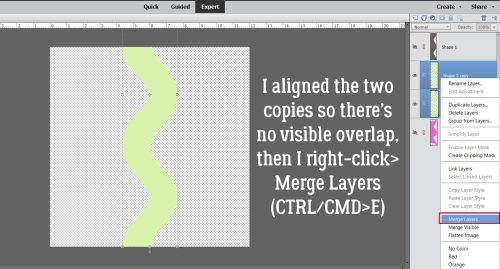
I moved one Copy so that it overlapped and aligned with the other Copy. Then the two layers need to be combined into one by Merging. Either activate both layers by click>SHIFT>clicking on them, right-click>Merge Layers… or CTRL/CMD>E. The Merged curvy shape extends off the canvas, but I’ll show you something that’ll help with that.
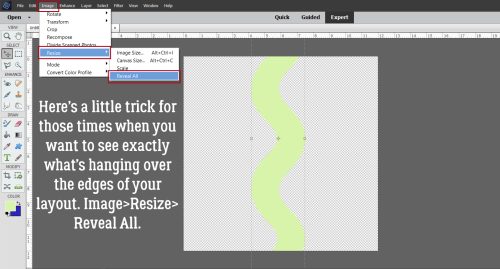
To see the whole extended curvy shape, Image>Resize>Reveal All. Boom!
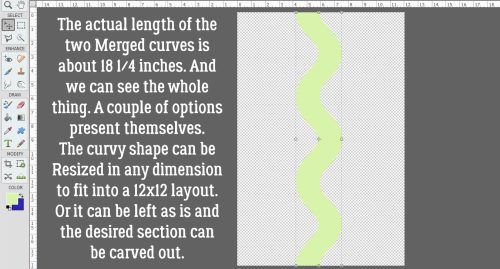
Here you can see that my extended curvy shape is about 18 1/4 inches long.
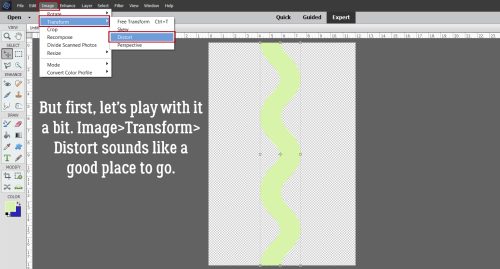
Now let’s change the way the curves look. This time let’s use Image>Transform>Distort.
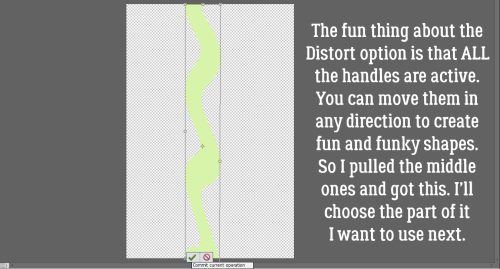
Distort has a lot more opportunities for weird. Each of the handles is active and can be moved horizontally, vertically and laterally until you see something you like.
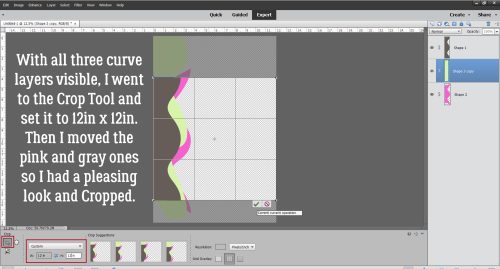
All three shapes are visible now and I can move them around until I have a chartreuse curve I like. Once I’d made my choice, I went to the Crop Tool, set the size to 12×12 and Cropped the canvas.
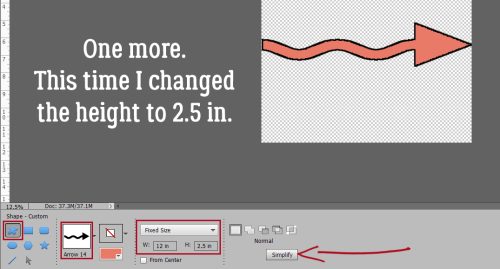
Last one.
And again, I made a Copy, aligned and Merged.
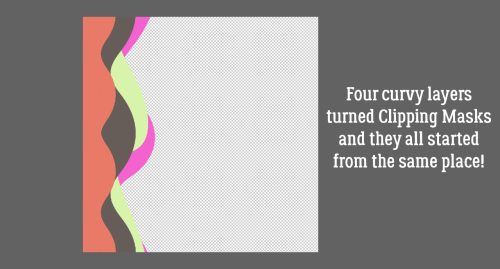
There! Four curved border Clipping Masks, all ready to go. And they all came from the same source Shape.
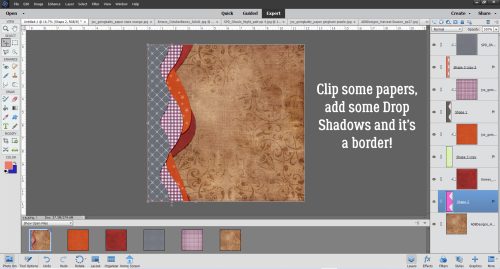
In case you wanted to see them in action, I Clipped some papers from this month’s Buffet kits to them and hit them with Drop Shadows.
I’ll be back tomorrow to introduce the October Designer Spotlight superstar…
PDF VERSION : https://bit.ly/3gdizBK
![]()