Happy Hallowe’en everybody! Jan’s taking the day off today and will be back next Tuesday with some fresh, new content. She hopes…
![]()
Happy Hallowe’en everybody! Jan’s taking the day off today and will be back next Tuesday with some fresh, new content. She hopes…
![]()
Happy Friday friends. It’s hard to believe we’re at the end of another month. The Christmas holidays are slowly (or not so slowly) creeping in on us.
Remember if you spend $10 in the store, you get this great collab for free.

Let’s see what the designers have for us this week.


Have you picked up the October Monthly Mix? Only a few days left to get it at the sale price.

How are your challenges going? Complete any 10 challenges to get this kit as a reward.

Have you had time to check out the feature Digital Scrapper class for October? This time we are featuring a Template Mini Class called Easy As Pie.

In this class by Jenifer Juris, you’ll be blown away by the beauty of it all.
Exclusive Sale for GingerScraps Customers
Save 35% through Tuesday, October 31, 2023, Midnight EDT. Regularly $30.


Check out this tip from Jenifer for using your new pie templates.
Pie Template Photo Tip:
And, here’s the page Jenifer created with her tip:

I hope to see you in class!

Quick Trick – Hiding Multiple Layers
![]()
PDF Version : https://bit.ly/40foM33
Have you ever been working with a template and found yourself struggling with placement of elements because there are SO MANY LAYERS in the way and you wish they would just disappear? This happens to me a lot when I’m trying to adjust photos for size. I don’t want the clipping mat to be visible, but sometimes one or more edges is invisible because they’re underneath a cluster or another photo spot. If this sounds like you, read on! I JUST learned this trick and I can’t believe it took me this long!! I’m using a template from Miss Fish‘s Just the Basics (retired) collection. Look at all those layers…

I want to isolate the layer this bow is on. I right-clicked on the eyeball (visibility icon) and this menu appeared. So I chose Show/Hide all other layers.

And POOF! All the other layers are sleeping. It’s magic. It has to be! But this is one situation where Undo [CTRL/CMD>Z] won’t work. To turn on visibility for all the sleeping layers, just reverse the process… Right-click>Show/Hide all other layers. Of course, you know there HAS to be a keyboard shortcut, right? For the Work Smart Not Hard crowd, it’s just ALT/OPT>eyeball.

How’s that for QUICK??
It looks like autumn is here to stay. Yesterday I was doing yard work in shorts and a t-shirt, this morning we woke up to snow on the mountains (none at our altitude… yet) and the mercury is struggling to stay at 6°C (43°F). There are still lots of leaves on the trees, even though we had gale-force winds yesterday, but winter is definitely on its way. What’s it like where you are?
![]()
Happy Friday! The weekend is almost here, and our excitement knows no bounds! Fridays are not just the gateway to the weekend; they’re your ticket to discovering the latest treasures our designers have crafted just for you. Get ready to unwrap a world of creativity and inspiration. Let’s dive into the delightful offerings awaiting your artistic touch!
Remember if you spend $10 in the store, you get this great collab for free.
Let’s see the great things the designers have for us this week.


Have you gotten a good start on your challenges? We are more then half way through the month, make sure you get them all wrapped up before the month is over. Complete any 10 challenges to get this great reward.
Have you had time to check out the feature Digital Scrapper class for October? This time we are featuring a Template Mini Class called Easy As Pie.
In this class by Jenifer Juris, you’ll be blown away by the beauty of it all.
Exclusive Sale for GingerScraps Customers
Save 35% through Tuesday, October 31, 2023, Midnight EDT. Regularly $30.
Check out this tip from Jenifer for using your new pie templates.
Pie Template Photo Tip:
And, here’s the page Jenifer created with her tip:
I hope to see you in class!


Follow JB Studio in her Facebook Fan Group.
Remember, the download is kept up for 5 days, and then it is taken down. If you miss pieces, the kit will be available for purchase on the first day of the following month.

Challenge Spotlight: Pinterest
![]()
This month, Lisa Minor chose this fall wedding photo as her Pinterest Challenge inspiration.

Her description of the photo is “it’s all about the colors!”, “floral fall colors” and her Challenge is to use the photo to scrap what the Pin says to you. So far, eleven scrappers have taken her up on it. They mostly seem to have chosen the same theme for their layouts, as you’ll see. As with each month’s Challenge Spotlight, these layouts appear in the order they were uploaded. I’ll point out the aspects that caught my eye, and each layout is linked to the Gallery so you can pop over and offer some praise. Just click on the scrapper’s user name and you’ll fly over to the Gallery.
First up is B2N2Scraps. She’s got the fall theme, the colours from the photo and the flowers. She didn’t miss a trick! Her simple layout puts the focus on the smiles in her photo.

KarenDiamond has the fall theme as well, with a bit more of the blue from the Pin. I see she’s anonymized the child in the circular photo as a silhouette. This technique works perfectly in a backlit photo, instead of just blurring features.

DianeInOz went for the colour palette, creating a whimsical layout with a clever nod to autumn. I love that wood-look cow cutout!

This stunning layout is from greenfiend27. Her choice of soft oranges and corals against a gray, dusty background, with ample floral elements, provides the perfect foil for that beautiful photo. The result is elegantly grungy. I think this is my favourite of the bunch.

Windswept has all the colours in there, and chose our major autumn celebration as her theme. Her focal photo is so cute!

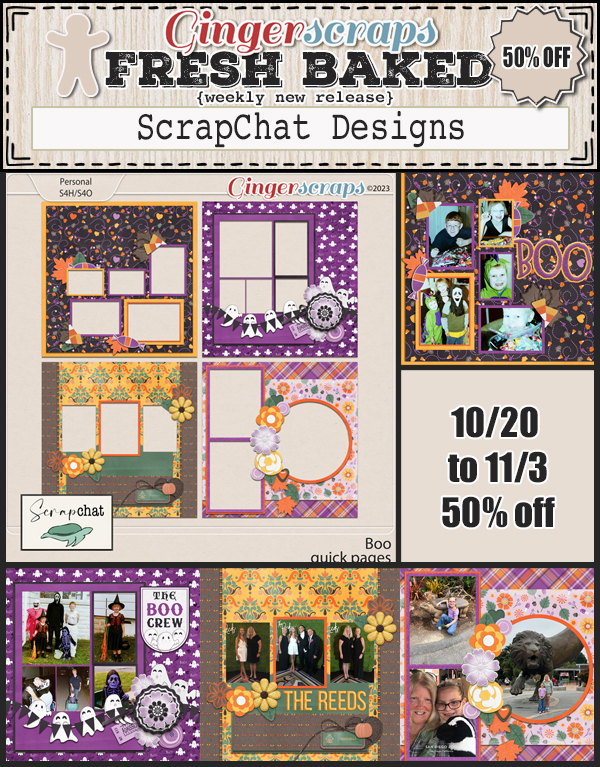
The pocket style of zippyoh‘s layout works so well with all those pumpkin photos. The harvest/autumn theme is obvious but not in-your-face. She accents all the orange in the photos very nicely with touches of purple, gold and white. Aren’t those little foxes just too sweet?

For her layout, pinklily chose to document a week of her late fall activities from last year. (I’ve been to that mall… just sayin’. Winkwink!) The colour palette was what inspired her here.

Route66 pulled only 4 of the dozen colours in the Pin for her layout. Looks like somebody’s been playing with title tuts. 😉

The subject of this layout from gmae is a somber one. It could be seen as a play on “fall”, and a clever one at that. She has pulled a few of the fall colours from the Pin, and added some floral elements. Possibly the only flowers these resting places see these days…

Pippin went all in on individual style here. Her sole connections to Lisa‘s comments are her floral clusters and the pinks and blues from the Pin photo. This is a layout after my own heart.

Last up is this very autumnal layout from snojewel. She has some subtle hints of gorgeous teal stamped in her background. The oranges, browns, golds and burgundies complement her photos of Ben very well.

Next week I’ll have a Quick Trick for you. I haven’t decided which one from my little list of topics… we’ll all find out together!
Given what’s happening around the world these days, I hope this has given you a brief break from fear and worry. I also hope the people you love are safe and healthy. And that we all stay out of harm’s way.
![]()
Who is ready for the $1.50 Bake Sale?! I know you are going to LOVE what we have to offer this month!

I’m so excited to share a new class with you from Digital Scrapper! This time we are featuring a Template Mini Class called Easy As Pie.
In this class by Jenifer Juris, you’ll be blown away by the beauty of it all.
Exclusive Sale for GingerScraps Customers
Save 35% through Tuesday, October 31, 2023, Midnight EDT. Regularly $30.
Create 10 Templates w/Hundreds of Possible Variations

This class will teach you how to use actions and shortcuts to create digital scrapbooking templates that showcase a geometric shape cut into equal sections.

I hope to see you in class!
Happy Friday! Did everyone make it through DSD? Did you find some great deals? We can’t wait to see what you make with your new goodies.
Remember if you spend $10 in the store, you get this great collab for free.
Let’s see the great things the designers have for us this week.


Have you gotten a good start on your challenges? Did you use anything you got during the DSD celebration for a challenge. Complete any 10 challenges to get this great reward.
Greetings, Scrapbook Enthusiasts!
As our exhilarating DSD celebration draws to a close, I hope you’ve been relishing the delightful blend of shopping frenzy and engaging forum activities!
A quick reminder: our sensational 50% off sale will conclude at 11:59 ET on Thursday, October 12. Hurry, because once the clock strikes midnight, prices will gracefully revert to their non-sale figures. DSD SALE ENDS COUNTDOWN:
And here’s an exciting nugget of news: dive into our special DSD Grab Bag section at the store! You won’t believe the fantastic deals waiting there just for you!

🌟 **Check it out here:** [DSD Grab Bags]
But wait, there’s more! For purchases over $20.00, you’re in for a treat – our “Let’s Get Crafty” MEGA Collab is absolutely free! Make sure to snag this amazing offer before the DSD sale bids adieu.

Lastly, don’t overlook the treasure trove of discounts and specials tucked away in our forum’s hidden corner: DSD 2023 {Specials & Sales} Our thoughtful designers have poured their generosity into creating additional delights for you there.
Get inspired by our special DSD 2023 {Fun & Games} Our designers have a variety of super fun activities to kickstart your scrapping!
So, make the most of these final moments, indulge in your passion for scrapbooking, and seize these unbeatable offers before they slip away. Happy scrapping! <3 Ginger
Four Ways to Use Dingbat Fonts
![]()
PDF Version : https://bit.ly/3PVn7eh
After last week’s tutorial, Lisa commented, “… now that you bring up dingbats I’d love a tutorial on how to really use them in a layout!” So today, I have four techniques to share. There are many more than four, but for now we’re just looking at four. These are all relatively simple techniques we’ve used before so I’m not going deep into the weeds with step-by-steps. If you think of other ways to use dingbats, I’d love to try them!
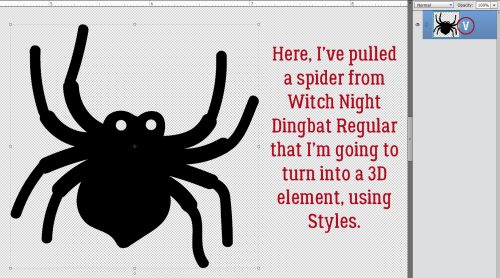
First, if you’re not using a font manager like High Logic MainType, and aren’t familiar with Wordmark It, figuring out which characters will give you the image you want means either searching your computer for “character map” or trying one character at a time. If you look at the screenshot, I’ve enlarged the character V for this spider from Witch Night Dingbat as shown on the Type Layer.
I think this spider would look a lot more scary with some glowing red eyes. So I added a New Layer to put the eyes on, then using the Elliptical Marquee Tool, set on Fixed Ratio 1:1, I dragged out a circle just slightly bigger than the eye hole.

Then using the Paint Bucket Tool, I filled the circle with red.

He’s got two eyes, so I Duplicated the red circle [CTRL/CMD>J], positioned the new circle over the other eye hole then Merged [CTRL/CMD>E] the two layers.

I intend to layer two Styles on the eyes, one a red acrylic Style that adds both a Bevel and a highlight, and a glass Style which will add some shine and a Drop Shadow. While it IS possible to layer Styles on a single layer, the two I plan to use won’t work that way. So I Duplicated [CTRL/CMD>J] my eyes layer.

The acrylic Style is opaque and changes the colour of what’s under it. The glass Style makes the layer it’s applied to transparent or translucent, depending on which glass Style you choose. This is why the acrylic was applied to the lower eye layer and the glass to the upper. I wasn’t totally jazzed by how the glass layer looked so I made some adjustments; I double-clicked on the fx symbol on the glass layer and moved the sliders until I liked the look. To put the highlight in the right spot, I changed the Lighting Angle. Once I was happy, I Merged [CTRL/CMD>E] the two layers and moved them under the spider body layer.

All that was left now was to add a Simple Scalloped Bevel to the spider’s body and it looks quite evil!

Dingbats are ideal for creating Brushes. The character for this black cat in Witch Night Dingbat is the letter O. Resize the image until it’s about 2500 pixels. Then click Edit>Define Brush.

My example is 1583 pixels, but can be enlarged when it’s used as a Brush. I gave it a name, Black Cat. A highly original name.

This part is just for fun. I want to add some dimension to the image, so I’m going to apply a Layer>New Fill Layer>Pattern Fill. Then I scrolled through the options in the Pattern Fill menu to Texture Fill and chose Denim. It’s the one that looks most like fur. Only problem is now the cat’s gray, not black. So…

I Merged [CTRL/CMD>E] the Fill Layer and the Brush Layer together. Then I adjusted Levels. [CTRL/CMD>L] I also filled the eyes with green and added a pupil, but that was for me! Now if I add a little Bevel, I’ve got a puffy sticker to add to my layout.

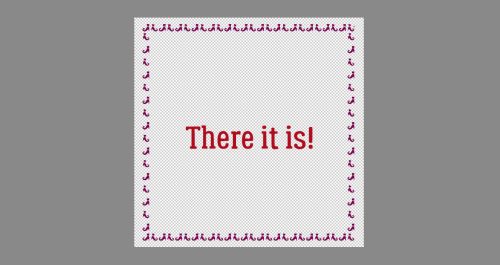
The third use I’ve got for you today is to use dingbats to create a border. I’m still using Witch Night, and the character that produces a pair of witchy shoes is either E or Y. All I did here was to type out a row of 13 pairs of shoes.

Don’t forget that dingbats are actually fonts where Elements is concerned. So they have to be treated like fonts. Before I can add Texture, Styles or do much of anything, the font has to be Simplified.

For the top of the border, I just Duplicated the base layer [CTRL/CMD>J] and moved it to the top of the canvas. Use your View>Grid (not shown)! It really helps with positioning and symmetry.

Now, I could have just Duplicated the base layer again and rotated it, but I decided I wanted to have the soles of the shoes all “touching the ground”. I knew there were individual shoe dingbats in the set, so I changed the Type Tool from Horizontal to Vertical then typed out a line of alternating Is and Rs. I ended up with one too many shoes, but that was easy to fix.

There. I have a border!
This last example is using both a traditional font and a dingbat. My favourite Bugs Bunny cartoons are the ones with the vampire, the witch, bats and the two-headed buzzards. In one, Bugs and the vampire have a spell-casting battle. So this just seemed to create itself. The traditional font is called Abracadabra (of course, what else could it be?) and the dingbat is from Alit Halloween. I typed out Abra ca dabra – with spaces for the bats, then Simplified the text. If I didn’t do that, when I switch to the dingbat, the font will change to it too. So nope!! I typed out the bats (character is b) on their own layers so I could tilt them. I wasn’t happy with the way everything aligned and fitted together so I Cut the “ca” out, Pasted it back onto the canvas then moved it into place a bit lower than the baseline. This could be used as a sticker by adding a white Stroke to it, or it could have a Style applied, or a paper clipped to it, or… whatever suits my fancy.

If you think you might want to reuse any of the things you’ve created from dingbats, make sure to Save As a PNG so the transparent background is preserved. I hope I’ve given you some ideas here. If the kit you’re working with doesn’t have that one special object in it that you’d really like to include, check out your dingbats!
![]()