Tutorial Tuesday (Photoshop Elements)
Creating a 3D Metallic Look on 2D Shapes

We made it! This is the last Tuesday of 2020… and I’m sure none of us thought we’d ever get here. It’s been a long, long year. This is also my 200th Tutorial Tuesday post! I definitely never thought I’d have that much to share with you, but thanks to the women who approach me with questions, I’m still going. This week’s tutorial is the result of a query from Bernice (bkasko). She’s a planner, and she found a beautiful planner template set created by Lisa, the Cherry on Top. She was particularly attracted to the template that looks like a multi-ring binder, but she wasn’t having any luck creating a realistic metal effect for the rings. She’d tried a bunch of things and wasn’t happy with the results so she asked me what she could try. Off I went to find out. I watched a bunch of videos based in Photoshop, which of course are useless to Elements users. But… because I’ve been learning all the ins and outs of Elements so I can teach them to you, I was able to come up with an Elements method by playing with some of the less-commonly accessed features in the software. Let’s see what I’ve done.

First I had to decide what kind of 2-dimensional image I was going to play with. I chose a brush (it’s NOT a reflection of anything, however!) that lends itself nicely to a metal effect.

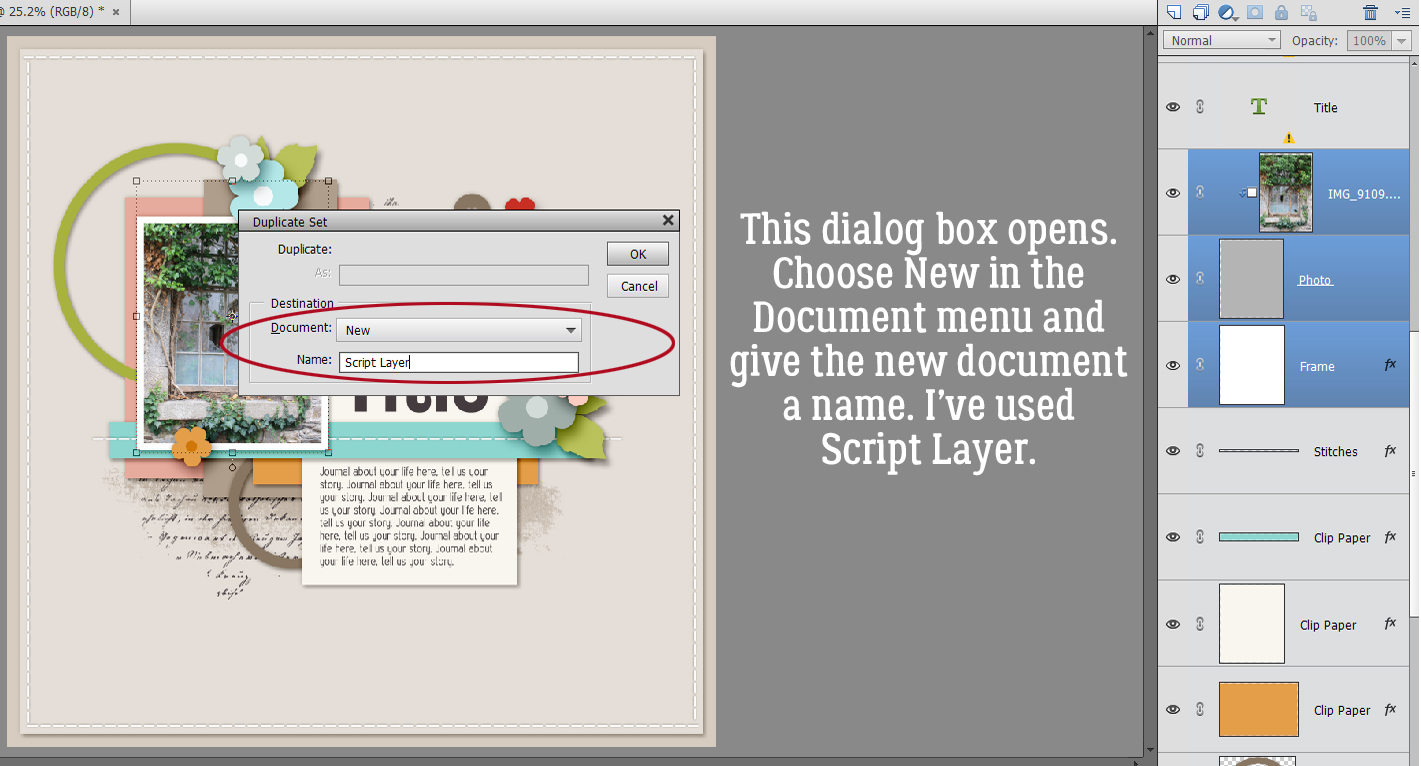
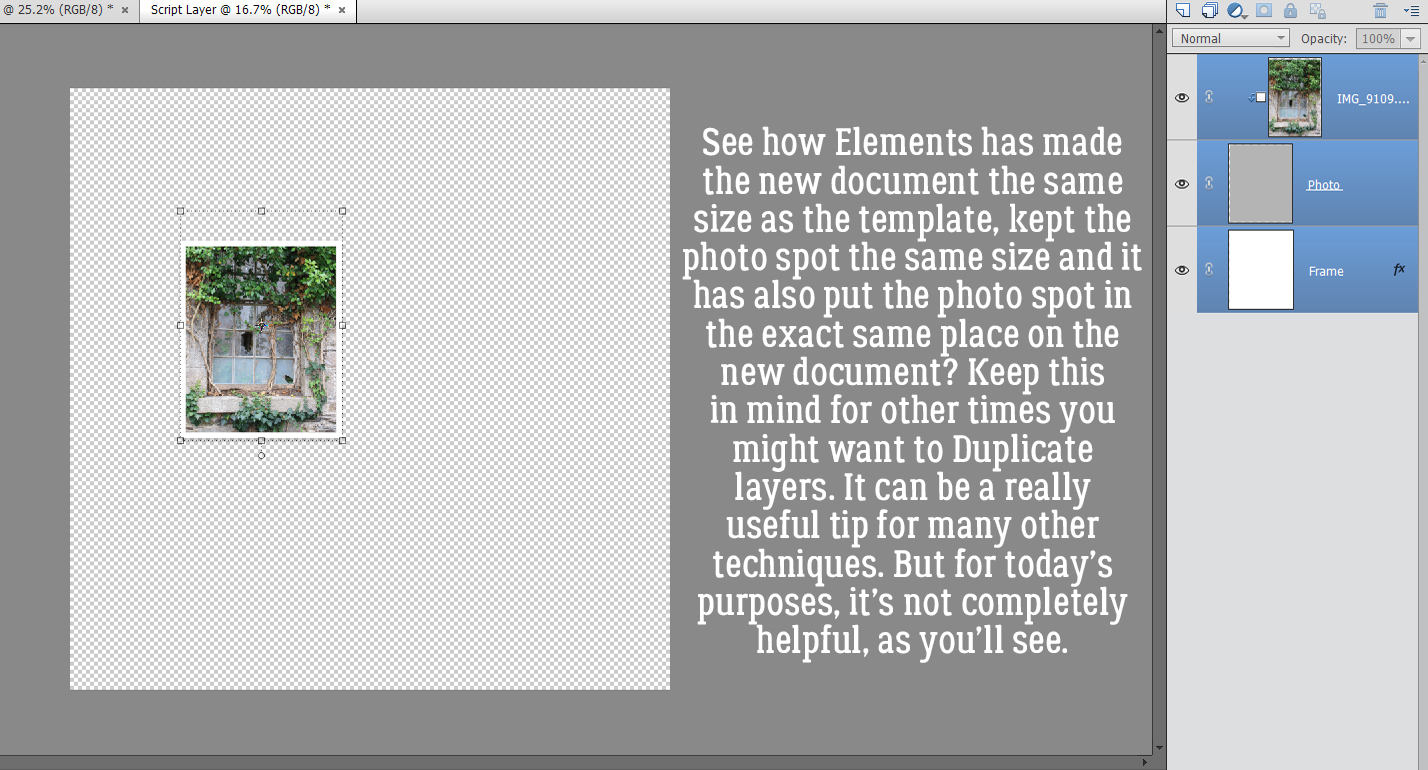
A very important part of this technique is to work on a transparent background, with your 2D image on a new, blank workspace. As you see in the screenshot, my brush is on a transparent background; if you’re using a template, Duplicate the layer with the item you’re metallizing onto a new document, then move it back to the template when it’s finished. Now, this brush is a little anemic when it comes to presence. So I added some padding to it.

I used an 8 pixel Stroke centered over the brush to just beef it up a bit. Not so much that the clean lines were lost.

Yes! That’s more like it!

Then I made 3 copies (CTRL/CMD>J) of the original layer. To keep them straight in your mind you might want to rename the layers but that’s not essential. I also turned off visibility to all but the layer at the bottom.

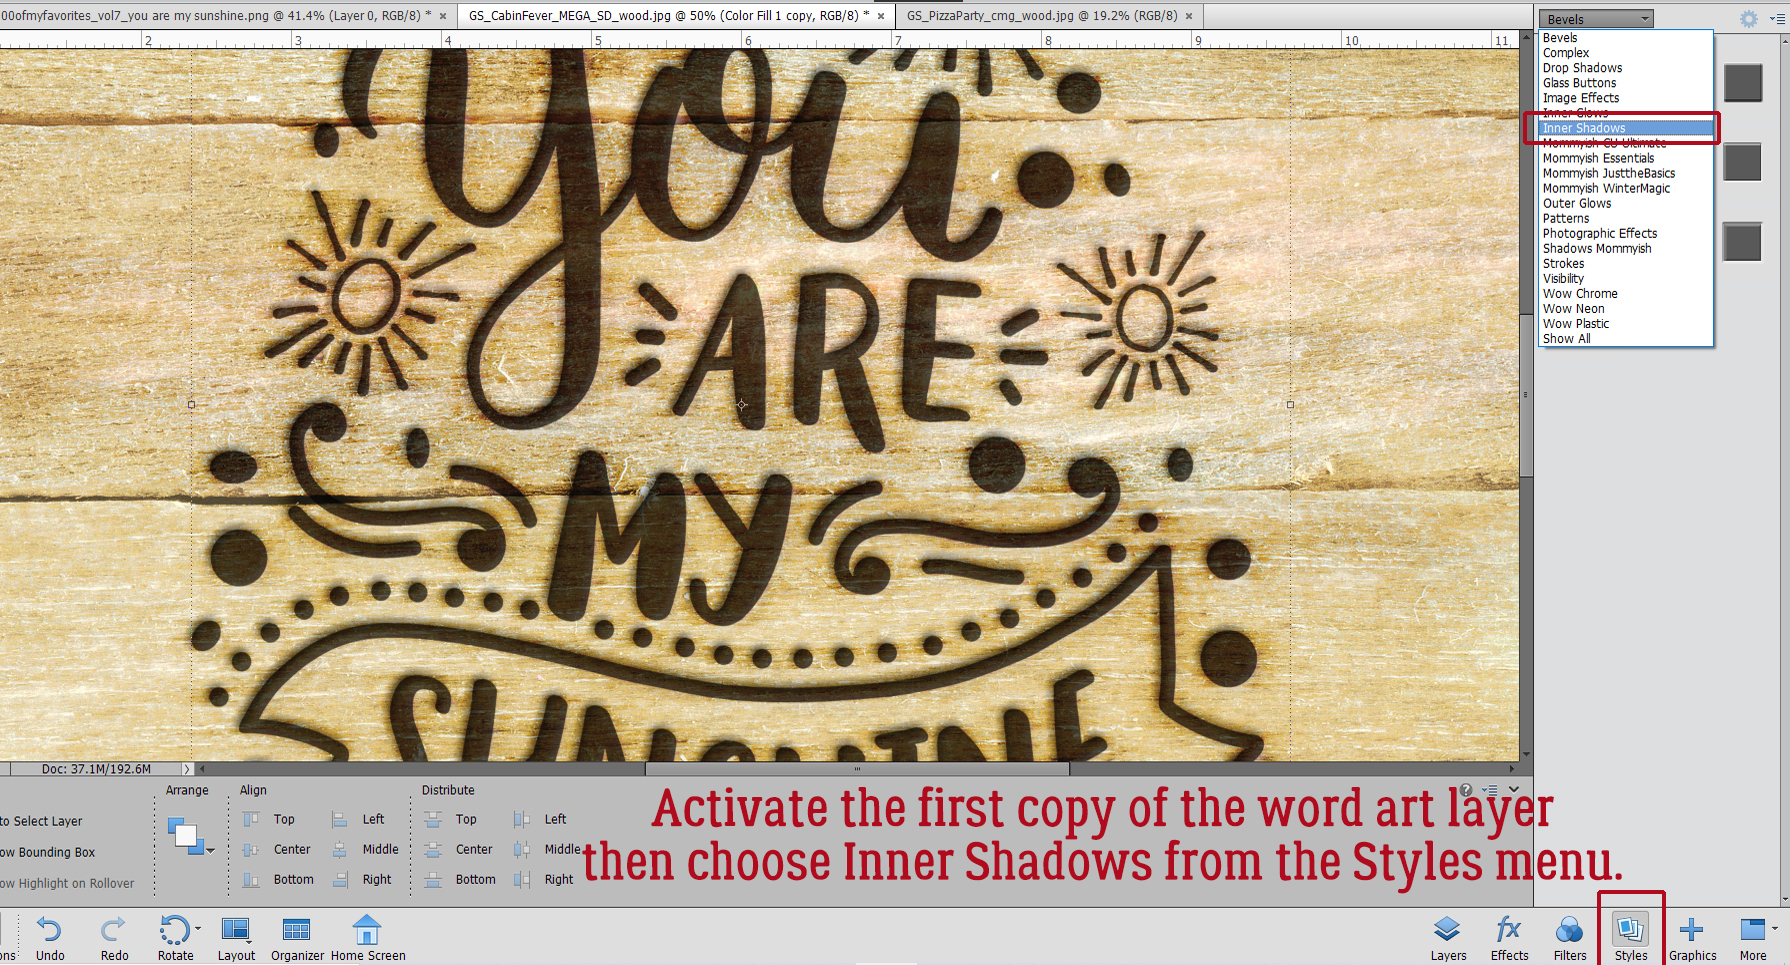
I really find it helpful to Zoom in and out while I’m working on this kind of project. Keyboard shortcuts: Zoom In CTRL/CMD>+ and Zoom Out CTRL/CMD>-. The first adjustment I’m going to make to my image is to add a Bevel. Click on the Styles button at the lower right of the workspace then choose Bevels from the pull-down menu. The Bevel shown inside the red box is the Simple Inner Bevel and that’s what I used.

You can see that there’s now some rounded dimension to the brush. Cool, right?

Editing Layer Styles adds so much creativity and possibility to our work. To open up the Edit menu, double-click on the fx icon on the layer. The new menu shows you what you can change about that Layer Style. The defaults for Bevels are Lighting Angle 90°, Size 21 pixels and Up Direction. I adjusted the Lighting Angle to 120° and the Size to 40 pixels.

Next, I moved UP one layer to Layer 1 Copy. Visibility is on.

Still in the Styles menu, I chose the Inner Glows function.

From the Inner Glows options, I chose the Small Border Glow.

Huh! Look at that! There’s some definite dimension there now! (It looks a bit like epoxy right now.)

I’m going to Edit this Style too. Double-click on fx and adjust the Size and Opacity of the Glow. This is an active process and your preview will change as you make your adjustments so you can see what you’re doing. It’s also possible to change the colour of the Glow by clicking on the colour swatch and choosing another colour. Pure white is “ffffff” for those you like to be precise.

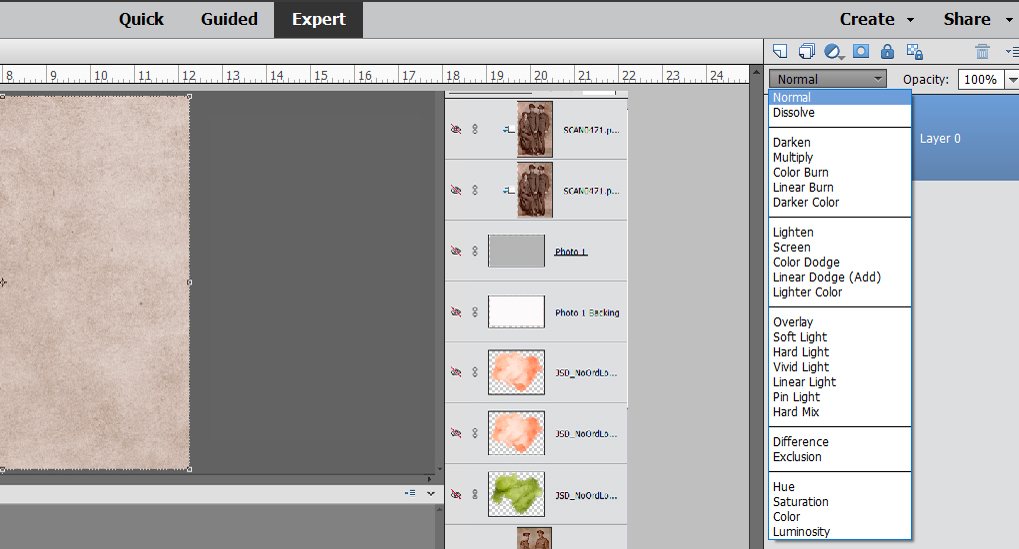
Now to change the Blend Mode for the Inner Glow layer to Screen. This lightens the layer and gives it the contours of the layer below.

Moving up to the Layer 1 Copy 2 layer, I turned the visibility back on. Don’t worry that all the work you’ve done so far isn’t visible. It will be!

For this layer I’m going to add a Wow Plastic Style.

The two layers at the bottom of the stack are off. The Wow Plastic style I used is the Clear Shadow style. Right now it looks ummmm… bad! But it’s easily fixed.

First thing I did in the Edit Style menu was to turn off that honking huge shadow. This style uses an Outer Glow, which I adjusted so that the Size is 18 pixels, the Opacity is 22% and the colour is pure white. Then I increased the Bevel on this layer to 75%.

Here’s where I sorta dropped the ball. I missed a screenshot. I’ve moved up to the Layer 1 Copy 3 layer and now I’m going to add another Inner Glow.

Again I used the Small Border Glow.

But this time I changed the Blend Mode to Multiply. This Blend Mode darkens but maintains the contours. Then I dropped the Opacity of the layer to 55%. Up close it doesn’t look too great.

But when I moved the Multiply layer down one space so it’s under the Wow Plastic layer, it looks a lot better!

Then when I pull the Zoom back, the full effect is much more visible. It’s shiny, but not liquidy-shiny. And it has 3 dimensions. 23

I popped a paper (from the December Mini Kit Challenge created by Jumpstart Designs) underneath it. Just to see how I like it. To me, it looks more like pewter than chrome or silver. What to do…?

I Zoomed back in and played with the Opacity of the Multiply layer and settled on 40%. It looks more silvery now.

Okay! I think that looks better. This technique will work on any template object you’d like to metallize. And if you apply it to a scripty font, you can create wire words!

Bernice, please let me know if this was the look you were seeking. To all of you, Happy New Year!! Let’s all hope 2021 is an improvement on all things. See you next year!


Designer Spotlight: CathyK Designs

We’re slipping Cathy in just under the wire here! I know we all understand how hectic December is… So settle in for a few minutes and get to know a little bit about CathyK.

J: How long have you been designing?

C: About 12 years.

J: What made you decide to design?

C: I started making some freebies just for fun, then got hooked!

J: What do you use to create your designs (program, additional tools, etc.)?

C: I use Photoshop CS4 and Inkscape, though I am planning to move to Creative Cloud hopefully soon now that I have a new laptop.

J: Describe your design workplace.

C: I have a computer desk with a desktop computer and large display in our family room. My work area tends to be pretty cluttered, plus I always have my paper planner and paper notebook open on the desk to scribble down ideas.

J: What motivates and inspires you as a designer?

C: I like seeing an idea come to fruition and then seeing how people use that kit to scrap their precious memories. I get inspiration and ideas from color, everyday life, my sons’ activities and interests, magazines, Pinterest, textures, a song, a good quote, our camping trips. Really, anything can be the inspiration for a product!

J: What is your favorite kit currently in your GS store and why?

C: It’s so hard to answer that! I guess my current favorite is my Nature Walk Collection. I absolutely love how the collection turned out! The peach and purple looked fantastic against all the neutral greens and browns. I think that nature/outdoor collections are my favorite to design.

J: If you could only eat one meal for the rest of your life, what would it be?

C: Steak with Bourbon Peppercorn Sauce.

J: What is your favorite game or sport to watch and play?

C: I like watching college football, especially Ohio State. Go Buckeyes!

J: What did you want to be when you were small?

C: An architect

J: Aside from necessities, what one thing could you not go a day without?

C: Well, if people are included, I’d say my hubby for sure. If not, then I’d say coffee.

J: Who would you want to play you in a movie of your life?

C: Um…maybe Sandra Bullock.

J: If you had a warning label, what would yours say?

C: Caution: tends to ramble on!

J: What celebrity would you like to meet at Starbucks for a cup of coffee?

C: Tom Hanks

Thanks for sharing with our readers, Cathy! Before I forget, Cathy has generously put her ENTIRE STORE on sale at 30% off for the whole month of December and she has a terrific kit in the Daily Download. Don’t worry if you’re late to the party, because the whole kit will be in the store in January.

Next month the Designer Spotlight will be a little different. There are some fun new questions and our designers get to decide which ones they answer! I’ll be chatting with Cheré Kaye and Aimee Harrison New Year’s Day so be sure to check in.


Tutorial Tuesday (Fonts)

Christmas is Coming… Get Your Fancy Fonts HERE!

I’m pretty sure I’m not the only one whose having a hectic time right now. Even though Christmas will be a little different this year, it’s still coming and there are still lots of jobs to take care of. I haven’t had much free time this week to do something wildly creative to share with you, so I went for the low-hanging fruit – free Christmasy fonts! (It’s been a while since I shared some wintertime fonts with you, after all.) I have a baker’s dozen for you, and four sets of dingbats that I think you’ll love. They’re all from dafont.com and are 100% free for personal use. The bold blue test links you right to the download area, so have fun! (I won’t tell you how many I downloaded while I was doing my “research”.)

We’ll start with this brand new font called Christmas Bell. It has a bunch of glyphs (swirlicues, doodles and tiny ornaments) that turn the letters into something really special. If you’re unsure how to find those fancy add-ons, I have a tutorial for you called Unlocking the Secret Extras in Your Font Files and one for Mac users here.

Next up is Snowy Christmas. It’s a cute one, with lots of potential. It too has some little add-ons like that adorable snowman.

The third one has the very imaginative title of Merry Christmas. But those snowflakes! And the reindeer!!

Holly and Berries looks similar to Snowy Christmas, but it’s got lots of its own charm.

The Perfect Christmas is also similar, but is a cursive font that looks almost hand-drawn. And it has snowflakes.

Sorry, I got sidetracked there for a second. I was watching a red-tailed hawk looking for lunch! PW Joyeux Noel is font #6 on my list today. It’s more wintery than Christmasy, but it’s fun. (Joyeux Noël is Merry Christmas in French.)

This one has a delicious distressed, grunge look. Miraculous Christmas would be ideal for layouts with a farmhouse or rustic theme.

Christmas Lights is like a font/dingbat hybrid. It has two different looks: the “outside” version reminds me of all the times hubby and I were outside in the freezing cold, putting lights on the gutters without enough clips and freezing our fingers off. Yep, it’s good enough, now let’s get inside! Then the “inside” version looks like the lights have been carefully strung on a mantel or around a door, with plenty of attention to detail.

This one, Christmas Time, comes with two versions, one with stars and one without.

I think I might have shown you Candy Cane before. But it’s cute enough and has so many possibilities, so here it is (maybe) again.

Next Tuesday, December 21, is the first time in nearly 800 years that the “Bethlehem star” (a conjunction between Jupiter and Saturn that will look like a huge star) will be visible to the whole world. (Astronomers say those living near the Equator will have the best view.) If you’d like to know more about why I’m calling it the “Bethlehem star”, drop me a comment and I’ll expound. What made me think of it is the way the stars in Christmas Sparkle look a lot like artistic portrayals of the original New Testament star.

I like this next one for its title-potential. Hello Christmas has a calligraphic style with a scatter of glitz.

What can I say about Christmas/Flakes? It’s a very formal, very upright, very elegant all-caps font with snowflakes!

Now on to the dingbats. There are so many things that can be done with these!! You could create a customized coloring book for a special little person, create a brush you can use over and over, turn them into Christmas cards or gift tags, really the only limit is your imagination.

Xmas TBF Christmas is filled with festive images. That reindeer cracks me up!

I think this one is really creative. The outlines can be done in one color, the fillers in another. Hello Christmas Icons is simple but interesting.

I think Merry Christmas Go would be perfect for the littlest kiddos as coloring pages. The outlines are thick and dark, the shapes aren’t overly fussy and they could be used to teach new words to little readers.

I saved the BEST dingbat set for last. It’s crammed with images both spiritual and fun. There are 3 dingbat sets in one collection called WM Christmas. Pro tip: This one takes a lot of time to queue up to install, so make sure you verify a successful install before you want to use it.

Hopefully next week I’ll have something new and creative for you, but I’m not making any promises. I’m going to make a drive-by visit at my parents’ house on Sunday, just to see them with my own eyes. It’s a 2 1/2 hour drive each way, but the weather should be good. Maybe inspiration will strike while I’m driving… To my Jewish friends out there, may the last days of Hanukkah be blessed.

Tutorial Tuesday (GingerScraps)

Add Some Links to Your Signature!

Last week Missi, manager extraordinaire of the GingerScraps world, asked me if I had a tutorial for adding creative team or blog links to those fancy signatures a lot of our members create each month. It was a very timely question, since my siggy was still stuck back at Hallowe’en. I’m going to start with a refresher on adding signatures to forum posts and then show the simple steps to add links to them. Ready? (Pro tip: Open GingerScraps in two separate tabs, one for the Forum and one for the Gallery. Also open up the destination of your intended link in a separate tab.)

When you open up the Forum section of GingerScraps, over at the far right of the header there’s a Settings button. This is where we’ll find the Edit Signature option, so let’s click on it.

There it is! Click on that!!

See what I mean? Definitely time for a new siggy! Almost hidden at the top of the screen is the existing signature, and below is the Edit box. This is where we’ll be working.

Right-click on the old signature (if you’re changing it… if you’re loading one for the first time, skip ahead!) then choose Cut to remove it. Or you can simply click and hit Delete, or click and CTRL/CMD>X. Any of those methods will get rid of it.

Now move over to your Gallery tab. Click My Photos to go to your Gallery and find your signature in it.  Open it. Right-click on the image and choose Copy image address.

Go back to the Forum tab. As the screenshot shows, I like to center my signature under my posts, so I’ve got the Center Justification button clicked. To add the image of my signature to the box, I click on the icon in the middle line of options that looks like a photo being stretched from the corners.

Then I Paste the address I Copied from the Gallery into the command box and Clicked OK.

Here’s another pro tip. I save my signatures as PNGs so the background is transparent. That lets things like glitter, lace, leaves and branches appear to be sitting on the Forum page and the edges to have an organic look. If the signature is saved as a JPG, the background will be white and the rectangular edges will be visible.

Before I Save my new signature, I’m going to add a link to the GingerScraps Blog. (You, of course, can add a link to your personal blog, creative team gallery, Instagram or other desired space on the web.) There aren’t many font choices on the site, but that’s not a huge problem. I added text to describe what I’m linking to. You can vary the size and the color of the text to suit yourself.

Now go to the tab with your destination opened on it. Highlight the URL, right-click and Copy it.

Return to the Edit Signature screen and Highlight your text. Don’t worry, the URL is still copied and waiting. Click on the icon that looks like a globe with a couple of links of chain at its lower right.

Now Paste the URL into the box and click OK.

The screenshot isn’t quite large or clear enough for you to see that the text is underlined now, which indicates it has been hyperlinked. But it’s there. When you’re finished with that, all that’s left is to Save Signature.

And here is my new siggy as seen in the Forum. I tested the link just to be sure it works. Next month, if I create a new siggy and update it, I won’t have to add the Blog link again, because they’re separate processes in the Edit Signature box. That’s a bonus!!


Tutorial Tuesday (Photoshop Elements)

Stuffing that Envelope!

Did you ladies enjoy the tutorial on Reflections, Perspective and Shadows from a few weeks back? I hope you did. I know the ladies on the creative team for Ginger at Dandelion Dust Designs did, and becky_a wound up with a Layout of the Week with her version of the scraplift. After such success, the team has brought me another technique challenge after they found this beautiful layout by Blackkathy.

That envelope is to die for, isn’t it? It looks three dimensional and so real! So challenge accepted. Let’s hit it!

I looked and looked through my stash for an envelope or pocket I could transform and came up empty. So I created a template, which I’ve zipped up for you to download if you like. You can find it here. Then I clipped a paper from CathyK‘s Christmas Delight kit to it. (It’s rotated 90° to have the stripes running diagonally instead of the original vertical.) When you go to use the template, clip your paper to the base layer BEFORE you move your envelope onto you layout. That way you’ll have both the paper layer and the stitching together.

Then I loaded up the envelope with pretty seasonal goodies that will work with my photo. (It’s from Pixabay, the photographer is Terri Cnudde.) I used more of the elements in Christmas Delight as well as from a couple of CathyK‘s other kits. Remember when you’re putting objects “inside” pockets or envelopes that are stitched down that your objects have to sit within the stitched border. They shouldn’t rest UNDER the stitching, unless they’re flat or you plan to warp your pocket/envelope around them. In this screenshot you can sort of see the bounding box for the crocheted snowflake I’ve tucked in there. (More about THAT choice later…)

To achieve the dimensional look of a stuffed envelope we’re going to use the Dodge and Burn tools. I’ve shown several ways to use these tools before and if you’re already comfortable using them, you’ve probably figured out where I’m going. first up is the Burn tool. If you remember the basics, Burning darkens or burns the where you apply it, while Dodging lightens. I’m going to use a LARGE (367 pixels) soft brush with the Burn tool with the Range set to Shadows and the Exposure set to 55%.

Make sure the active layer is the ENVELOPE and keep it the active layer all the way to the end! I’m right handed and work toward myself rather than away, but you’re welcome to start with either corner, depending on your own preference. I’ve placed the cursor as shown to centre the tool over the actual corner of the envelope. Click and drag the brush down, across and back up along the edge of the envelope to darken it where it would be more tightly attached to the background.

Now you can see the difference. It already looks more contoured. And you could stop here and it would be just fine!

But that’s not my jam… so I’m going to highlight areas where the paper of the envelope would be stretched by the things inside it. I started with the chocolate dipped spoon. To know exactly where the handle is touching the paper on the inside of the envelope, I CTRL/CMD>clicked inside the layer thumbnail for the spoon – don’t click on the layer itself, just the thumbnail. You don’t want to change your active layer! The marching ants show me where the edges of the handle are and I can adjust the size of my brush to fit inside. This time I’m using the Dodge tool with the Range set to Midtones, the brush size is much smaller (65 pixels) and the Exposure is 30%. I click-dragged the brush down the centre of the handle.

And this is the effect it gave me.

Then I moved on to the candy cane, which is sitting underneath the spoon. It *might* be pushing the spoon into the paper a little harder so the area where they intersect is a smidge lighter.

This springerle cookie mold is a bit more complex. It has a significant ridge in the centre of the outline and so I’m going to do the Dodging in two steps. First I’ll do the whole width of the metal, then with a smaller brush I’ll go over the high ridge again. I’m not going to be too picky here, just close enough.

I think it still needs something. So I’m going back to the Burn tool with a smaller brush and I’ll go around the outside of the star to add a bit of shading.

It doesn’t have to be right there in your face, but perceptible if you know what you’re looking for.

This little gingerbread house cookie has holes in it. So I think it needs the same treatment.

See what I mean? It’s subtle, but definite.

I kept working down the layers, adding contour as I went. This paper strip really only needed a tiny bit of shading/Burning along the edge, since it’s flat and probably a bit stiff.

Ah yes. The crocheted snowflake. What was I thinking? Dodge the high spots, burn the low spots. Zoom out. Look at it. Zoom in and add a bit more. Zoom back out. Repeat until I’m happy.

There, I think that’s good enough!

Here’s how it’s looking so far. I think I might add a bit more shading to the outside edges of the envelope, and in between the thicker objects.

I’m really pleased with how it looks. So now to finish the layout!


Tutorial Tuesday with a Twist

Is it Thanksgiving, or Giving Thanks?

This year, Thanksgiving has a completely different meaning for most of us. Here in Canada, our celebrations at Thanksgiving are always much less exuberant than those of our neighbours to the south (and six weeks earlier). Even so, we had to make some accommodations to the times we’re living in. When this year began, I imagined our Thanksgiving to include my elderly parents, my sister and brother, our daughter and son-in-law and the three of us, all around the table with a big turkey in the centre. Instead, it was the three of us, our daughter and son-in-law and the world’s smallest turkey. But it was how it had to be. With the whole of the United States heading into their 4-day (or is it a week now?) Thanksgiving extravaganza at the same time that the weather has pushed people indoors AND a rapid increase in COVID spread has begun, it looks like the perfect storm to this observer. So I’d like to take a few moments to encourage everyone to think about the real meaning of “thanksgiving”.

Every one of us, no matter where we are or what’s happening in our lives, has something to be thankful for this year. Some of us have big things – graduations, weddings, promotions, new homes, new family members. Some of us have small things – a new friend, a better job (or any job!), learning a new skill, time for DIY projects, finding something long thought to be lost forever. But all of us have SOMETHING. An attitude of gratitude starts with recognizing that, and what better time to start making that shift than at Thanksgiving?

I know people are tired of restrictions and want life to be the way it was before. There’s a lot of temptation to just say to heck with it… I’m out! But the thing about this situation is that we have lots of examples of how short-term sacrifice bears long-term benefit. The Spanish Flu pandemic is one example. Far more people died in those two years than we could possibly imagine, but the ones who survived have allowed US to exist! They too hated the restrictions placed on them – much harsher than the ones we’re faced with, to be honest. But in the end, they did what needed to be done. World War 11 gives us another strong model of personal privation that ultimately kept the world spinning. Just like this crisis, the effects were stronger and lasted longer in some areas than others. I think they had it far worse than we do… compulsory identification of all citizens and aliens, food and gasoline rationing, blackouts, restricted travel, internment camps and conscription all came into being. And for the most part, people did what needed doing without much resistance. But they didn’t have many of the amenities we take for granted. The internet for example! With it we can not only stay in contact with each other, but we can SEE each other without being in the same place. Imagine how a farm family in 1944 would have loved the opportunity to visit with neighbours without even leaving home! We have unlimited options for amusement right in our own homes, while they had to shelter in place in the dark every night. We have easy access to whatever food choices we might make, and can have it brought right to the door; no thought of “this is all the hamburger we have for the month”. We have an international army of scientists working flat out to understand how COVID works, how to treat it better, how to save lives and to develop vaccines so that NEXT year, we’ll have a real reason to be thankful as we gather with the people we love. We’re really very lucky, but we don’t appreciate it when we focus on what we’re giving up.

So what does this have to do with scrapbooking, you ask. Everything! Scrapbooks record the significant people and events in our lives so we can remember them later. The good parts… and if you’re “real”, the bad too.  My challenge to each of you is to take a few minutes just to think about what – and who – you really need in your life. Why are your choices important to you? What are you prepared to do to keep them? What do you have to celebrate in 2020? What makes it worth celebrating? And to finish up, are you ready to be thankful for what you already have? I am. I hope you are too.


Tutorial Tuesday (Photoshop Elements)

Jazzing Up a Neutral Background

Let’s see how NOT trying to outsmart WordPress works!

Let’s talk about personal style for a minute. We’ve all got our own preferences when it comes to how we construct our layouts. I like neutral backgrounds and am totally lost (terrified is more like it!) when it comes to using papers with bold patterns. But at the same time, I often feel that using a plain paper or cardstock leaves my layouts looking a little unfinished. So you’ll notice that I add some sort of border to most of them. When I looked at this month’s Bake Sale I was delighted to see that Lindsay Jane had a set of her Edge It border masks in there that I didn’t have. She also has a line of simple doodled borders I’ve been collecting. But she’s not the only one who creates gorgeous borders. Most of our talented designers have border sets in their stores. Take a moment to check them out!

Anyway, I thought I’d show you how to take a simple piece of cardstock and make it into an eyecatching background using borders.

This cardstock came from a GingerBread Ladies collection called Certainly Summer. I like it a lot because it’s got a nubby texture to it. But it’s PLAIN otherwise.

Here’s one of those border masks from Lindsay’s Edge it V7 pack. (Yes! The set of 6 is on sale until November 20, 2020 for the incredible sum of $1!) Of course, it’s black in its original state, and that isn’t the look I’m after…

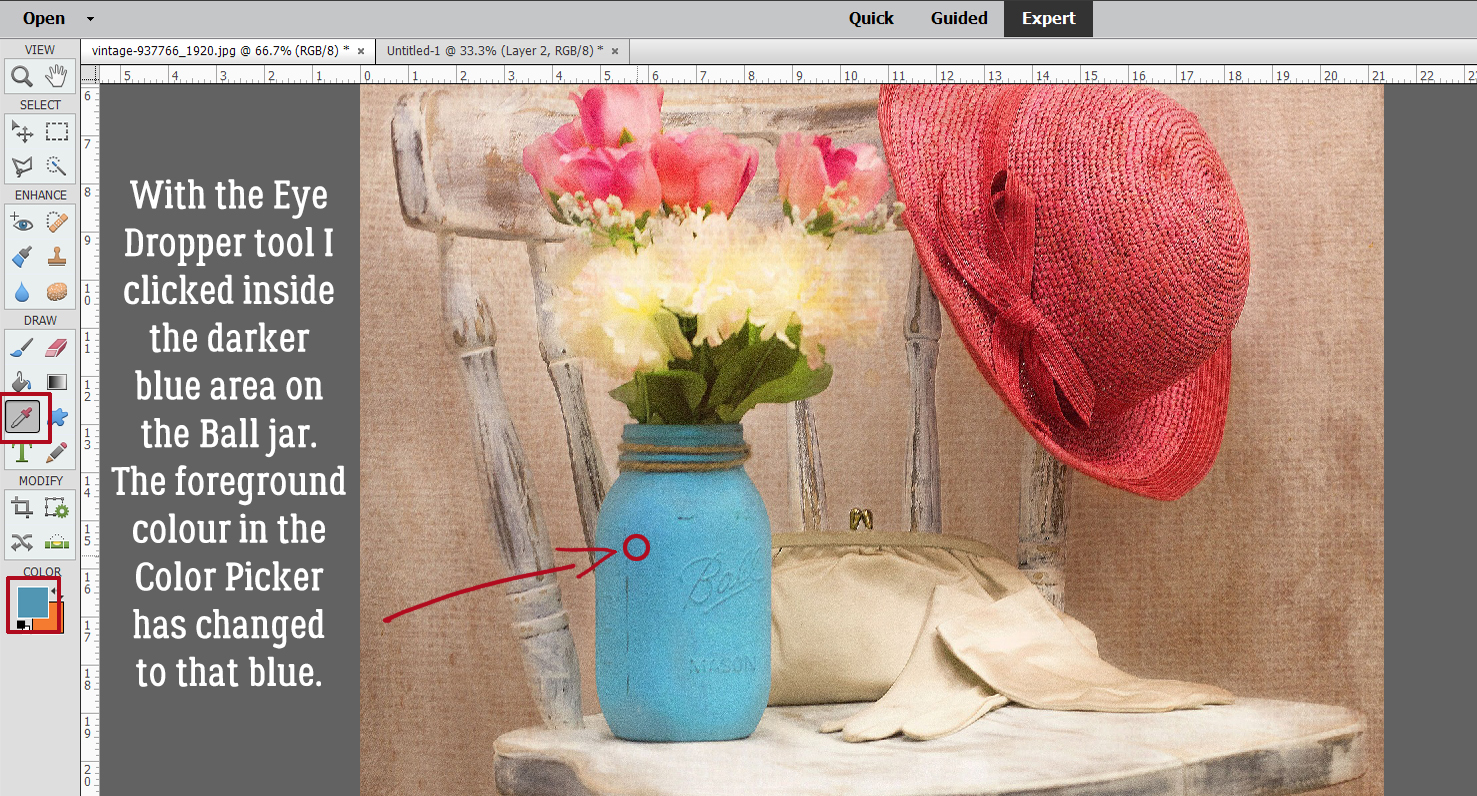
Contrasting borders look great in certain situations, but I really like monochrome looks a lot, so I grabbed the Eye Dropper tool and clicked on the cardstock to activate the Color Picker to keep my border in the same colour family.

By going just a bit darker, I can turn this border into almost a vignette-like look. I love that I can see the contrast between the current colour and the colour I’m choosing.

To get that new darker teal onto the border mask, I’ll click Layer>New Fill Layer>Solid Color.

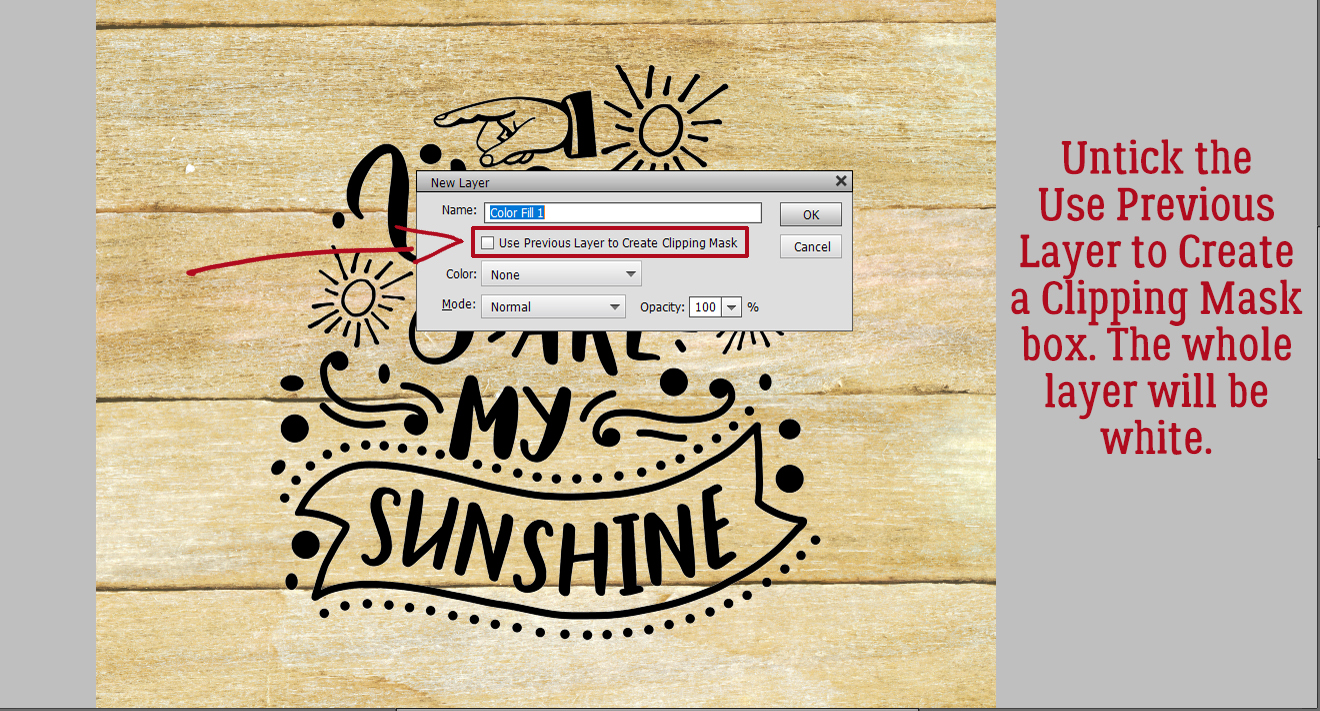
The menu takes a lot of the work out of the process by letting me Use Previous Layer to Create Clipping Mask. In one step I can turn just the border a different colour.

This time when the Color Picker opens, Elements shows me what the new border will look like, and it gives me the option of changing it if it doesn’t please my eye.

I want to have control over the border as it is with the new colour filling it so I Merged the two layers. I love how it’s coming along.

But it’s still a little bright. Wanting subtlety, I decreased the Opacity to 40% and like how it looks.

But what would it look like if I clipped a paper (from PrelestnayaP‘s Delicate Moments) to that border? (Or to one of the borders in Irina‘s kit?) Let’s see!

Here it is, clipped to the border and the two layers Merged. I think it looks a bit like snow, with the pattern indistinct. Hmm.

If the pattern isn’t a factor, maybe if I decrease the Opacity to 60%? That’s nice and subtle.

Here I’ve added a doodled border from Lindsay Jane’s Page Borders V34. I’m going to  it with the same darker teal that I used before.

That looks pretty!

After I toned it down a smidge, the outer border looks a lot more interesting.

What happens if I add a Bevel Style to that doodle border? The best Bevel for adding visual interest in this situation is the Simple Emboss. I think it’s a bit heavy-handed though.

Layer Styles are adjustable, so if you don’t like what you see, play with it! I double-clicked on the fx symbol on that layer and opened up the adjustment menu. Then I dropped the size of the Bevel to 3 pixels. (Default is 21 pixels.) I think it still looks a bit sharp though.

So I decreased the Opacity of that layer to 10%. Better. But still not what I want.

I ended up removing the messy border layer to showcase the embossed border better. And now I’m going to clip another cardstock layer to the embossed doodled border layer.


That looks pretty good, but still too in-my-face. So now what?

With the Opacity at 10% I have a nice, soft embossed border!


But before we go, let’s see what it looks like if I add some glitter to that messy border. This can be either by using a Glitter Style or by clipping a sheet of glitter paper to the mask. Yes! That might work for a fancy layout!!

There are so many ways to find our own style!

Tutorial Tuesday (Photoshop Elements)

Reflections, Perspectives and Shadows


Well. Today has been an unmitigated disaster. I should just not try to outsmart WordPress, because I only end up making more work for myself! Let’s see if third time’s the charm.

Have you ever looked at a layout and thought, “Holy cow! That’s so amazing… I have to scraplift it right away!” and then tried to figure out how the original scrapper did it? That’s the challenge that GingerDandelion Dust Designs – threw at me. One of her Facebook fans had seen a totally fabulous layout in Katie Pertiet’s gallery on her blog and wanted to know if Ginger had any tips for recreating it. Ginger came to me… so I scraplifted it myself and now I’m going to show you how I did it. The layout was created by Jane_Bond7, who says in her description that SHE scraplifted it from a layout she saw on Pinterest… and she used a photo strip template from Katie that you can download hereWARNING!! This is an advanced tutorial, with 55 screenshots. You have been warned!

Isn’t that a fabulous layout? The first thing I did was to download the template, choose a photo and some embellies for my layout and got underway.


Then I had a look at things. Obviously, if my layout is going to be true to Jane’s I’m going to need to rotate my template by Image>Rotate>Flip Horizontal.


Next I opted to Merge the three photo spots together into a single photo strip. That’ll save me some effort later. Select the three layers, right-click>Merge Layers or CTRL/CMD>E.

Looking at Jane‘s layout to guide me, I Resized the photo strip to leave room for the shadow and the reflection. 75% of the original size looks about right.

I looked at Jane‘s layout again for awhile and decided the height of the photo strip wasn’t quite right. So I stretched JUST the height by 10%.

Time to add the photo. I’ll adjust its size and position after I’ve got it clipped to the photo strip to make sure as much of the vineyard is visible as possible.

To clip the photo to the strip, right-click on the layer>Create Clipping Mask OR CTRL/CMD>G for PSE versions before 14, OR CTRL/CMD>ALT>G for PSE versions 14 or later.

For ease of handling later I Merged the photo with the photo strip then Selected the edges of the photo strip by CTRL/CMD>clicking inside the layer thumbnail in the layers panel. Alternatively click Select>All.

I got a bit carried away and picked the foreground colour for my shadow before creating a blank layer UNDER my photo strip. But not to worry… it’s going to happen. I typed in the dark brown colour I wanted for my shadow, “2c1901” and the Color Picker shows you what it looks like.

The easiest way to add a blank layer under another layer is to CTRL/CMD>click on the sheet of paper icon at the top left of the layers panel. Then I activated the Paint Bucket tool to fill the Selection I made previously, with brown. That’s the basis for the shadow layer.


Okay… let’s play with the shadow. But first Deselect the edges either by Select>Deselect or CTRL/CMD>D.

If you need a visual…

Now I’ve turned the Visibility of all but the shadow and background layers off so I can see what I’m doing better.

If you look closely at Jane‘s layout you’ll see the only part of this shadow layer I actually need is the large one at the left end. So I activated the Rectangle Marquee tool and corralled the other two pieces.

And to remove the other two pieces Edit>Cut or CTRL/CMD>X and they go away.


How on Earth’s layout has a lot of air behind her photos strip with the shadow quite a distance off. It also looks like the photo has a fold at the bottom. So I’ve moved my shadow over to the left a fair bit.

Now, how on Earth did she get that folded look? I think the Polygon Cookie Cutter will help with that. A triangle should work so I activated the Cookie Cutter tool, chose the Polygon and 3 sides.

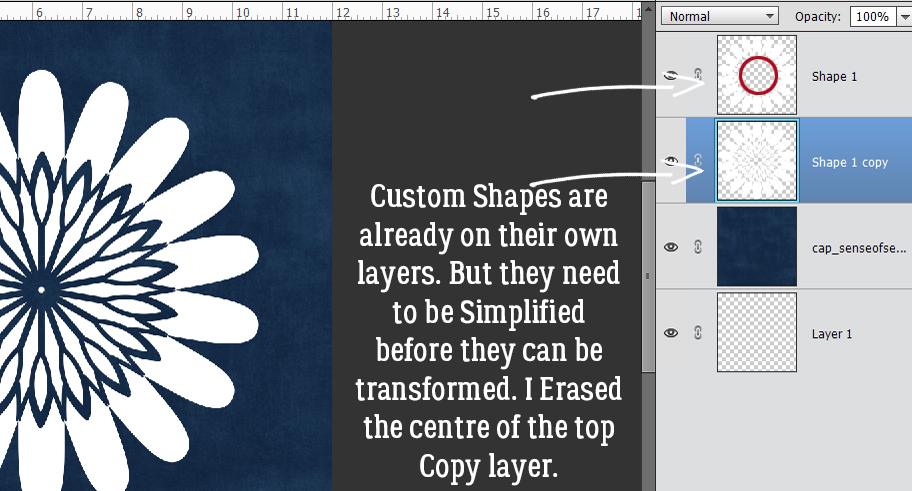
I made my triangle bigger than I thought I would need, in a colour different from my background and shadow. Remember when I was talking about Smart Objects in the Preferences tutorial? Shapes created by the Cookie Cutter are Smart Objects. So in order to do much with them they need to be Simplified. Right-click>Simplify Layer.

Now I moved the triangle and rotated it so that it’s over the lower left corner of the shadow. It’s not going to hang around so don’t worry if it hangs off the page.

I like to put the shape underneath whatever I’m using it to alter so when I DO the alteration I can see it. It isn’t necessary though.

Time to Select the outline of the triangle by CTRL/CMD>Clicking inside the layer thumbnail as before.

Then I can cut off the corner of the shadow: Edit>Cut or CTRL/CMD>X. TaDA… a “folded” shadow!

If you look at the layer thumbnail in the layers panel you can see the corner’s gone.

The triangle isn’t needed any more. You can turn it off or delete it now. The photo layer needs to be visible so the shadow can be positioned in the correct spot.

It turned out to be easier to control the corners by using the Image>Transform>Skew tool. This tool lets you move a corner of your bounding box in any direct to skew the shape inside it.

It’s not easy to see but the lower left corner of the bounding box around the shadow is lower than the right corner now.

On Jane‘s layout I think I see a slight curve to the side of her shadow. So I activated the Smudge tool, made it as big as I could but only 57% of its maximum strength then very… very… carefully Smudged it just a tiny bit. The Smudge tool also blurs whatever it touches a bit, which you can see in the screenshot.

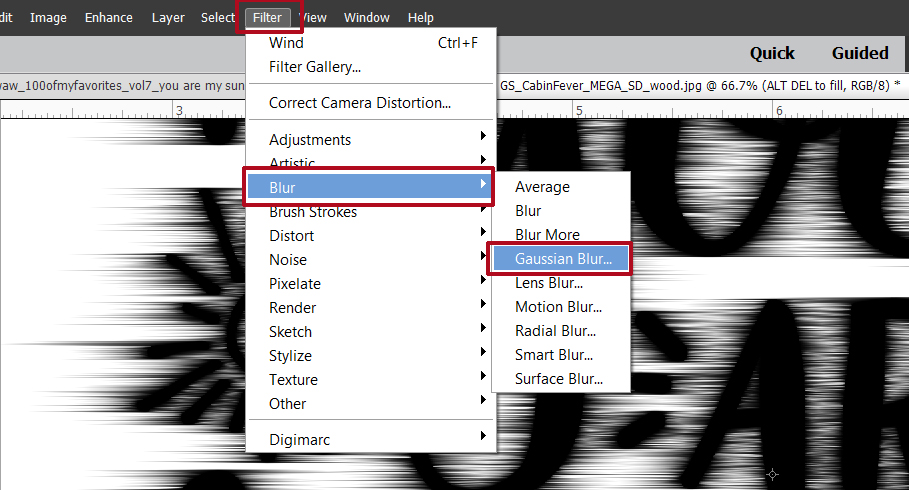
What I’ve been showing you in these last few steps is how I manage all of my custom shadows. The next step is to soften it up, using a Filter>Blur>Gaussian Blur.

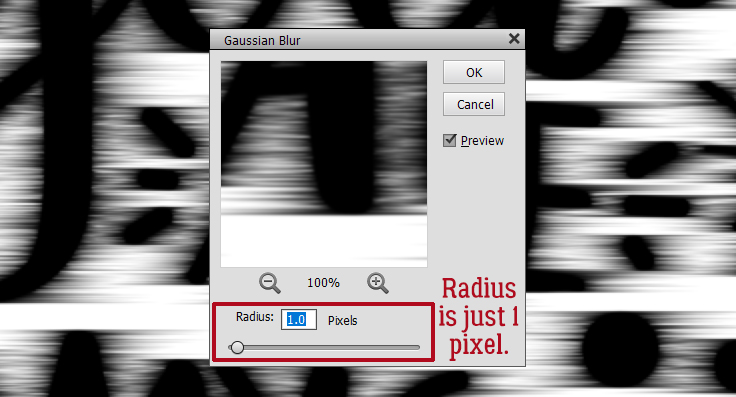
The Preview pane lets you see what’s happening to your image as you adjust the Blur, so you know where to stop. I decided 6.0 pixels was just right.

I change the Blend Mode to Linear Burn for my shadows. It allows a bit more of the layer below to show through as shadowed, not just covered.

Adjusting the depth of shadow is best done with the image Zoomed out. Then I decreased the Opacity of the shadow layer until it looked right to me, at 40%.

Jane‘s layout appears to have a narrow Stroke around the edges of her photos so I added a 7 pixel dark brown stroke to mine. Edit>Stroke (Outline) Selection

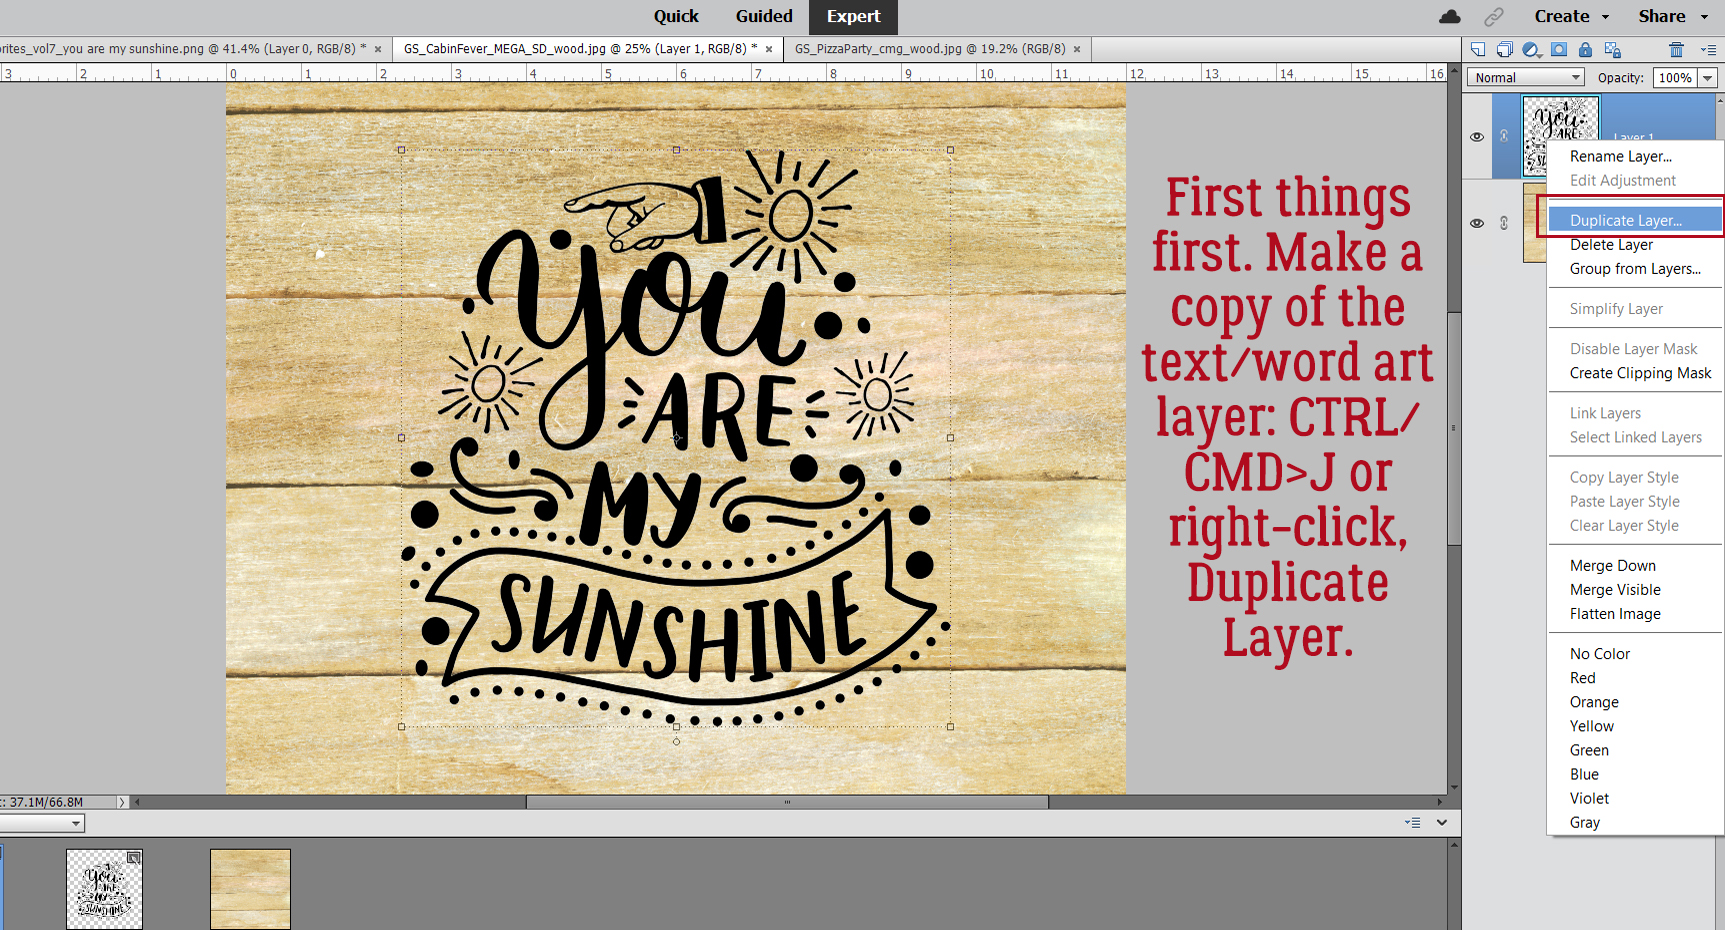
That looks good, so on to the really complicated part – the reflection. Getting it right isn’t going to be easy! I changed the Canvas size to give me some more room to work. I just picked a number out of the air. Image>Resize>Canvas or CTRL/CMD>ALT>C Then I Duplicated the photo strip layer. Right-click>Duplicate Layer or CTRL/CMD>J

Reflections are mirror images so this Copy layer needs to be inverted. To do this, grab the “handle” in the centre of the top edge and pull it down toward the bottom of the workspace. Type -100 into the Height box and it will be exactly the same size as the initial photo strip layer.

As I might have mentioned, this is the really fiddly part. The reflection layer will need a lot of manipulation to get it right. There can’t be any space between the photo strip and its reflection so I Rotated and nudged the reflection layer so the two overlap.

Then I moved the reflection layer down so it’s underneath the photo strip layer. For this reflection to work, the left lower corner and the two gaps have to line up. Easier said than done. Image>Transform>Skew or Distort will come into play here.

In Jane‘s image, it seems to me that the reflection of the photo at the left side is a bit longer than this, so Image>Transform>Skew lets me pull that corner down and in a bit to more closely approximate what I see in Jane‘s layout. You can see in the screenshot how the bounding box’s corner isn’t 90° any more.


Next… To try and better align the corners and gaps. Image>Transform>Distort gives the ability to move any or all of the corners of the bounding box in any direction I want. So that’s what I did!

It’s a lot better, but still needs a tiny tweak at that intersection. In Jane‘s layout it looks like the reflection extends perfectly from the folded edge of the shadow so that needs to be dealt with.

It looks pretty good now! Time to clean up. I’m going to Erase the little bits of corners that show where they shouldn’t and I’m going to use a Layer Mask so if I take away too much, I can paint it back.

Once I was happy with the clean-up, I Simplified the reflection layer to absorb the Layer Mask.

To turn the reflection into more of a reflection I decreased the Opacity down to 55% and it’s starting to look like Jane‘s.

The Blend Mode goes to Multiply.

Then to give the reflection even more realism I’ll add a Filter>Blur>Lens Blur to it.

I set the Preview to More Accurate so I can see the changes more easily, then Radius, Blade Curvature, Rotation, Brightness, and Amount are set to 10, Threshold to 255, Distribution is Gaussian and Monochromatic is checked.

There!! All that’s left is to blend the edges and it’s done!

I used the Eraser tool with a large (500 pixel) soft brush set to 45% Opacity and ran it over the edges.


And it’s done! Now to complete the rest of the layout…

You may have seen my layout in the Gallery. If not…


Designer Spotlight: November 2020

Wimpychompers!

Here we are in November already. 2020 has, in so many ways, definitely been an annus horribilus, to steal from the Queen. Hopefully there are better days ahead!

I’d like to introduce you all to Christina, the creative genius behind Wimpychompers. (I just wish I would have thought to ask her how she came up with that name… I’m sure there’s a story there!) She’s in the Designer Spotlight this month and has gifted all of us with a fabulous Daily Download. Make sure you’re picking up your pieces while they’re available.

J: How long have you been designing?

C: I want to say 10 or 11 years

J: What made you decide to design?

C: I got really interested in making signatures in forums actually. I started messing around with Paint Shop Pro (ha) and ended up writing tutorials for signature making. I swore I would never start digital scrapbooking as I did paper scrapping at the time but soon changed my mind. Once I started figuring out the program I switched to digital, then decided I loved designing.

J: What do you use to create your designs (program, additional tools, etc.)?

C: Mostly Photoshop but I have recently gotten my hands on Procreate so we will see if I add my own drawings to my items

J: Describe your design workplace.

C: My couch. (laughs). I sit on the couch with a lap desk, it’s the most comfortable and especially helpful now that my kids are doing school from home and have taken all of our desks.

J: What motivates and inspires you as a designer?

C: I love looking at colors on Pinterest but mostly I am theme driven. I especially love to do kits I know I could use.

J: What is your favorite kit currently in your GS store and why?

C: Can I say all of them? (ha). I would say the entire When I Grow Up series, it’s not technically one kit but that one took a lot of time and makes me smile, each kit being so different.

J: If you could only eat one meal for the rest of your life, what would it be?

C: Ooh, dangerous. Cinnamon rolls probably although my waistline may not appreciate that one

J: What is your favorite game or sport to watch and play?

C: I don’t watch sports but I love playing Lego video games with my kids, it can be therapeutic to smash everything in the game.

J: What did you want to be when you were small?

C: A children’s book author, a teacher, and a ballerina

J: Aside from necessities, what one thing could you not go a day without?

C: Hugs from my kids, they are teens so it’s not as often anymore and I take them when I can!

J: Who would you want to play you in a movie of your life?

C: I’ve never considered this one. Maybe someone like Kristin Bell

J: If you had a warning label, what would yours say?

C: Caution: Can go off on a tangent with no warning!

J: What celebrity would you like to meet at Starbucks for a cup of coffee?

C: Maybe Reese Witherspoon

Before we say thanks and see ya to Christina, I think I should tell you that she’s put everything in her store on sale at 30% off for the WHOLE MONTH of November!! That’s really generous, and I bet it boosts her sales pretty nicely, just in time for Black Friday and Christmas. I’m going to check it out right now!

Tutorial Tuesday (Photoshop Elements)

Customizing Template Banners

First, I want to thank all the GingerScrappers who reached out with kind thoughts and prayers for my Dad. I can’t tell you how much they were appreciated and how much better they made me feel. I wish I could say he’s back to normal but he’s back in the hospital and will be there for the foreseeable future. He’s in the safest place he can be for right now and although he’s not happy about it, he’s accepted it. And life will go on.

I got a request from Bernice (bkasko) about making banners look more realistic. “I would love help with making a banner look more real. I am not talking about the shading on the banner flags even though help with that would be great but on the top of the banner where it meets the string. I have tried the dodge and burn tool and I just cannot get the look I want. I saw an action that unfortunately only works on the banner that the action makes and it looks like a blurred line is made but I could not duplicate it. I would love help with making a banner from a designers kit look more real or even a banner in a template that I add my own papers to. Thanks.” I wasn’t totally sure I understood what she was asking so I asked her some questions.  Her response: “I have an action that will make a banner for me and I really like the shading on it and would like to be able to create the shading that it does either on a banner that comes in the kit I am using or sometimes a template has a banner on it and I like the placement of that banner so I would like to use it.” So I settled on this.

I looked through my stash and found a Connie Prince template in a retired Triple Threat pack that has a banner and would work with some of the photos of my grandkids I’ve been saving up for layout creation. This is the one I chose.

The first thing I did was select the kit I wanted to use and gather up an assortment of papers from it. Then I went through the template and turned off visibility to all but the banner and background paper layers so I could see clearly what I was doing… and so could you! To clip different papers to the pennants on the banner, I’ll need to separate them from each other and set them up on their own layers. So I’m using the Rectangle Marquee tool to select each pennant and will start on the far left.

To detach the pennant from the banner, Edit>Cut (CTRL/CMD>X) works well.

It’s gone, but it’s not gone-gone. Elements is hanging on to it for me, I just can’t see it. To bring it back, Edit>Paste (CTRL/CMD>V) does the trick.

The neat thing is that although Elements drops it right on the centre of the workspace, it’s exactly the same size and positioned at the exact angle of the original, so sliding it into place is simple. See it over there in the Layers Panel? This process is repeated for each of the triangle pennants across the banner.

This image shows what I was looking at on my workspace several pennants down the road. Each of the pennants I’ve Cut and Pasted are back in line and on their own layers.

After all the pennants have been separated onto their own layers I can use them as Clipping Masks for my papers. The kit I’m using is also a Connie Prince creation called Sense of Wonder. (It’s not available at GingerScraps yet, but should be here soon.)

The pennants are small and the patterns on some of these papers aren’t, so I’ll Resize and Rotate them to give a pleasing look. This can be done before or after you’ve clipped the paper to the object under it.

Now to Clip the paper to that pennant. For those who aren’t sure what I’m talking about, Clipping a paper or photo to a shape underneath it “cuts” the paper or photo to conform with the shape. There are two ways to do this: Right-click on the paper layer and select Create Clipping Mask from the dropdown menu, or use the keyboard shortcut CTRL/CMD>G (for Elements versions up to 14) or CTRL/CMD>ALT>G for versions 15 and up.

Here I’m showing how I Rotated the paper so the arrows line up with the pennant better. I just clicked on one of the little square “handles” on the outside edge of the paper and moved it in the direction I wanted it to go.

I followed the same steps with each of the pennants across the banner, using the same paper twice in some instances.

Once I had all the pennants Clipped to papers I went through the Layers Panel and Merged the papers with their pennants. I did this to make managing the banner and working through the next series of steps easier. But I’m not going to Merge all the pennants together because I’m going to use one of the Warped Shadow techniques from a previous tutorial to customize the way each looks based on what it’s sitting on when the layout is done. Merging layers can be done in two different ways. Select the layers to be Merged (hold down the CTRL/CMD key and click on each of them) then Right-Click, choosing Merge Layers or use the keyboard shortcut CTRL/CMD>E.

After each paper and pennant have been Merged, it’s on to adding some dimension, to make it look like the pennants are wrapped around some string. I’m going to start at the far left and work to the right, but you do it whatever suits you. For these steps, Zooming in will make it easier.

To simulate the look of paper-wrapped string, we’re going to use the Dodge and Burn tools. These tools are digital versions of good old film photo printing techniques to spot-correct exposure. When printing an old-fashioned paper print, the developer can lighten up areas that are too dark in the original contact sheet image by Dodging – holding a piece of paper or an actual dodging tool over the area that’s too dark, moving it continuously to prevent demarcation lines around the edges, between the enlarger and the photo paper, decreasing the amount of light that hits the paper. Yes, it’s just as much work as it sounds, and I never got good at it. The Dodge tool in Elements has an icon that looks just like a Dodging tool! Burning, conversely, darkens areas that are too light with a similar technique but this time using a larger piece of card with a hole in it, moving the card between the enlarger and the paper over the area that’s too light to allow more light to hit the paper. Here, the Burn tool icon is a hand with the thumb and fingertips touching. They’re are very labour-intensive processes and totally a trial-and-error thing. I wasted so much paper back in my film days! Aren’t you glad digital is so much simpler?? And that your faithful Obijan does the trial-and-error stuff for you! Let’s get to it!

First I want to show you the way I’ve set up my Preferences for Cursors. The next part will make more sense to you if I show you.

Starting with the Burn tool, using a 9 pixel round brush on the Midtones, and a 45% exposure, I put the intersection of the crosshairs right on the upper left corner of the pennant. (You don’t have to be super-precise for these steps – the cursor can start somewhere off the edge of the pennant, because the only layer this step will actually affect is the pennant itself. But this Burn process has to be at the very edge.) Click at that corner then holding down the Shift key, move the cursor to the opposite, upper right corner of the pennant and Click again. You’ll see a faint but noticeable darkening of that edge.

Then I changed to the Dodge tool, set to Midtones, 15 pixels and 45% Exposure. I’ve positioned the cursor with the top edge of the brush tip at the upper edge of the pennant. Again, Click, Shift, move, Click. This step lightens up the area it covers. The effect is pretty subtle but once the last step is done, you’ll see quite a difference.

Just a word about the settings I’ve used. They’re right for the scale of this banner. If I was using bigger pennants and creating a thicker string, I’d go with a bigger brush for both steps, keeping the ratio roughly the same.

Flipping back to the Burn tool, oh look! The settings are still the same as the ones I used for the first Burn step! Isn’t that just perfect?! I don’t have to remember them, Elements does it for me. Knowing this makes the rest of the process look a lot less daunting. I’m again going to put the cursor on the left side of the pennant, with the top edge of the brush tip at the edge of the lightened area. Click, Shift, move, Click.

Now that I’ve done a couple of the pennants, I think it really looks like there’s some string in there.

Using the same three steps, I worked my way all across the pennant and down the Layers Panel until all the pennants have been wrapped around my imaginary string.

The effect is more obvious on solid papers and those with smaller patterns, but when you look at it as a whole, it looks pretty realistic.

The ends of the banner will be hidden behind other embellishments on my layout so I’m not worried about having tails on my “string”. If you’d like to see my finished layout, you can find it here.

Well, that’s a wrap for this week! Thanks for the suggestion Bernice. I had fun doing this for you. I hope it’s what you were looking for. If not, I can try again another time.