“Fillet of a fenny snake,
In the caldron boil and bake;”
– Macbeth, Shakespeare
Family. Friends. Life. Love. Chaos. It all plays together and it always creates memories!

There is SO MUCH GOING ON! Scavenger Hunt. Forum games!

And when you spend $20, you get this MEGA COLLAB!

You KNOW you want to get in with the DSD Grab Bags!

https://store.gingerscraps.net/

Make sure you check out the Scavenger Hunt!

And this is just a sneak of the activities! Make sure you check out the forum for more information: https://forums.gingerscraps.net/forumdisplay.php?1621-2019-DSD-Digital-Scrapbooking-Day-CLICK-HERE-for-all-the-info
Remember when you spend $10 in the store, you get a great new collab! There’s something about the changing of the leaves that makes autumn just shimmer.

https://store.gingerscraps.net/GingerBread-Ladies-Collab-Autumn-Shimmer.html

https://store.gingerscraps.net/Be-The-Light-5-Grab-Bag.html

https://store.gingerscraps.net/Traveling-Album-Grab-Bag.html

https://store.gingerscraps.net/Fall-Blessings-Grab-Bag.html

https://store.gingerscraps.net/ADB-Designs/

Collection: https://store.gingerscraps.net/Copper-Spice-Collection-by-Aimee-Harrison.html
Kit: https://store.gingerscraps.net/Copper-Spice-Page-Kit-by-Aimee-Harrison.html
Alphas: https://store.gingerscraps.net/Copper-Spice-Alpha-Sets-by-Aimee-Harrison.html
Borders: https://store.gingerscraps.net/Copper-Spice-Borders-by-Aimee-Harrison.html
Graffiti: https://store.gingerscraps.net/Copper-Spice-Graffiti-by-Aimee-Harrison.html
Plaids: https://store.gingerscraps.net/Copper-Spice-Plaid-Papers-by-Aimee-Harrison.html
Messy Edges: https://store.gingerscraps.net/Copper-Spice-Messy-Edges-by-Aimee-Harrison.html
Glitters: https://store.gingerscraps.net/Copper-Spice-Glitters-by-Aimee-Harrison.html

Cozy Comfort Grab Bag: https://store.gingerscraps.net/Cozy-Comfort-DSD-Grab-Bag-by-Aimee-Harrison-and-JB-Studio.html
Mini Kit Grab Bag: https://store.gingerscraps.net/Mini-Kit-DSD-2019-Grab-Bag-by-Aimee-Harrison.html

https://store.gingerscraps.net/2019-DSD-Template-Grab-Bag.html

Hello October – Kit https://store.gingerscraps.net/Hello-October-Kit-Aprilisa.html
Hello October – Cards https://store.gingerscraps.net/Hello-October-Cards.html
Hello October – Template Pack https://store.gingerscraps.net/Hello-October-Template-Pack.html
Hello October – Bundle https://store.gingerscraps.net/Hello-October-Bundle-Aprilisa.html

https://store.gingerscraps.net/RV-There-Yet-Grab-Bag-by-CathyK-Designs.html

Grab Bag 1: https://store.gingerscraps.net/Build-Your-Own-Grab-Bag-1-iDSD-2019-by-CathyK-Designs.html
Grab Bag 2: https://store.gingerscraps.net/Build-Your-Own-Grab-Bag-2-iDSD-2019-by-CathyK-Designs.html

https://store.gingerscraps.net/cozy-fall-fun-by-Clever-Monkey-Graphics.html

https://store.gingerscraps.net/cu-dsd-grab-bag-by-Clever-Monkey-Graphics.html

Color Roll Ribbons: https://store.gingerscraps.net/cu-color-roll-ribbons-by-Clever-Monkey-Graphic.html
Wood Slices No1: https://store.gingerscraps.net/cu-wood-slices-no1-by-Clever-Monkey-Graphics.html
Driftwood: https://store.gingerscraps.net/cu-driftwood-by-Clever-Monkey-Graphics.html
Ornament Caps: https://store.gingerscraps.net/cu-ornament-caps-by-Clever-Monkey-Graphics.html

https://store.gingerscraps.net/Halloween-Night-Grab-Bag-by-Connie-Prince.html

Bundle: https://store.gingerscraps.net/Farmhouse-Fall-Bundle-by-Connie-Prince.html
Kit: https://store.gingerscraps.net/Farmhouse-Fall-Kit-by-Connie-Prince.html
Border Clusters: https://store.gingerscraps.net/Farmhouse-Fall-Border-Clusters-by-Connie-Prince.html
Word Art: https://store.gingerscraps.net/Farmhouse-Fall-Word-Art-Pack-by-Connie-Prince.html
Messy Papers: https://store.gingerscraps.net/Farmhouse-Fall-Messy-Papers-by-Connie-Prince.html
Plaid Papers: https://store.gingerscraps.net/Farmhouse-Fall-Plaid-Papers-by-Connie-Prince.html
Flowers and Leaves: https://store.gingerscraps.net/Farmhouse-Fall-Flowers-and-Leaves-by-Connie-Prince.html

https://store.gingerscraps.net/By-The-Number-3-Templates-by-Dagilicious.html


Smell My Feet | Collection: https://store.gingerscraps.net/Smell-My-Feet-Collection.html
Smell My Feet | Kit: https://store.gingerscraps.net/Smell-My-Feet-Kit.html
Smell My Feet | Alpha: https://store.gingerscraps.net/Smell-My-Feet-Alpha-Pack.html
Smell My Feet | Element Pack: https://store.gingerscraps.net/Smell-My-Feet-Element-Pack.html
Smell My Feet | Paper Pack: https://store.gingerscraps.net/Smell-My-Feet-Paper-Pack.html
Smell My Feet | Alpha Bundle: https://store.gingerscraps.net/Smell-My-Feet-Alpha-Bundle.html
Smell My Feet | Finishing Touches: https://store.gingerscraps.net/Smell-My-Feet-Finishing-Touches.html
Smell My Feet | Journal Cards: https://store.gingerscraps.net/Smell-My-Feet-Journal-Cards.html

Sweater Weather | Collection: https://store.gingerscraps.net/Sweater-Weather-Collection.html
Sweater Weather | Kit: https://store.gingerscraps.net/Sweater-Weather-Kit.html
Sweater Weather | Alpha pack: https://store.gingerscraps.net/Sweater-Weather-Alpha-Pack.htm
Sweater Weather | Element Pack: https://store.gingerscraps.net/Sweater-Weather-Element-Pack.html
Sweater Weather | Paper Pack: https://store.gingerscraps.net/Sweater-Weather-Paper-Pack.html
Sweater Weather | Finishing Touches: https://store.gingerscraps.net/Sweater-Weather-Finishing-Touches.html
Sweater Weather | Pattern Paper Pack: https://store.gingerscraps.net/Sweater-Weather-Pattern-Paper-Pack.html

https://store.gingerscraps.net/DSD-2019-Grab-Bag-Down-This-Road-Designs.html


Bundle – https://store.gingerscraps.net/Fall-in-Love-BUNDLE-by-Heather-Z-Scraps.html
Kit – https://store.gingerscraps.net/Fall-in-Love-KIT-by-Heather-Z-Scraps.html
Elements – https://store.gingerscraps.net/Fall-in-Love-ELEMENTS-by-Heather-Z-Scraps.html
Papers – https://store.gingerscraps.net/Fall-in-Love-PAPERS-by-Heather-Z-Scraps.html
Alphabets – https://store.gingerscraps.net/Fall-in-Love-ALPHABETS-by-Heather-Z-Scraps.html
Accents – https://store.gingerscraps.net/Fall-in-Love-ACCENTS-by-Heather-Z-Scraps.html
Journal Cards – https://store.gingerscraps.net/Fall-in-Love-JOURNAL-CARDS-by-Heather-Z-Scraps.html
Weathered Wood – https://store.gingerscraps.net/Fall-in-Love-WEATHERED-WOOD-by-Heather-Z-Scraps.html
Extra Papers – https://store.gingerscraps.net/Fall-in-Love-EXTRA-PAPERS-by-Heather-Z-Scraps.html
Paint – https://store.gingerscraps.net/Fall-in-Love-PAINT-by-Heather-Z-Scraps.html

Collection: https://store.gingerscraps.net/Copper-Spice-Collection-by-Ilonka-s-Designs.html
Mega Kit: https://store.gingerscraps.net/images/T/xctmpLjojid.png
Fall Papers: https://store.gingerscraps.net/Copper-Spice-Fall-Papers-by-Ilonka-s-Designs.html
Ripped Papers: https://store.gingerscraps.net/Copper-Spice-Ripped-Papers-by-Ilonka-s-Designs.html
Borders: https://store.gingerscraps.net/Copper-Spice-Borders-by-Ilonka-s-Designs.html
Overlays: https://store.gingerscraps.net/Copper-Spice-Overlays-by-Ilonka-s-Designs.html
Embellishments: https://store.gingerscraps.net/Copper-Spice-Embellishments-by-Ilonka-s-Designs.html
Clusters: https://store.gingerscraps.net/Copper-Spice-Clusters-by-Ilonka-s-Designs.html
Plaids: https://store.gingerscraps.net/Copper-Spice-Plaids-by-Ilonka-s-Designs.html
Paper Pack: https://store.gingerscraps.net/Copper-Spice-Paper-Pack-by-Ilonka-s-Designs.html

Collection: https://store.gingerscraps.net/Leaves-Fall-All-Around-Collection-by-Ilonka-s-Designs.html
Mega Kit: https://store.gingerscraps.net/Leaves-Fall-All-Around-Mega-Kit-by-Ilonka-s-Designs.html
Template Pack: https://store.gingerscraps.net/Leaves-Fall-All-Around-Template-Pack-by-Ilonka-s-Designs.html
Borders: https://store.gingerscraps.net/Leaves-Fall-All-Around-Borders-by-Ilonka-s-Designs.html
Fallen Leaves Papers: https://store.gingerscraps.net/Leaves-Fall-All-Around-Fallen-Leaves-Papers-by-Ilonka-s-Designs.html
Shapes: https://store.gingerscraps.net/Leaves-Fall-All-Around-Shapes-by-Ilonka-s-Designs.html
Clusters: https://store.gingerscraps.net/Leaves-Fall-All-Around-Clusters-by-Ilonka-s-Designs.html
Plaids: https://store.gingerscraps.net/Leaves-Fall-All-Around-Plaids-by-Ilonka-s-Designs.html
Paper Pack: https://store.gingerscraps.net/Leaves-Fall-All-Around-Paper-Pack-by-Ilonka-s-Designs.html
Elements: https://store.gingerscraps.net/Leaves-Fall-All-Around-Elements-by-Ilonka-s-Designs.html

https://store.gingerscraps.net/Home-Is-Where-Memories-Live-Template-Pack-by-Ilonka-s-Designs.html

https://store.gingerscraps.net/JoCee-Designs/

https://store.gingerscraps.net/Jumpstart-Designs/

https://store.gingerscraps.net/Jumpstart-Designs/

https://store.gingerscraps.net/Jumpstart-Designs/

https://store.gingerscraps.net/Kristmess/

https://store.gingerscraps.net/Layered-Page-Templates-Halloween.html

https://store.gingerscraps.net/Magical-Treats-GrabBag.html

https://store.gingerscraps.net/Lauries-Scraps/

https://store.gingerscraps.net/Lindsay-Jane/

https://store.gingerscraps.net/DSD-Page-Kit-Grab-Bag-2019-by-LouCee-Creations.html

https://store.gingerscraps.net/Magical-Scraps-Galore/

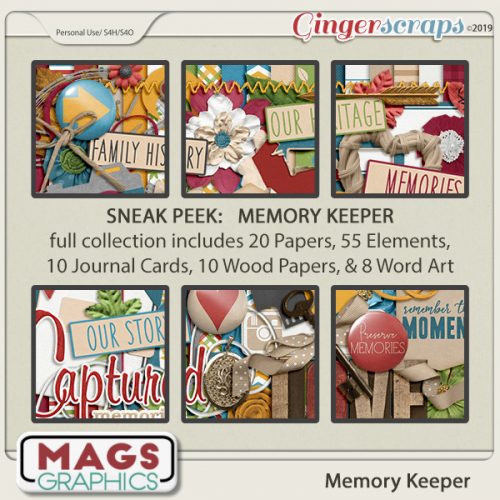
Bundle: https://store.gingerscraps.net/Memory-Keeper-BUNDLE-by-MagsGraphics.html
Kit: https://store.gingerscraps.net/Memory-Keeper-KIT-by-MagsGraphics.html
Journal Cards: https://store.gingerscraps.net/Memory-Keeper-JOURNAL-CARDS-by-MagsGraphics.html
Wood Papers: https://store.gingerscraps.net/Memory-Keeper-WOOD-PAPERS-by-MagsGraphics.html
Word Art: https://store.gingerscraps.net/Memory-Keeper-WORD-ART-by-MagsGraphics.html

https://store.gingerscraps.net/Building-Blocks-Album-Templates-by-Miss-Fish.html

https://store.gingerscraps.net/Blended-Clusters-3-Templates-by-Miss-Fish.html

https://store.gingerscraps.net/Blended-Clusters-3-Templates-by-Miss-Fish.html

DSD 2019 Grab Bag 1 – https://store.gingerscraps.net/Special-DSD-2019-Grab-Bag-1-Buy-6-Packs-for-8.html
DSD 2019 Grab Bag 2 – https://store.gingerscraps.net/Special-DSD-2019-Grab-Bag-2-Buy-5-Packs-for-6.html
DSD 2019 Grab Bag 3 – https://store.gingerscraps.net/Special-DSD-2019-Grab-Bag-2-Buy-10-Packs-for-12.html

Kit – https://store.gingerscraps.net/Copper-spice-Kit.html
Clusters – https://store.gingerscraps.net/Copper-spice-Clusters.html
Painted papers – https://store.gingerscraps.net/Copper-spice-Painted-papers.html
Photo-Blended papers – https://store.gingerscraps.net/Copper-spice-Photo-Blended-papers.html
Solid papers – https://store.gingerscraps.net/Copper-spice-Solid-papers.html
Stamps – https://store.gingerscraps.net/Copper-spice-Stamps.html
Stamps&Bordes – https://store.gingerscraps.net/Copper-spice-Stamps-and-Borders.html
Masks&Frames – https://store.gingerscraps.net/Copper-spice-Masks-Frames.html
Full Bundle – https://store.gingerscraps.net/Copper-spice-Bundle.html

Blurred Photomasks Set1 – https://store.gingerscraps.net/Blurred-Masks-Photomasks-Set1.html
Arbitrary movements Photomasks Set1 – https://store.gingerscraps.net/Arbitrary-Movements-Photomasks-Set1.html
Watercolor Fantasy Photomasks Set4 – https://store.gingerscraps.net/Watercolor-fantasy-Photomasks-Set4.html
Masks&Frames Standard Set8 – https://store.gingerscraps.net/Masks-and-Frames-Standard-Set8.html

https://store.gingerscraps.net/A-Day-In-The-Life-Bundle-by-Scraps-N-Pieces.html

https://store.gingerscraps.net/Tapestry-DSD-Digital-Scrapbooking-Bundle-by-Shepherd-Studio.html

https://store.gingerscraps.net/10-kits-for-25-Scraps-N-Pieces-SNP.html

https://store.gingerscraps.net/Aprilisa-Designs/

Personal Use Shop: https://store.gingerscraps.net/Snickerdoodle-Designs-PU/
Commercial Use Shop: https://store.gingerscraps.net/Snickerdoodle-Designs-CU/

https://store.gingerscraps.net/Magical-Scraps-Galore/

https://store.gingerscraps.net/4-bundles-For-20-DSD-grab-bag.html

https://store.gingerscraps.net/JoCee-Designs/

https://store.gingerscraps.net/5-for-10-dsd.html

https://store.gingerscraps.net/Build-Your-Own-Grab-Bag-iNSD-Offer.html

https://store.gingerscraps.net/Kristmess/

https://store.gingerscraps.net/LDragDesigns/

BYO GB 1: https://store.gingerscraps.net/Build-Your-Own-Grab-Bag-1-by-LDragDesigns.html
BYO GB 2: https://store.gingerscraps.net/Build-Your-Own-Grab-Bag-2-by-LDragDesigns.html
BYO GB 3: https://store.gingerscraps.net/Build-Your-Own-Grab-Bag-3-by-LDragDesigns.html

https://store.gingerscraps.net/Tami-Miller-Designs/

JB Studio: https://store.gingerscraps.net/JB-Studio/
JB Studio Templates: https://store.gingerscraps.net/JB-Studio-templates/


https://store.gingerscraps.net/Down-This-Road/

https://store.gingerscraps.net/Alexis-Design-Studio/


https://store.gingerscraps.net/CathyK-Designs/

Cozy Comfort Grab Bag: https://store.gingerscraps.net/Cozy-Comfort-DSD-Grab-Bag-by-Aimee-Harrison-and-JB-Studio.html
Mini Kit Grab Bag: https://store.gingerscraps.net/Mini-Kit-DSD-2019-Grab-Bag-by-Aimee-Harrison.html
Remember, if you complete 10 challenges, just ten, you get a free kit as well!!

It’s time for those wonderful moments in nature!
![]()


