Archives for February 2019

Sneak Peeks February 28th 2019

Happy Thursday!!! It’s the last day of the month so I get to show you a sneak peek of the new BUFFET as well!!!!!

From Heather Z

From our new Guest this month, Down this Road Designs

From Clever Monkey Graphics

Image may contain: 2 people, people smiling, outdoor

Image may contain: 1 person, smiling

Image may contain: text and outdoor

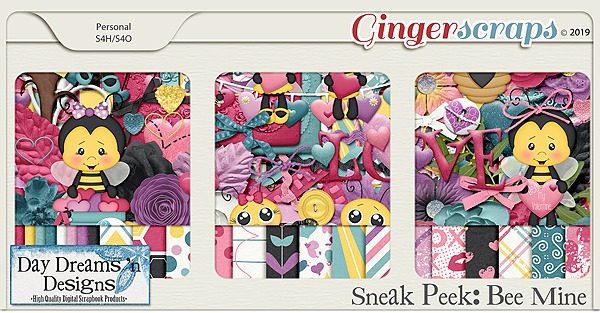
And now lets take a peek of the new Buffet!!!!

Come back tomorrow to see all the awesome goodies releasing!!!

Tutorial Tuesday (Photoshop Elements)

Magic Eraser!! (Not Mr Clean but close)

I know I can’t be the only one who collects brochures from the attractions I visit when I travel. And I’m pretty sure I’m not the only one who likes to make my own journal cards to go with my photos when I scrap those travel photos. I really wanted to use the Wells House logo somewhere on my layout below and decided this would be a good time to try something new (to me). The template I chose, from the GingerBread Ladies mega-collab Oh Snap! had a journal card spot, and it inspired me. And ADB Designs‘ January Daily Download kit Cozy New Year was the perfect kit to go with my photos.

The logo is pretty well delineated in the image below, and I just want the logo itself. I could put it on a new document and extract it using one of the methods I’ve shown you in the past, but I wanted to try something new. So let’s get to it!

I’d never tried the other options in the Eraser Tool menu and this seemed like a good time to give it a look. That one with the yellow starburst is called the Magic Eraser Tool and it is indeed magical!

There are some settings that are vital to use with this technique. The Opacity has to be 100%, and all three boxes along the right side of the menu should be checked: Sample All Layers, Contiguous and Anti-Aliasing.

The screenshot says it all… I really did just click on the background and it vanished. (See the new transparent background?)

So then I wanted to play! I have a bunch of Bitmoji images saved to my computer and this one, which is pretty much how I’ve looked the whole month of February, was my next victim.

CLICK!

It was so easy, I wondered what would happen if I tried it on a photo. This one looks like a good choice to experiment with.

Oh. Didn’t expect that!

The tool magically erased some of his t-shirt along with the sky. That’s a limitation – the shadow isn’t enough of a contrast to the sky and Elements couldn’t tell

So I combed through my stock photos for one with more obvious contrast.

Now I’m starting to understand how the tool works. I’m going to need to click on every. single. different. colour. variation. Too much work!

So how about this one? Will it work better?

Not so much.

Maybe this one will work.

Or maybe not. Now I had to see what else I could do that would be smart, not hard, to preserve the stuff I wanted and remove the stuff I didn’t.

I went to the Magic Wand tool to see if it would be quick and easy enough to extract the woman and only the woman.

The marching ants surrounded her hair well enough. So I clicked on Select>Inverse (I lie. You know I went with CTRL/CMD>Shift>I.) to invert the selection… to “select” the background and not her hair.

Now you can see the marching ants around the outside of the photo. Back to the Magic Eraser I went.

Much better! The wisps might be a problem.

I clicked on other areas of the background that were still there.

Not bad! The only fiddly part of this is the wispy hair now.

I wanted to try it one more time, with this crest from one of the radar stations I lived on when I was a kid. It’s a fair representation of the place, I’ll say that! And it has a more detailed edge with that wreath of maple leaves.

One click got rid of most of the background, but left the white in the spaces between the leaves. You can see them along the right side of the screenshot. I’d already clicked a few more times in the spaces to the left side. It only took about a minute to go all the way raound and get rid of the rest of the white background.

Sweet!! I’m not sure what I’ll use this for, and I’m going to see what I can do about wispy hair for a future lesson, but I can feel you chomping at the bit to try this one yourself.

Have fun!!

Fresh Baked: February 22, 2019

Um, we are already in the last week of February. Where is the year going? It feels like 2019 is going faster than 2018! Then, sometimes, it feels slower! When you’re feeling overwhelmed, it’s the perfect time to sit and relax! Whether you’re scrapping for the new Survivor Challenge or just for fun, make sure you check out the shop for the perfect kits!

Remember when you spend $10 in the store, you get a great new collab! It’s not just the young persons who get celebrated!

fwp_thumb_thumb_thumb
https://store.gingerscraps.net/GingerBread-Ladies-Collab-Over-The-Hill.html

01
https://store.gingerscraps.net/February-2019-Template-Bundle-by-Connie-Prince.html

02
https://store.gingerscraps.net/Big-Words-2.html

03
https://store.gingerscraps.net/Project-2019-Lovey-Dovey-Bundle.html

04
Bundle – https://store.gingerscraps.net/Sea-of-Love-BUNDLE-by-Heather-Z-Scraps.html
Kit – https://store.gingerscraps.net/Sea-of-Love-KIT-by-Heather-Z-Scraps.html
Extra Papers – https://store.gingerscraps.net/Sea-of-Love-EXTRA-PAPERS-by-Heather-Z-Scraps.html
Journal Cards – https://store.gingerscraps.net/Sea-of-Love-JOURNAL-CARDS-by-Heather-Z-Scraps.html
Grunge Hearts – https://store.gingerscraps.net/Sea-of-Love-GRUNGE-HEARTS-by-Heather-Z-Scraps.html
Word Art – https://store.gingerscraps.net/Sea-of-Love-WORD-ART-by-Heather-Z-Scraps.html

05
Bundle: https://store.gingerscraps.net/Catching-Snowflakes-Bundled-Collection-by-JB-Studio.html
Kit: https://store.gingerscraps.net/Catching-Snowflakes-Digital-Kit-by-JB-Studio.html
Artsy Papers: https://store.gingerscraps.net/Catching-Snowflakes-Artsy-and-Ombr-Papers-by-JB-Studio.html
Photo Masks: https://store.gingerscraps.net/Catching-Snowflakes-Photo-Masks-by-JB-Studio.html
Flowers: https://store.gingerscraps.net/Catching-Snowflakes-Flowers-by-JB-Studio.html

06
Denim & Glitter 6: https://store.gingerscraps.net/Denim-and-Glitter-Templates-6-by-JB-Studio.html
Denim & Glitter 7: https://store.gingerscraps.net/Denim-and-Glitter-Templates-7-by-JB-Studio.html

07
https://store.gingerscraps.net/JoCee-Designs/

08
https://store.gingerscraps.net/CU-Ephemera-Volume-1-by-Key-Lime-Digi-Design.html

09
https://store.gingerscraps.net/CU-Ephemera-Volume-2-by-Key-Lime-Digi-Design.html

10
https://store.gingerscraps.net/CU-Ephemera-Volume-3-by-Key-Lime-Digi-Design.html

11
https://store.gingerscraps.net/Layered-Page-Templates-February.html

12
https://store.gingerscraps.net/Riding-The-Rails-GrabBag.html

13
Bundle: https://store.gingerscraps.net/LSSweet-Talk-Bundle.html
Kit: https://store.gingerscraps.net/LSSweet-Talk-PageKit.html
Flairs: https://store.gingerscraps.net/LSSweet-Talk-Flairs.html
Grunge: https://store.gingerscraps.net/LSSweet-Talk-Grunge.html
Clusters: https://store.gingerscraps.net/LSSweet-Talk-Clusters.html
Titles: https://store.gingerscraps.net/LSSweet-Talk-Titles.html
Cards: https://store.gingerscraps.net/LSSweet-Talk-Cards.html

14
{kit] https://store.gingerscraps.net/Beautiful-Dreams-by-LDragDesigns.html
[frame clusters] https://store.gingerscraps.net/Beautiful-Dreams-Cluster-Frames-by-LDragDesigns.html
[cards] https://store.gingerscraps.net/Beautiful-Dreams-Journal-Cards-by-LDragDesigns.html
[stacked pages] https://store.gingerscraps.net/Beautiful-Dreams-Stacked-Papers-by-LDragDesigns.html
[collection] https://store.gingerscraps.net/Beautiful-Dreams-The-Collection-by-LDragDesigns.html

15
[kit] https://store.gingerscraps.net/All-About-Boys-by-LDragDesigns.html
[templates vol. 1] https://store.gingerscraps.net/All-About-Boys-Templates-Vol.-1-by-LDragDesigns.html
[templates vol. 2] https://store.gingerscraps.net/All-About-Boys-Templates-Vol.-2-by-LDragDesigns.html
[cards] https://store.gingerscraps.net/All-About-Boys-jOURNAL-cARDS-by-LDragDesigns.html
[graffiti] https://store.gingerscraps.net/All-About-Boys-Graffiti-by-LDragDesigns.html
[alphas] https://store.gingerscraps.net/All-About-Boys-Alphas-by-LDragDesigns.html
[tape tags] https://store.gingerscraps.net/All-About-Boys-Tape-Tags.html
[collection] https://store.gingerscraps.net/All-About-Boys-The-Collection-by-LDragDesigns.html

16[kit] https://store.gingerscraps.net/A-Mother-s-Love-by-LDragDesigns.html
[cards] https://store.gingerscraps.net/A-Mother-s-Love-Journal-Cards-by-LDragDesigns.html
[frame clusters] https://store.gingerscraps.net/A-Mother-s-Love-Cluster-Frames-by-LDragDesigns.html
[wornout papers ] https://store.gingerscraps.net/A-Mother-s-Love-Worn-Out-Papers-by-LDragDesigns.html
[glitters] https://store.gingerscraps.net/A-Mother-s-Love-Glitterstyles-by-LDragDesigns.html
[collection] https://store.gingerscraps.net/A-Mother-s-Love-The-Collection-by-LDragDesigns.html

17
https://store.gingerscraps.net/Templates-Hearts-1-by-Lindsay-Jane.html

18
https://store.gingerscraps.net/Document-Life-February-2019-Grab-Bag.html

19
https://store.gingerscraps.net/Vacation-Album-Travelogue-Templates-Bundle-by-Miss-Fish.html

20
Winter Friends Bundle: https://store.gingerscraps.net/Winter-Friends-bundle-by-Neia-Scraps.html
Winter Friends Full Kit: https://store.gingerscraps.net/Winter-Friends-kit-by-Neia-Scraps.html
Winter Friends Journal Cards: https://store.gingerscraps.net/Winter-Friends-journal-cards-by-neia-scraps.html

21
Brushes MM VOL 02:https://store.gingerscraps.net/Brushes-Mixed-Media-VOL-02-by-Neia-Scraps-CU.html
Brushes MM VOL 03:https://store.gingerscraps.net/Brushes-Mixed-Media-VOL-03-by-Neia-Scraps-CU.html
Brushes MM VOL 04: https://store.gingerscraps.net/Brushes-Mixed-Media-VOL-04-by-Neia-Scraps-CU.html

22
LIS17: https://store.gingerscraps.net/Life-is-Sweet-17-Templates-By-Neia-Scraps.html
LIS18: https://store.gingerscraps.net/Life-is-Sweet-18-Templates-By-Neia-Scraps.html

23
Set 5 – https://store.gingerscraps.net/Multi-photo-Masks-and-Frames-Set5.html
Set 4 – https://store.gingerscraps.net/Multi-photo-Masks-and-Frames-Set4.html
Set 3 – https://store.gingerscraps.net/Multi-photo-Masks-and-Frames-Set3.html
Set 2 – https://store.gingerscraps.net/Multi-photo-Masks-and-Frames-Set2.html

24
01: https://store.gingerscraps.net/Pocket-Scrapping-Templates-01.html
02: https://store.gingerscraps.net/Pocket-Scrapping-Templates-02.html
03: https://store.gingerscraps.net/Pocket-Scrapping-Templates-03.html
04: https://store.gingerscraps.net/Pocket-Scrapping-Templates-04.html
Bundle: https://store.gingerscraps.net/Pocket-Scrapping-Templates-Bundle-01.html

25
https://store.gingerscraps.net/Magical-journey-4..html

26
https://store.gingerscraps.net/Bygone-Baby-Bundle-by-ADB-Designs.html

27
Lace Frames: https://store.gingerscraps.net/Heritage-Resources-Lace-Frames-by-ADB-Designs.html
Bead Alphas: https://store.gingerscraps.net/Heritage-Resources-Bead-Alphas-by-ADB-Designs.html
Lace Page Borders: https://store.gingerscraps.net/Heritage-Resources-Lace-Page-Borders-by-ADB-Designs.html
Birth Certificate Template: https://store.gingerscraps.net/Heritage-Resources-Birth-Certificate-Template-by-ADB-Designs.html

28
https://store.gingerscraps.net/Hygge-Bundle-by-ADB-Designs.html

29
Collection: https://store.gingerscraps.net/360-Life-Mar-Replenish-Collection-by-Aimee-Harrison.html
Page Kit: https://store.gingerscraps.net/360-Life-Mar-Replenish-Page-Kit-by-Aimee-Harrison.html
Alphas: https://store.gingerscraps.net/360-Life-Mar-Replenish-Alpha-Sets-by-Aimee-Harrison.html
Frames: https://store.gingerscraps.net/360-Life-Mar-Replenish-Frame-Clusters-by-Aimee-Harrison.html
Blooms: https://store.gingerscraps.net/360-Life-Mar-Replenish-Blooms-by-Aimee-Harrison.html
Extra Papers: https://store.gingerscraps.net/360-Life-Mar-Replenish-Extra-Papers-by-Aimee-Harrison.html
Messy Edges: https://store.gingerscraps.net/360-Life-Mar-Replenish-Messy-Edges-by-Aimee-Harrison.html
Glitters: https://store.gingerscraps.net/360-Life-Mar-Replenish-Glitters-by-Aimee-Harrison.html

30
https://store.gingerscraps.net/Clowning-Around-BGD.html

31
https://store.gingerscraps.net/Snow-Whoa-Woe-Collection-by-Clever-Monkey-Graphics.html

32
https://store.gingerscraps.net/Heather-Z-Scraps/

Remember, if you complete 10 challenges, just ten, you get a free kit as well!!

cr_thumb_thumb_thumb
Perfectly perfect for “Pizza Party Friday Night”!!

Using the Drag and Drop Feature in Photoshop Elements

With the release of Photoshop Elements 2015, Adobe introduced a new Drag and Drop feature. This component of Elements is activated when using templates that were created specifically with this feature.

The Drag and Drop feature does work in Photoshop Elements versions 10-14, with limited editing capability. It also works in versions released after Version 15.

The Drag and Drop feature does not work in the full version of Photoshop. Those users can use Drag and Drop templates; however, will need to use traditional clipping masks, just as they would with any template.

You’ve got to see how easy the Drag and Drop feature is to use in order to fully appreciate it! I’ve created a 10-minute video  so you can see for yourself how fun these templates are to use.

If you are inspired to use these templates,  you will find them in my shop.

Karen Schulz/Snickerdoodle Designs

How to Use Drag and Drop Pocket Scrapping Templates


Sneak Peeks February 21st 2019

Happy Thursday!!! Our designers have been busy all week to bring you LOADS of new scrapping goodies! Let’s check them out!

From Dagi

From JB Studio

From Heather Z

From LDrag

From JoCee

From Tinci


From Luv Ewe

From Miss Fish

From Neia Scraps

From Aimee Harrison

From Clever Monkey Graphics

Tutorial Tuesday (PSE-Word Mashup)

A Whole New Meaning to Copy-and-Paste!

Welcome to the tutorial that almost wasn’t! The last week has been a little difficult around our house and the weekend was particularly so. I didn’t have time to put together something to share with you before I had to go back to work yesterday. 12 hour shifts don’t leave a lot of energy, mentally or physically, and I always do two in a row so I was expecting to have to disappoint you all by posting a “sorry…” and a promise to do better. But the over-staffing fairy visited me this morning and I magically got the day off. Not having a topic in mind, I had to do some pondering. And then I learned something myself that I knew would be perfect for this week. So we’ll settle for late, rather than not at all. Here goes!

Have you ever put your heart and soul into a layout, then spent forever coming up with the perfect journaling – only to hate the way the journaling looks, or worse… see a glaring typo? Have you ever wished PSE came with a spell-check? Or that you could copy-and-paste something from a website? Well, have I got the trick for you! Word and PSE work together! And even better… all your fonts are there in Word too!

Your Word version may be different from mine; the interface might look different but this is pretty basic, and all the things I’m going to show you will work with any version. I opened a new blank document in Word, chose a font and set my formatting so that my text would fit inside a border on a beautiful journaling blank I pulled from Ooh La La ScrapsShabby Chic collection.

I love using quotations for a variety of reasons. Like not having to think too hard! I typed out this one in a matter of a few seconds. I changed the size of the font for Mr Bergen’s name.

I just spotted a typo on my screenshot below. RATS! Word’s spell-check wouldn’t have caught it either, but it DOES catch those transposed letters, “e”s that should be “a”s and that kind of thing. It also capitalizes the first word of each sentence for you if you forget.

Then I opened up Elements on my desktop, dropped my journal blank onto a new document and set up the Text tool with the same font settings that I chose in Word. If I skipped this step now, Elements would default to the last settings I used.

Back to Word… I selected the text then right-clicked to open up a dialogue box. It looks like this. I want to Copy the text. (WSNH tip: the same keyboard shortcuts I’ve shown you in previous tuts also work exactly the same in Word, so CTRL/CMD>C will work to copy the text.)

I flipped back to Elements and Pasted my text into the journaling space. That can be done by right-clicking then choosing Paste from the dialogue box, or CTRL/CMD>V. Did you notice that Elements ignored the different text sizes?

Now I have the ability to change it up to suit my layout. I changed the text colour first by pulling the gray from the border.

Then I changed the font size on Mr Bergen’s name again. Now that I know the font size changes made in Word don’t move over to Elements, I can skip that step in the future.

Even better, it’s totally possible to Copy whole sections of text from a web site or other document on your computer and Paste it into Word. As you can see in the screenshot below, I’ve selected a new quote from my favourite quotations site.

Then I Pasted it into Word with a couple of clicks! Yeah. I wasted time resizing Ellen’s name. (Did you catch the typo in this screenshot too?)

Here you can see that I’ve got Elements open and it’s just waiting for me to Copy-Paste Ellen’s words of wisdom over.

Oh, right… I didn’t go to Elements and set up the font. So this is the font, size and colour I used for the last layout I created.

So I just Undid that step and started over. But this time I decided to use a Text Box. This handy tool helps to constrain the text so it doesn’t bleed out into areas where I don’t want it. To create a Text Box, with the Type tool click-and-drag from one corner diagonally to the opposite corner of the area you want to cover with text. This journal blank made it easy by having reference points in the border.

And then I pasted Ellen’s quote into my text box. Notice that it’s now centre-justified, rather than left-justified as it was in Word. I had “Center” selected in the Text tool settings and Elements over-rode Word.

This time I didn’t have too many changes I needed to make, other than shrinking Ellen.

But to show you how easy it is to change it to suit your purposes, I switched the angle from upright to right-italic and changed the text colour. I want to try this trick with texting on a path, but wanted to get you the basics now. Stay tuned!

Cabin Fever is Setting In!

We have so very exciting things happening at GingerScraps!!
To celebrate the season of love we have some "Sweet Talk" just for you. Who doesn’t love FREE goodies!?
Join our Facebook Hop and pick up an amazing selection of products.
If you get lost along the way stop by the forum to get the full list of links.

FREE Sweet Talk Facebook Hop! {February 2019}
https://forums.gingerscraps.net/showthread.php?45907-FREE-Sweet-Talk-Facebook-Hop!-February-2019
And…. the event you all know and love is BACK! Scrapping Survivor {2019} is here! Signups are OPEN NOW!
The theme this season is {CABIN FEVER} get ready to get cozy and get your scrap on with 5 weeks of fun, games, competition, friendship, inspiration and of course some beautiful scrapbook pages!

Visit the forum for all the details!
https://forums.gingerscraps.net/forumdisplay.php?1537-2019-Scrapping-Survivor-9-*Cabin-Fever*

Remember when you spend $10 in the store, you get a great new collab! It’s not just the young persons who get celebrated!

fwp_thumb_thumb
https://store.gingerscraps.net/GingerBread-Ladies-Collab-Over-The-Hill.html

01
https://store.gingerscraps.net/affixedtotheboard-by-Clever-Monkey-Graphics.html

02
Bundle: https://store.gingerscraps.net/Be-Bold-Bundle-by-Connie-Prince.html
Kit: https://store.gingerscraps.net/Be-Bold-Kit-by-Connie-Prince.html
Alpha Pack: https://store.gingerscraps.net/Be-Bold-Alpha-Pack-AddOn-by-Connie-Prince.html
Word Art: https://store.gingerscraps.net/Be-Bold-Word-Art-Pack-by-Connie-Prince.html
Extra Papers: https://store.gingerscraps.net/Be-Bold-Extra-Papers-by-Connie-Prince.html
Border Clusters: https://store.gingerscraps.net/Be-Bold-Border-Clusters-by-Connie-Prince.html
Pocket Cards: https://store.gingerscraps.net/Be-Bold-Pocket-Cards-by-Connie-Prince.html
Quoted: https://store.gingerscraps.net/Be-Bold-Quoted-by-Connie-Prince.html

03
Grab Bag: https://store.gingerscraps.net/February-2019-Grab-Bag-My-Everything-by-Connie-Prince.html
Alpha Pack: https://store.gingerscraps.net/My-Everything-Alpha-Pack-AddOn-by-Connie-Prince.html
Word Art: https://store.gingerscraps.net/My-Everything-Word-Art-Pack-by-Connie-Prince.html
Quick Pages: https://store.gingerscraps.net/My-Everything-QuickPages-by-Connie-Prince.html

04
https://store.gingerscraps.net/Make-A-Wish-Digital-Scrapbook-Kit-by-Dandelion-Dust-Designs.html

05
https://store.gingerscraps.net/Layered-Page-Templates-Love.html

06
https://store.gingerscraps.net/LSSweet-Talk-GrabBag.html7
07
Kit: https://store.gingerscraps.net/You-Matter-by-LDragDesigns.html
Bundle: https://store.gingerscraps.net/You-Matter-The-Collection-by-LDragDesigns.html
Journal Cards: https://store.gingerscraps.net/You-Matter-Journal-Cards-by-LDragDesigns.html
Cluster Frames: https://store.gingerscraps.net/You-Matter-Cluster-Frames-by-LDragDesigns.html
Worn Out Papers: https://store.gingerscraps.net/You-Matter-Worn-Out-Papers-by-LDragDesigns.html
Textured Papers: https://store.gingerscraps.net/You-Matter-Textured-Papers-by-LDragDesigns.html
Glitter Styles: https://store.gingerscraps.net/You-Matter-Glitterstyles-by-LDragDesigns.html
Bundle: https://store.gingerscraps.net/You-Matter-The-Collection-by-LDragDesigns.html

08
https://store.gingerscraps.net/Forest-Walk-Collection-by-Lindsay-Jane.html

09
Kit: https://store.gingerscraps.net/Forest-Walk-by-Lindsay-Jane.html
Quick Pages: https://store.gingerscraps.net/Forest-Walk-Quick-Pages-by-Lindsay-Jane.html

10
https://store.gingerscraps.net/Sweet-Talk-Digital-Scrapbooking-Kit-and-Templates-Bundle-by-Miss-Fish.html

11
Bundle: https://bit.ly/2EaEWCc
Flowers: https://bit.ly/2Gr07m6
Kit:https://bit.ly/2DCRgda
Templates:https://bit.ly/2USRdk8
Goodies: https://bit.ly/2I9h1Hd

12
Full Bundle – https://store.gingerscraps.net/Sweet-kisses-Bundle.html
Kit – https://store.gingerscraps.net/Sweet-kisses-Kit.html
Masks&Frames – https://store.gingerscraps.net/Sweet-kisses-Masks-and-Frames.html
Painted papers – https://store.gingerscraps.net/Sweet-kisses-Painted-papers.html

13
https://store.gingerscraps.net/My-Boyfriend-s-Back-kit-by-Scraps-N-Pieces.html

14
Templates: https://store.gingerscraps.net/Love-to-Scrap-Volume-16-Templates-by-Shepherd-Studio.html
Facebook Page: https://www.facebook.com/shepherdstudio.scrapbooking

15
https://store.gingerscraps.net/Everyday-memories-2.-True-love.html

16
Collection: https://store.gingerscraps.net/Very-Vintage-Collection-by-Aimee-Harrison.html
Kit: https://store.gingerscraps.net/Very-Vintage-Page-Kit-by-Aimee-Harrison.html
Alphas: https://store.gingerscraps.net/Very-Vintage-Alpha-Sets-by-Aimee-Harrison.html
Word Art: https://store.gingerscraps.net/Very-Vintage-Word-Art-by-Aimee-Harrison.html
Frames: https://store.gingerscraps.net/Very-Vintage-Frame-Clusters-by-Aimee-Harrison.html
Extra Papers: https://store.gingerscraps.net/Very-Vintage-Extra-Papers-by-Aimee-Harrison.html
Messy Edges: https://store.gingerscraps.net/Very-Vintage-Messy-Edges-by-Aimee-Harrison.html
Glitters: https://store.gingerscraps.net/Very-Vintage-Glitters-by-Aimee-Harrison.html

17
https://store.gingerscraps.net/Youve-Got-Mail-BGD.html

18
https://bit.ly/2E4Z0WN

19
https://store.gingerscraps.net/Neia-Scraps/

20
https://store.gingerscraps.net/Neia-Scraps/

Remember, if you complete 10 challenges, just ten, you get a free kit as well!!

cr_thumb_thumb
Perfectly perfect for “Pizza Party Friday Night”!!

Sneak Peeks February 14th 2019

Happy Valentine’s Day! Today is the day we celebrate the people we love most in the world. It’s a perfect holiday for digi scrappers. Our hobby let’s us preserve our favorite memories of our loved ones for years to come. This week our designers felt the love in the air and have a bunch of new goodies ready to go. Also don’t forget about the Gingerscraps Facebook hop! Our fabulous designers have some awesome freebies ready for you on their facebook pages and fan groups.

Let’s take a peek at some of the awesome new releases!

From Neia Scraps

From Tinci

From JB Studio

From Clever Monkey Graphics


From Lindsay Jane

From Shepherd Studio

From Aimee Harrison

From Miss Fish

From L Drag

Have a great weekend!

Tutorial Tuesday (Photoshop Elements)

It’s All About the EXPOSURE!

Today’s tutorial comes to you courtesy of my weekend wandering through that black hole known as Pinterest. I wasn’t even looking for inspiration but BAM! there it was!!

I don’t know about you but I have a whole folder of photos that are unscrappable for one reason or another. Many of them are seriously under-exposed… and they’re usually of something I really, really, REALLY wanted to use for a layout. Like this one, for example. I took it on my first trip to Ireland in 2014; there’s a lovely 2-storey manor house in the centre, surrounded by idyllic countryside. But you’d never know it. All my efforts in the past to improve these shots were failures, mainly because they looked really over-processed and artificial. Then I found this method of fixing these oh-so-dark shots. To wow you thoroughly, I’m going to start with this one, as my worst example of underexposure.

The first thing to do is make a copy of the image, either by right-clicking on the layer and selecting Duplicate Layer, or simply using the shortcut CTRL/CMD>J. If you choose the first method, there’s an extra step, because PSE is going to ask you to name the new layer. The shortcut just makes a copy, and calls it that. (You already know what method I use.)

Now for the magic! Just change the Blend Mode from Normal to Screen. Click on the button at the immediate upper left of the Layers panel and select Screen from the drop-down menu. For those of you who don’t know much about Blend Modes, they’re really great tools; I put together a tutorial on what they that you can find here.

Can you see the change that simple step has made? Hedges!!Shrubs!

Just by copying the Screen layer, I can bring out more details.

Still not great, but so much better…

So I added another copy of the Screen Layer.

And another…

I kept adding copies of the Screen layer and the image just kept getting better and better.

It’s getting there, but still has some room for improvement.

Almost there!

And then… YES! I can see the leaves on the shrubs in the foreground, the trees on the hill and have a much better photo.

Then I Merged all the layers together. Select all the layers then right-click somewhere within the Layers panel, choosing Merge Layers from the drop-down menu. Or do what I do,  select the layers then CTRL/CMD>E.

I’m happy with the exposure now, but I feel like the image is a bit hazy. So my next favourite new tool is the Enhance>Haze Removal (or CTRL/CMD>ALT>Z).

It doesn’t change the image in a huge way, but the leaves are sharper, the house looks sharper and the colours are a smidge more saturated.

Let’s try it again, this time with an indoor photo taken without a flash. No harsh shadows, but also no background detail…

The first Screen layer does this.

Adding a second Screen layer brings out more of the carved panelling.

Now I’ve got three Screen layers and I’m almost happy.

Four Screen layers and I’m happy.

Merge those layers and carry on! This one isn’t too hazy so I didn’t use the Haze Removal tool.

Let’s try it one more time, with an image that isn’t terrible, but could use a little help.

First Screen layer…

I added another one, then one more and now could see the beams under the roof a lot better.

Then I Merged the layers.

I wondered if Haze Removal would make it even better. And to my eyes it did.

So that’s a handy trick for the under-exposed shots. What about the ones that are just a little blown out – over-exposed? Is there a quick trick for them? YES! This photo is from my daughter’s wedding trip to Jamaica.

Now, this wasn’t in the little piece I found online, but I thought about if for a minute and decided to try something… it worked! I copied that first layer but instead of using the Screen Blend Mode, I chose Multiply.

Look at that! It’s a bit dark, but much better with just ONE blended layer on top of it.

The easiest way to adjust it was to lower the Opacity of that Multiply layer to 92%.

Merge those babies!

I gave it the Haze Removal treatment too.

And there it is!

This next one, a gallery I shot in New Orleans, doesn’t need a lot of adjusting either, but I wanted to know if I could love it more.

After the first Multiply layer I feel it’s a bit too shadowy now. But I know how to fix that.

Ooh, that’s better! 82% is about the right amount of Opacity here.

I love that this trick is so much less labour-intensive! I Merged the two layers…

and hit it with the Haze Removal tool too.

I saved the worst for last. This wall paper is in the circular entry hall of the manor at Coollattin, the estate where my Irish ancestors lived and worked until 1847. It’s hand-painted watercolour on heavy paper, and it’s absolutely beautiful. But you wouldn’t know it from this photo!

One Multiply layer later… I think it’s too dark now, but when I was batch-editing I thought it was fine.

I kept going with the process and reduced the Opacity to 80%.

It’s better than the original so I Merged the two layers.

And got rid of the Haze.

There’s a lot of detail visible now, and the colours are much more saturated.

Then, just to see, I added a Screen layer and it’s PERFECT!

Are you already looking through your photo folders for shots to experiment with? I bet you are!

~~February Feature Designer – Day Dreams ‘n Designs~~

Happy February. Today we’re talking with Shelley of Day Dreams ‘n Designs. She was kind enough to answer my scrapping and somewhat off-the-wall questions.

How long have you been designing?

I started out designing blog train freebies in 2014 and then opened my first store in April 2015. I started with a guest spot at GingerScraps in November 2017 and love being a GS designer.

What made you decide to design?

I had started digital scrapbooking a fews years before but then found some tutorials on how to design my own stuff. After participating in blog trains I found out how much I really enjoyed it.

What do you use to create your designs (program, additional tools, etc.)?

Photoshop CC

Describe your design workplace.

I have my own office with a large u-shaped desk that holds my PC and two monitors and my Mac Computer. And yes I use it all!

What motivates and inspires you as a designer?

My kids and what I need to scrap for them along with colors and themes.

What is your favorite kit currently in your GS store and why?

A Snowy Adventure has always been one of my favorites. I love doing snow kits because I love snow but I also love the color palette.

What was your first job?

My first job was at a place call Sears Teleservice. We answered calls from people wanting to schedule repair service for Sears appliances.

Have you ever met anyone famous?

Nope.

What are you reading right now?

The Unblemished series

What is your favorite quote?

Life is to be enjoyed, not endured.

What is something you want to do in the next year that you’ve never done before?

Take my family on a cruise.

You have your own latenight talk show, who do you invite as your first guest?

Hmm, I don’t really watch talk shows but recently some of my favorite songs have been from Imagine Dragons so let’s go with them!

If you had to delete all but 3 apps from your smartphone, which ones would you keep?

Find iphone, Messages, and overdrive – gotta have my ebooks and audiobooks!

If you could have someone follow you around all the time, like a personal assistant, what would you have them do?

Hands down cooking and then cleaning. But I hate cooking more.

Would you rather travel back in time to meet your ancestors or to the future to meet your descendants?

Hmm that’s a tough one but probably to the future to meet my descendants and see what it’s like.

What commercial jingle gets stuck in your head all the time.

We only stream so we don’t watch commercials but my kids like that shark song and that gets stuck in my head a lot unfortunately!

If you could turn the ocean into a liquid other than water, which one would you pick?

But water is my favorite thing to drink! I don’t drink soda any more but my favorite was cream soda so I’ll go with that.

Thank you to Shelley for playing along. Make sure to check out her GS Store, her FB Fan page, and her blog. Also, make sure you are grabbing each piece of the daily download from the GS blog.