Unlocking the Photoshop Elements Easter Eggs
![]()
The other day I was scrolling through Google News on my phone looking for celebrity stories and horoscopes… who doesn’t? I’d at one time done a Google search for tutorial ideas and obviously Google stores away all that information to use against me at a later date. Because there in front of me was a video extolling the virtues of Photoshop Elements+. I’d heard of Elements+ in passing before but never actually looked at it. I mean, who wants to spend more money than we have to for hobbies, right? But I watched the video anyway. Then I went over to the Elements+ website and bought it! My first pleasant surprise was the cost – $12 US ($17.87 CDN at today’s exchange rate, but still a steal!). They have a free demo option which is a much-abbreviated set of features, and if you aren’t sure you want to spend the cash, maybe give it a look first before you decide. What do you get for the cost of a couple of gourmet coffees? A TON!!
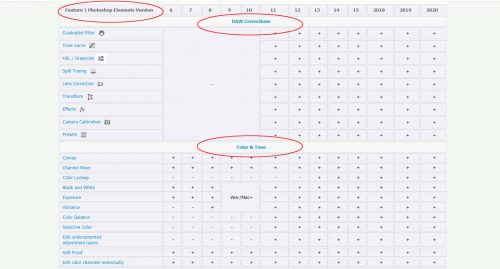
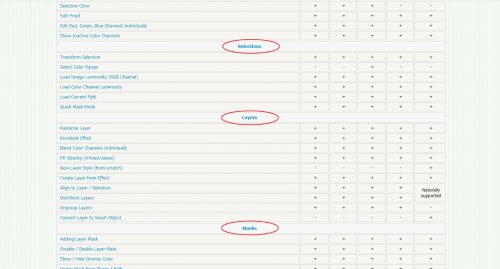
This first screenshot shows the key to the (very lengthy) list of features and which version they’re part of. The type is quite tiny but if you go to the website you can see the list full-sized. There is an Elements + version for every release of Elements from 1 through 2020, and the patch (that’s what the developer is calling it) unlocks all the hidden potential of the Elements software that turn it into so much more of a powerhouse. There are a lot of features in here that won’t appeal to the average scrapper, but don’t let that hold you back! The first block of features are RAW corrections. You may remember quite some time ago I gave you a tutorial on editing in Camera RAW, which is super for taking a so-so photo into the amazing realm. Elements + adds several functions not present in the basic software.
The second block of features in the screenshot are for Color and Tone. They’re pretty complex edits, and only the real photography snob or the wedding photographer might use them. But handy to have, no? Of note, there are some features that are only in the Windows version, or the Mac version, but not both, and the chart shows you which.
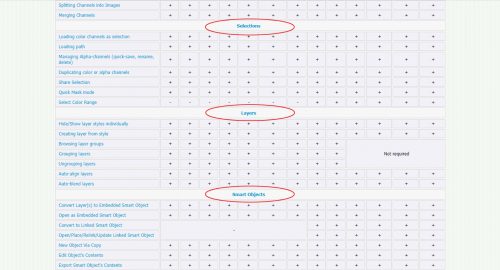
The list continues with Selections, a group of edits that make extracting much more precise and with fewer steps. They’ll take a bit of a learning curve, I think.
Next is a section on Layers. What caught my eye is the one called “Creating layer from style” and it’s making me giddy! I can’t wait to put my styles on their own layers so I can bend them to my will.
Then comes Smart Objects. I’ll confess, after using Elements 17 and being frustrated by Smart Objects, I think I need to learn how to make them work for me, so I’ll be exploring these functions.
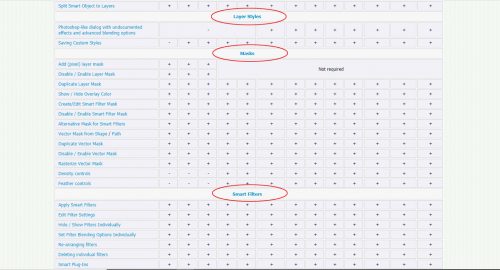
Layer Styles options look pretty interesting. “Photoshop-like dialog with undocumented effects and advanced blending options” sounds like something I need to know! “Saving custom styles” is also something that might be fun to learn.
Masks refers to layer masks, not the sort we’d use for clipping photos or papers to, but for making adjustments to individual layers. I’ll need to do some playing to understand how they work.
Smart Filters sounds like Instagram went to college. But I suspect there are some really useful edits to be found in there.
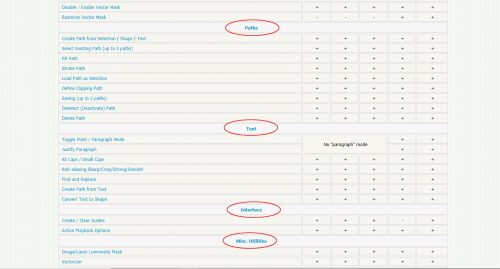
In Elements‘ later versions there’s a text option for putting words on a path. You know, putting test around the outside of a box, a heart, a star or some other shape. These options under Paths expand and extend that to so many applications, from creating paths to creating shapes from a path to using a path as a selection, there’s a lot to unpack there.
Text options to allow scaling of individual characters, the ability to edit only a fragment of text (not for Mac), text inside a shape and paragraph justification will make journaling much more interesting.
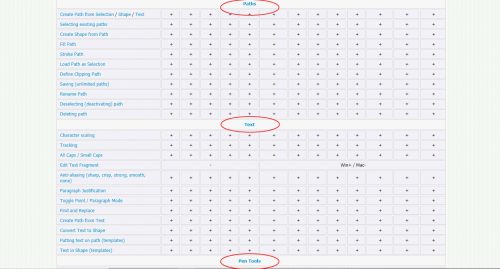
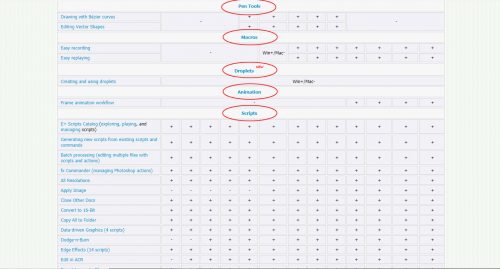
Pen Tools are only available in Versions 10-14. Bézier curves are a bit beyond my limited geometry, algebra and trigonometry education so I can’t explain that one. Anyone smarter than me care to dumb it down?
Macros are little bits of code that define a specific process. The two entries in this category relate to recording and replaying macros you create yourself. Let’s say you have several edits you do to every one of your photos or layouts and you wish you had a way to automate that. This is it! But. It needs something called Scripting Listener to be installed and functional within PSE. Let me look into that further…
Droplets could be a game-changer! The website says this: ““Droplets” provide a quick and intuitive way to apply scripts to pictures. You just drag one or more image files onto the droplet icon and… it’s done! ” The example they show is resizing a whole batch of photos to a defined size. (I might be interested in this for my tutorial screenshots…) I think this particular feature will be really handy for scrapbookers, because you can create a Droplet of your favourite script (I’m going to talk about Scripts next) and apply it to multiple objects. Once I’ve played with this, if there’s interest from my faithful readers, I’ll put it all into a tut.
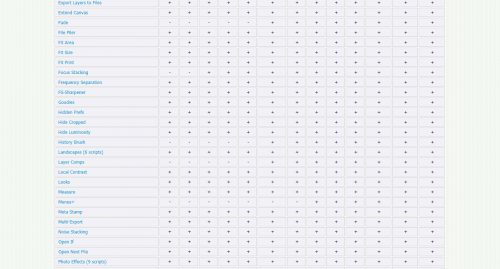
Let’s talk about Scripts. These are just what they sound like – series of instructions to be followed in order. I’ve used some of the scripts and will show you what I did with them in a bit. These Scripts let you do so many things it’ll make your head spin! The ones I think will be the most useful for scrapbooking are the Edge Effects scripts. Burnt Edges!! There’s one that turns your photo into a piece of Film, and another one that turns a series of photos into a Filmstrip. Another one applies Hand-stitching to the edges of whatever you want. The script varies the length and angle of each stitch so it’s completely random, and won’t be exactly the same twice. The colour of the stitches and the background texture are customizable. Page Curl rolls the corner of your photo or paper, putting the perfect shadow on it. Photo Corners, Rough Bounds, Rounded Corners, Stamp Edges, Torn Edges, Wavy Edges, Yellowed Margins and Zig-Zag complete the list. Then there are the Photo Effects scripts that expand significantly on the basic effects already in Elements. Randomize is something I want to get deeper into to see if I can make my own fabulous scatters. That’s just a sampling of what’s in the Scripts treasure chest.
This screenshot just continues the list of Scripts. More POWER!
This too is a continuation of the Scripts list. At the very bottom they show the functions available in Versions 1-5. Of course they’re much more limited because Elements has evolved so much over the years.
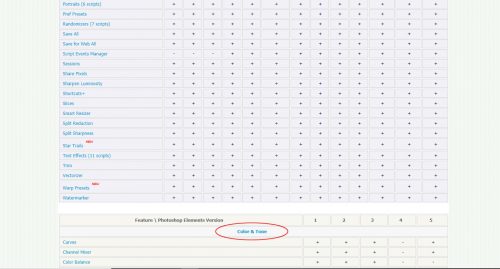
Still with Versions 1-5…
Notice how the lists are much shorter…
Okay! On to my experiment from earlier today. I downloaded the software and installed it. Then I opened up Elements and let it absorb all the new goodness. This will take several minutes, so if you decide you want to try it out make sure you have time to let it get set up.
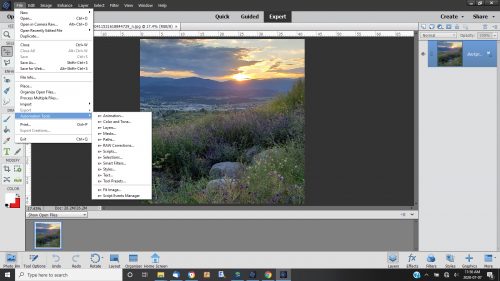
How do you find your Easter eggs? There are two ways to do it. You can click on File>Automation Tools (which would have been greyed out before) and the category menu opens.
Or you can click on the Effects button at the bottom of the layers palette and select Elements+ from the drop-down menu. Then you have all these thumbnails to give you an idea of what they hold.

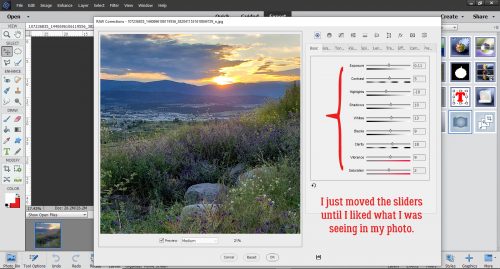
I had this Instagram photo I downloaded from my phone that was okay, but not really what my eyes were seeing when I shot it. So I thought, why not give it the RAW treatment? And I can get to it with the photo already open in Elements, which is fantastic! I’m going to tell you that, start to finish, this edit took me all of 2 minutes. And I’m impressed! The RAW menu looks a little different and offers a few options that aren’t found in the Open in Camera RAW menu. But the preview screen is still the same and lets you see what you’re doing as you do it.
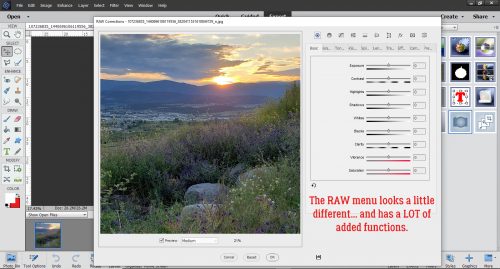
I did some basic editing to see if I could pull a bit more detail from the foreground, which was pretty underexposed. Of course, that washes out the sky a bit… but okay, onward and upward.
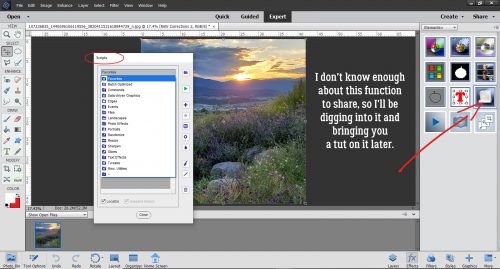
I took a look at the Scripts and was intrigued by the Favorites on the menu, but don’t know enough about it yet to do much with it. Later…
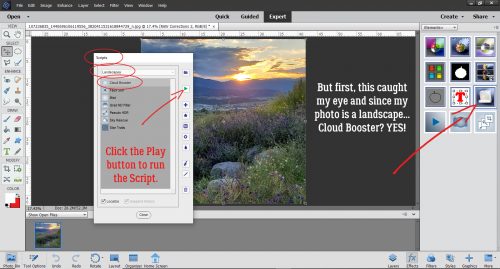
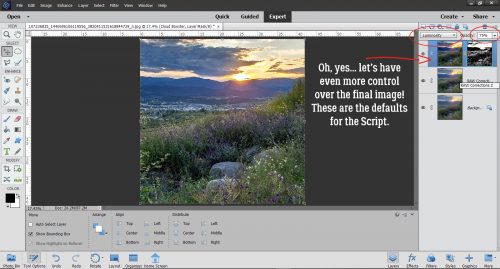
However… further down the list is Landscapes. So I opened it. And there’s a Cloud Booster. YES! I selected it then hit the green triangle icon that represents the Play button.
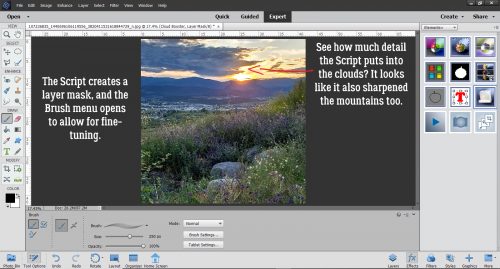
I haven’t shown it here but the Script creates a copy of the background layer and works upward. There’s a RAW layer, and then the Cloud Booster layer, which includes a layer mask. The Brush menu also opens so you can use a brush to adjust where and how much the effect changes your image. I didn’t touch the image with a brush though.
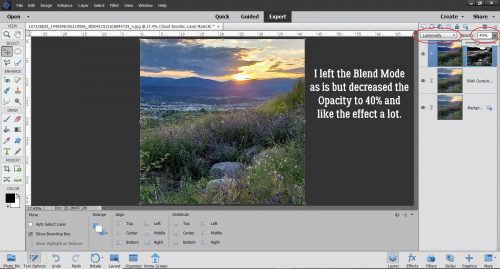
Instead, I took a look at the layers palette.
I toned down the Opacity of the layer mask, which softened up the mountains a bit, but didn’t change the Blend Mode.
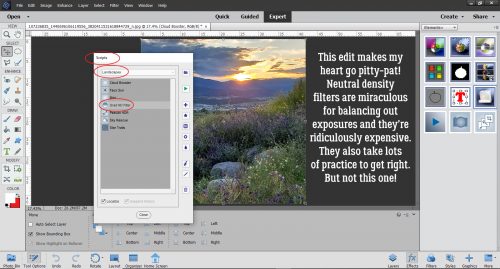
Then I spied the Neutral Density Filter script. Oh my heart! I have a neutral density filter for my DSLR, but find it cumbersome to use. To say nothing of pricey! ND filters are especially useful for landscape photos, where you know there’s going to be trouble getting the exposure just right. They come in a range of intensities from almost imperceptible to very dark. The glass is gradient-tinted; the filter needs to be positioned so that the darker part is over the lighter, brighter part of the intended photo – usually the sky. It decreases the amount of light getting through the lens in that area of the photo so it’s less exposed than the rest of the image. Using the filter takes practice, experimentation, exposure-bracketing and shooting purely in manual settings. How can Elements+ replace the on-lens filter? Let me show you!
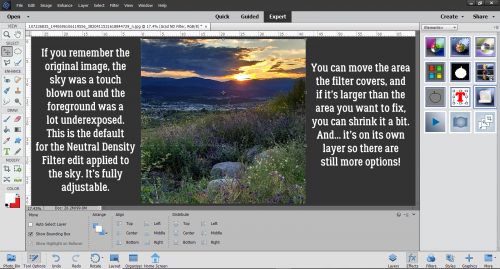
This is my photo after I ran the ND Filter script. Notice how the sky is darker now, maybe just a bit TOO dark? But because this is completely digital, I can make adjustments to the layer and fine-tune it so it’s just right. Let’s say I was shooting a snowscape and it was the FOREGROUND that’s over-exposed. I could rotate the filtered area so it’s at the bottom of the photo. If the filtered area bleeds into the part of the photo that is already correctly exposed, I could either shrink the filter area, or slide it up so that it only touches the area of the photo where it’s needed. And then there’s the on-its-own-layer thing. Bingo, more control!
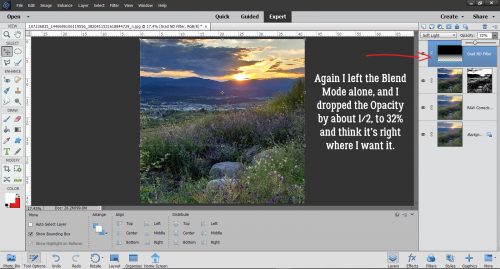
So let’s look at that. The Blend Mode is Soft Light, which works. The Opacity was about 45% at the default setting, and I just pulled it down to 32%.
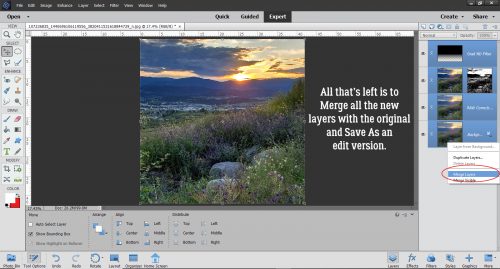
The last thing I did was to Merge all the layers and Save As an edited image.
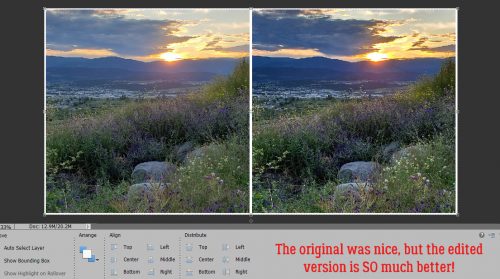
Just for you, I put the original next to the edited version. Now you see what my eyes saw on Sunday evening when I took my photo.
I think there’s a gold mine in this patch! I want to dig into how it can be leveraged for digital scrapbooking for you and then show you how to make it happen for your layouts. So much potential!!
![]()