Archives for November 2020

Black Friday & Fresh Baked! 11/27/2020

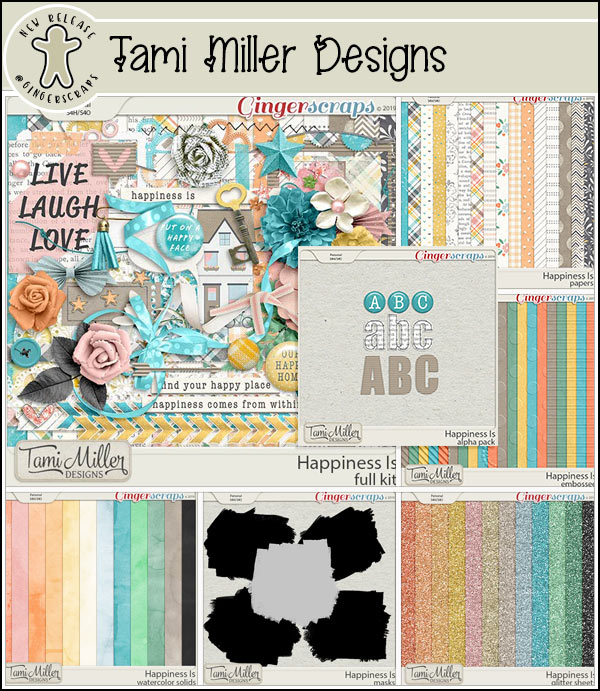
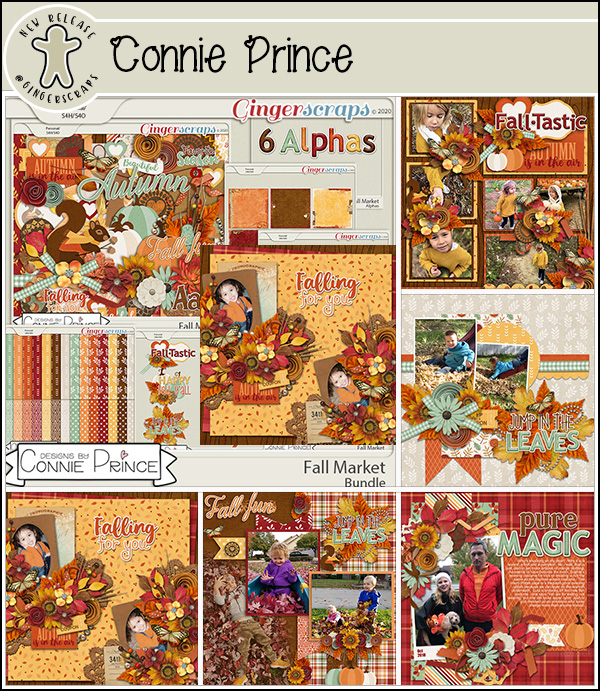
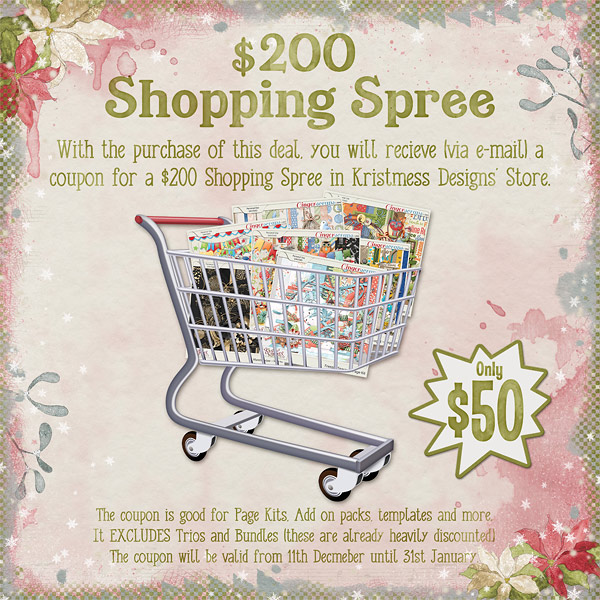
Who is ready for some AMAZING deals!? It’s our last big, site-wide sale of 2020, and some of these deals only come once a year, during our Black Friday event! It is the perfect time to stock up on all the goodies that you’ve had your eye on!

In addition to our weekly New Releases, we also have a special Black Friday category that is packed full of HUGE DEALS, Grab Bags, Shopping Sprees and more! Happy Scrapping and Happy Shopping! 

Tutorial Tuesday with a Twist

Is it Thanksgiving, or Giving Thanks?

This year, Thanksgiving has a completely different meaning for most of us. Here in Canada, our celebrations at Thanksgiving are always much less exuberant than those of our neighbours to the south (and six weeks earlier). Even so, we had to make some accommodations to the times we’re living in. When this year began, I imagined our Thanksgiving to include my elderly parents, my sister and brother, our daughter and son-in-law and the three of us, all around the table with a big turkey in the centre. Instead, it was the three of us, our daughter and son-in-law and the world’s smallest turkey. But it was how it had to be. With the whole of the United States heading into their 4-day (or is it a week now?) Thanksgiving extravaganza at the same time that the weather has pushed people indoors AND a rapid increase in COVID spread has begun, it looks like the perfect storm to this observer. So I’d like to take a few moments to encourage everyone to think about the real meaning of “thanksgiving”.

Every one of us, no matter where we are or what’s happening in our lives, has something to be thankful for this year. Some of us have big things – graduations, weddings, promotions, new homes, new family members. Some of us have small things – a new friend, a better job (or any job!), learning a new skill, time for DIY projects, finding something long thought to be lost forever. But all of us have SOMETHING. An attitude of gratitude starts with recognizing that, and what better time to start making that shift than at Thanksgiving?

I know people are tired of restrictions and want life to be the way it was before. There’s a lot of temptation to just say to heck with it… I’m out! But the thing about this situation is that we have lots of examples of how short-term sacrifice bears long-term benefit. The Spanish Flu pandemic is one example. Far more people died in those two years than we could possibly imagine, but the ones who survived have allowed US to exist! They too hated the restrictions placed on them – much harsher than the ones we’re faced with, to be honest. But in the end, they did what needed to be done. World War 11 gives us another strong model of personal privation that ultimately kept the world spinning. Just like this crisis, the effects were stronger and lasted longer in some areas than others. I think they had it far worse than we do… compulsory identification of all citizens and aliens, food and gasoline rationing, blackouts, restricted travel, internment camps and conscription all came into being. And for the most part, people did what needed doing without much resistance. But they didn’t have many of the amenities we take for granted. The internet for example! With it we can not only stay in contact with each other, but we can SEE each other without being in the same place. Imagine how a farm family in 1944 would have loved the opportunity to visit with neighbours without even leaving home! We have unlimited options for amusement right in our own homes, while they had to shelter in place in the dark every night. We have easy access to whatever food choices we might make, and can have it brought right to the door; no thought of “this is all the hamburger we have for the month”. We have an international army of scientists working flat out to understand how COVID works, how to treat it better, how to save lives and to develop vaccines so that NEXT year, we’ll have a real reason to be thankful as we gather with the people we love. We’re really very lucky, but we don’t appreciate it when we focus on what we’re giving up.

So what does this have to do with scrapbooking, you ask. Everything! Scrapbooks record the significant people and events in our lives so we can remember them later. The good parts… and if you’re “real”, the bad too.  My challenge to each of you is to take a few minutes just to think about what – and who – you really need in your life. Why are your choices important to you? What are you prepared to do to keep them? What do you have to celebrate in 2020? What makes it worth celebrating? And to finish up, are you ready to be thankful for what you already have? I am. I hope you are too.


Fresh Baked: November 20, 2020

It’s Friday again. One week until the holiday season officially starts. Are you planning any big shopping trips or staying in and shopping online this year?

Don’t forget, any $10 spent in the store will get you this awesome kit for free.

Let’s see what the designers have new for this week.

Remember, any 10 completed challenges gets you this kit as a reward.

And don’t forget to shop the November Bake Sale that ends TODAY! So many great items for only $1 each.

Keep your eyes peeled for some awesome goodness for Black Friday.

Tutorial Tuesday (Photoshop Elements)

Jazzing Up a Neutral Background

Let’s see how NOT trying to outsmart WordPress works!

Let’s talk about personal style for a minute. We’ve all got our own preferences when it comes to how we construct our layouts. I like neutral backgrounds and am totally lost (terrified is more like it!) when it comes to using papers with bold patterns. But at the same time, I often feel that using a plain paper or cardstock leaves my layouts looking a little unfinished. So you’ll notice that I add some sort of border to most of them. When I looked at this month’s Bake Sale I was delighted to see that Lindsay Jane had a set of her Edge It border masks in there that I didn’t have. She also has a line of simple doodled borders I’ve been collecting. But she’s not the only one who creates gorgeous borders. Most of our talented designers have border sets in their stores. Take a moment to check them out!

Anyway, I thought I’d show you how to take a simple piece of cardstock and make it into an eyecatching background using borders.

This cardstock came from a GingerBread Ladies collection called Certainly Summer. I like it a lot because it’s got a nubby texture to it. But it’s PLAIN otherwise.

Here’s one of those border masks from Lindsay’s Edge it V7 pack. (Yes! The set of 6 is on sale until November 20, 2020 for the incredible sum of $1!) Of course, it’s black in its original state, and that isn’t the look I’m after…

Contrasting borders look great in certain situations, but I really like monochrome looks a lot, so I grabbed the Eye Dropper tool and clicked on the cardstock to activate the Color Picker to keep my border in the same colour family.

By going just a bit darker, I can turn this border into almost a vignette-like look. I love that I can see the contrast between the current colour and the colour I’m choosing.

To get that new darker teal onto the border mask, I’ll click Layer>New Fill Layer>Solid Color.

The menu takes a lot of the work out of the process by letting me Use Previous Layer to Create Clipping Mask. In one step I can turn just the border a different colour.

This time when the Color Picker opens, Elements shows me what the new border will look like, and it gives me the option of changing it if it doesn’t please my eye.

I want to have control over the border as it is with the new colour filling it so I Merged the two layers. I love how it’s coming along.

But it’s still a little bright. Wanting subtlety, I decreased the Opacity to 40% and like how it looks.

But what would it look like if I clipped a paper (from PrelestnayaP‘s Delicate Moments) to that border? (Or to one of the borders in Irina‘s kit?) Let’s see!

Here it is, clipped to the border and the two layers Merged. I think it looks a bit like snow, with the pattern indistinct. Hmm.

If the pattern isn’t a factor, maybe if I decrease the Opacity to 60%? That’s nice and subtle.

Here I’ve added a doodled border from Lindsay Jane’s Page Borders V34. I’m going to  
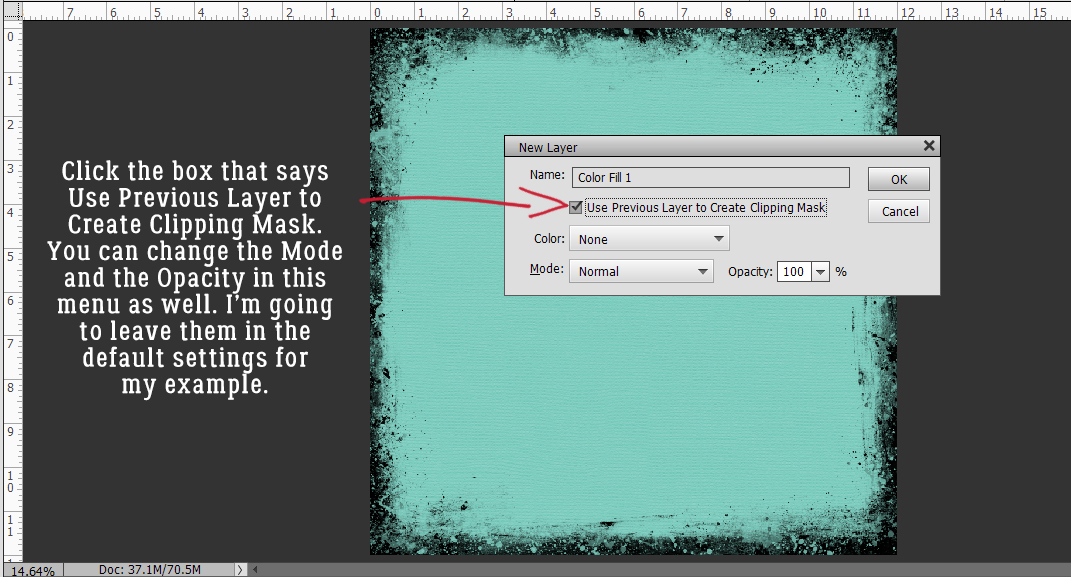
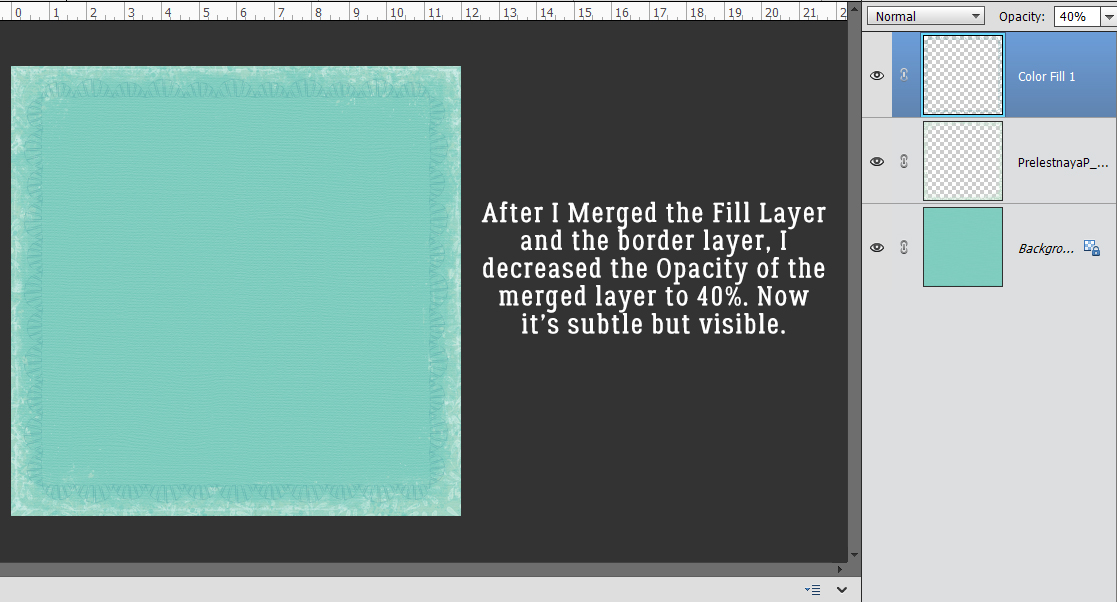
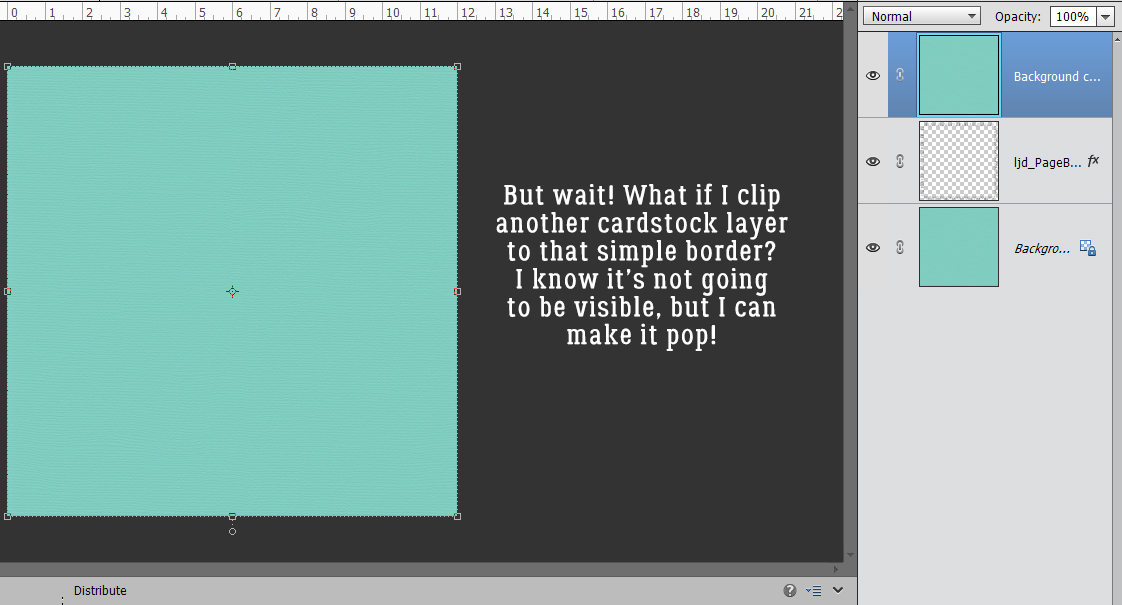
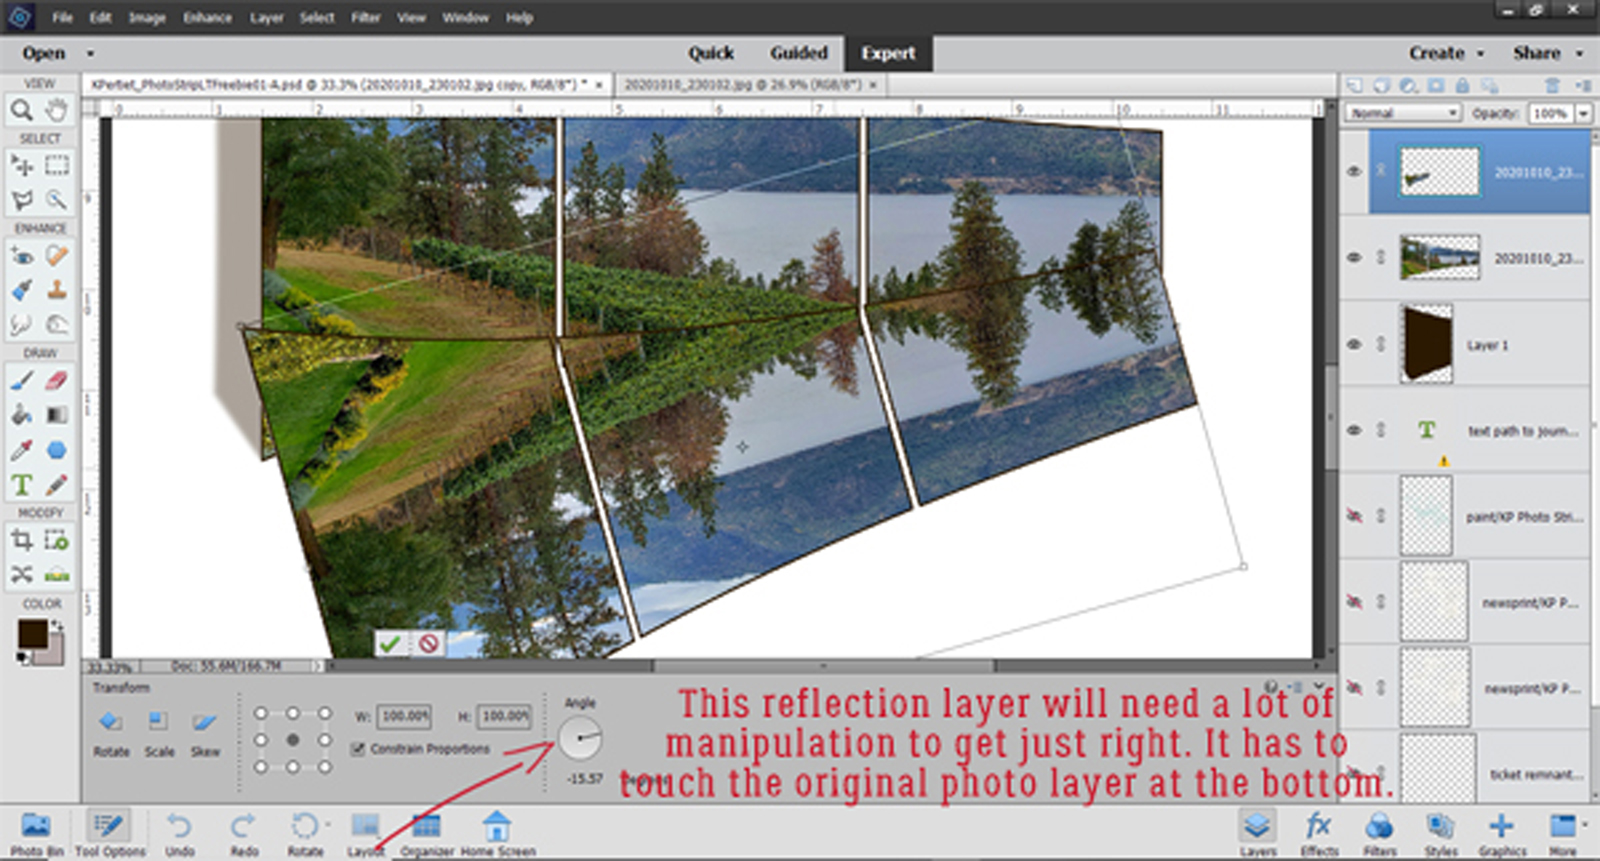
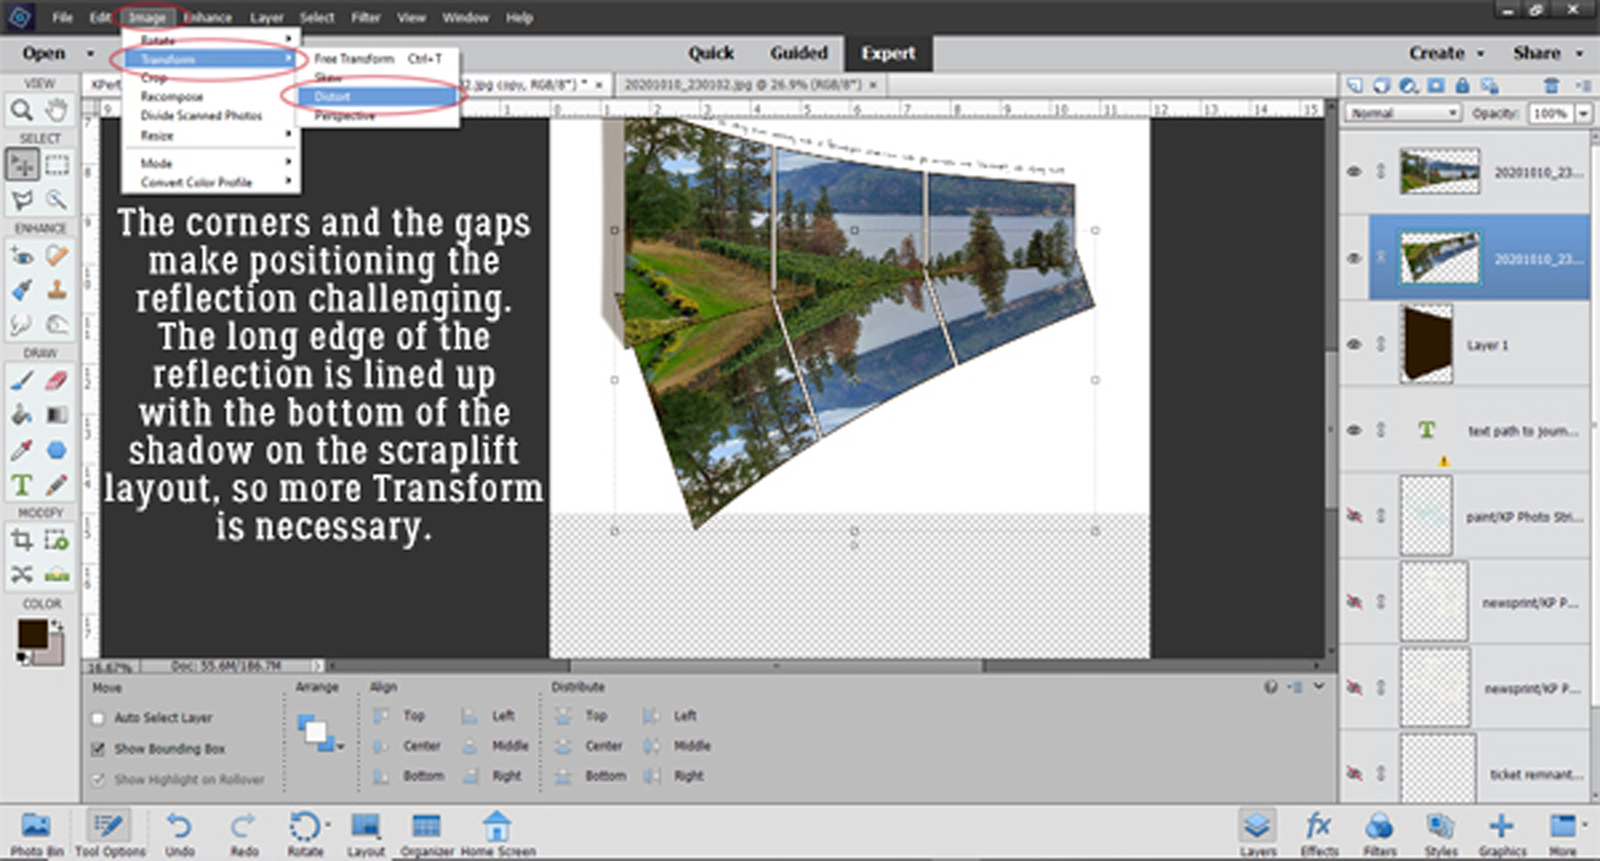
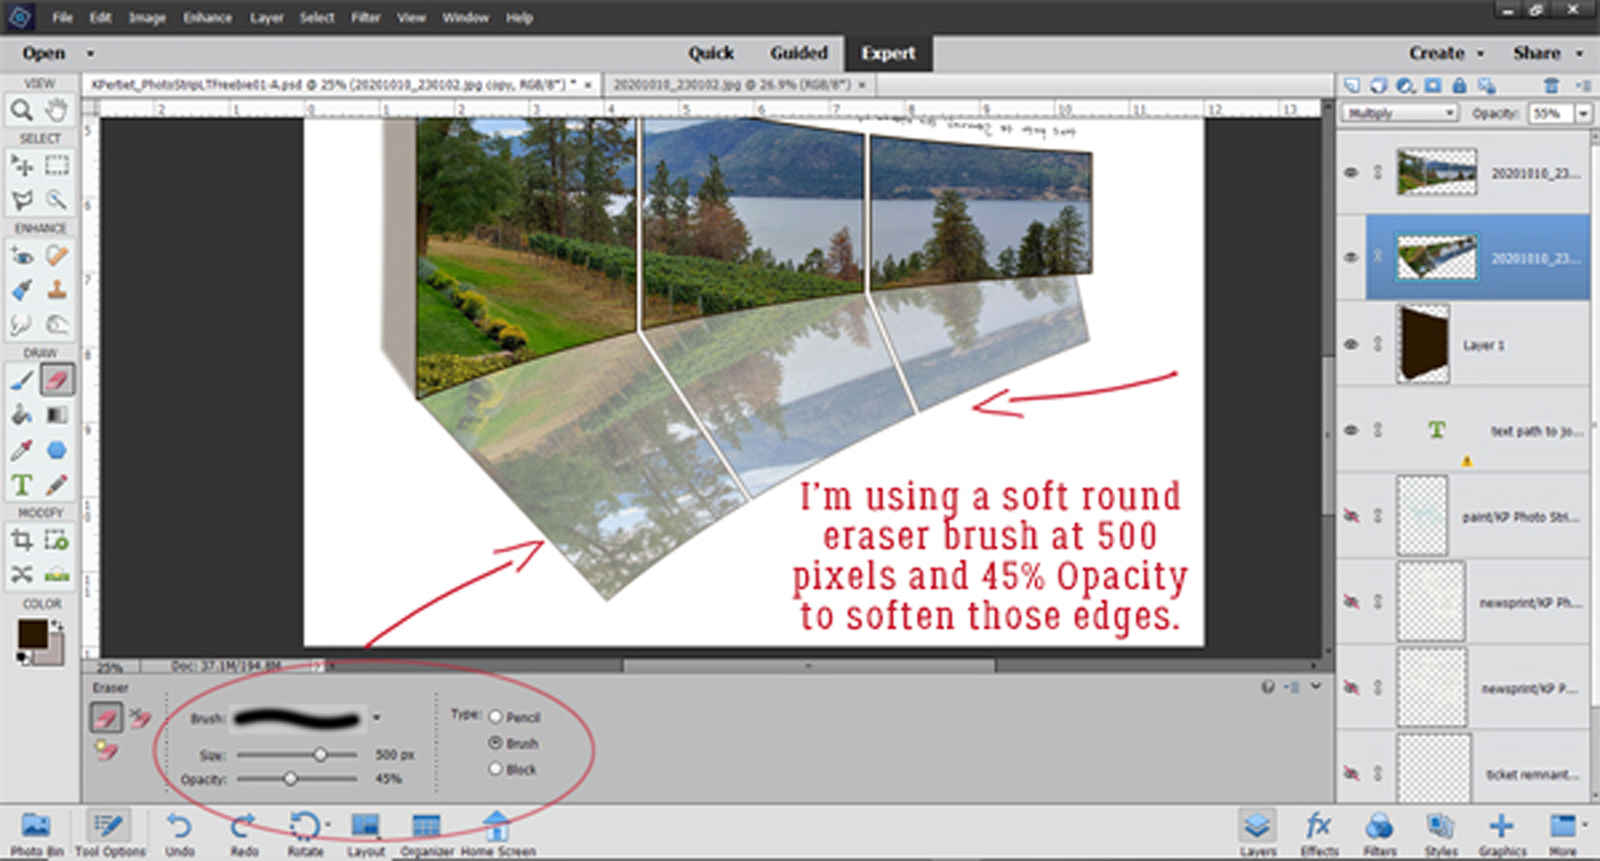
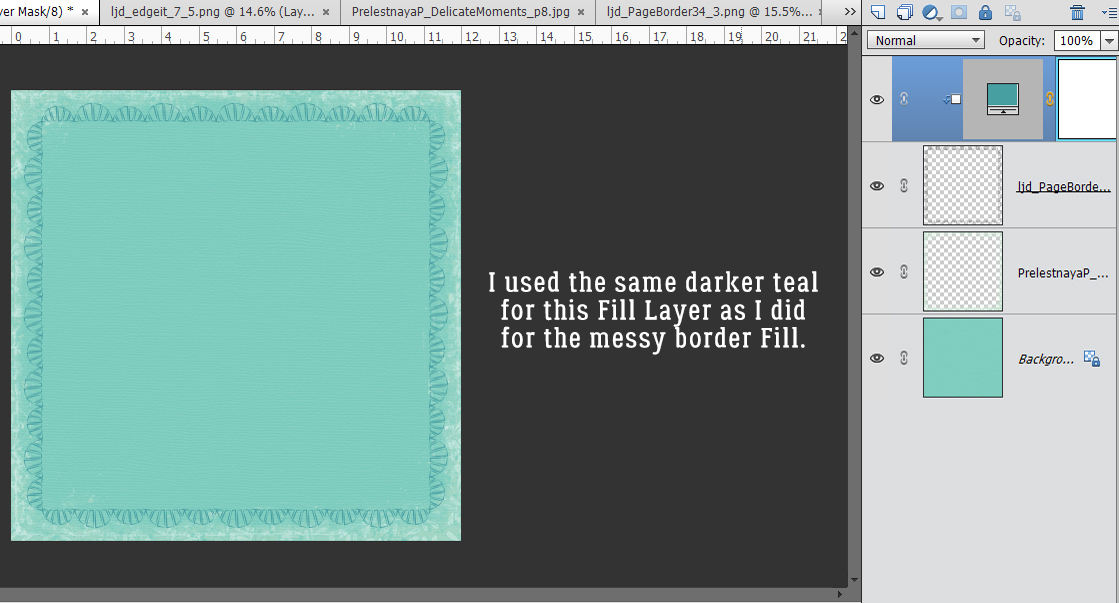
it with the same darker teal that I used before.
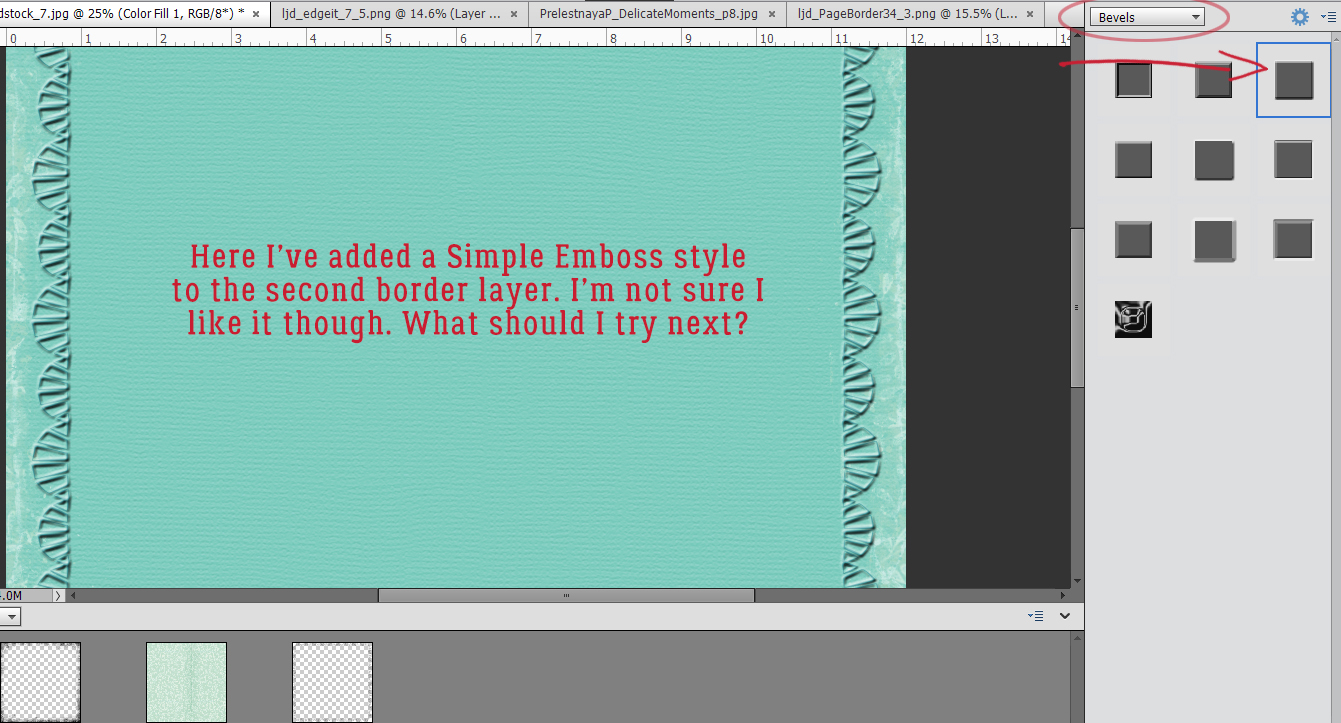
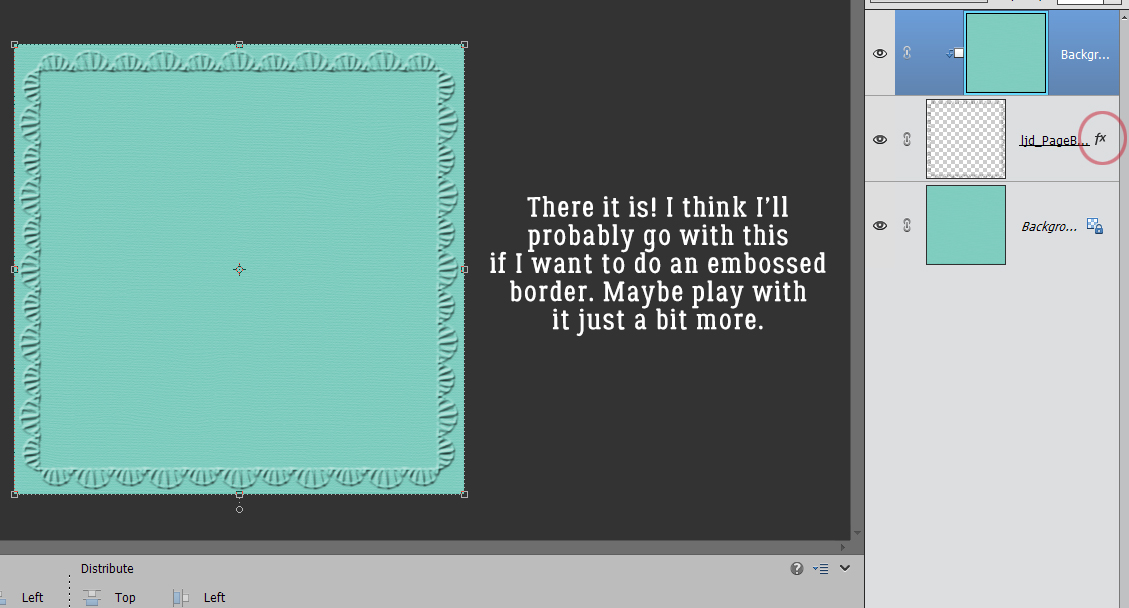
That looks pretty!

After I toned it down a smidge, the outer border looks a lot more interesting.

What happens if I add a Bevel Style to that doodle border? The best Bevel for adding visual interest in this situation is the Simple Emboss. I think it’s a bit heavy-handed though.

Layer Styles are adjustable, so if you don’t like what you see, play with it! I double-clicked on the fx symbol on that layer and opened up the adjustment menu. Then I dropped the size of the Bevel to 3 pixels. (Default is 21 pixels.) I think it still looks a bit sharp though.

So I decreased the Opacity of that layer to 10%. Better. But still not what I want.

I ended up removing the messy border layer to showcase the embossed border better. And now I’m going to clip another cardstock layer to the embossed doodled border layer.


That looks pretty good, but still too in-my-face. So now what?

With the Opacity at 10% I have a nice, soft embossed border!


But before we go, let’s see what it looks like if I add some glitter to that messy border. This can be either by using a Glitter Style or by clipping a sheet of glitter paper to the mask. Yes! That might work for a fancy layout!!

There are so many ways to find our own style!

Fresh Baked: November 13, 2020

Happy Friday the 13th. I saw someone say that the last Friday the 13th was in March. Here’s hoping this one resets all the crazy. Hope you have a great weekend and are ready to enjoy some goodness from our designers.

Remember, if you spend $10 in the store you get this great full kit for free!

Let’s see what the designers have been working on.

Have you grabbed the November Monthly Mix?

And, how are those challenges going? Any 10 completed challenges get you this awesome kit as a reward!

Tutorial Tuesday (Photoshop Elements)

Reflections, Perspectives and Shadows


Well. Today has been an unmitigated disaster. I should just not try to outsmart WordPress, because I only end up making more work for myself! Let’s see if third time’s the charm.

Have you ever looked at a layout and thought, “Holy cow! That’s so amazing… I have to scraplift it right away!” and then tried to figure out how the original scrapper did it? That’s the challenge that GingerDandelion Dust Designs – threw at me. One of her Facebook fans had seen a totally fabulous layout in Katie Pertiet’s gallery on her blog and wanted to know if Ginger had any tips for recreating it. Ginger came to me… so I scraplifted it myself and now I’m going to show you how I did it. The layout was created by Jane_Bond7, who says in her description that SHE scraplifted it from a layout she saw on Pinterest… and she used a photo strip template from Katie that you can download hereWARNING!! This is an advanced tutorial, with 55 screenshots. You have been warned!

Isn’t that a fabulous layout? The first thing I did was to download the template, choose a photo and some embellies for my layout and got underway.


Then I had a look at things. Obviously, if my layout is going to be true to Jane’s I’m going to need to rotate my template by Image>Rotate>Flip Horizontal.


Next I opted to Merge the three photo spots together into a single photo strip. That’ll save me some effort later. Select the three layers, right-click>Merge Layers or CTRL/CMD>E.

Looking at Jane‘s layout to guide me, I Resized the photo strip to leave room for the shadow and the reflection. 75% of the original size looks about right.

I looked at Jane‘s layout again for awhile and decided the height of the photo strip wasn’t quite right. So I stretched JUST the height by 10%.

Time to add the photo. I’ll adjust its size and position after I’ve got it clipped to the photo strip to make sure as much of the vineyard is visible as possible.

To clip the photo to the strip, right-click on the layer>Create Clipping Mask OR CTRL/CMD>G for PSE versions before 14, OR CTRL/CMD>ALT>G for PSE versions 14 or later.

For ease of handling later I Merged the photo with the photo strip then Selected the edges of the photo strip by CTRL/CMD>clicking inside the layer thumbnail in the layers panel. Alternatively click Select>All.

I got a bit carried away and picked the foreground colour for my shadow before creating a blank layer UNDER my photo strip. But not to worry… it’s going to happen. I typed in the dark brown colour I wanted for my shadow, “2c1901” and the Color Picker shows you what it looks like.

The easiest way to add a blank layer under another layer is to CTRL/CMD>click on the sheet of paper icon at the top left of the layers panel. Then I activated the Paint Bucket tool to fill the Selection I made previously, with brown. That’s the basis for the shadow layer.


Okay… let’s play with the shadow. But first Deselect the edges either by Select>Deselect or CTRL/CMD>D.

If you need a visual…

Now I’ve turned the Visibility of all but the shadow and background layers off so I can see what I’m doing better.

If you look closely at Jane‘s layout you’ll see the only part of this shadow layer I actually need is the large one at the left end. So I activated the Rectangle Marquee tool and corralled the other two pieces.

And to remove the other two pieces Edit>Cut or CTRL/CMD>X and they go away.


How on Earth’s layout has a lot of air behind her photos strip with the shadow quite a distance off. It also looks like the photo has a fold at the bottom. So I’ve moved my shadow over to the left a fair bit.

Now, how on Earth did she get that folded look? I think the Polygon Cookie Cutter will help with that. A triangle should work so I activated the Cookie Cutter tool, chose the Polygon and 3 sides.

I made my triangle bigger than I thought I would need, in a colour different from my background and shadow. Remember when I was talking about Smart Objects in the Preferences tutorial? Shapes created by the Cookie Cutter are Smart Objects. So in order to do much with them they need to be Simplified. Right-click>Simplify Layer.

Now I moved the triangle and rotated it so that it’s over the lower left corner of the shadow. It’s not going to hang around so don’t worry if it hangs off the page.

I like to put the shape underneath whatever I’m using it to alter so when I DO the alteration I can see it. It isn’t necessary though.

Time to Select the outline of the triangle by CTRL/CMD>Clicking inside the layer thumbnail as before.

Then I can cut off the corner of the shadow: Edit>Cut or CTRL/CMD>X. TaDA… a “folded” shadow!

If you look at the layer thumbnail in the layers panel you can see the corner’s gone.

The triangle isn’t needed any more. You can turn it off or delete it now. The photo layer needs to be visible so the shadow can be positioned in the correct spot.

It turned out to be easier to control the corners by using the Image>Transform>Skew tool. This tool lets you move a corner of your bounding box in any direct to skew the shape inside it.

It’s not easy to see but the lower left corner of the bounding box around the shadow is lower than the right corner now.

On Jane‘s layout I think I see a slight curve to the side of her shadow. So I activated the Smudge tool, made it as big as I could but only 57% of its maximum strength then very… very… carefully Smudged it just a tiny bit. The Smudge tool also blurs whatever it touches a bit, which you can see in the screenshot.

What I’ve been showing you in these last few steps is how I manage all of my custom shadows. The next step is to soften it up, using a Filter>Blur>Gaussian Blur.

The Preview pane lets you see what’s happening to your image as you adjust the Blur, so you know where to stop. I decided 6.0 pixels was just right.

I change the Blend Mode to Linear Burn for my shadows. It allows a bit more of the layer below to show through as shadowed, not just covered.

Adjusting the depth of shadow is best done with the image Zoomed out. Then I decreased the Opacity of the shadow layer until it looked right to me, at 40%.

Jane‘s layout appears to have a narrow Stroke around the edges of her photos so I added a 7 pixel dark brown stroke to mine. Edit>Stroke (Outline) Selection

That looks good, so on to the really complicated part – the reflection. Getting it right isn’t going to be easy! I changed the Canvas size to give me some more room to work. I just picked a number out of the air. Image>Resize>Canvas or CTRL/CMD>ALT>C Then I Duplicated the photo strip layer. Right-click>Duplicate Layer or CTRL/CMD>J

Reflections are mirror images so this Copy layer needs to be inverted. To do this, grab the “handle” in the centre of the top edge and pull it down toward the bottom of the workspace. Type -100 into the Height box and it will be exactly the same size as the initial photo strip layer.

As I might have mentioned, this is the really fiddly part. The reflection layer will need a lot of manipulation to get it right. There can’t be any space between the photo strip and its reflection so I Rotated and nudged the reflection layer so the two overlap.

Then I moved the reflection layer down so it’s underneath the photo strip layer. For this reflection to work, the left lower corner and the two gaps have to line up. Easier said than done. Image>Transform>Skew or Distort will come into play here.

In Jane‘s image, it seems to me that the reflection of the photo at the left side is a bit longer than this, so Image>Transform>Skew lets me pull that corner down and in a bit to more closely approximate what I see in Jane‘s layout. You can see in the screenshot how the bounding box’s corner isn’t 90° any more.


Next… To try and better align the corners and gaps. Image>Transform>Distort gives the ability to move any or all of the corners of the bounding box in any direction I want. So that’s what I did!

It’s a lot better, but still needs a tiny tweak at that intersection. In Jane‘s layout it looks like the reflection extends perfectly from the folded edge of the shadow so that needs to be dealt with.

It looks pretty good now! Time to clean up. I’m going to Erase the little bits of corners that show where they shouldn’t and I’m going to use a Layer Mask so if I take away too much, I can paint it back.

Once I was happy with the clean-up, I Simplified the reflection layer to absorb the Layer Mask.

To turn the reflection into more of a reflection I decreased the Opacity down to 55% and it’s starting to look like Jane‘s.

The Blend Mode goes to Multiply.

Then to give the reflection even more realism I’ll add a Filter>Blur>Lens Blur to it.

I set the Preview to More Accurate so I can see the changes more easily, then Radius, Blade Curvature, Rotation, Brightness, and Amount are set to 10, Threshold to 255, Distribution is Gaussian and Monochromatic is checked.

There!! All that’s left is to blend the edges and it’s done!

I used the Eraser tool with a large (500 pixel) soft brush set to 45% Opacity and ran it over the edges.


And it’s done! Now to complete the rest of the layout…

You may have seen my layout in the Gallery. If not…


Fresh Baked: November 6, 2020

Well, we made it to another Friday. Hope you have all had a good week. Did you accomplish something fun this week? I finished the first afghan I have ever made for myself (crochet) and I love it so much. I figured after all I’ve given away, it was time for one for me!

Remember with any $10 spent in the store, you get this fun {movember} kit for free.

Let’s see what our designers have this week. There is a little bit of everything in every color here.

Do you enjoy the challenges in the forum? Remember if you complete any 10 challenges, you get this kit as a reward.

Leave a message and let me know what fun things you have accomplished this week!

Designer Spotlight: November 2020

Wimpychompers!

Here we are in November already. 2020 has, in so many ways, definitely been an annus horribilus, to steal from the Queen. Hopefully there are better days ahead!

I’d like to introduce you all to Christina, the creative genius behind Wimpychompers. (I just wish I would have thought to ask her how she came up with that name… I’m sure there’s a story there!) She’s in the Designer Spotlight this month and has gifted all of us with a fabulous Daily Download. Make sure you’re picking up your pieces while they’re available.

J: How long have you been designing?

C: I want to say 10 or 11 years

J: What made you decide to design?

C: I got really interested in making signatures in forums actually. I started messing around with Paint Shop Pro (ha) and ended up writing tutorials for signature making. I swore I would never start digital scrapbooking as I did paper scrapping at the time but soon changed my mind. Once I started figuring out the program I switched to digital, then decided I loved designing.

J: What do you use to create your designs (program, additional tools, etc.)?

C: Mostly Photoshop but I have recently gotten my hands on Procreate so we will see if I add my own drawings to my items

J: Describe your design workplace.

C: My couch. (laughs). I sit on the couch with a lap desk, it’s the most comfortable and especially helpful now that my kids are doing school from home and have taken all of our desks.

J: What motivates and inspires you as a designer?

C: I love looking at colors on Pinterest but mostly I am theme driven. I especially love to do kits I know I could use.

J: What is your favorite kit currently in your GS store and why?

C: Can I say all of them? (ha). I would say the entire When I Grow Up series, it’s not technically one kit but that one took a lot of time and makes me smile, each kit being so different.

J: If you could only eat one meal for the rest of your life, what would it be?

C: Ooh, dangerous. Cinnamon rolls probably although my waistline may not appreciate that one

J: What is your favorite game or sport to watch and play?

C: I don’t watch sports but I love playing Lego video games with my kids, it can be therapeutic to smash everything in the game.

J: What did you want to be when you were small?

C: A children’s book author, a teacher, and a ballerina

J: Aside from necessities, what one thing could you not go a day without?

C: Hugs from my kids, they are teens so it’s not as often anymore and I take them when I can!

J: Who would you want to play you in a movie of your life?

C: I’ve never considered this one. Maybe someone like Kristin Bell

J: If you had a warning label, what would yours say?

C: Caution: Can go off on a tangent with no warning!

J: What celebrity would you like to meet at Starbucks for a cup of coffee?

C: Maybe Reese Witherspoon

Before we say thanks and see ya to Christina, I think I should tell you that she’s put everything in her store on sale at 30% off for the WHOLE MONTH of November!! That’s really generous, and I bet it boosts her sales pretty nicely, just in time for Black Friday and Christmas. I’m going to check it out right now!

Tutorial Tuesday (Photoshop Elements/Windows)

Preferences and Settings


Thank you all again for your kind thoughts and prayers for my dad. You’ll be happy to know that he had his “big” surgery yesterday and is doing well today. He’s hoping to be home on Friday and that life will go back to normal for all of us. Now let’s talk about settings and preferences.

It hadn’t really occurred to me that this topic would be all that helpful, since preferences are quite individual. But a message from Ellen (gmae) told me maybe it would be something we could talk about. She messaged me to ask about layer thumbnails. “When you do your screen shots of the layers panel you can see your layers so well. I have to guess unless its a large background. is there a setting somewhere I am missing? I have looked at the general presets and nothing seems like it addresses the size of an image in the layers panel.” It’s actually a really simple thing to make the layer thumbnail fill the whole box. If someone like Ellen, who’s been digiscrapping for a long time, wasn’t sure how to do it then for sure there are people who are just learning the ins and outs who could benefit from some info about preferences and settings. There are a LOT of screenshots in this tutorial but they DON’T represent steps, so don’t be intimidated. I want to make what I’m showing you as clear as possible. (The thumbnail solution is one of the last things I’ll show you today.)

First, you can’t Edit Preferences if you don’t even know why you’d want to or if it’s possible. Customizing the way your software behaves is a big part of streamlining and improving workflow, making it easier to do the things you want. Under the Edit tab, Preferences is found at the bottom of the dropdown menu. Clicking on it opens another dropdown menu with a list of what can be changed. I’m going to go through each item on the list and expand on what they do.

There are lots of options in the General menu. You can choose what Elements uses for the Color Picker, between Adobe and Windows. I let Adobe’s Color Picker do it for me; selecting Windows for this setting doesn’t provide the palette you’ll see in my tutorials where it’s possible to make tiny adjustments to the colour chosen and the only options presented are Windows‘ basic colour sets.

Just below the Color Picker setting is Step Back/Fwd. This allows you to decide the keyboard shortcuts used to Undo or Redo. I like the most basic, CTRL>Z and CTRL>Y – fewer movements and fewer keys to remember!

The other preferences I use are shown above and below. The ones I choose are largely self-explanatory but I’m going to talk about some of them in greater depth. Show Tool Tips means there’s a visible icon for the tool on the workspace so you can see where you’re putting your cursor. I don’t know about you but I NEED that visual! Select Move Tool after committing text also speaks for itself. As soon as the checkmark is hit, the Move Tool activates and you can shift your text in all directions, as well as resize it. Disable Smart Objects is a bit more complicated and needs a bit more discussion. Essentially, Smart Objects are “locked” and can’t be edited without first being Simplified. Also, in Version 14, everything was considered a Smart Object and when an item was dragged onto the workspace from the Photo Bin, it was automatically made to fill the canvas. Think about a 12×12 button… Nope! I’m going to show you what unticking this box does.

In the screenshot below, I want to Erase part of the bow. But when I try to do it, I get a pop-up as shown. And if you look at the layers in the Layers Panel, each of the embellishments I’ve got on my canvas has a little box in the lower right corner of the thumbnail. That tells me the layer CANNOT be modified other than to resize and rotate.

What does Allow Floating Documents in Expert Mode do? Well, instead of only having the images open up on the Photo Bin, they’re also opened in their own full-sized windows right on top of the workspace. These floating documents can be resized and moved around on the workspace by holding down the left mouse button and grabbing the document by the dark bar at the top. Lots of people like to work that way, because it allows you to drag things between these floating documents and it can be useful when photo editing. But for scrapbooking, I don’t think it’s all that practical. (“Preference”!) Here, I’ve resized some of the images I’ve opened.

Busy, isn’t it? Now let’s look at Enable Floating Document Window Docking.

This is another preference that lots of people love, but for me it only adds to the overstimulation! What it does is give each of the documents its own tab. You can see multiple Elements icons in the toolbar as shown. Moving the mouse over the toolbar will show each of these documents and let you move between them. For me, this isn’t workable, so I went back and unticked both Floating Document boxes.

Next on the menu is Saving Files. These options can be really helpful. I like to be asked before Elements does anything that might be hard to undo. Other people are okay with only being asked if the file is an original, and yet others are okay with Elements just writing over the file every time.

So you might wonder why I’ve selected Always Save when it comes to Image Previews. I’ve found it really doesn’t affect anything I do.

File Extension lets you decide how the saved file will be named when you save it. I prefer lower case. By ticking the Save As to Original Folder, I know anything I Save As (CTRL/CMD>SHIFT>S) will go into the folder where I opened it from originally. You may recall that I use folders to organize the things I plan to use for my layouts so this just makes sure the final versions of my layout will be easy to find later.

I’ve left the Ignore Camera Data (EXIF) profiles box unticked because although I use Elements for photo editing, that’s not my primary use and it makes no difference to my scrapbooking. Maximize PSD File Compatibility will allow me to use those PSD files in earlier and later versions of Elements without a lot of extra steps. Recent file list contains x files lets you choose how many files you’ve recently opened will show on the list when you select Open>Recently Edited from the File menu.

The Performance menu relates to how much of your operating system resources Elements uses when it’s running. The software will make a recommendation about how much RAM you have and how much you should allocate to Elements to keep things running smoothly. Just realize that when you allocate a lot of resources to Elements in this setting, while it’s running it will slow down other things you might use your computer for. There’s a good explanation of the other settings down at the bottom of the menu.

I like to have my Cache Level setting at the max to speed things up when I’m Undoing. With 100 History States and 8 Cache Levels, I can take a layout right back to almost any point from the start and make changes. Ticking Use Graphics Processor for Adjusting Facial Features lets the graphics processor in my computer be involved in any facial feature editing.

Scratch Disks relates to where Elements stores the History States and Cache Levels. If you have multiple drives, or work from an external drive, you can choose that storage area.

Display and Cursors is a really valuable menu. Here is where you can set things up to make working with Brushes, either as Brushes or within the Pen/cil, Dodge or Burn Tools, more streamlined and accurate. This shot shows my settings. I’ll show you what the rest of them look like in subsequent images.

The thing to look for in these screenshots is how the cursor looks, then decide which will work better for you. Show Crosshair in Brush Tip gives a higher degree of accuracy when you’re doing delicate work.

Crop Tool Shield lets you see exactly what part of your photo or image will be included when you crop it. I find that Black and 75% lets me see enough of the image to know if I’m keeping the parts I want. You do you!

The last setting on this menu is for High Density Displays. Automatic seems like a no-brainer.

Another really important menu is the Transparency menu. Here’s where you decide what you want to see when you’ve got something with a transparent background. I’ll show you some of the options for reference.

This combo might be useful for some activities but I really can’t think of one. 😉

Units and Rulers is where you tell Elements how you think. I still think in inches rather than centimeters, but when I set the country at the tail end of the Preferences menu, Elements wants to default to metric. I have to get tough with it! When thinking about Type, Points is the most commonly used measure and makes it a lot easier to have a clue about what will happen when you type in your text. Print Resolution is a vital setting if you’re planning to print out your layouts. 300 pixels per inch is the optimum setting for that, but when you’re just looking at it on the screen, 72 pixels per inch is good enough. (That’s why my screenshots aren’t as crystal clear as my layouts are.)

Guides and Grids are helpful tools. Guides are single straight lines that can be pulled from the top or the left of the workspace and allow for precise placement of objects and type on your layout. Grids give you graph paper, essentially. I use both regularly for my layouts. For them to be most useful, you need to be able to see them without them obscuring your work. These tools can be solid lines or dashed lines for Guides, solid, dashed or dotted lines for Grids. I have old eyes so my settings are what will work best for me. By all means, experiment until you get what you need.

Here’s an image with two perpendicular Guide lines on it.

How do you get them to be visible? Along the top of the workspace there’s a View tab. Click it and a new menu opens. Click on the tool you want to make visible. I leave the Rulers on all the time. I like having them there as reference points. Guide lines don’t require this step. Just put your cursor barely off the workspace, hold down the left mouse button and pull the mouse either down or to the right. You can add multiple Guides in either horizontal or vertical plane. Making them go away again, click View and click Guide again.

If you want to make it so your Guides and Grids don’t move when you accidentally mouse over them, you want to Snap To. To have them remain on your workspace regardless of what image you’re working on, Lock Guides.

The Grid, or graph paper tool is customizable in several ways. You get to choose the colour of the Grid, the measurements you want for your Grid lines and how that Grid is subdivided. Again you can choose between solid, dashed or dotted lines. I used this a ton when I was doing floor plans of the new house and trying out various furniture dimensions.

Here’s an image using a Grid. (This tool is so useful for speed-scrapping, when the facilitator says, “Place a large flower 2 inches from the left side and 1 1/2 inches up from the bottom.” Or, “Cut a rectangle from your paper measuring 4 inches long by 3 1/4 inches high.”)

Plug-ins aren’t something I have, so I’ve never had occasion to do anything with this setting.

Adobe Partner Services are for developers and people who are smarter than me.

Here you have the option to make Elements tell you when there’s an update to the software, or to give it permission to just update whenever.

Type… these settings are important for title work and journaling. Smart Quotes means all the quotation marks, apostrophes and commas in your text will be curvy, which is a high-quality typography feature. Show Asian Text Options allows the use of Asian fonts and dingbat style fonts. Missing Glyph Protection is a setting that gives Elements permission to substitute another character for one not present in a font family. Font Preview is something I insist on having as large as possible for my old eyes.

Country/Region Selection is self-explanatory.

Now, on to Ellen’s question. When you look at the Layers Panel, in the upper right corner of the screen there is an icon that looks like 4 horizontal lines with a tiny blue triangle just to the left of it. When you click on that, the dropdown menu has an item at the very bottom called Panel Options. Click on that and you can set the size of your Layer Thumbnails.

You’ll notice I’ve selected Layer Bounds in the Thumbnail Contents section. That means that ONLY what’s on THAT layer is shown in the thumbnail. If Entire Document is selected… well… the thumbnail will basically be a microscopic version of your entire layout. By selecting Use Default Masks on Fill Layers, I can see what part of the contents of the layer has been filled.

The last thing I want to talk about is Move tool options. You’ll notice I’ve ticked Show Bounding Box but haven’t ticked the box for Auto Select Layer. I want to show you why.

When Auto Select Layer is ticked, Show Highlight on Rollover is automatically selected too.

When there are just a bunch of random items sitting on a transparent background, this option isn’t a big problem. When the mouse rolls over any of the flowers or the bow on my workspace, a blue box appears around the outside of the object.

But when there are things positioned on top of other things, it’s very possible to move things you didn’t intend to move just because you had too much pressure on the mouse when it rolled over them. You might not even realize it’s happening until all of a sudden that flower is hanging off the page, or the paper you thought you put under your photo is now halfway across the page. And when you look at the Layers Panel the object’s layer isn’t even active! So I turn that off and just have the Bounding Box on so I can see the outer limits of the object as I move it around.

I hope you’ve learned some useful things today. I did, even though all I did was show you how I’ve selected my preferences. (I had to be able to explain them, right?)

Next week’s tutorial is going to be a very special one, thanks to Ginger (Dandelion Dust Designs), her creative team and her Facebook fan group. It’s a doozy so I’ll have to start work on it right away! See you next Tuesday.


Fresh Baked: November 1, 2020 & NEW Free With Purchase, Monthly Mix and More

Welcome to November. For those of us ending Daylight Savings Time, did you remember to reset your clocks? I remember a time when we actually had to manually set the clocks. Now it seems everything automatically resets for us.

Don’t forget to check out the Buffet Bundles. One easy click to add bundles of Buffet goodies to your cart.

I’m just in love with these buffet colors. Remember all the buffet kits are built off the same color scheme so they can easily be mixed together for that perfect layout.

Let’s see what the designers have for us. Keep reading to the end so see some sample layouts from our talented store creative team.

Remember any $10 spent in the store gets you this great collab. Does your significant other participate in {movember}?

The November Monthly Mix is great for those Thanksgiving photos. We are {grateful, thankful, blessed}.

The beginning of the month means a new Daily Download. November’s DD is provided by Wimpychompers.

And finally, any 10 challenges completed (and there are over 25 to chose from) will get you this {thankful hearts} kit as a reward.

And now a few samples from our store CT. Take a look in the Gallery for more beautiful layouts.