How Do I Build a Reusable Cluster?
![]()
Happy New Year, GingerScrappers! The holidays were quiet at our house, but exhausting anyway. In a few days it’ll be time to put all the decorations away and turn to figuring out what life will look like this year. Sort of depressing, isn’t it? Thankfully we have our digi-scrapping hobby to distract from all that!
This week’s tutorial was inspired by a question from Rachel M. She wanted to know how to create a cluster that she could save and reuse on other layouts – for themed albums, I’m guessing – with the separate layers preserved. She’d experimented but just couldn’t make it work. So I took over the experimenting and came up with a way to do it. Why keep the layers separated though? So the clusters can be modified a little, of course! To keep them from looking too contrived, to maybe substitute some of the elements, to rotate and manipulate easily while keeping the overall look consistent. Now, I’m going to climb up on the soapbox for a second before we go on… I strongly suggest you create your own unique clusters if you plan to do this. If you’re using a template created by someone else, there’s really no need to save a cluster, right? Because the original creator has already saved it… O-o-okay. Onward and upward.
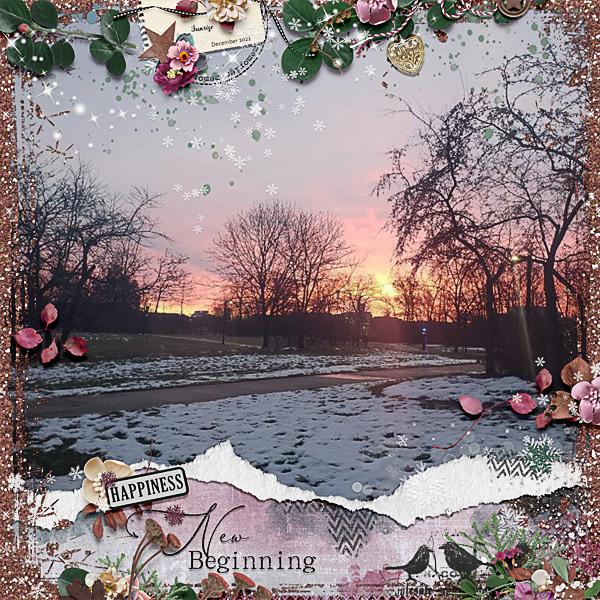
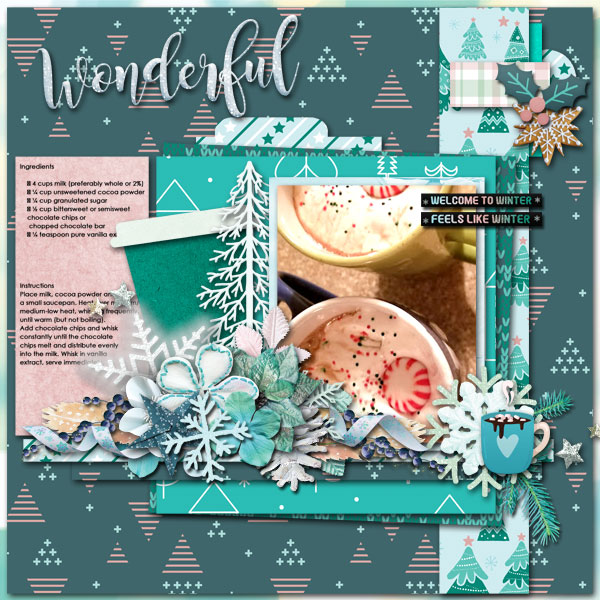
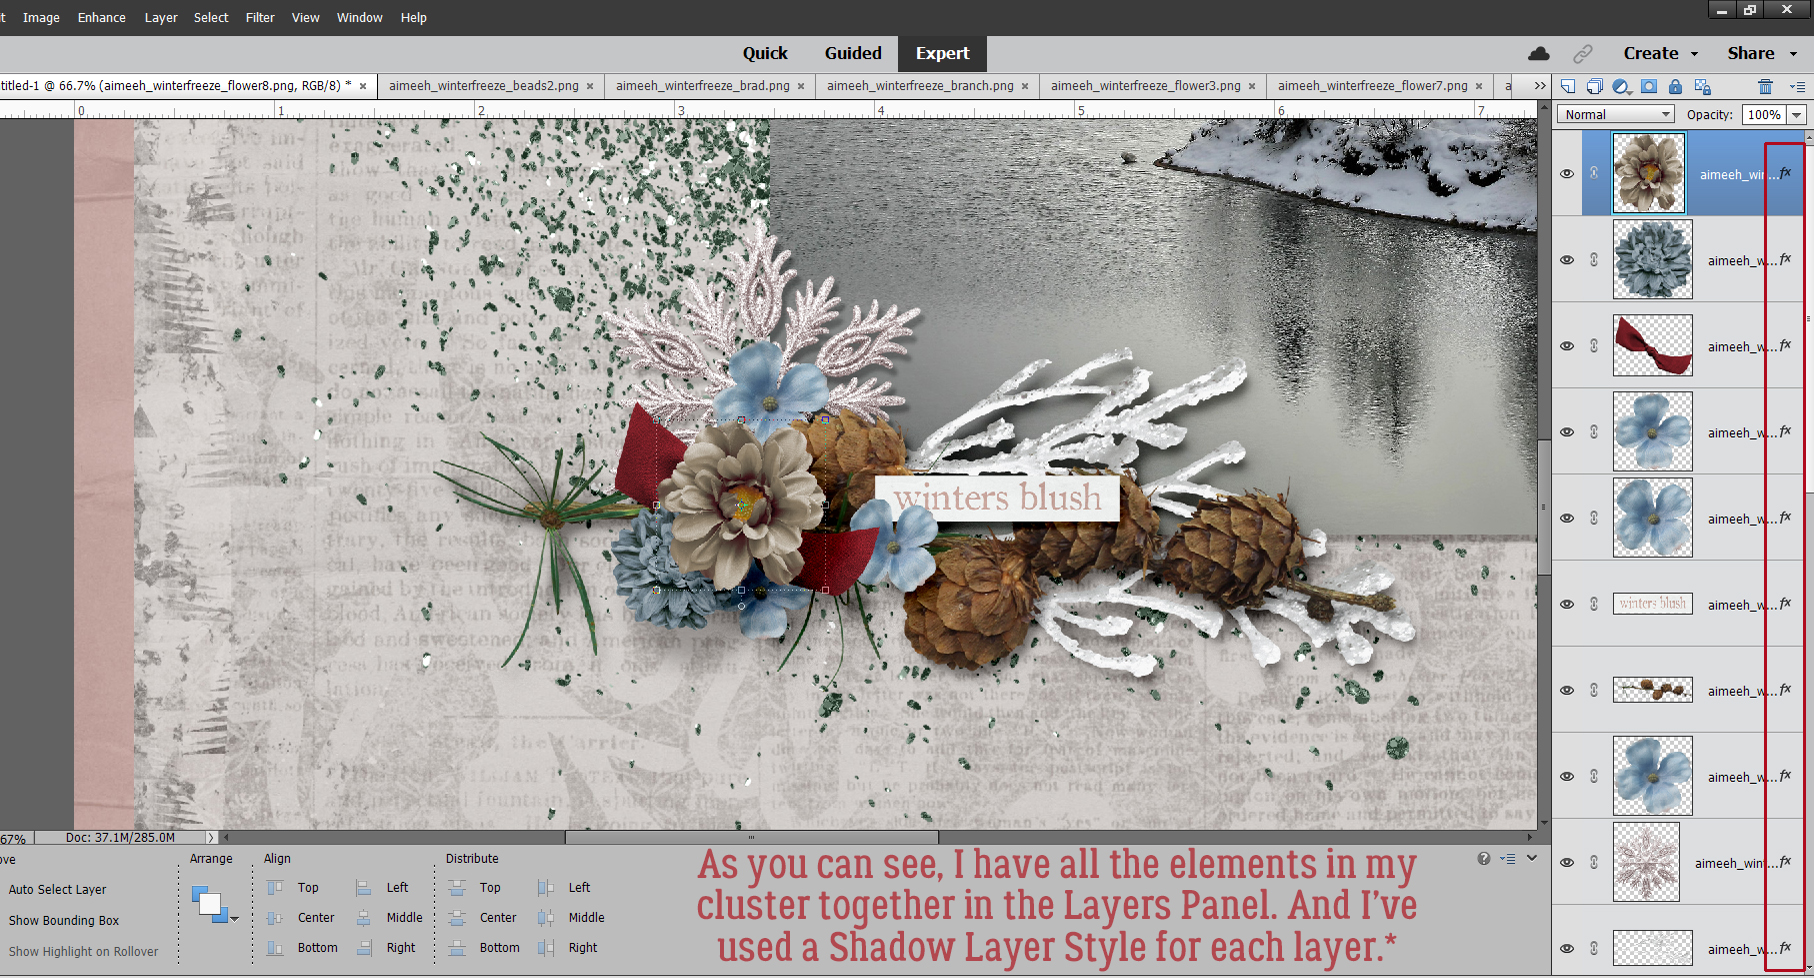
This image is of the cluster I created for Magical Scraps Galore‘s January Surprise Challenge. I used Aimee Harrison‘s Winter Freeze kit (no longer available) and a photo from Pixabay for my layout. The cluster is simple, but has several layers so I figured it would be a good one for demonstrating this technique. The layers are all together in the Layers Panel to make the next step easier. As you might have noticed, I’ve used Shadow Layer Styles rather than custom shadows. I know, how unlike me! But for the cluster to be really reusable, custom shadows would need to be added to individual layers once the layout is completed. The reason for this will become a bit more clear as we work through the tutorial.
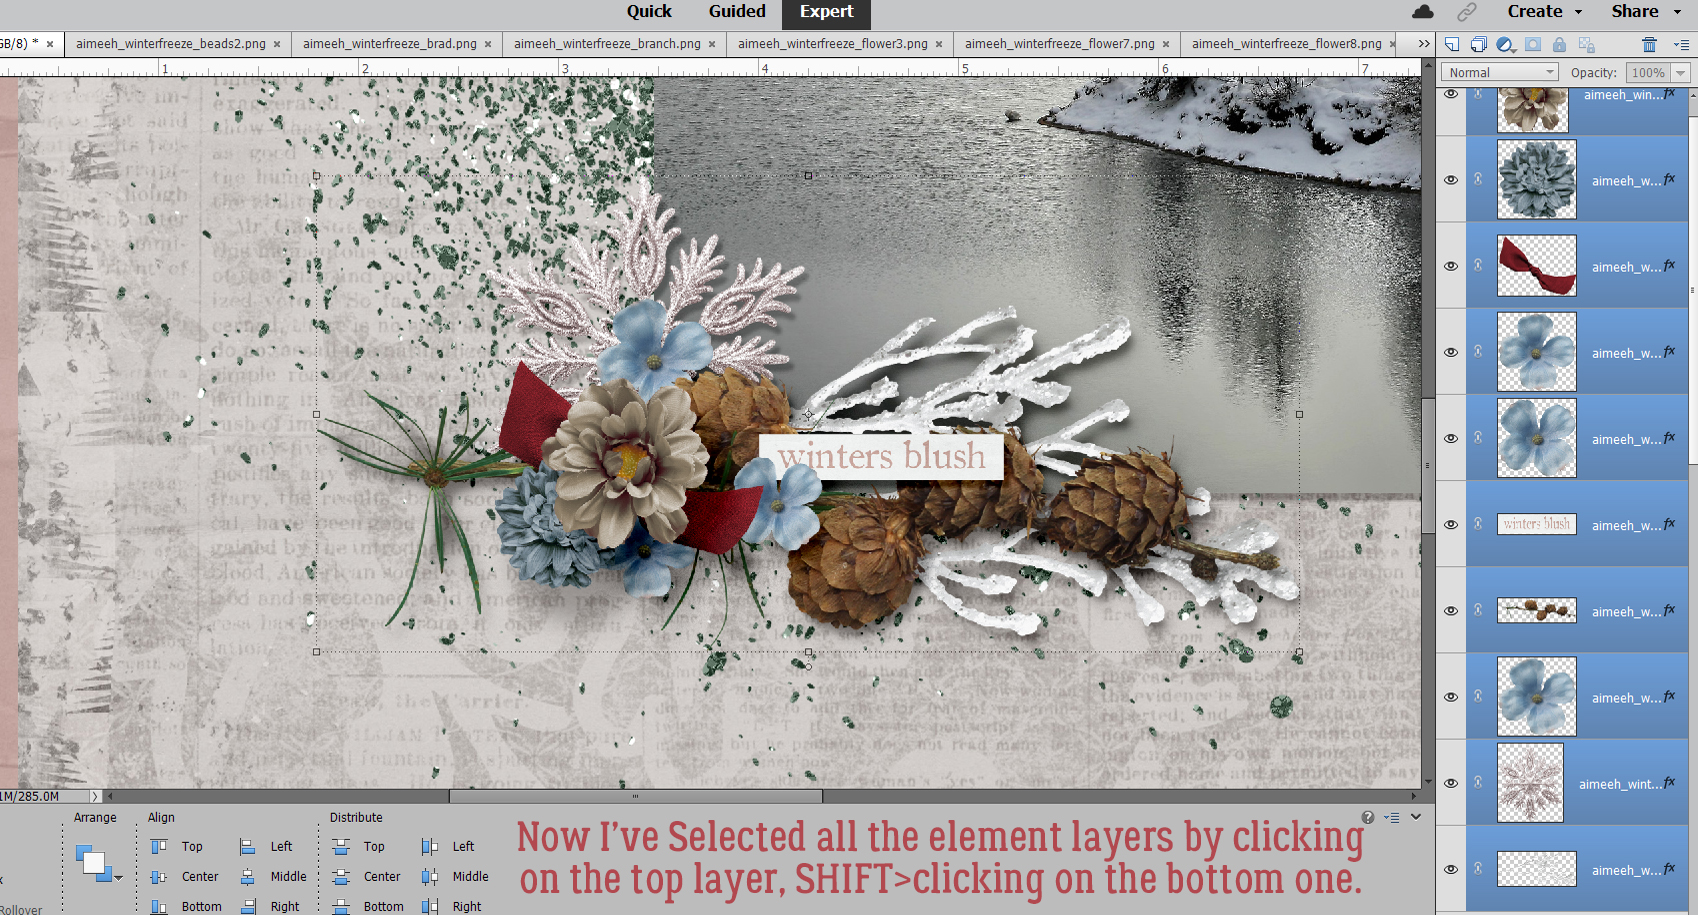
I Selected all the element layers by clicking on the top layer of the cluster, holding down the SHIFT key and clicking on the bottom layer. It works the other way too, clicking on the bottom layer, SHIFT>clicking on the top. You do what works for you!
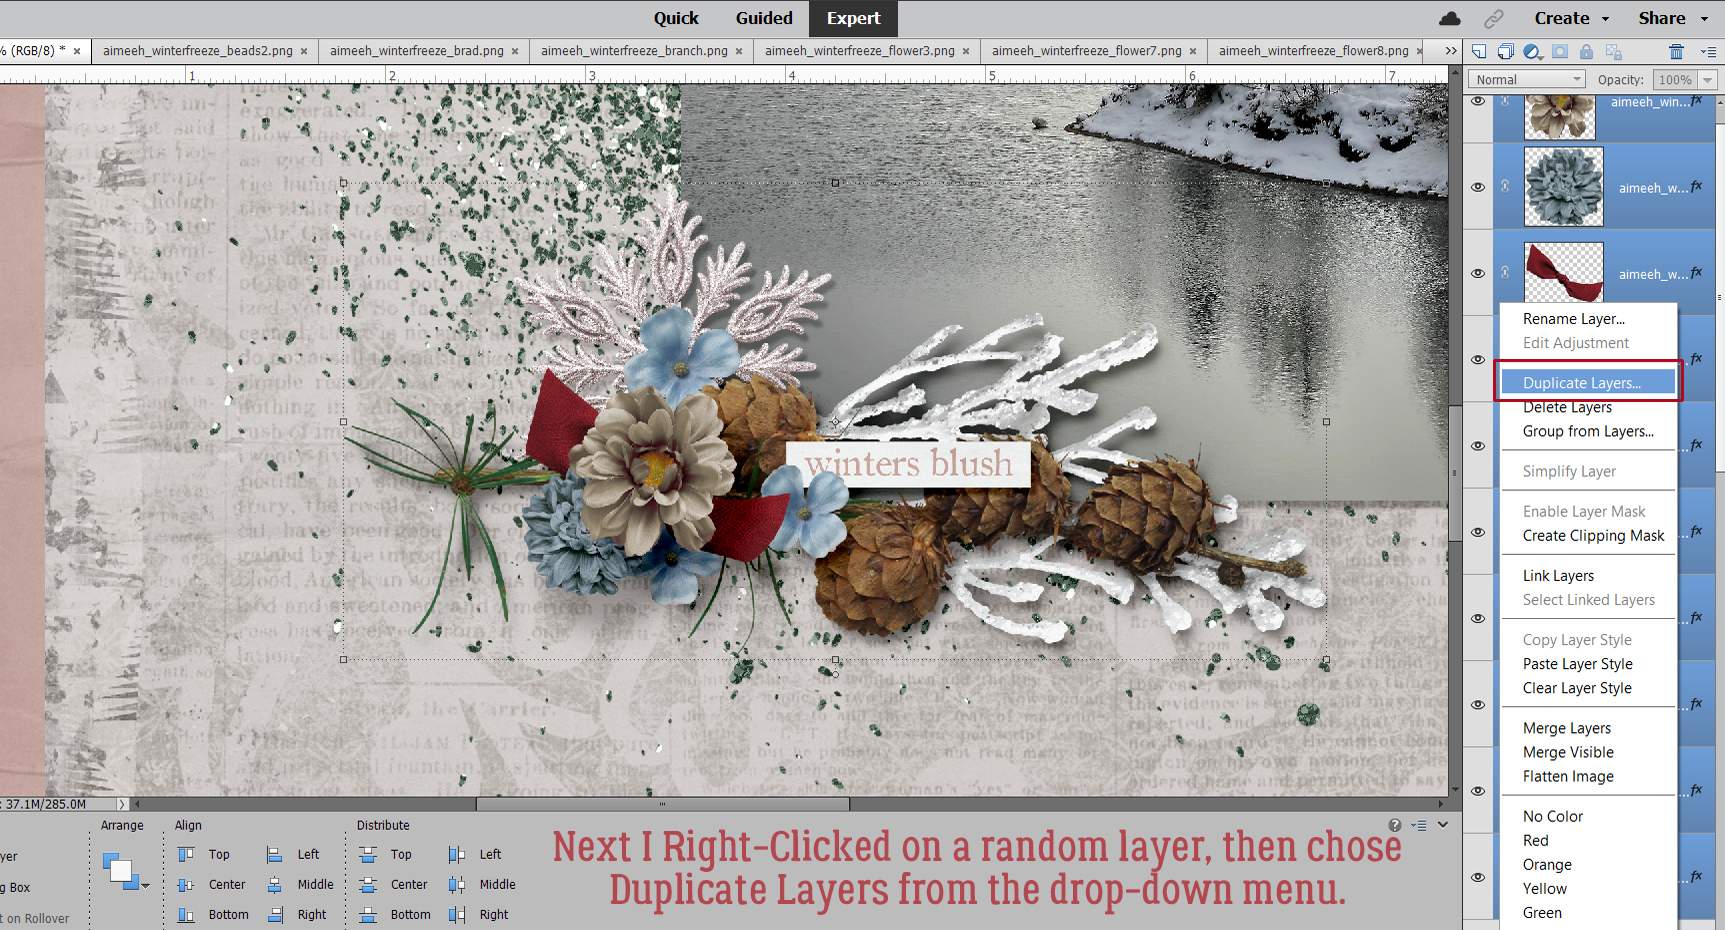
Next, I right-clicked on a random layer. (With them all Selected, what happens to one happens to all.) Then I chose Duplicate Layers from the drop-down menu.
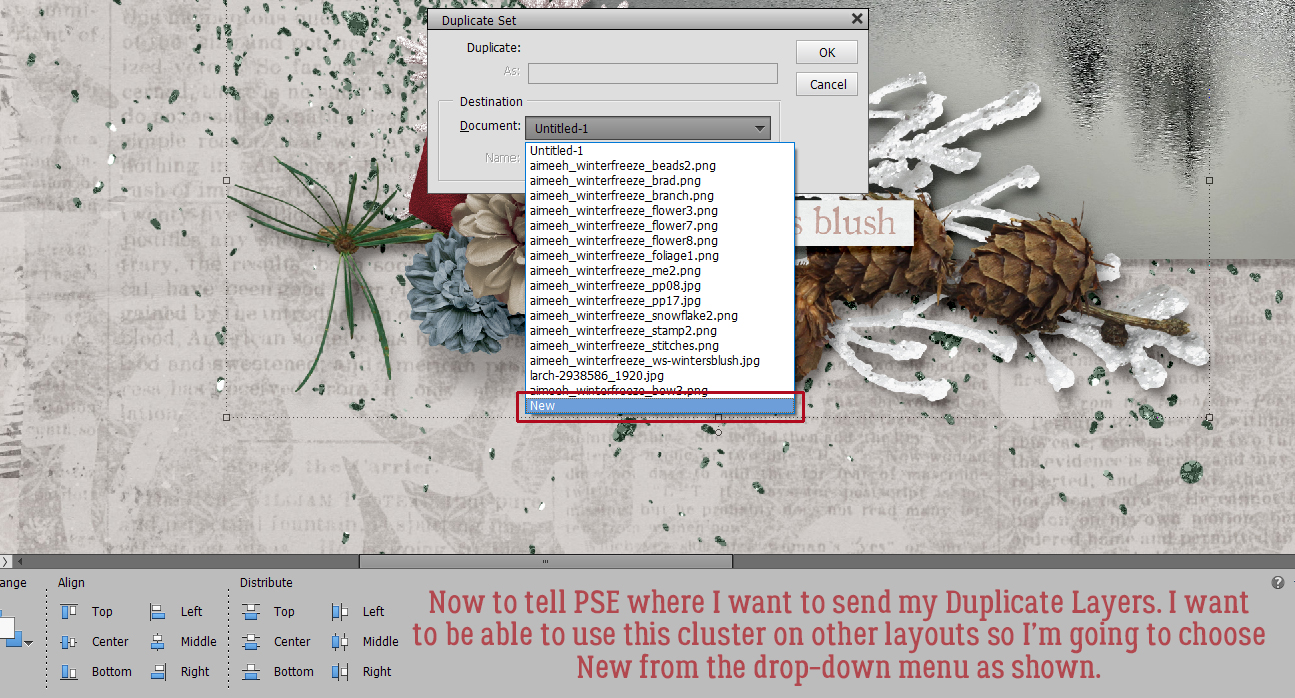
PSE will need you to tell it where you want those Duplicated Layers to go. If you just want to add them to the canvas you’re already working on (named Untitled-1 here), all you need to do is click OK. But for this exercise, I chose New.
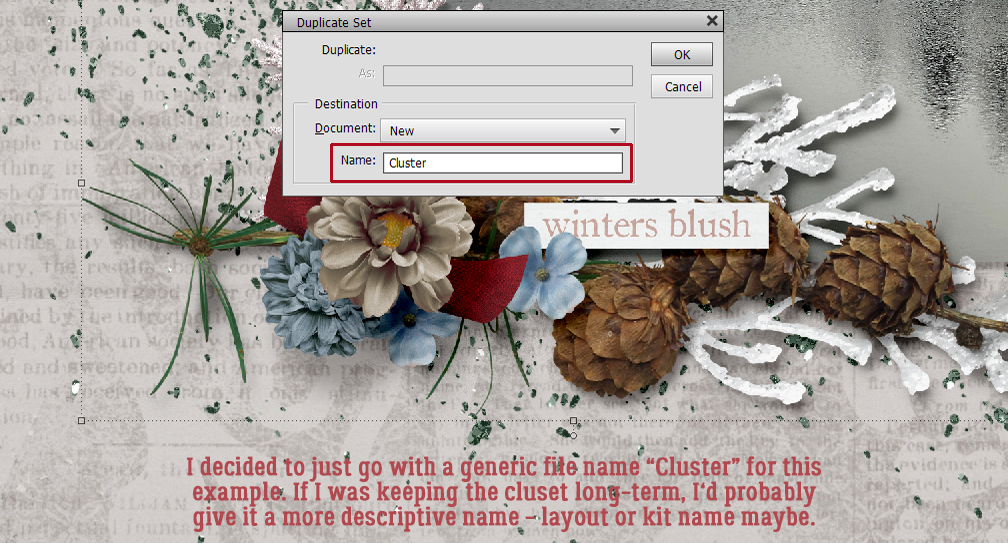
PSE will create a whole new canvas and to help keep track of it, I recommend giving it a name. I went the lazy route and just called it Cluster, but if this was a cluster I planned to use over and over again, I’d give it a more descriptive name, maybe with the layout name, the kit name, the theme or a combo of all of them.
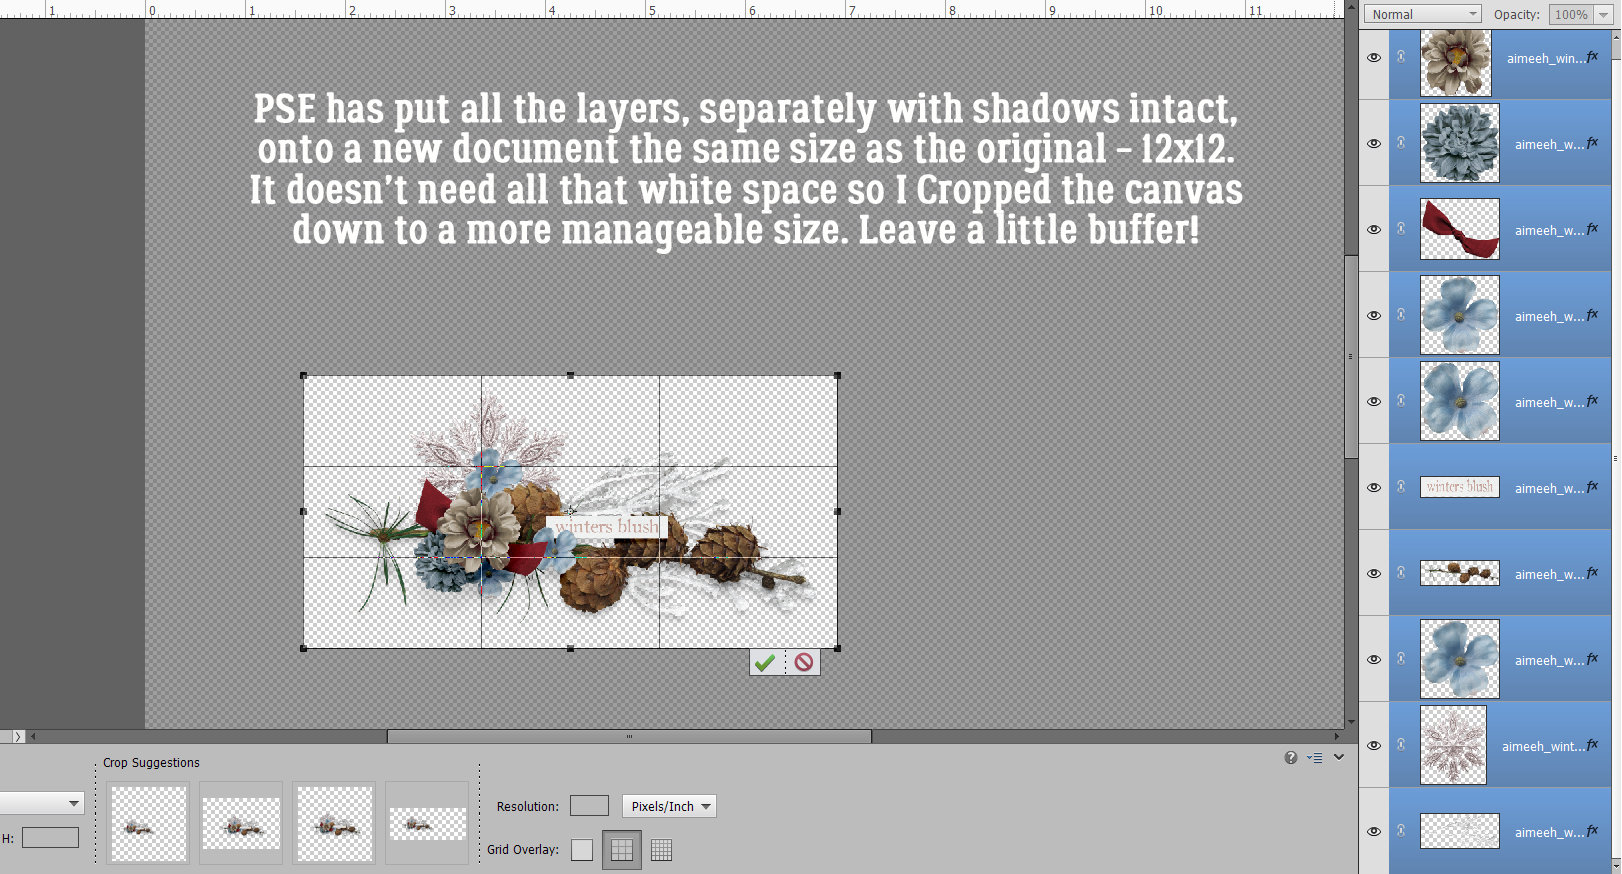
The new canvas is the same dimensions as the original one, 12×12. All the individual layers are there, all the Shadow Styles are there. To make it a little less cumbersome, I Cropped it down to a more manageable size, with a little border of white space around it for future tweaking.
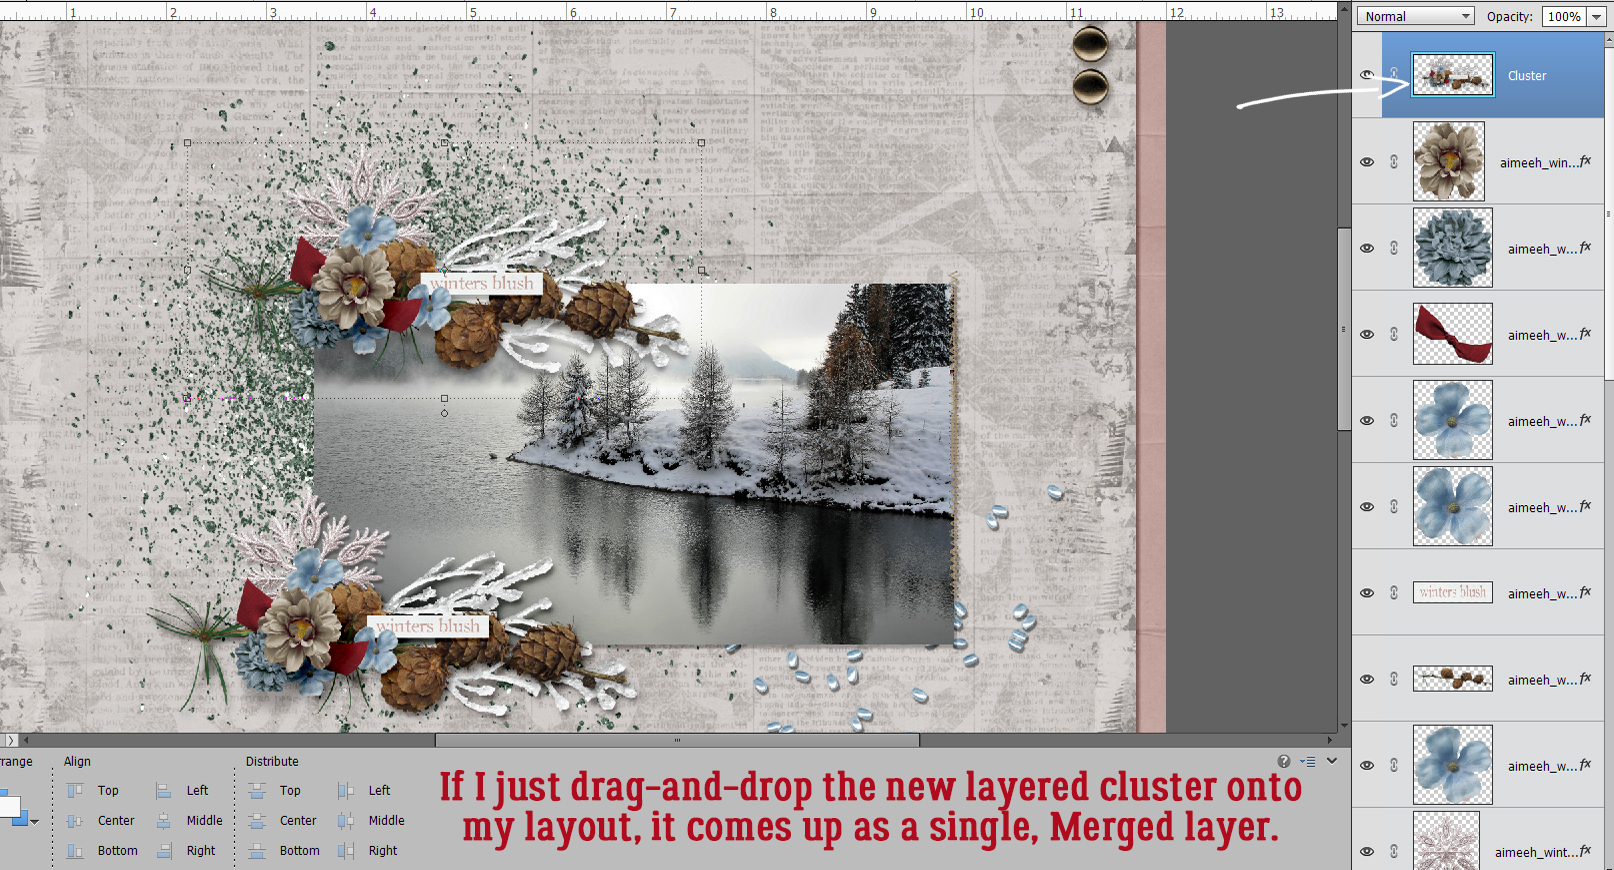
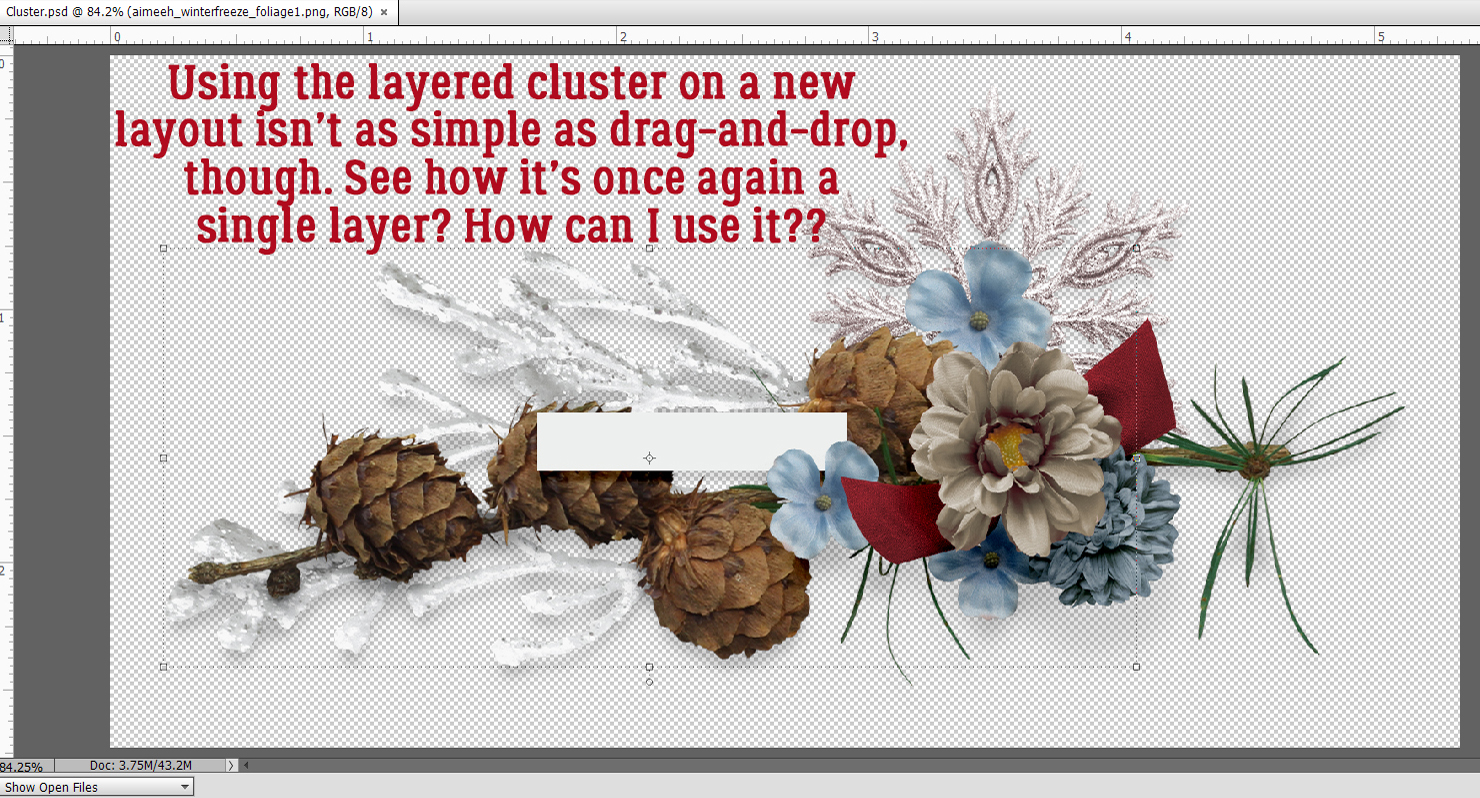
Now, the reusing part isn’t quite as straight-forward. If I just drag-and-drop the layered cluster from the Photo Bin onto my layout, it comes up as a single, Merged/Flattened layer. That might be okay, but what if I decide I want to Rotate it? The Shadow Styles aren’t going to adapt to the new position! And that might be okay, unless your eye sees the inconsistency and it drives your OCD crazy. Oops, projecting!
When I Open the cluster while it’s in the Photo Bin, all the layers and Styles are still there. How can I harness that so that I can have my cluster and tweak it too?
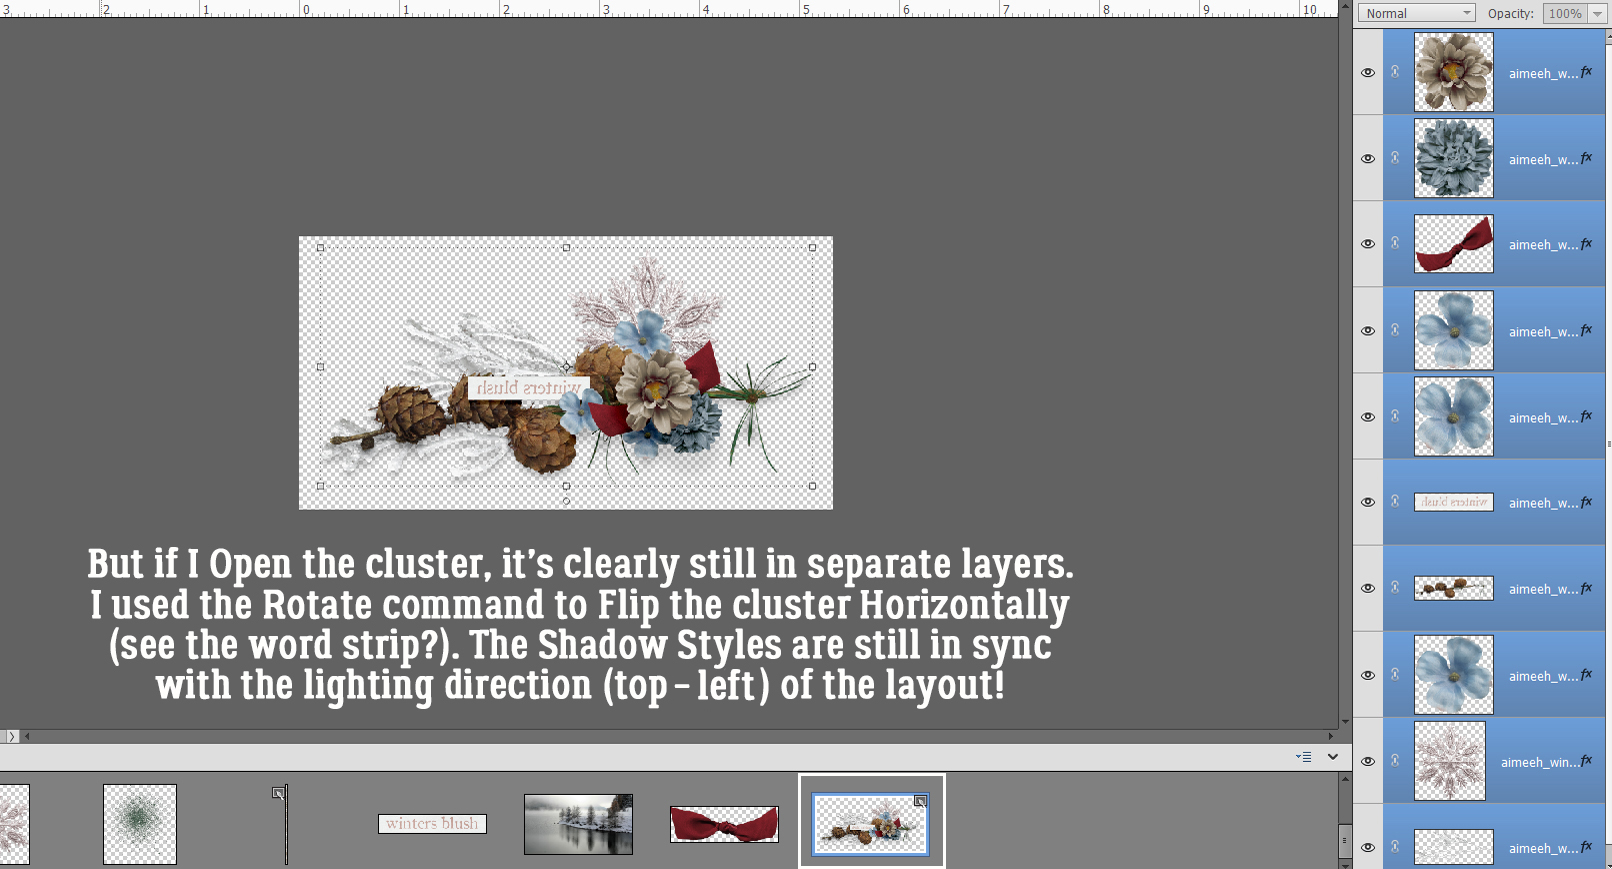
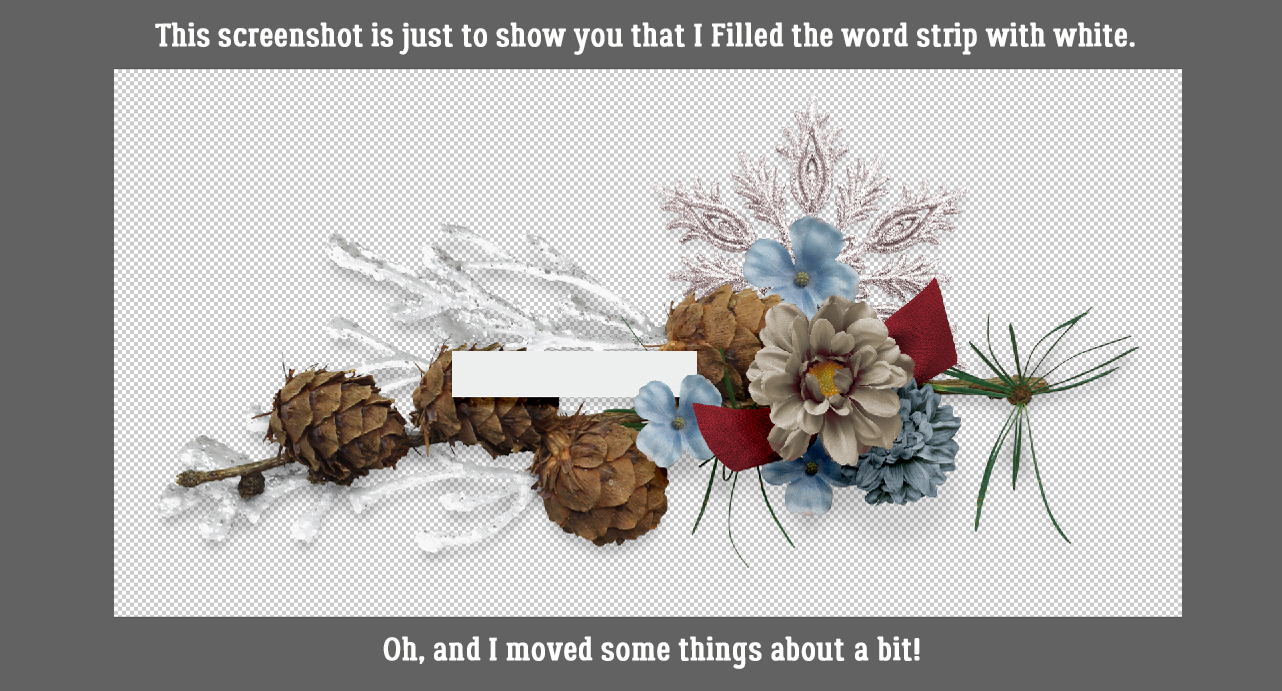
Answer? Do the tweaking right there on the layered cluster canvas! Here I’ve used the Rotate command to Flip the cluster Horizontally, then I Filled the word strip with white and oh yeah. I rearranged things a little.
This step can be done before you play with things, rather than after like I’ve done. But the tweakability is there either way. The goal is to be able to use the LAYERED cluster again, so it will need to be Saved As a layered cluster – a Photoshop document, so make sure it’ll preserve the Layers and Color Profile. You could alternatively Save As a TIFF to save some hard drive space. Go with whichever format you’re more comfortable with.
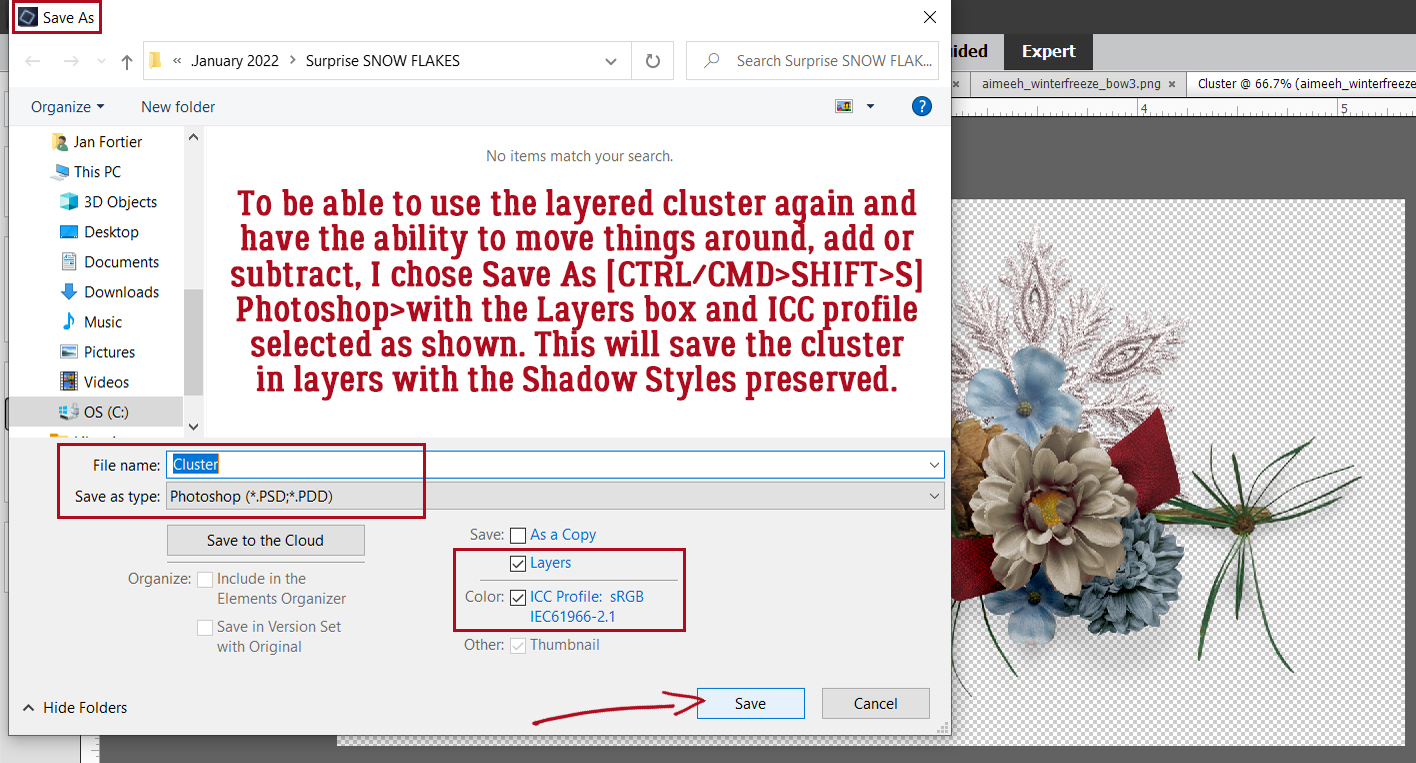
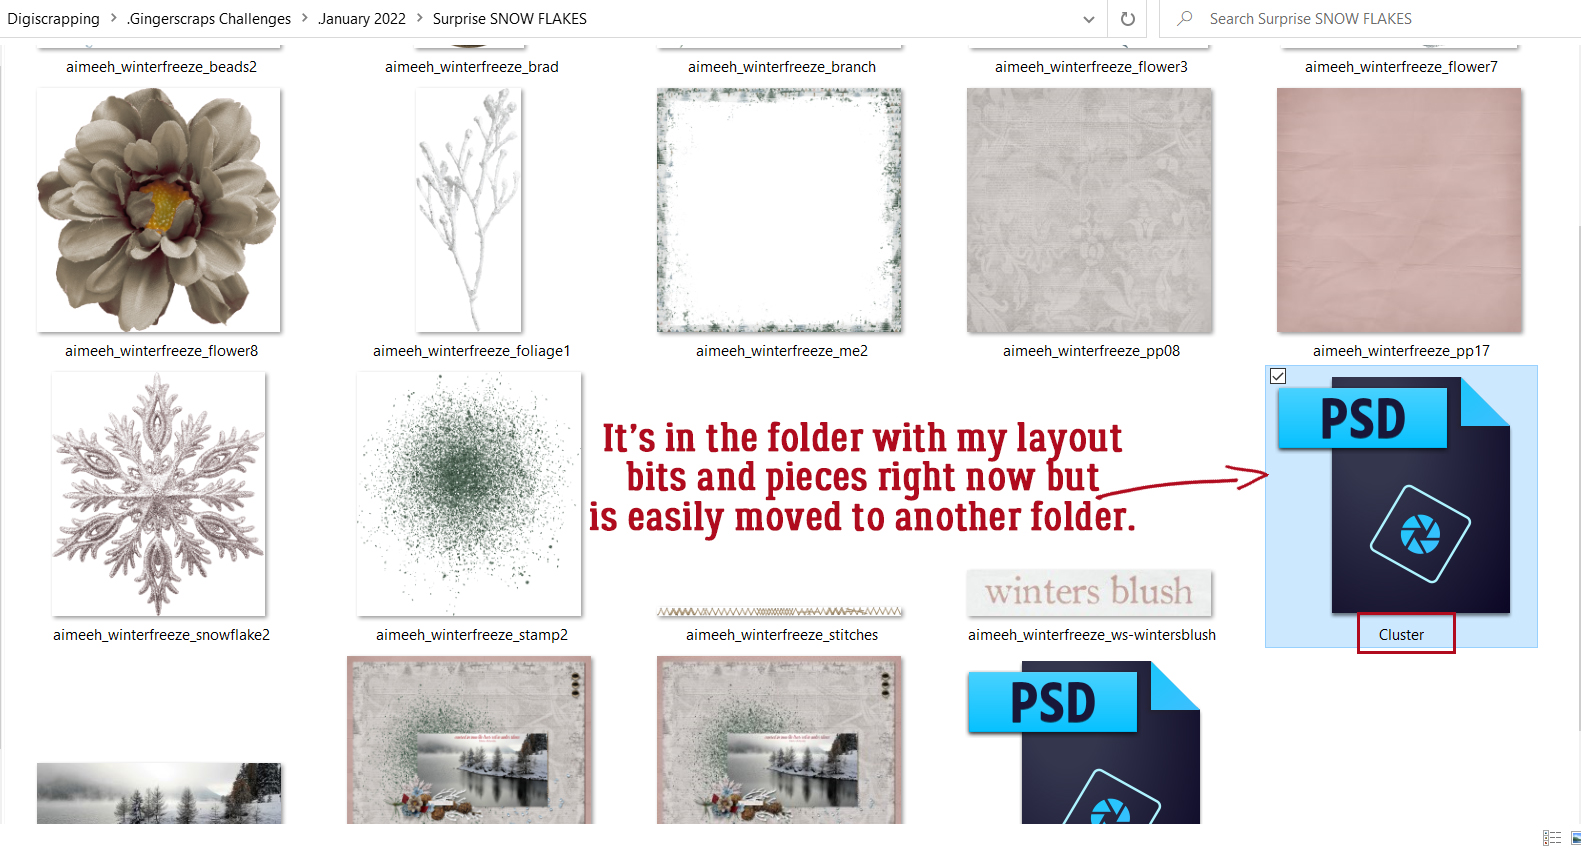
Here I’ve Saved the PSD to the folder for my Challenge layout. If it was going to be used again and again, I might put it into the kit folder so it would be right there to mix and mingle.
Now, how is it reusable once it’s been Saved? As I said, just drag-and-drop isn’t going to work.
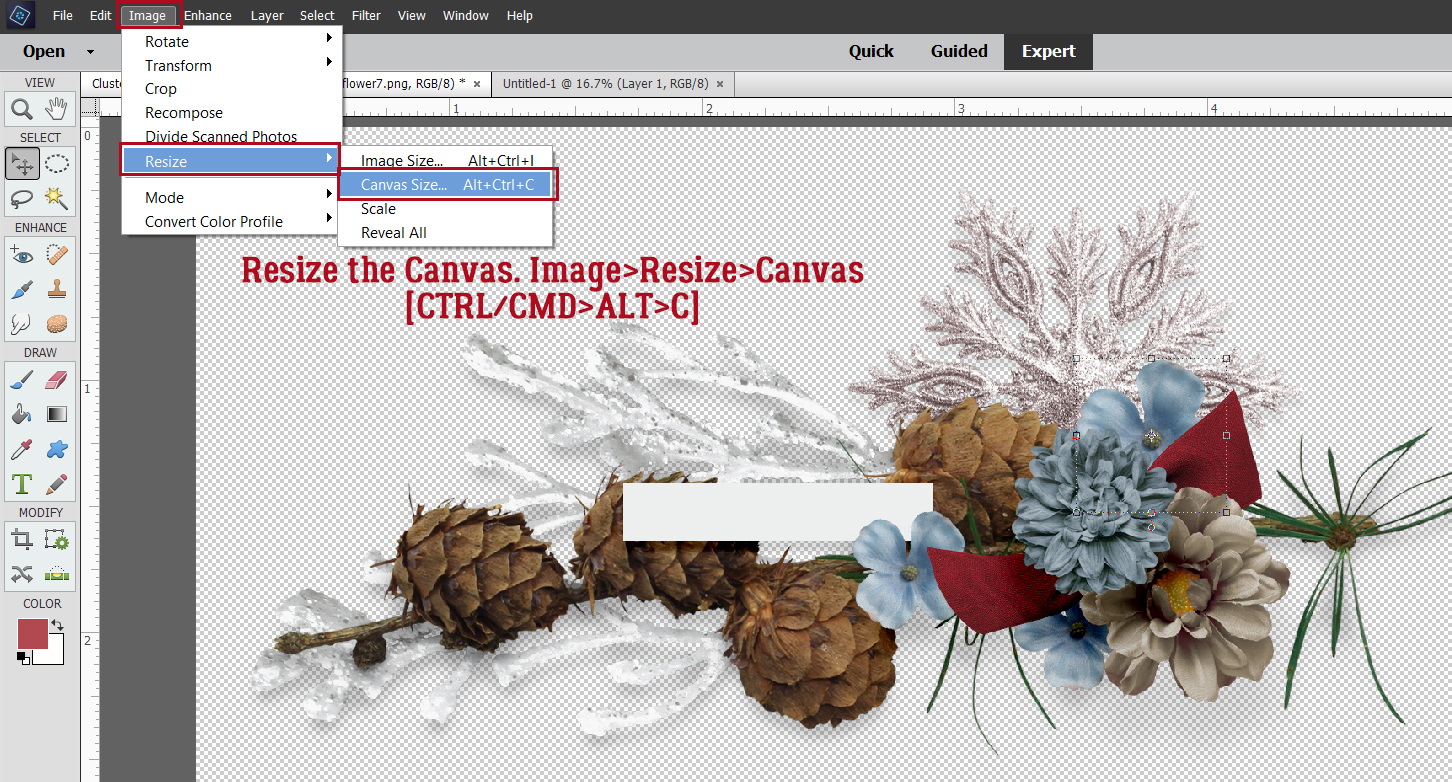
I could decide how I want the cluster to be oriented on the layout, adjust all the shadows to sync with the rest of the layout and then drag-and-drop. But that’s a lot of work and might need a bunch of Undo and Redo [CTRL/CMD>X and CTRL/CMD>Y]. Surely there’s a better way… one that’ll keep the layers loose. Just build the layout behind it!

But to do that I’ll need to Image>Resize>Canvas [CTRL/CMD>ALT>C] so there’s room.
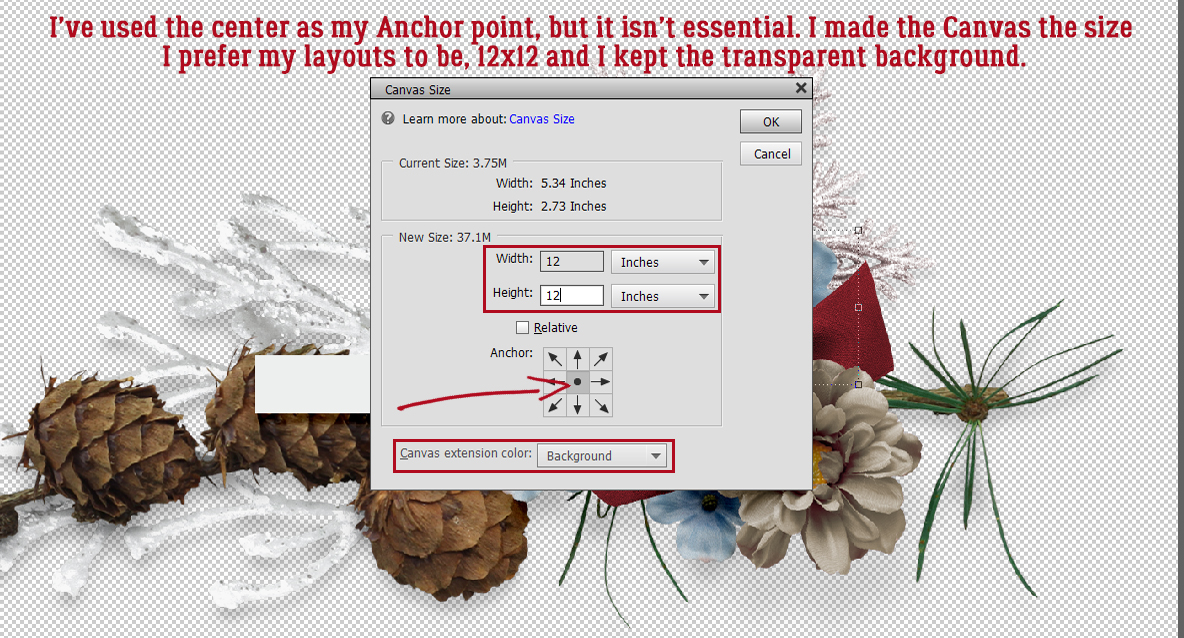
I used the default center as my Anchor point but it isn’t essential. What does matter is making the Canvas the size you want your finished layout to be. I work with a transparent background, so I want that preserved too.
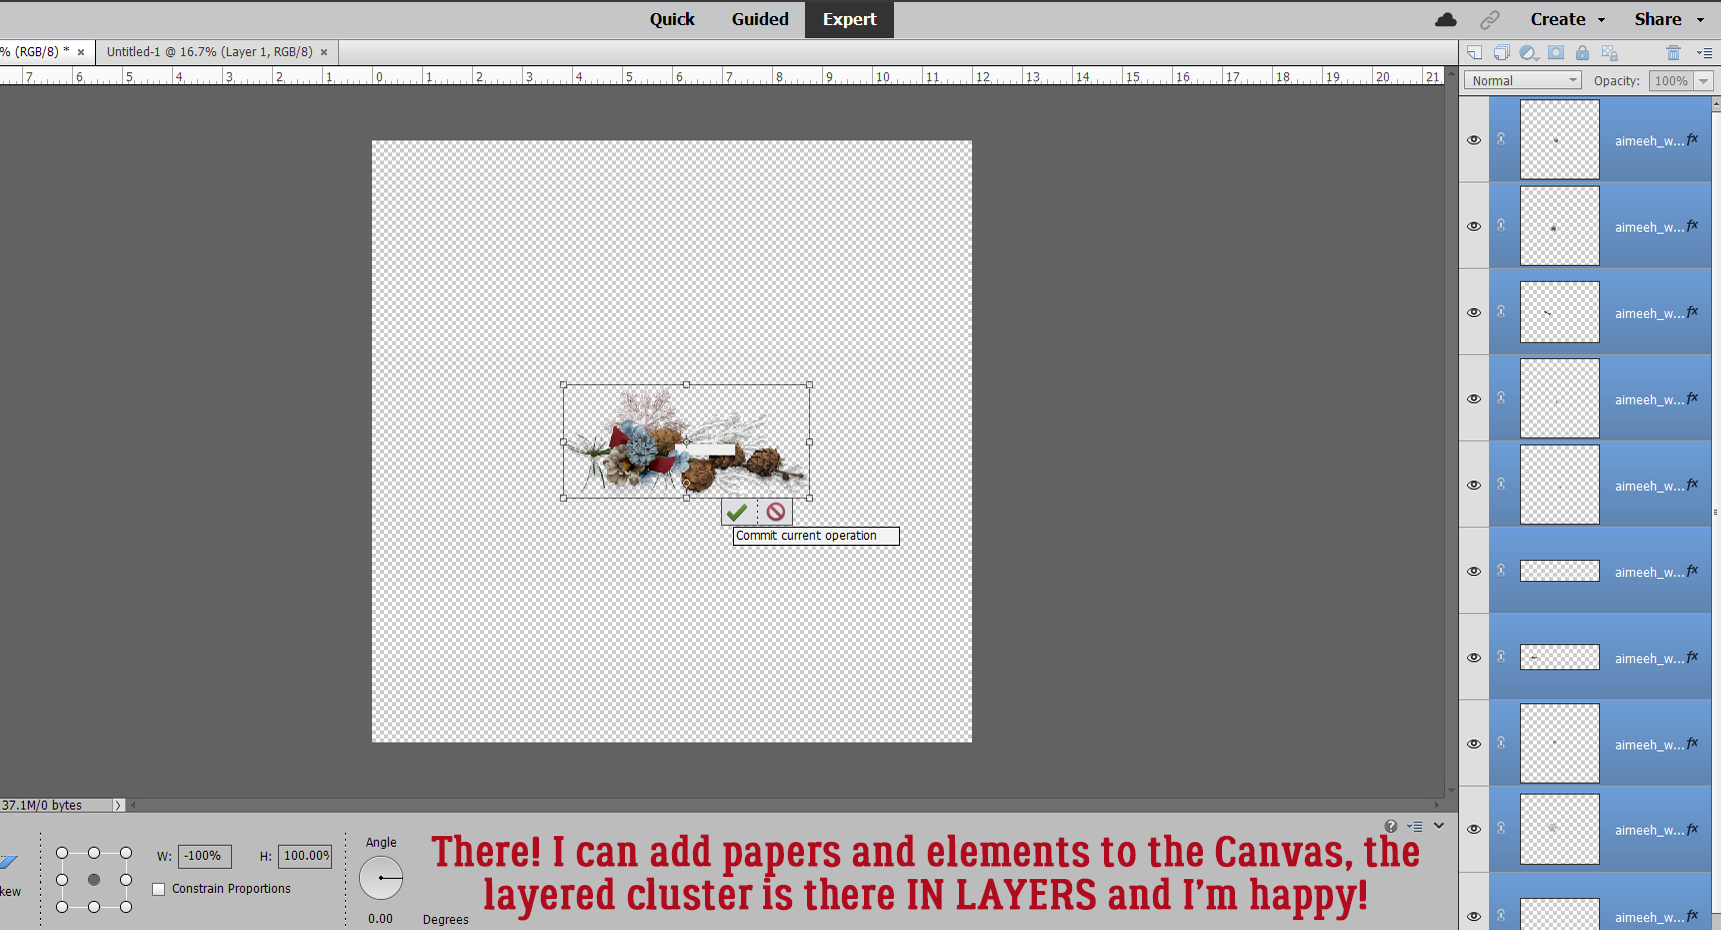
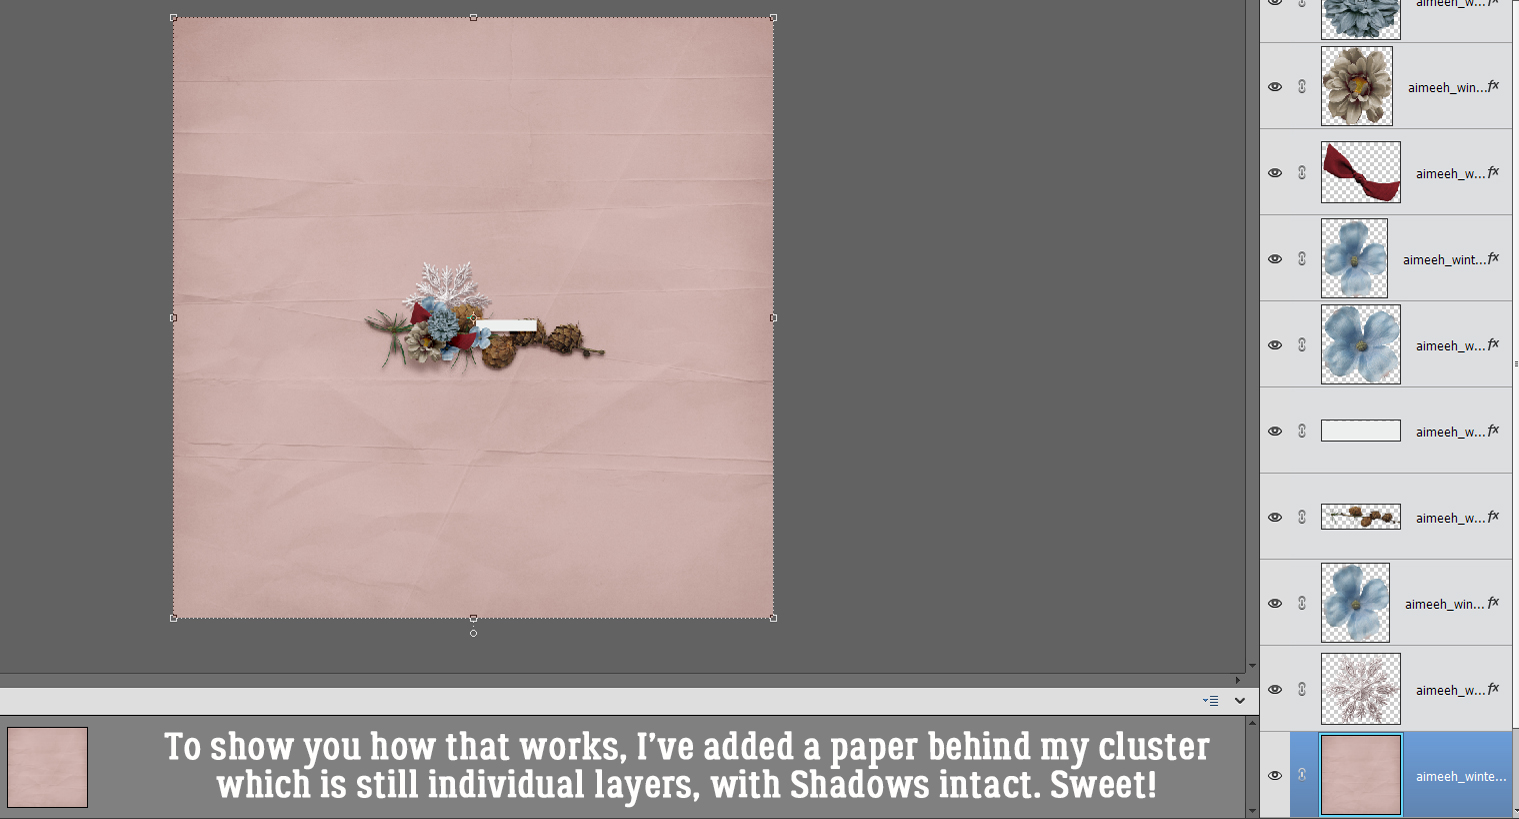
Bingo! All the layers are there, I have room to add papers, photos and other elements, and the canvas is the correct size to become a layout!
I just popped a paper behind the cluster layers to show you how it works. I hope this is what Rachel had in mind when she asked her question…
Next Tuesday I’m going to use this same layout as my example. Can you guess what the topic will be?
PDF Version : https://bit.ly/3EVpJRJ
![]()