Trick or treat! Smell my feet! Time for Halloween is nearly upon us! Have some fun, enjoy some treats, and dress as someone or something you are not! Have fun and we’ll see you again on Thursday!
Remember, when you spend $10, you get a free kit!

https://store.gingerscraps.net/GingerBread-Ladies-Collab-Sisterhood.html

https://store.gingerscraps.net/The-Witching-Hour-BGD.html

https://store.gingerscraps.net/October-2018-Template-Bundle-by-Connie-Prince.html

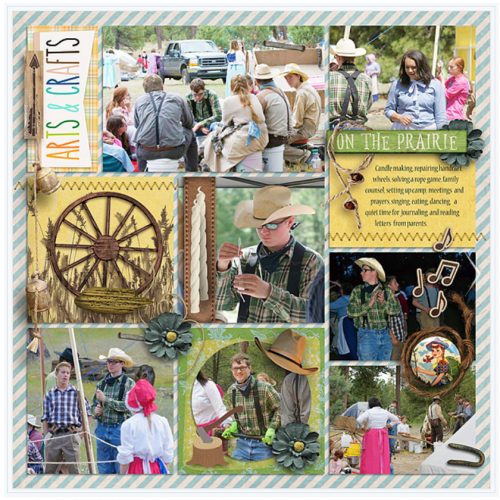
Album 16 Vol 2: https://store.gingerscraps.net/Craft-Templates-Album-16-Vol.2.html
Squared: https://store.gingerscraps.net/Craft-Templates-Squared.html
Squared Too: https://store.gingerscraps.net/Craft-Templates-Squared-Too.html
Squared Life: https://store.gingerscraps.net/CraftTemplates-Square-Life.html
Squared Life Too: https://store.gingerscraps.net/Craft-Templates-Square-Life-Too.html

https://store.gingerscraps.net/Spooked-Digital-Scrapbook-Kit-By-Dandelion-Dust-Designs.html

https://store.gingerscraps.net/The-Adventure-Begins-Templates-by-Dear-Friends-Designs.html

https://store.gingerscraps.net/Spooky-Kit.html

https://store.gingerscraps.net/Passport-Japan-GrabBag.html

Bundle: https://store.gingerscraps.net/Hocus-Pocus-Bundle.html
Kit: https://store.gingerscraps.net/Hocus-Pocus-PageKit.html
Flairs: https://store.gingerscraps.net/Hocus-Pocus-Flairs.html
Grunge: https://store.gingerscraps.net/Hocus-Pocus-Grunge.html
Clusters: https://store.gingerscraps.net/Hocus-Pocus-Clusters.html
Titles: https://store.gingerscraps.net/Hocus-Pocus-Titles.html
Cards: https://store.gingerscraps.net/Hocus-Pocus-Cards.html

https://store.gingerscraps.net/I-Love-Trains-by-LDrag-Designs.html

https://store.gingerscraps.net/Little-Bundle-Of-Joy-by-LDragDesigns.html

https://store.gingerscraps.net/Little-Diva-by-LDragDesigns.html

https://store.gingerscraps.net/Photo-Frenzy-Game-Day-by-Miss-Fish-Templates.html

https://store.gingerscraps.net/Whole-Lotta-Photos-1-Templates.html

https://store.gingerscraps.net/Whole-Lotta-Photos-2-Templates-by-Miss-Fish.html

https://store.gingerscraps.net/Scraps-N-Pieces/

https://store.gingerscraps.net/Hello-autumn-2..html

Collection: https://store.gingerscraps.net/360-Life-All-About-November-Collection-by-Aimee-Harrison.html
Kit: https://store.gingerscraps.net/360-Life-All-About-November-Page-Kit-by-Aimee-Harrison.html
Alphas: https://store.gingerscraps.net/360-Life-All-About-November-Alpha-Sets-by-Aimee-Harrison.html
Templates: https://store.gingerscraps.net/360-Life-All-About-November-Templates-by-Aimee-Harrison.html
Borders: https://store.gingerscraps.net/360-Life-All-About-November-Borders-by-Aimee-Harrison.html
Date Tabs: https://store.gingerscraps.net/360-Life-All-About-November-Date-Tabs-by-Aimee-Harrison.html
Quotes: https://store.gingerscraps.net/360-Life-All-About-November-Quotes-by-Aimee-Harrison.html
Titles: https://store.gingerscraps.net/360-Life-All-About-November-Titles-by-Aimee-Harrison.html
Messy Edges: https://store.gingerscraps.net/360-Life-All-About-November-Messy-Edges-by-Aimee-Harrison.html
Glitters: https://store.gingerscraps.net/360-Life-All-About-November-Glitters-by-Aimee-Harrison.html

Remember, if you complete 10 challenges, just ten, you get a free kit as well!!

It’s time to open our hearts and be thankful for all of our blessings.