Sneak Peeks April 5th, 2018

Happy Thursday! How is the first week of April treating you? Our designers are fully embracing spring and have a bunch of new releases for you this week!

From Heather Z

From Mags Graphics

From CathyK

From Tinci

From Lindsay Jane

From Aimee Harrison

Have a great weekend!

Tutorial Tuesday – Photoshop Elements

Totally TACKY!

We’ve moved into the second quarter of 2018 already! And with a new month comes new challenges at GingerScraps… Don’t you love them?? This month, Marina (Magical Scraps Galore) has a really different spin on the Mix It Up challenge. She wants us to use at least 3 different silver or chrome elements on a layout. Well. When I saw “chrome”, it was like a bell went off! I had planned to show you how to create a dotted border the quick-and-easy way, and it very quickly morphed into a tacky border instead. (Well, it’s a couple of additional steps.)

I chose this fabulous bandana-style paper as my background. It’s from Just So Scrappy‘s Let Freedom Ring collection. Then I popped a new layer on top of it for my border layer.

Next step was to choose a round brush from the Brush tool menu. I resized it to 75 pixels (to give it some presence) and set the Opacity to 100%. The colour really doesn’t matter but you should choose something that will show up against your background. I’m going to turn the visibility of my paper layer off for the next few steps. You can do whatever works for you.

After making sure I was working on the BLANK layer at the top, I went on to my next step.

I went back to my Brush menu and clicked on the Brush Settings button. Here I made sure my Fade was set to 0, Hue Jitter also to 0 and Scatter to 0. Spacing needs to be a big number. It’s a percentage of the brush’s size and will determine how much space is between the dots. Since I have a 75 pixel brush, I set this number to 400%. But feel free to experiment. Hardness (determines how sharp the edge of the brush will be) and Roundness both need to be at 100% (unless you’re faking a stitched border but we’re not going to go there today).

I turned on my Grid (View>Grid or CTRL/CMD>’) to save myself some effort. I decided my border should be 1/2 inch in from the corner. Then I clicked my Brush at that spot.

Do you remember how to draw a straight line in Elements? Hold down the Shift key and click at the spot where you want your line to end!

To make the rest of the border, it’s simply holding down the Shift key and clicking in the other three corners. It literally will take you 15 seconds. You can stop here if you just want a dotted border.

Now, to turn that dotted border into a tack border. I went to my Styles button down at the bottom of the Layers panel then chose Wow Chrome. In that menu I selected Wow-Chrome Shiny Edge. This Style set is one of the default styles that come with the Elements software right out of the box.

I liked the effect but thought it looked too umm… domed. If I’m smacking tacks with a hammer, they’re gonna flatten a bit. So I right-clicked on the fx on the layer and decreased the Bevel to about 6 pixels. I left the drop shadow alone.

This is how the finished border looked with the paper behind it.

To give you a better idea of scale, here’s the entire 12×12 canvas.

I wanted to see what other effects I could get using default Styles. So I copied the border layer and turned the Visibility of that layer off. It’s possible to add multiple Styles to an object or text as long as you work on individual layers with each.

This time I chose Bevels from the Styles menu and went with the Scalloped Edge bevel. Now the dots look like fancy tacks.

Next I selected the top layer and turned the Visibility back on.

I used the very same Wow-Chrome Shiny Edge style, but dropped the Opacity of that layer to 70%. Now the tacks look more like those pearl-inlaid buttons you see on Western shirts.

The different isn’t blatant, but it’s definitely there.

Another of the default Styles that came with Elements is Complex. I tried a couple of the choices here and settled on the Diamond Plate style. It has a funky industrial look to it.

When I decreased the amount of Bevel on this style, the effect became somewhat more matte and there wasn’t as much detail. It really looks like hand-cut nail heads to me now.

And here it is with the paper behind it. I’m not sure which one I like best. They’re all so neat!

There’s one more thing I played with and that’s turning the dotted border into holes in the paper. So I Selected the Layer thumbnail of the dotted border layer by clicking on the thumbnail in the Layers panel. That gave me my marching ants.

I turned off Visibility for the border layer and made sure I was working on the paper layer.

Then I Cut the selected dots out of the paper. (Edit>Cut or CTRL/CMD>X)

That gave me perfectly spaced holes in my paper to perhaps weave a ribbon through.

I bet you can think of a few more ways to make this technique work for you. I’d love to see what you do with it!

HapPy Easter and Happy April from Gingerscraps!

April Fool’s! Happy Easter! Are you ready for a new month? Did you know that April is Stress Awareness Month? Did you know that digital scrapbooking has been proven to lower your stress levels? Okay, maybe it hasn’t, but it sounded good, right. Well, even if it’s not proven, use the excuse to scrap more!

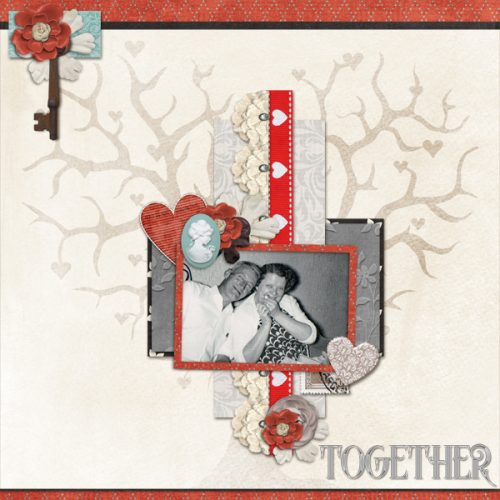
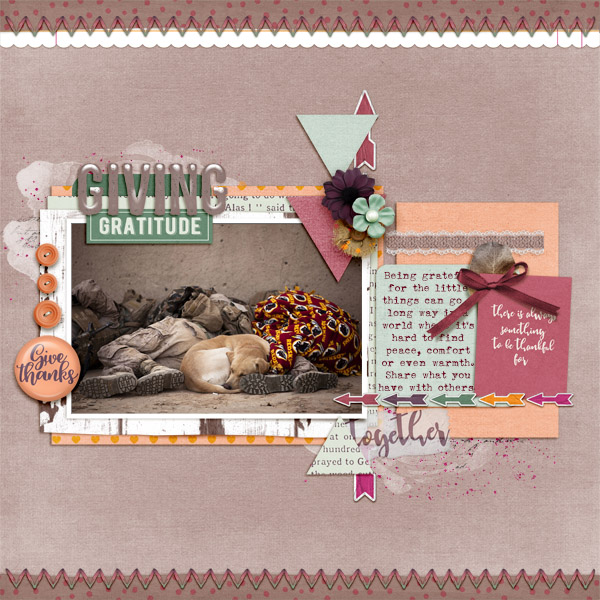
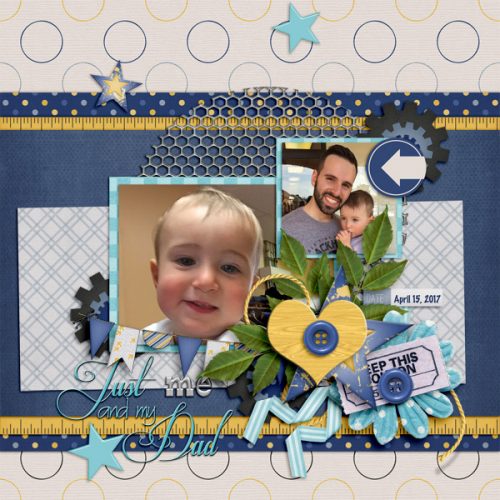
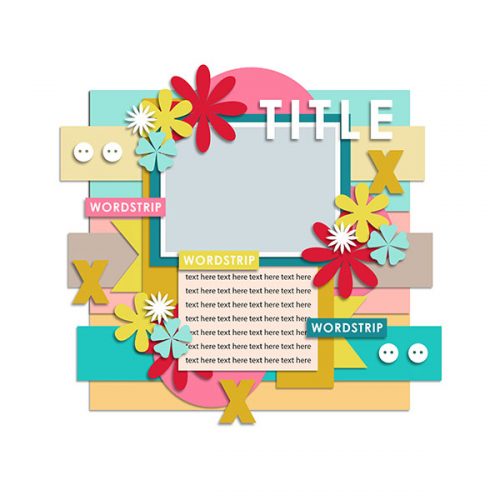
It is the First of the month, and that means the revel of our new Buffet!!

Don’t forget to check out the Buffet Bundles, one easy click to add bundles of Buffet goodies to your cart, and an amazing value too!

[Read more…]

DD: Apr 01

There’s no foolin’ when it comes to the daily download. I considered a trick and saying we weren’t having one this month but I decided against it.

Before I show you this month’s, I just have to show off last month’s:

dd-march
https://store.gingerscraps.net/Lucky-To-Have-You-DD.html

I know we were all lucky to have this kit for March!

And here’s this month’s:

dd
https://bit.ly/2Gh2ng3

All I know is that this “old lady” is loving the vibes from this kit!

Remember, the download is kept up for 5 days, and then it is taken down. If you miss pieces, the kit will be available for purchase on the first day of the following month.

Fresh Baked: March 30, 2018

Today is National Doctor Day. Is it time for a check-up? Spring is upon us! The designers aren’t worrying about illness, and have created some gorgeous new kits and templates, just in time for Easter!

Remember when you spend $10 in the store, you get a great new collab! It’s time for Spring and all the Spring Things!

fwp_thumb3_thumb_thumb_thumb
https://store.gingerscraps.net/GingerBread-Ladies-Collab-Spring-Things.html

boomers
https://store.gingerscraps.net/He-is-Risen-BGD.html

connie
Collection: https://store.gingerscraps.net/-2018-April-Bundle-Collection-by-Connie-Prince.html
Kit: https://store.gingerscraps.net/-2018-April-Kit-by-Connie-Prince.html
Mixed Media: https://store.gingerscraps.net/-2018-April-Mixed-Media-by-Connie-Prince.html
Snippets: https://store.gingerscraps.net/-2018-April-Snippets-by-Connie-Prince.html
Messy Papers: https://store.gingerscraps.net/-2018-April-Messy-Papers-by-Connie-Prince.html
Border Clusters: https://store.gingerscraps.net/-2018-April-Border-Clusters-by-Connie-Prince.html
Templates: https://store.gingerscraps.net/-2018-April-12×12-Template-Pack-CU-Ok-by-Connie-Prince.html
Extra Papers: https://store.gingerscraps.net/-2018-April-Extra-Papers-by-Connie-Prince.html
Alpha Pack: https://store.gingerscraps.net/-2018-April-Alpha-Pack-AddOn-by-Connie-Prince.html
Word Art: https://store.gingerscraps.net/-2018-April-Word-Art-Pack-by-Connie-Prince.html
Quick Pages: https://store.gingerscraps.net/-2018-April-Quick-Pages-by-Connie-Prince.html

heartstrings
https://store.gingerscraps.net/My-Arty-Pocekts-11-Templates.html

kaklei
https://store.gingerscraps.net/Spring-in-Pink-Templates-by-Kakleidesigns.html

kristmess
https://store.gingerscraps.net/Single-Page-Layered-Templates-Set1.html

lauries
Bundle: https://store.gingerscraps.net/The-Great-Frontier-Bundle.html
Kit: https://store.gingerscraps.net/The-Great-Frontier-PageKit.html
Flairs: https://store.gingerscraps.net/The-Great-Frontier-Flairs.html
Grunge: https://store.gingerscraps.net/The-Great-Frontier-Grunge.html
Ombre Papers: https://store.gingerscraps.net/The-Great-Frontier-OmbrePapers.html
Titles: https://store.gingerscraps.net/The-Great-Frontier-Titles.html
Journal Cards: https://store.gingerscraps.net/The-Great-Frontier-JournalCards.html

missfish
https://store.gingerscraps.net/Everyday-Paper-Strips-Templates-by-Miss-Fish.html

paty
https://store.gingerscraps.net/Happy-Easter-Watercolor-Bundled-Collection-by-Paty-Greif.html

tinci
https://store.gingerscraps.net/Cluster-and-colors-Flower-power.html

aimee
Collection: https://store.gingerscraps.net/360-Life-All-About-April-Collection-by-Aimee-Harrison.html
Kit: https://store.gingerscraps.net/360-Life-All-About-April-Page-Kit-by-Aimee-Harrison.html
Alpha: https://store.gingerscraps.net/360-Life-All-About-April-Alpha-Sets-by-Aimee-Harrison.html
Temp: https://store.gingerscraps.net/360-Life-All-About-April-Templates-by-Aimee-Harrison.html
Borders: https://store.gingerscraps.net/360-Life-All-About-April-Borders-by-Aimee-Harrison.html
Date Tabs: https://store.gingerscraps.net/360-Life-All-About-April-Date-Tabs-by-Aimee-Harrison.html
Titles: https://store.gingerscraps.net/360-Life-All-About-April-Titles-by-Aimee-Harrison.html
Quotes: https://store.gingerscraps.net/360-Life-All-About-April-Quotes-by-Aimee-Harrison.html
Messy Edges: https://store.gingerscraps.net/360-Life-All-About-April-Messy-Edges-by-Aimee-Harrison.html
Glitters: https://store.gingerscraps.net/360-Life-All-About-April-Glitters-by-Aimee-Harrison.html

001
https://goo.gl/UBQg62

002
https://store.gingerscraps.net/Kristmess/

003
https://store.gingerscraps.net/Neia-Scraps/

Remember, if you complete 10 challenges, just ten, you get a free kit as well!!

cr_thumb3_thumb_thumb_thumb
Who else is ready for spring? This makes the wait a little better!

Sneak Peeks March 29th 2018

It’s the last Thursday in March! Since the Buffet starts on Sunday, I am giving you a double sneak peek today!! Sunday will be a busy day with it being Easter and a new Buffet, I have a sneaky suspicion Ginger has something else up her sleeves that day. Make sure to check back and see all the new releases coming tomorrow and the awesomeness of a Buffet on Sunday! Let’s check out a few peeks of tomorrow’s new releases first.

From Tinci

From Aimee Harrison

From Miss Fish

And now for a peek at the Buffet!

Have a wonderful weekend!

Tutorial Tuesday (Photoshop Elements)

DIAMONDS are a Girl’s Best Friend

My dear friend Glee has been very helpful in providing me with topics and this is another one that came from her. She pointed me to this GORGEOUS layout by Imperio and asked if I could tell her how the diamond-shaped frame was created. Wait until you see how easy it is… you’re going to be looking for shapes to do it with.

I started with a 12×12 canvas – everything is resizable, right? Then I opened the Pencil tool and selected a hard, round brush from the PSE-default Basic Brush menu and set the Opacity at 100%. I used black for demonstration purposes, but you can use any colour you want. Make sure you turn on the Grid (View>Grid or CTRL/CMD>’) so you have defined dimensions. You can set your parameters in the Edit>Preferences>Units & Rulers. I chose inches because although Canada has been on the metric system of more than 40 years, I still think in inches.

If you’ve read the tutorial about giving stickers some dimension, you might remember how to draw a straight line with Elements. It’s pretty easy. Click on the spot where you want your line to start, then hold down the Shift key and click on the spot where you want it to end. The grid will make these next steps a lot easier by giving you reference points.

There’s my first straight line. The intersections of the major lines are obvious choices for this task.

I kept moving around the outside.

Then I took it to a point in the centre of the canvas, 1 inch from the bottom.

And back up, using the same reference points on the other side.

Now the shape is enclosed and looks kind like the insignia on Superman’s cape. (Maybe somebody wants to try that?)

I kept adding lines as shown in the screenshots.

You’ll see that I didn’t quite WSNH here… see the next screenshot for proof.

This will save you a step – just take that diagonal line all the way to the top corner.

Now there are only two more lines to put in there and you have that great diamond shape.

And a one-a…

… and a two-a! (Any Lawrence Welk fans here?)

Now I’ll show you how to make the clipping masks for the different papers, as Imperio‘s layout has. Add a new layer on top of your shape layer. Then click on the Layer Thumbnail for the shape layer.

Your selection will have those marching ants.

To invert the selection, either click on the Select tab and choose Inverse, or CTRL/CMD>Shift>I which will now select everything BUT the shape outline.

Choose another colour and fill the selected areas with the Paint Bucket tool.

And now your canvas looks like the screenshot, but not for long.

Turn off the visibility on the shape outline layer.

Now to get rid of the parts we don’t need to keep. I started by using the Rectangular Marquee tool and Edit>Cut or CTRL/CMD>X to cut away some of it.

Then I went to the Erase tool and used it with abandon.

Just erase what you aren’t going to need.

You’ll be left with something that looks like this. If you’re only going to use one paper for all the sections, you can quit now.

But if you want to use different papers for each section, make 8 copies of the filled-in layer as shown. CTRL/CMD>J is quick and easy, but you can right-click and select Duplicate Layer, then click OK on the pop-up menu if you’re into taking extra steps.

Turn off the visibility of all the layers but the one you’re working on. Now, go one layer at a time and erase all but one segment.

Here’s an example of two layers with only a single segment on each.

Use a BIG brush so you can do this quickly.

When you have only one segment on each of your 8 layers, you have a template! Each segment is its own clipping mask.

The second-to-last last step is to make the outline layer a little beefier. The easiest way is to add a stroke to it. I used 10 pixels and Centered it on the shape layer.

Then just move the shape outline layer to the top of the Layers panel and your template is complete. If you like, you can save it as a .psd file and use it over and over and over!

There are all kinds of ways you can make this technique work for you. Easter eggs? Flower petals? Pie? Have some fun with it… I sure did! Make sure you leave Imperio some love in the gallery. (Click on her user name anywhere in this post to go right to her layout.)

Fresh Baked: March 23, 2018

Who else thinks that waffles are the best thing ever? Well, if you do, remember that Sunday is National Waffle Day! Have a waffle for every meal!

While you’re waiting for your waffle iron to heat up, check out the awesome new products in the store! Spring is in full force, and the designers are so ready for this new season!

Remember when you spend $10 in the store, you get a great new collab! It’s time for Spring and all the Spring Things!

fwp_thumb3_thumb_thumb_thumb
https://store.gingerscraps.net/GingerBread-Ladies-Collab-Spring-Things.html

aimee
Collection: https://store.gingerscraps.net/The-Egg-Hunt-Collection-by-Aimee-Harrison.html
Kit: https://store.gingerscraps.net/The-Egg-Hunt-Page-Kit-by-Aimee-Harrison.html
Alphas: https://store.gingerscraps.net/The-Egg-Hunt-Alpha-Sets-by-Aimee-Harrison.html
Blooms: https://store.gingerscraps.net/The-Egg-Hunt-Blooms-by-Aimee-Harrison.html
Journal Cards: https://store.gingerscraps.net/The-Egg-Hunt-Journal-Cards-by-Aimee-Harrison.html
Word Art: https://store.gingerscraps.net/The-Egg-Hunt-Word-Art-Titles-by-Aimee-Harrison.html
Messy Edges: https://store.gingerscraps.net/The-Egg-Hunt-Messy-Edges-by-Aimee-Harrison.html
Glitter: https://store.gingerscraps.net/The-Egg-Hunt-Glitters-by-Aimee-Harrison.html

aprilisa01
https://store.gingerscraps.net/Picture-Perfect-161.html

aprilisa02
https://store.gingerscraps.net/Picture-Perfect-162.html

boomers
https://store.gingerscraps.net/Fiesta-Time-BGD.html

clever
https://store.gingerscraps.net/farmhouse-easter-by-Clever-Monkey-Graphics.html

connie
Bundle Pack: https://store.gingerscraps.net/Travelogue-Illinois-Bundle-Pack-by-Connie-Prince.html
Word Art and Flair Pack: https://store.gingerscraps.net/Travelogue-Illinois-Word-Art-and-Flair-Pack-by-Connie-Prince.html
Kit: https://store.gingerscraps.net/Travelogue-Illinois-Kit-by-Connie-Prince.html
Word Bits: https://store.gingerscraps.net/Travelogue-Illinois-Word-Bits-by-Connie-Prince.html
Templates: https://store.gingerscraps.net/Travelogue-Illinois-12×12-Temps-CU-Ok-by-Connie-Prince.html

heartstrings
https://store.gingerscraps.net/The-Bigger-Picture-10-Templates-HSA-the-bigger-picture-10.html

jocee
Bundle: https://store.gingerscraps.net/Aries-Bundle.html
Kit: https://store.gingerscraps.net/Aries-Kit.html
Cards: https://store.gingerscraps.net/Aries-Cards.html
Alphas: https://store.gingerscraps.net/Aries-Alphas.html
Glitters: https://store.gingerscraps.net/Aries-Glitters.html
Basic Papers: https://store.gingerscraps.net/Aries-basic-Papers.html

kaklei
https://store.gingerscraps.net/Color-Fest-kit-by-Kakleidesigns.html

kristmess
https://store.gingerscraps.net/CU-Zodiac-Constellations-Layered-Template.html

lauries01
https://store.gingerscraps.net/The-Great-Frontier-GrabBag.html

lauries02
Bundle: https://store.gingerscraps.net/Sports-Basketball-Bundle.html
Kit: https://store.gingerscraps.net/Sports-Basketball-PageKit.html
Flairs: https://store.gingerscraps.net/Sports-Basketball-Flairs.html
Grunge: https://store.gingerscraps.net/Sports-Basketball-Grunge.html
Ombre Papers: https://store.gingerscraps.net/Sports-Basketball-OmbrePapers.html
Titles: https://store.gingerscraps.net/Sports-Basketball-Titles.html
Journaling Cards: https://store.gingerscraps.net/Sports-Basketball-JournalingCards.html

lindsay01
https://store.gingerscraps.net/Page-Borders-31-by-Lindsay-Jane.html

lindsay02
https://store.gingerscraps.net/Page-Borders-32-by-Lindsay-Jane.html

magical
Bundle: https://store.gingerscraps.net/All-Tangled-Up-collection.html
Page kit: https://store.gingerscraps.net/All-Tangled-Up.html
Journaling Cards: https://store.gingerscraps.net/All-Tangled-Up-cards.html
Graffiti Pack: https://store.gingerscraps.net/All-Tangled-Up-graffiti-pack.html
Glitter Pack: https://store.gingerscraps.net/All-Tangled-Up-glitter.html
Bonus Papers: https://store.gingerscraps.net/All-Tangled-Up-bonus-papers.html

memories01
https://store.gingerscraps.net/Mouse-ical-Big-Pic-Templates-1.html

memories02
https://store.gingerscraps.net/Mouse-ical-Big-Pic-Templates-2.html

missfish
https://store.gingerscraps.net/Traveler-s-Notebook-Bundle-1-by-Miss-Fish-Templates.html

scraps
https://store.gingerscraps.net/Imagine-Kit-by-Scraps-N-Pieces.html

tinci
https://store.gingerscraps.net/Miracle-of-spring-2..html

004_thumb_thumb
https://store.gingerscraps.net/Neia-Scraps

001
https://goo.gl/UBQg62

Remember, if you complete 10 challenges, just ten, you get a free kit as well!!

cr_thumb3_thumb_thumb_thumb
Who else is ready for spring? This makes the wait a little better!

Sneak Peeks March 22nd, 2018


Happy Thursday!!! It’s finally Spring! And of course the first day in Spring here in Florida was cold. Well cold to a Floridian. Hopefully warmer temps are coming for everyone! Our designers have some great Spring themed kits and templates this week!

From Ponytails

From Tinci

From Miss Fish

From JoCee

From Memories by Digital Design

From Aimee Harrison

From Aprilisa

Image may contain: 2 people, people smiling

From Clever Monkey Graphics

From Luv Ewe Designs

From Heartstrings Scrap Art

Have a wonderful weekend!

Tutorial Tuesday (Photoshop Elements)

Uniquely YOURS

Life at my house has been a tad bit hectic lately so today’s tutorial will be a quick-and-easy one. I don’t know about you but I just love Connie Prince‘s collections. She often includes some absolutely fabulous clustered word art titles, and she ALWAYS includes at least one alpha set. Her new collection, My Lucky Stars, is no exception. There are six clustered titles in the bundle… but what if none of the included titles really works for your layout? Well, it’s not difficult to make your own. I don’t know how Connie does it, but I’ll show you how Jan does!

I start with a new project workspace of roughly the size of the area I want to cover with my title cluster.

I like to start by placing one of the larger elements I plan to use into my space and moving it around a smidge. That will form the base for placement of everything else.

Then I usually add in my alpha. I’ve already decided what my title will say, and copied the various letters into my layout folder. As you can see, my title for this layout is “Sisters”. Make sure your letters are in the correct order! Then resize them all as a group. Guestimate how much space they’re going to take on your canvas.

Getting the size right isn’t always immediate. I adjusted mine a couple of times before I used the Distribute tool. This is similar to the Align tool. It simply moves everything between two spaces as I’ve shown you below and distributes them based on what parameter you choose. I went with Distribute>Middle. You could choose the right edge or the left edge depending on the look you’re after.

As you can see below, I didn’t get the size right even after I resized a couple of times. So I resized, moved the last S over to the right edge again and Redistributed until I had enough space to read what my title says.

There were a couple of letters that I needed to nudge individually because the algorithm the software uses to determine the middle of a letter doesn’t account for skinny letters like I or wide letters like W.

Once I had the letters arranged the way I wanted them, I added more of my elements onto the workspace. Layer them in a way that makes sense to you and for your layout. I usually have some idea of how I plan to use the things I’ve chosen, but sometimes I get a happy little surprise.

I moved the letters and string up a bit so all five points of the star were visible. I tucked the bow in behind the I and a little on top of the first S.

I knew from the beginning that I’d be using one of the Celtic knots from the kit, but wasn’t sure where I was putting it. I decided it looked really nice behind everything else, so that’s where it went. And since I was creating this layout on March 17th, I had to include a shamrock.

Then came time to shadow everything. All the items in this type of cluster should be shadowed separately so they look right where they overlap once you move them onto your layout. I started with the first S in Sisters and used a shadow style for paper. Then I made some minor adjustments so it looked the way I wanted it. Can you see it in the screenshot? To use the same settings on all the letters I right-clicked on the first S layer in the Layers panel and selected Copy Layer Style.

Then I selected all of the other alpha layers. (If they’re on on top of the next, click on the first layer, hold down the shift key and then click on the last layer. If they’re staggered throughout the Layers panel, hold down the CTRL/CMD key and click on each one separately.) Right-click brings the layers menu back up and this time I chose Paste Layer Style.

Now all the letters are shadowed and have definition and dimension.

I made custom shadows for the string and the bow, bringing the shadow in close where the object touches what’s underneath it and pulling it away where things could be lifted off the paper.

The last step is to link all the layers together so when I move the title cluster onto my layout, everything goes, and it all stays where I’ve put it. To link the layers, select them all as you did for shadowing multiple layers in one click. Click on the little link icon to the left of any one of the selected layers in the Layers panel and the links will turn yellow. That’s how you know the layers are linked together and will move together when the time comes.

Once you’ve added your title cluster to your layout, look at it at several different magnifications to see if you need to add a drop shadow to the whole shebang. I found that mine looked better with an added shadow. The finished layout is built on a template called My Lucky Charm from Heartstrings Scrap Art.

That’s how Jan does it. Nothing to it!