Archives for September 2017

Sneak Peeks September 14, 2017

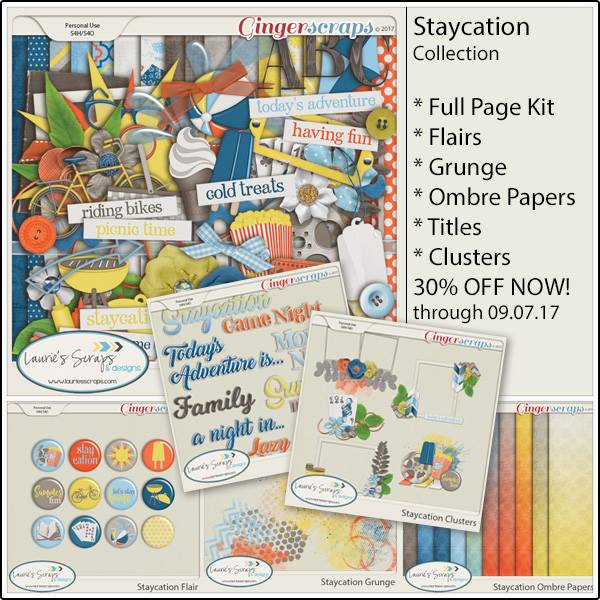
Happy Thursday! Tomorrow kicks off a TON of awesomeness! It’s Gingerscraps birthday celebration!!! A full week of celebrating sales and fun! Check out what our designers are releasing as part of the celebration!

From Mis Miss

From Ponytails

From Luv Ewe

From Dagi

From Tinci

From Aimee Harrison

From JoCee

From Heather Z

From Heart Strings Scrap Art

From Joyful Expressions

From Neverland Scraps

From Lindsay Jane

Enjoy the festivities!

Tutorial Tuesday (Photoshop Elements)

Revisionist History

Do we have any family historians in the house? I’m pretty sure we do. And I bet you’ve scanned a ton of old photos, only to find the resulting images dust-specked, foxed (stained with brown ick), scratched, folded or otherwise flawed. Sometimes that’s a good thing, if you’re going for that vintage, grungy, tattered look. But if you’re not, you might want to clean them up a little. That was my thought when I saw this scan of my mom and her sister, taken in the spring of 1957. I love the subject (yes, my mom was in the air force and was home on leave), but I don’t love that it’s crooked, speckled, stained and scratched. And the exposure is pretty wonky. So I set out to make it better without changing it too much.

First order of business was to straighten my image. Initially, I didn’t plan to crop it, which would have solved my problem in one step. And I do have lots of photos that were scanned crooked (thanks, honey…) that I won’t be cropping so I’ll show you a quick trick to straighten a photo. I right-clicked on the image layer and selected Layer From Background. By doing this, I could then create a blank layer underneath the photo, then Image>Resize>Canvas (CTRL/CMD>ALT>C) let me make that blank canvas a bit bigger than the photo so I could tip the photo without it hanging over the edges.

When you straighten any object in PSE, there are a couple of tools you can use to ensure its actually straight when you’re done. You can eyeball it if you’re not overly perfectionistic, you can drop a grid over it by hitting View>Grid (CTRL/CMD>’) or you can pull a guideline out from either the top edge or the far left edge of your workspace. Then you’d use the bounding box to adjust your photo.

After all that, I decided to crop the photo, so I definitely was working hard, not smart! The crop shield is turnable so I could have saved myself a lot of time.

And then I deleted the totally unnecessary bottom layer!

Once I zoomed in on the image, I could see the scratches and dust motes better.

I started with the scratches. Using a small brush size and the Spot Healing tool set on Content Aware, I carefully clicked-and-dragged my cursor over the big scratch. I could have done it a bit faster with a bigger brush, but then it would have been really obvious.

Make sure you watch what’s happening with your image while you’re tidying it up. Zoom in and out often so you have a clear view of the whole image. This scan is really pixelated when I zoom in close, but that’s okay. It’s not going to be big enough on my layout to be a problem.

When using the Spot Healing tool, it sometimes picks up the wrong content so you could turn a white scratch to a dark blotch. So make the brush size as small as possible to address those areas.

A lot of the time, dust specks are easily seen and Healed just by putting the tool’s cursor over top of them and clicking once. They show up as fairly regularly-shaped bright white spots where the light from the scanner bed couldn’t penetrate. Foxing is the reverse, showing up as brown areas, and can be irregularly shaped because it’s usually caused by moisture. Having said that, when there’s areas of your photo where there are already high-contrast shapes like the grassy part of my photo, seeing the dust specks is a bit harder. So look for those EXTRA-bright white spots and blend them in.

You might not be able to see the flaw I’ve outlined below, but on my screen, it was very distracting – greenish and filled with odd little straight lines. And the area around it is highly textured. So that nice little Spot Healing tool isn’t going to give me the results I want. It would make it more noticeable by blurring the edges.

That’s where the Clone Stamp tool comes into play. Unlike the Spot Healing tool, which blends whatever it touches, the Clone Stamp actually duplicates its target area. Depending on the size of the sample, it could actually replicate entire objects. It’s really great for covering up things you want removed from your image (like the overly large woman in the black swimsuit that was growing out of my daughter’s underarm in one of her beach photos). For this image, I chose to use a soft square drop shadow brush from the default set PSE comes with. To choose the sample for covering up this weird area, I put the brush cursor on an area close to where I’d be stamping, then ALT>clicked. That cloned the small area inside the cursor; the duplicated area is visible inside the cursor and there’s a little crosshiar icon that shows what area of the image is being cloned. Then I just moved the cursor over to the weird spot and click-covered the whole area. You want to make sure your clone sample has the same tonal quality and the same light exposure to minimize the hey-look-at-me effect.

For this area that’s all I had to do… paying attention to the content inside the cursor and where the crosshairs were let me control what sections of the wall I was randomly cloning onto the weird spot.

I also used the Clone Stamp to overcome this blown-out area of the upper wall. When cloning along an edge like this, centering the cursor over a clear, clean spot when selecting the sample area will keep the line true.

The major positive of the Clone Stamp is also its major downfall. See how there’s a really obvious pattern inside the box in the image below? If you’re seeing that, you can go back over the area with the Spot Healing tool and randomly break up that pattern.

At super-zoom, it’s not perfect, but when I zoom back out, it looks pretty good. I randomly hit it a few more times with a small Spot Healing brush and blended it in a bit more.

Now you can see a little better how the image is improved by what’s already been done to it. A lot of photos only need a little tweaking.

But I wanted to adjust the contrast a bit and see if I could improve detail without sacrificing anything. So I selected Enhance>Adjust Lighting>Shadow/Highlights. Be aware that when you do this, PSE will automatically brighten the shadowed areas by 35%. If the shadows weren’t THAT heavy, you’ll have to scale that back.

These are the settings I ended up with.

But it still wasn’t making me happy, so I went back into Enhance>Adjust Lighting and chose Levels. (CTRL/CMD>L will get you there too.) I LOVE this adjustment mode! You can really adjust the light and dark areas infinitely with this tool.

You can see the changes on your original image as you move the sliders. I didn’t move them much, just a skoosh here and a titch there. The Input levels ended up around 12 at the left side and about 240 on the right. Output was maybe 8 and 242. That improved the contrast and tightened up the details a little. Nothing dramatic, but just right.

Thinking I was done, I zoomed back out to see how great it looked. And then I saw THIS!

So I played with it a little more.

I tried a High Pass filter to sharpen the details a little, but the image is too pixelated for that to look good. So I had to come up with an alternative. And Enhance>Unsharp Mask… was it.

With this tool you can watch what’s happening and fine-tune your results really nicely.

Here are the two images side by side. And I’m really pleased with how my edit looks.

These techniques can be used on colour photos too, in exactly the same way. I have a bunch of new scanned photos my cousin’s son sent me that I’ll need to clean up before I use them for layouts. How about you?

Let’s Celebrate Grandparents!

Tomorrow is Grandparent’s Day here in the state. Let’s be honest though…they deserve celebrating more than just the one day! I can personally say that a lot of who I am today is thanks to the amazing grandmother I had in my life. She is one of my most favorite things to scrap. Which got me to thinking. With that holiday just around the corner, we should showcase some of the great items we have in the store here at GingerScraps to do just that…celebrate our grandparents.

There isn’t a specific section dedicated to just this in the store. However, there is a section for family inspired digital scrapbooking items. That is where I found most of these items. You can view that section HERE if you like. All the images below are linked to their counterpart in the store.

Here are some items that are specifically for grandparents:


Here are a few more items that are not totally for grandparents. However they all are wonderful for scrapping the Grands in our lives (and more!):


A lot of these items above are geared toward women and Grandmothers. Don’t get me wrong. I am surrounded by males in my life; and they get scrapped surrounded by the typical female colors often! That being said, here are a few items geared towards the men and Grandpa’s!


Fresh Baked: September 08, 2017

September is in full swing and it’s time to gather all things pumpkin spice and fall weather. It’s the perfect time of year to get pictures of the gorgeous colors of the changing of leaves, and so much more!

Remember when you spend $10 in the store, you get a great new collab!

 fwp_thumb3
https://store.gingerscraps.net/GingerBread-Ladies-Collab-Spice-Of-Life.html

scrapsnpieces
Kit: https://store.gingerscraps.net/My-Life-September-Kit-by-Scraps-N-Pieces-SNP_MLsepK.html
Bundle: https://store.gingerscraps.net/My-Life-September-Bundle-by-Scraps-N-Pieces.html

tinci
https://store.gingerscraps.net/A-girly-thing.html

boomers
https://store.gingerscraps.net/The-Cats-Meow-BGD.html

connie
https://store.gingerscraps.net/September-2017-Template-Bundle.html

dagitemp
https://store.gingerscraps.net/Whatcha-Cookin.html

dandelion
https://store.gingerscraps.net/Fresh-Air-By-Dandelion-Dust-Designs.html

dear01
https://store.gingerscraps.net/So-Little-Time.html

dear02
https://store.gingerscraps.net/Through-the-Years-Bundle.html

dear03
https://store.gingerscraps.net/School-Days-by-DFD.html

jocee
https://store.gingerscraps.net/Sew-Mic_Fun_Kit.html

joyfulexpressions
https://store.gingerscraps.net/Pumpkin-Spice-and-Everything-Nice-by-Joyful-Expressions.html

kristmess01
https://store.gingerscraps.net/Kristmess/

kristmess02
https://store.gingerscraps.net/Kristmess/

kristmess03
https://store.gingerscraps.net/Kristmess/

lauries01
https://store.gingerscraps.net/Island-Princess-GrabBag.html

lauries02
https://store.gingerscraps.net/Siblings-Bundle.html

lindsay01
https://store.gingerscraps.net/Teal-Memories-Collection-by-Lindsay-Jane.html

lindsay02
https://store.gingerscraps.net/Teal-Memories-by-Lindsay-Jane.html

lindsay03
https://store.gingerscraps.net/Simple-Masks-16-by-Lindsay-Jane.html

littlerad
https://store.gingerscraps.net/On-The-Bright-Side-templates.html

mags
Bundle: https://store.gingerscraps.net/Doctor-On-Call-BUNDLE-by-MagsGraphics.html
Kit: https://store.gingerscraps.net/Doctor-On-Call-KIT-by-MagsGraphics.html
Alpha: https://store.gingerscraps.net/Doctor-On-Call-ALPHA-by-MagsGraphics.html
Journal Cards: https://store.gingerscraps.net/Doctor-On-Call-JOURNAL-CARDS-byMagsGraphics.html
Word Art: https://store.gingerscraps.net/Doctor-On-Call-WORD-ART-by-MagsGraphics.html

missfish01
https://store.gingerscraps.net/Now-and-Then-Templates-by-Miss-Fish-Templates.html

missfish02
https://store.gingerscraps.net/Card-Me-5-Templates-by-Miss-Fish.html

missfish03
https://store.gingerscraps.net/Threepeat-Templates-by-Miss-Fish.html

Remember, if you complete 10 challenges, just ten, you get a free kit as well!!

cr_thumb3

I’m ready for school to start, and I think I’ll have to get my challenges done for this!

Save

Sneak Peeks September 7th, 2017

Happy Thursday! I hope everyone in Florida is getting ready to hunker down this weekend! Please stay safe! Fall is almost here! Most kids are back in school and everyone is ready for the weather to cool down. Our designers have awesome goodies releasing tomorrow!

From Heather Z Scraps


From JoCee

From Miss Mis


From Tinci


From Lindsay Jane

From Little Rad Trio

From Miss Fish

From Joyful Expressions

Have a wonderful weekend!

Tutorial Tuesday (Windows)

Mixing it UP!

This week’s tutorial is going to take a slightly different path than most of the others. Many of you may not know this about me but I’m NOT a kit-scrapper. I can do it if I must, but I like to pull goodies from several kits for most of my layouts. My credit lists are usually quite lengthy and the September Color Challenge layout I created as the basis for this tut is no exception. Colour challenges are actually the perfect vehicle for mixing up kits; this month’s was pretty straight-forward since it only required shades of blue. But what do you do when the designer has provided a swatch and you don’t have a kit with all the colours in it? You mix a bunch of kits together!

Caveat: This is my workflow and you might have a method that will work better for you.

I like to use templates, not gonna lie. They make scrapping so much easier. And I like to use folders. For me, they too make scrapping easier. For mixing kits, folders are a HUGE help. I have folders for each store I frequent, each of the kits I’ve added to my stash and I have folders for every layout I’ve created. It helps keep me organized. I’ve read posts from people who go through all of their kits and individually tag EVERYTHING. That’s a ton of work, and for the most part, it’s unnecessary. Designers usually label everything in a kit in some way, so why duplicate their efforts? Work Smart, Not Hard!

So let’s talk about folders. At the beginning of every month, I create a Challenges folder. And in this folder I add subfolders for all my favourite challenges. Into those folders, I copy my photo(s), template, papers and elements. After I’m happy with the layout, have ensured I have no bloopers and the layout is posted, I empty the folder of everything but the PSD of the layout and 2 JPEGs. That keeps the space taken up by the layout to a minimum but lets me find them later. The image below shows some of my folders in the list to the left. My first step is to select a template to use. In the tutorial on organizing your stash, I talked about labeling template previews in some fashion so it’s easier to find what you’re looking for later. My system, borrowed from someone else but modified to suit my workflow, is to label with whether the template is for a single or double spread, the number of photo spots and sometimes the shape/mask/blend the photo spots assume. The screenshot below shows a Windows File Explorer search for a single spread with 1 photo. (The icon for this utility is the file folder… super simple!) I had chosen a cute photo to build my layout around, so I opened my GingerScraps digikit folder then in the search box shown on the upper right, I typed in “single1“. After a few minutes, Windows had found all the template previews so labeled and showed them to me. (The actual search time will depend on the size of the folder you’re searching and the number of like objects to be found. It may only take seconds.) Now I could look at them and pick a template that would work for my layout.

Now, how did I find the actual template, you ask, since all that’s displayed are the preview thumbnails? I right-clicked on the preview and selected Open file location from the menu window. That takes me right to the folder that holds the template. Then I copied the template file into my challenge folder. For other searches this step won’t be necessary, because you can just copy the objects right from the search pane.

Next, I opened the template preview thumbnail in a photo viewer so I could see what supplies I needed to find next. I counted up the different papers the template employs and went on to my next search.

For this search, I put “paper blue” in the search box, as I’ve shown below. And Windows found all the papers labeled with those two words. Results will show both folders and individual images, which makes it easy to see just what you’re looking for.

I copied each of the blue papers I might want to use into my GingerScraps Challenges> September 2017>Colour SHADES OF BLUE folder so I could see them all in one place. That helped me determine if they’d work together or not. They look pretty good!

I worked my way through the different items used for the template one at a time to find things I wanted to include. There was a circular element I decided must be a flair, so I did a “flair” search.

Remembering that templates don’t necessarily have to be duplicated exactly, I chose to add some string to it. The search showed me a blue string right near the top that would work beautifully!

Once I had chosen all the things I thought I might use (substituting flowers for the stars) I could see everything in one place and knew they’d all work well together. I had pieces from FOURTEEN kits!

Once I was ready to build my layout, I opened Photoshop Elements and went to the Colour SHADES OF BLUE folder and opened all the items onto my workspace. From there it was zip, zip, zip!

And this is where I ended up. (Once I post my challenge layout, I add a hyphen to the beginning of the folder name so I know it’s done.)

Another way this method is useful is for speed scraps. You can have Windows searching for things while you work on the previous steps. That’s sort of where I came up with my system. I used to partake of monthly speed scraps at another site that is no longer around and I wanted to be sure I was finished my layout with time to spare in order to win the prize.

This screenshot shows how CathyK has labelled the items in her kit Aviator. This is for GingerScrapper Karen who had some questions about metadata.


Please feel free to adapt this however it will work for you!

Fresh Baked: September 01, 2017

September is here! Kids are officially back in school. Fall is on it’s way! There’s nothing better than fall colors. Especially the night-time colors! Which is what this month’s buffet color palette is very reminiscent of!

It is the First of the month, and that means the revel of our new Buffet!!

Don’t forget to check out the Buffet Bundles, one easy click to add bundles of Buffet goodies to your cart, and an amazing value too!

[Read more…]

DD: Sept 01

Whoo hoo! It’s time for the daily download! I hope you’re ready for a nap!

Before I show it to you, here’s last month’s:


https://store.gingerscraps.net/Staycation-Bundle.html

This month’s Daily Download is all about catching some z’s! Days are going to start getting shorter and the nights longer, so it’s the perfect time for it!

https://bit.ly/2wiRB1Z

Remember, the download is kept up for 5 days, and then it is taken down. If you miss pieces, the kit will be available for purchase on the first day of the following month.