Like a Broken Record
![]()
I was fooling around with a thought I had to see how it would look and a tutorial was born! I love papers with a small pattern repeat and I adore embossed cardstock. But I can’t always find what I want when I want it, so I decided to give creating my own a try. It’s so simple!! (But let’s not put our awesome designers out of work, ‘k?)
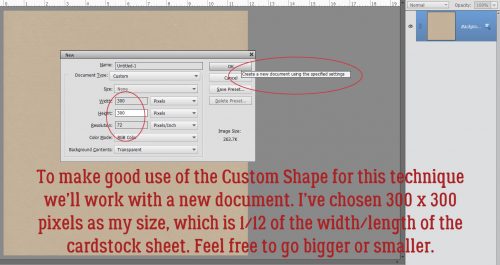
I started out with a plain Kraft-coloured cardstock from Scraps N Pieces‘ Oh Canada… Eh! collection. Then I opened a new document (CTRL/CMD>N). I knew I was going to use something that would resemble a tile effect and chose to work on a 300 x 300 pixel square canvas. Our 12 x 12 inch layouts are 3600 x 3600 pixels, so this size will be 1/12th of the length/width of the overall cardstock.
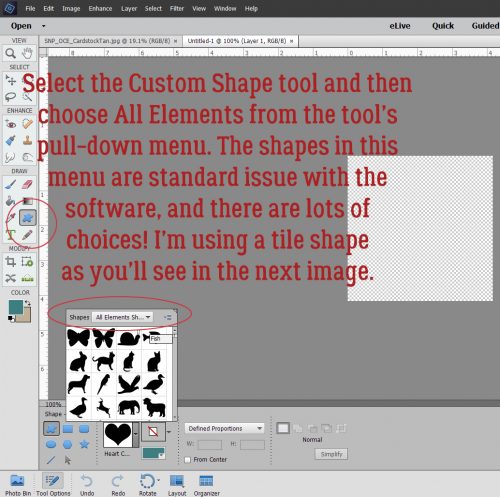
I opened up the Custom Shape Tool menu then chose All Elements to see every shape available.
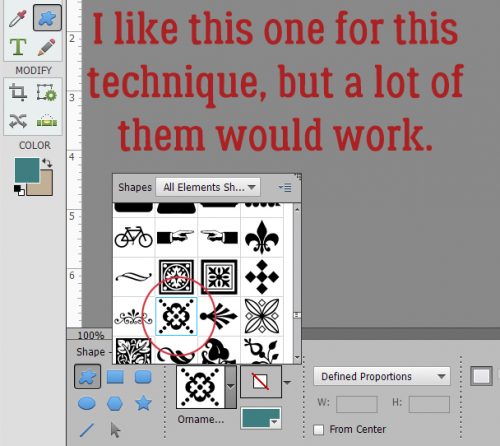
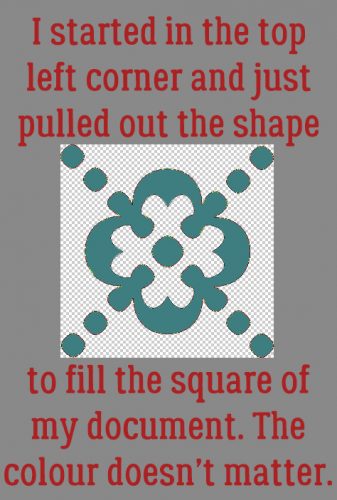
I played with more than one of these shapes before I settled on this one.
I put my cursor at the upper left corner and pulled the shape diagonally across my square canvas to completely fill it. The colour I used isn’t important because I’m going to change it later. I wanted something I could see easily.
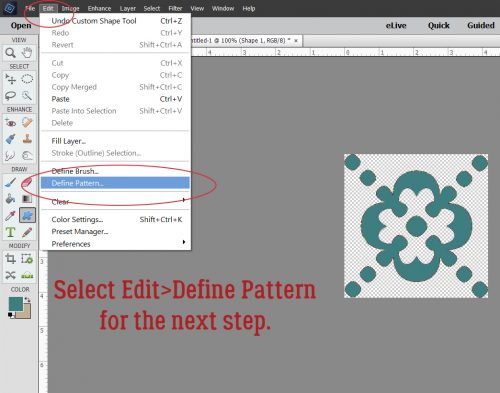
Then I clicked Edit>Define Pattern. This is going to allow me to use this little doodad as a repeating pattern on my paper.
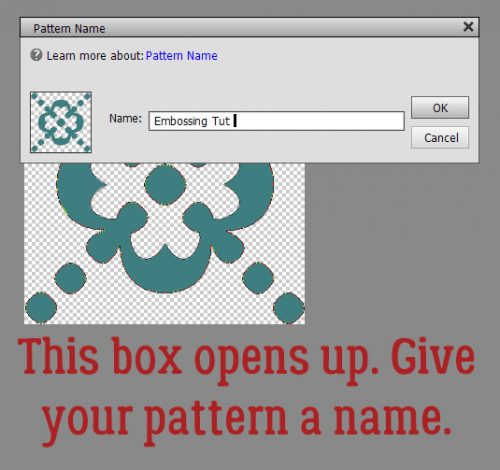
The Pattern Name menu opens up. I gave it a name that meant something to me and would be easy to find later. There’s a clue in there as to where we’re going to end up.
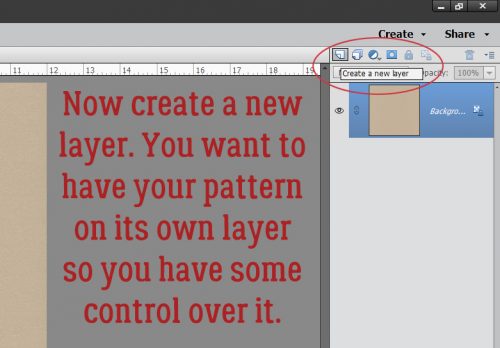
If you’re familiar with my tutorials you’ll know I always tell you to work on a separate layer when using brushes. It goes double for patterns!
You may have noticed that many of the Tools in Photoshop Elements have multiple options. The Paint Bucket has one I’d never used before but now that I know what it does, I’m SOLD! With this versatile tool you can fill an area with colour or……. a pattern!
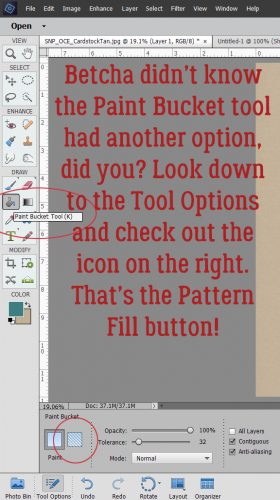
Make very sure you’re working on the new, blank layer. Click on the Pattern Fill button, the one that looks like a square with a bunch of diagonal lines through it.

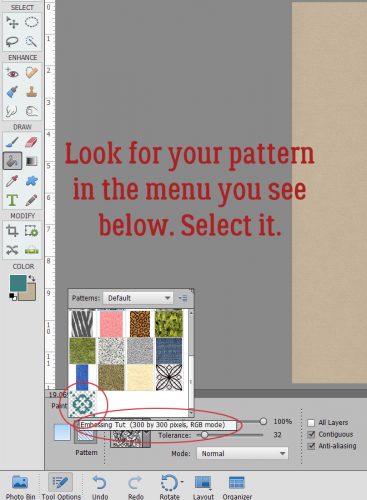
When the Pattern Menu opens up look for your new pattern.
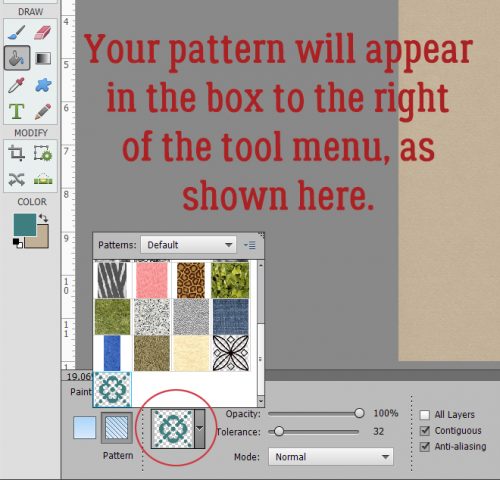
Elements will open up your pattern in the active box as shown.
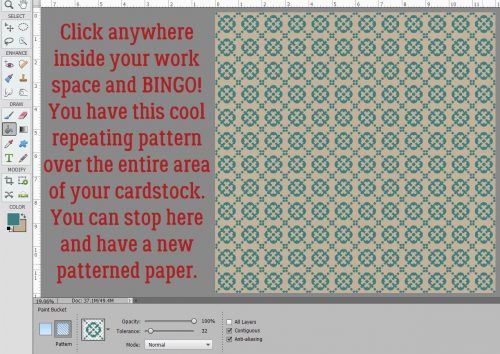
Now just click anywhere within the borders of your canvas. It’s like magic!! I have 144 little repeats of my pattern creating an Argyle effect. I could stop here and have a cute custom patterned paper. I’d love to do something like this with a tone-on-tone, or with either white or black. Then I’d Merge the layers and save it somewhere I’ll be able to find it again.
But you know me… we’re going to keep going. I want to show you how to turn it into embossed cardstock, so turn off the visibility to your cardstock layer and have your pattern layer selected. Then Layer>New Fill Layer>Solid Color.
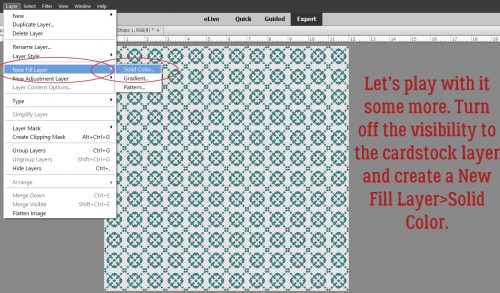
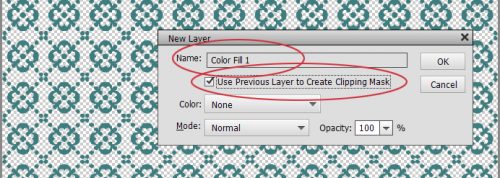
In this menu, click the Use Previous Layer to Create Clipping Mask then click OK.
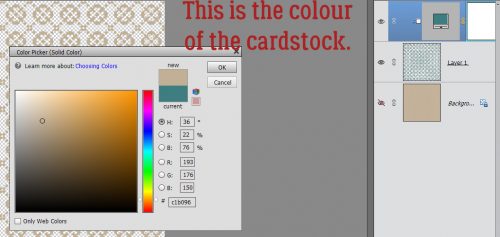
Use the same colour as your cardstock by clicking on it with the Eyedropper.
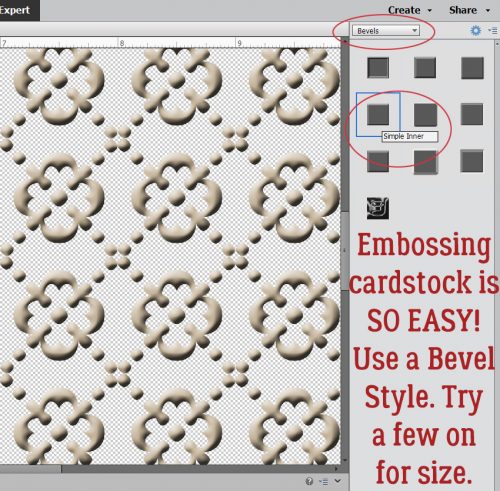
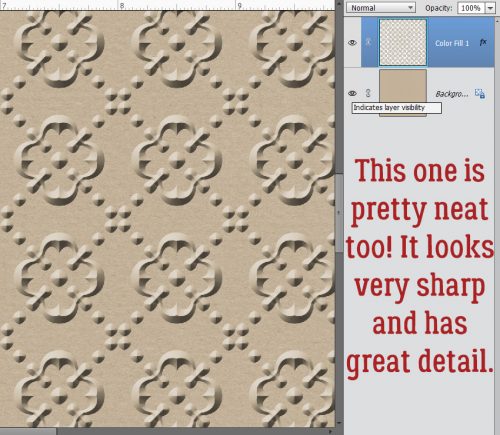
Merge the Color Fill layer with your pattern layer. Then you’re going to hit it with a Bevel Layer Style. Bevels are included with the software and can be found in the Styles menu. Below I’ve used the Simple Inner bevel. It’s a nice, rounded bevel that raises the pattern off the surface beautifully.
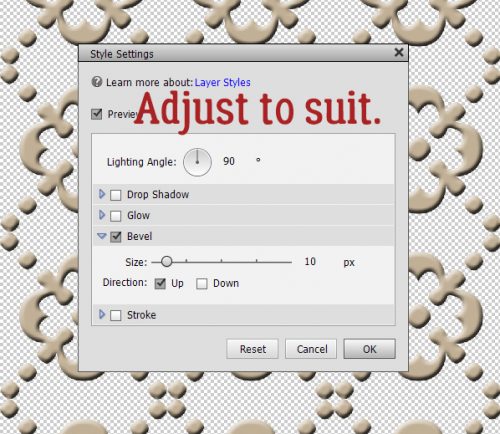
If you feel that the bevel is TOO obvious, you can click on the fx icon on the layer and adjust it to suit. (This is the only Bevel I adjusted while putting together this tutorial.)
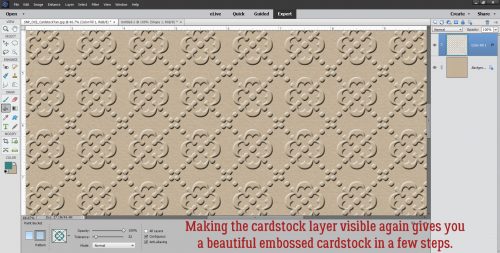
Turn on the cardstock layer and voilà… Merge the layers and now you’ve got a custom embossed cardstock.
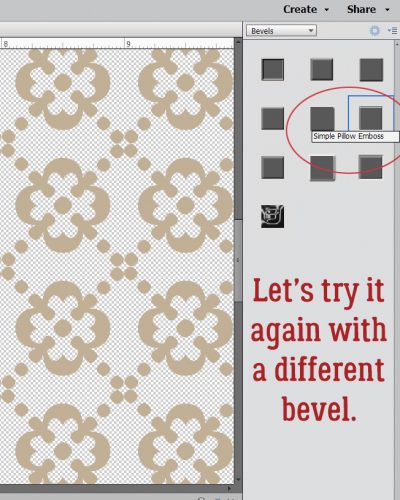
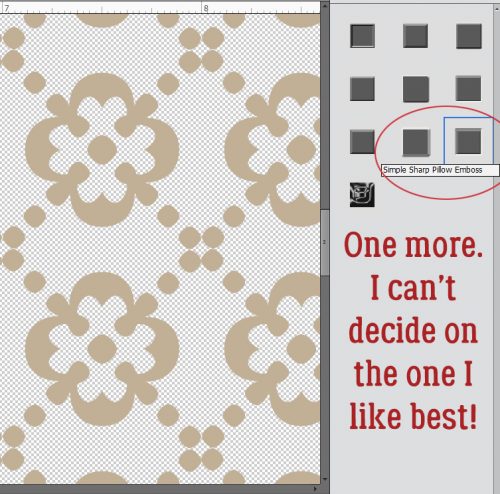
Some of the other Bevel styles work for this technique too. Let’s look at the Simple Pillow Emboss.
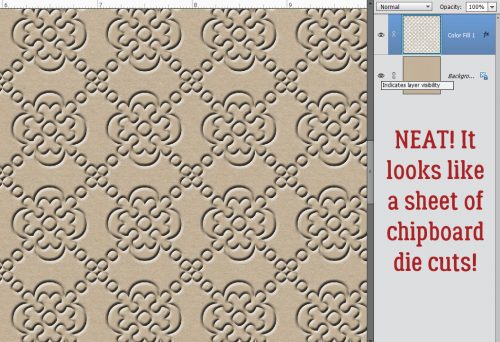
Is this the effect you were expecting? It looks a lot like those sheets of die-cut chipboard!
Simple Sharp Inner looks like this on just the pattern layer.
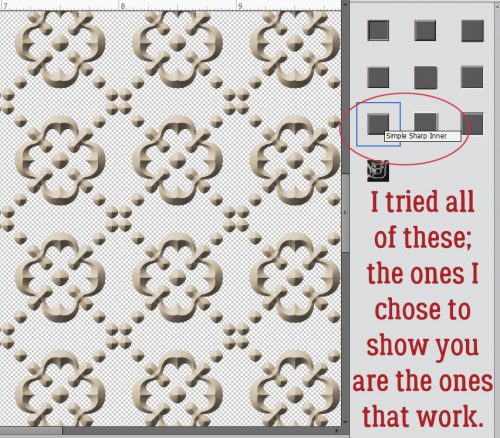
I really like the look of this one.
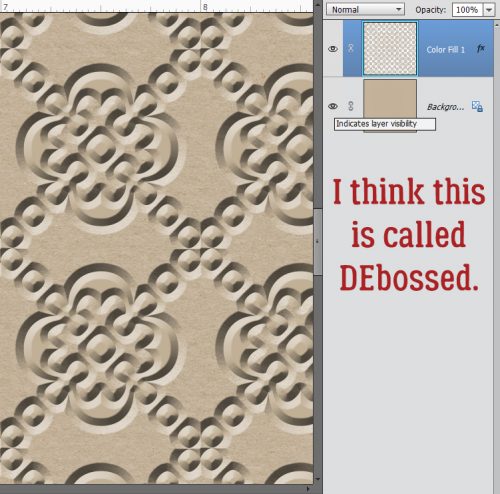
One last one… Simple Sharp Pillow Emboss.
This effect is really interesting. If I went into the fx controls and reversed the direction of the bevel it would raise it off the paper. Might be worth trying!
I can think of a long list of ways these simple techniques can be used to elevate my scrapping. Can you?
![]()


