Giving Credit where Credit is Due
Or: Editing your Gallery images
![]()
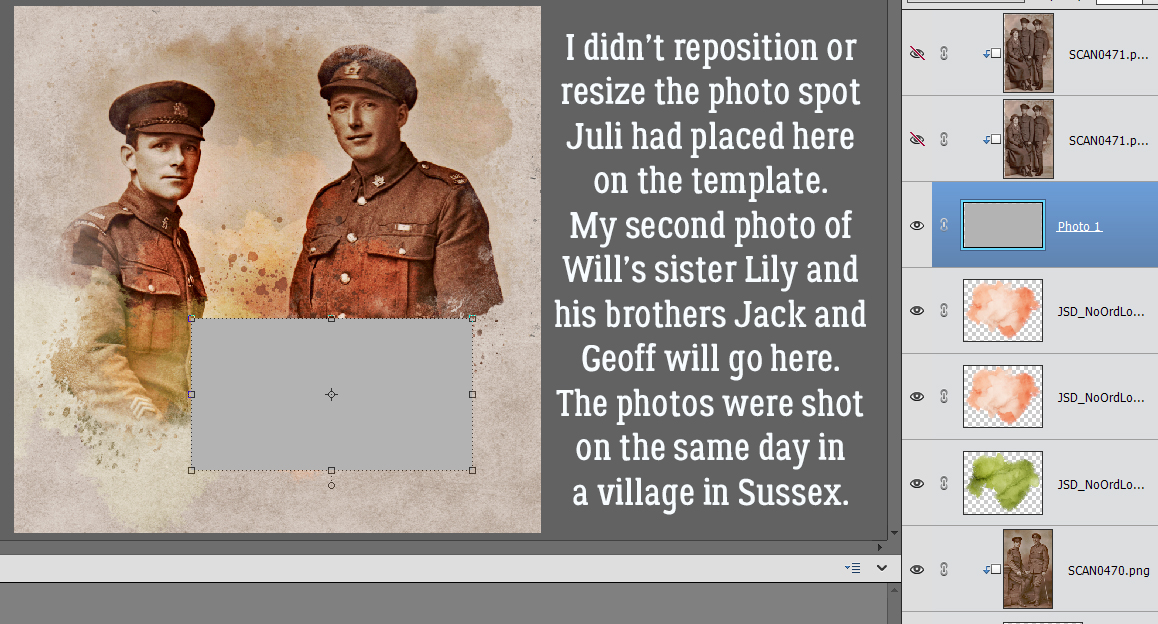
Hi again ladies! Today I want to talk about something a bit more serious than usual. I’m going to do a Featured Challenge post next week, and have been perusing the Gallery to check out the layouts I want to include. I noticed that there are quite a few layouts that don’t include any credits; whether it’s an oversight or intentional, I don’t know. But I do know this. The Terms of Service at pretty much EVERY digiscrapping website that hosts a Gallery, and the Terms of Use included by every designer in every kit include a requirement for providing proper credit to the designer(s) of the content the scrapper uses. I know that when I see a layout that’s exquisitely created, I’m going to look at credits to see which kit(s) the scrapper used so I can go shopping! If we think about it, giving credit to someone whose products inspire us and help us improve our skills should be automatic, as a courtesy if nothing else. And really, who wants to be accused of theft of intellectual property? Those who are new to our hobby may not realize they’re missing a step. And then there’s the well-known GingerScraps Gallery glitch that deletes some of the things we add to the first Upload screen that’s easy to overlook. (I think that might have been fixed, it hasn’t happened to me in a while.) But what can you do if your layout posts to the Gallery without that important information? Let me show you!
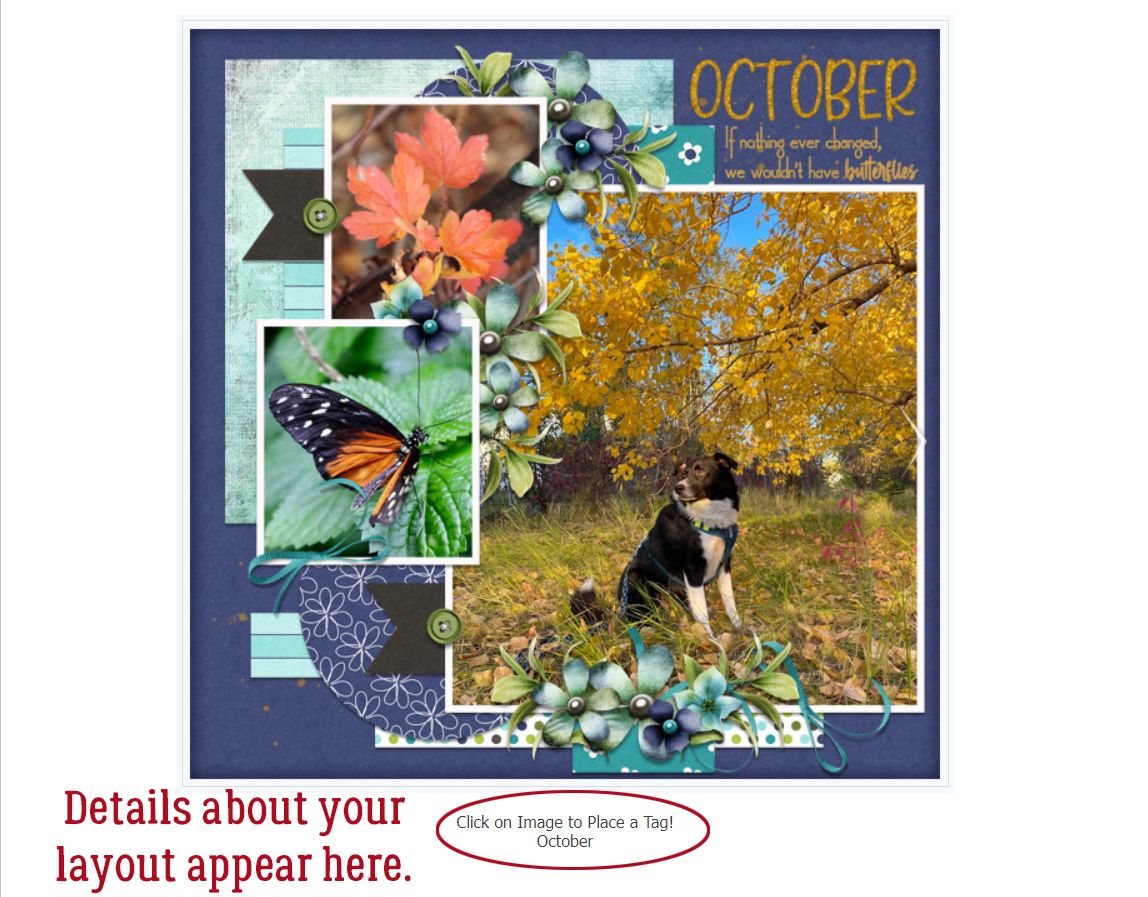
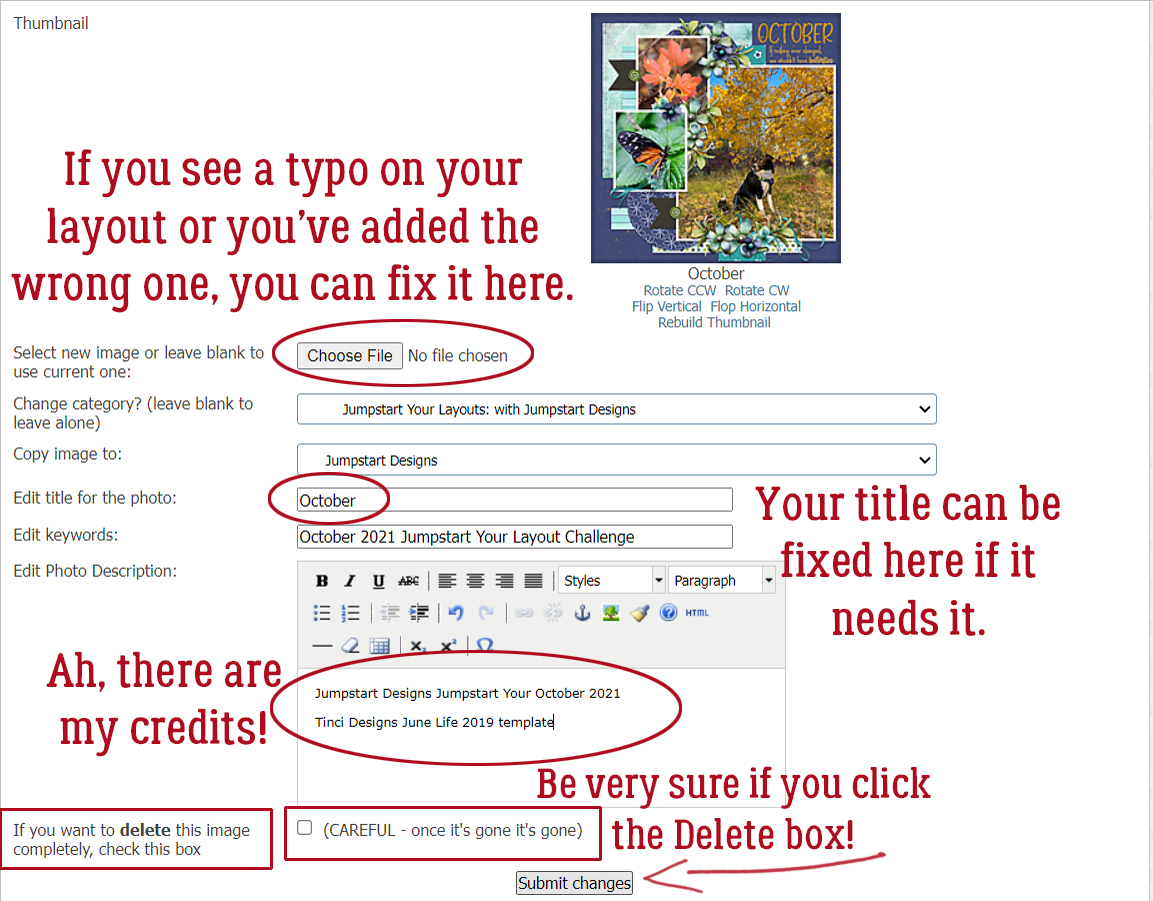
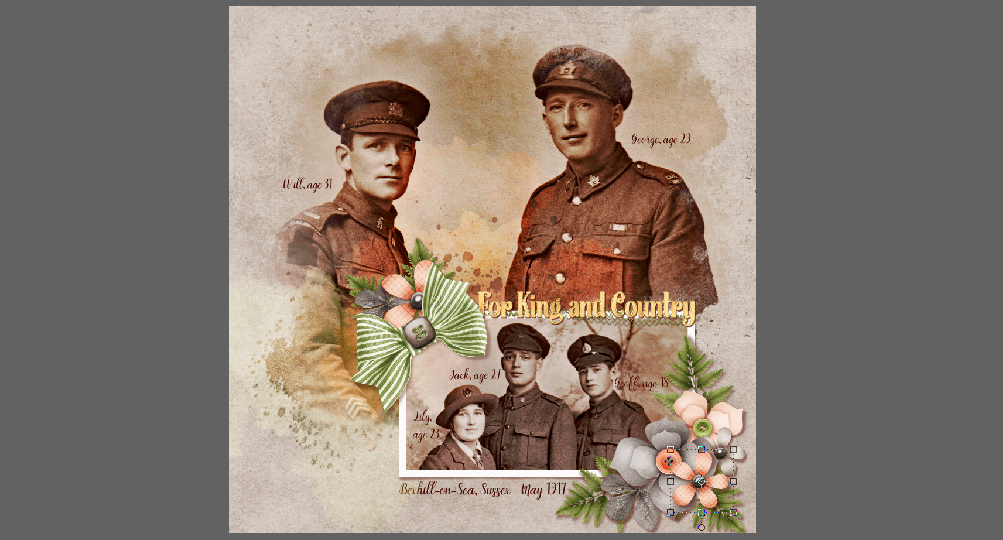
Here’s the layout I created for the Jumpstart Your Layout Challenge this month. At the bottom of the layout inside the red oval, the only detail that appears is the title I gave my layout. OOPS!
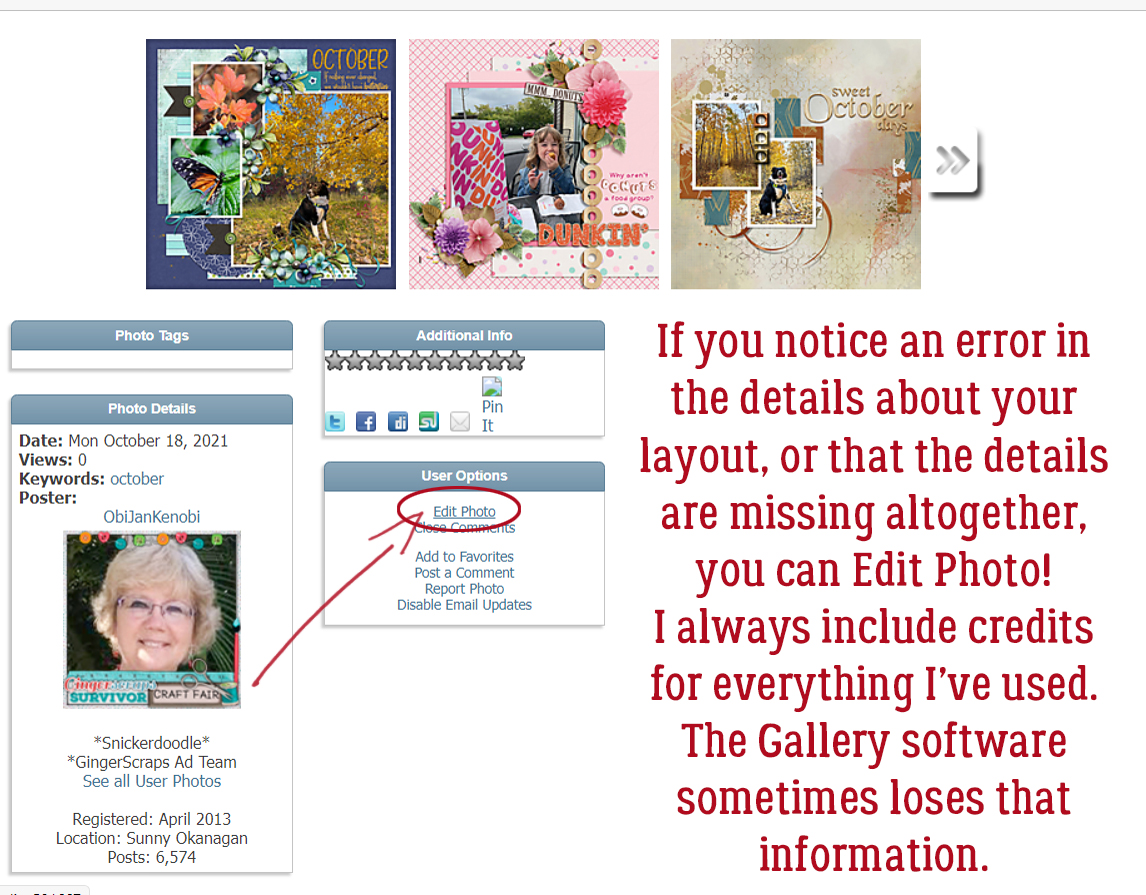
A quick word about titles… if you use a special character like a # or a @ or a ? for example, the Gallery uploader will lose everything you’ve typed AFTER the first of those characters. It’s going to mess up your Member Gallery but if you know ahead of time that will happen you can remember to follow these steps to fix it. Other things that may need to be changed in your layout’s details could be typos, omitted information, or an error on the layout itself that you’ve corrected already but the image you’re seeing is still the one with the mistake. When you click on My Photos and then choose the layout you need to fix, scroll down past the image until you see your avatar on the left, as shown. In that User Options box, click on Edit Photo.
When you upload a Challenge layout, if you want it to count for the Challenge Reward, it must be posted in the current month’s (and year’s!) Challenge Gallery. The website’s uploader default is to place uploaded images in the Member Gallery, which is fine, but not for being rewarded! (It’ll also sometimes default to the last Gallery you chose, or some other random Gallery, so check and see where it’s going!) This first change I’m making is to put my layout in the Jumpstart Your Layouts October 2021 album.
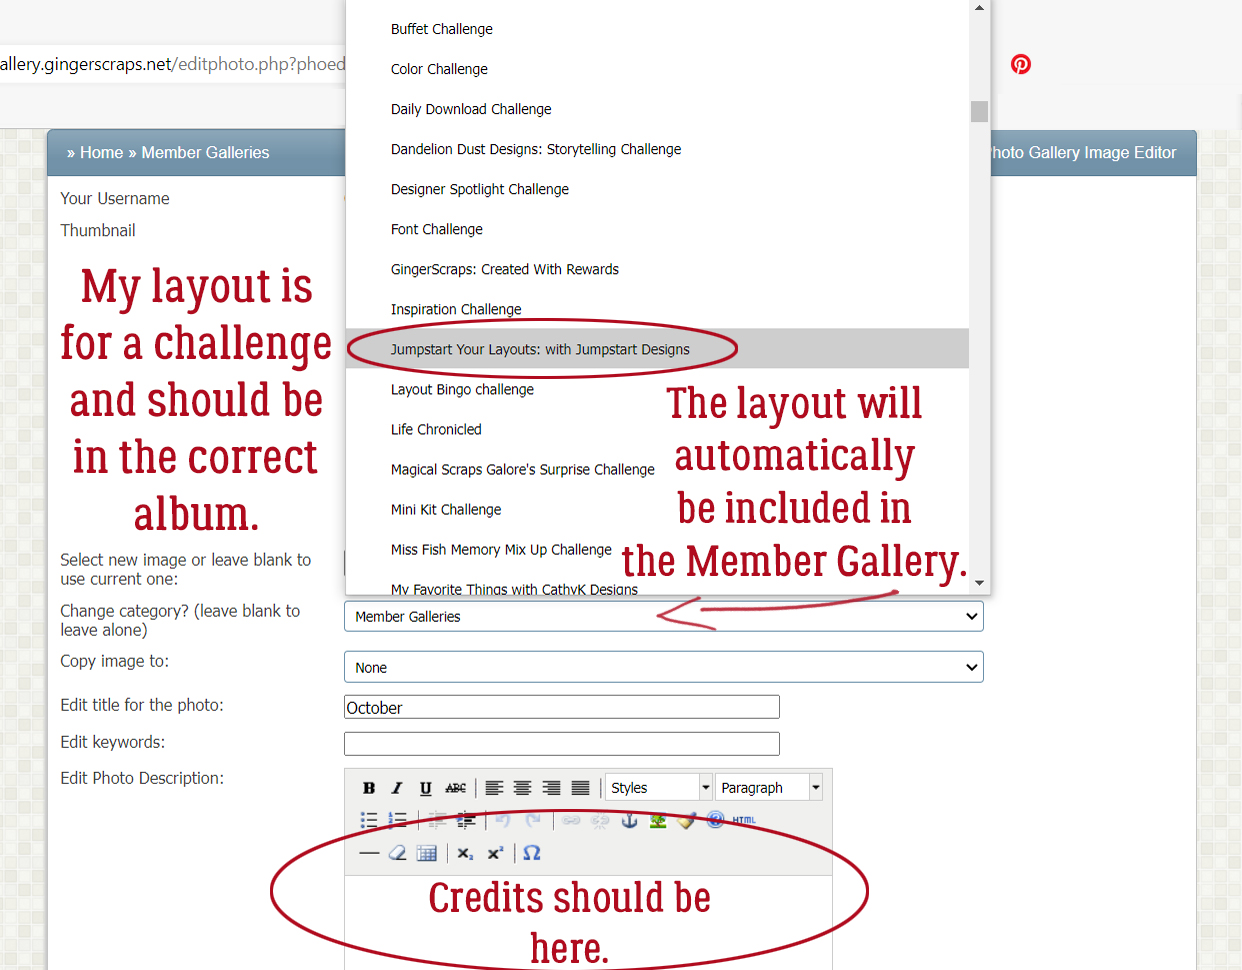
This next (optional) step is especially useful for people who create for designers on their Creative Teams. The layout can be Copied to other Galleries just by making a selection in the second dropdown. There’s also another advantage to using this Edit part of the uploader. If you put your layout into multiple albums when you first upload them, EACH of those copies will count as one of your 8 permitted daily uploads, but if you Copy them with the Edit feature, they only count once! Yeah, it’s an extra step and it’s a bit of a drag, but it’s a lot better than getting told you’ve already used up all your uploads for the day on only 2 or 3 layouts.

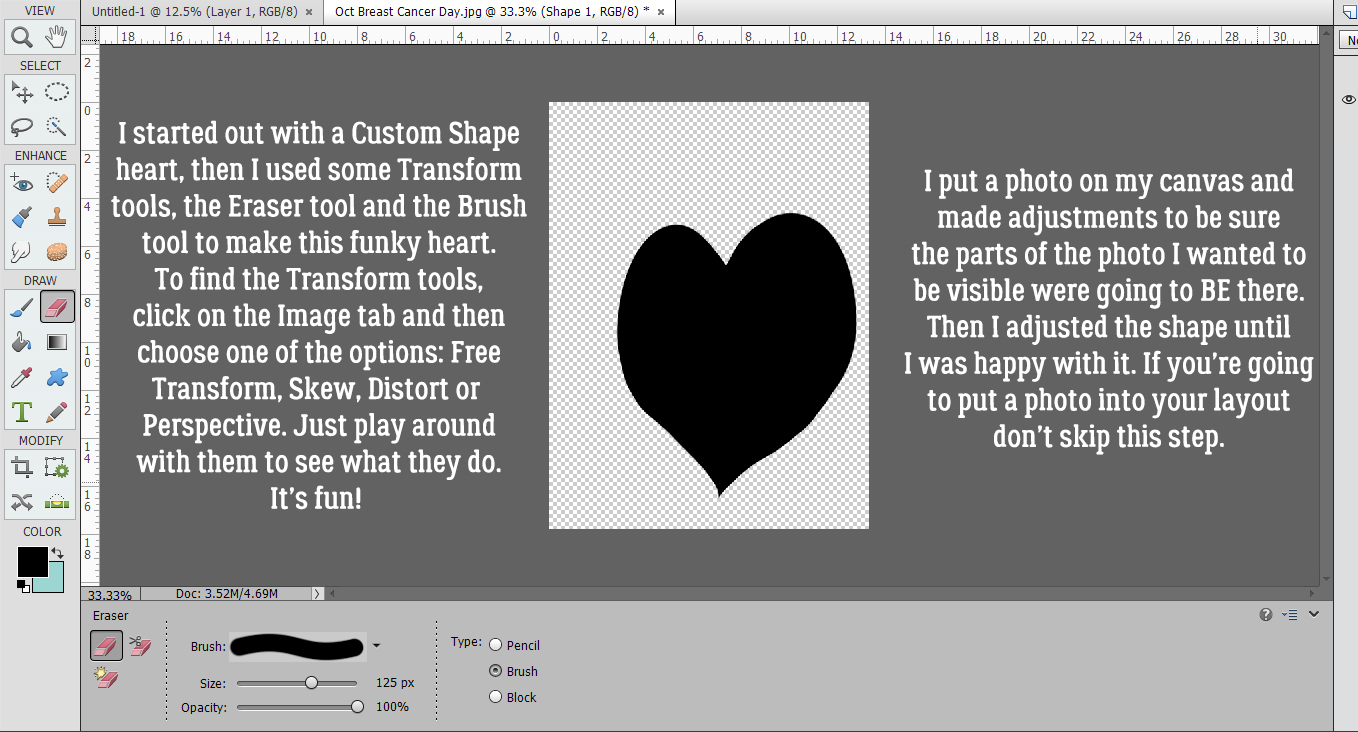
Okay, so let’s pretend you spotted a glaring typo in your title – maybe I spelled my title OTCBREO because I was tired, in a hurry and wanted to get my layout into the Gallery so I could go to bed. I get up this morning to several comments on my layout, all of them politely ignoring OTCBREO, but I’m still upset with myself that I didn’t notice it. So I open up my saved PSD version of my layout, fix my title, save it with a slightly different file name (more about that in a second) and now I want to post the corrected version instead of the trashed one. I can click on the Choose File button and select the corrected version to replace the other one. [If I didn’t Save my corrected layout with a slightly different file name, the uploader won’t know the image has been changed, and it’ll use the original one. So if you end up having to do this kind of big correction, add a number to the end of your file name and the uploader won’t be confused.] I can also fix the title if I notice it’s missing some special characters, or if in my addled, sleep-deprived state, I used the mis-spelled title here too. I also have the ability to add my credits here too, in the Photo Description section. Last, if I’ve changed my mind and don’t want to share my layout with the world after all, I can Delete it. It and everything I’ve typed about it will disappear forever. There’s no way to UNDO this step, so be really sure you can’t Edit it before you take this drastic step. When all the needed adjustments have been made, Submit changes.
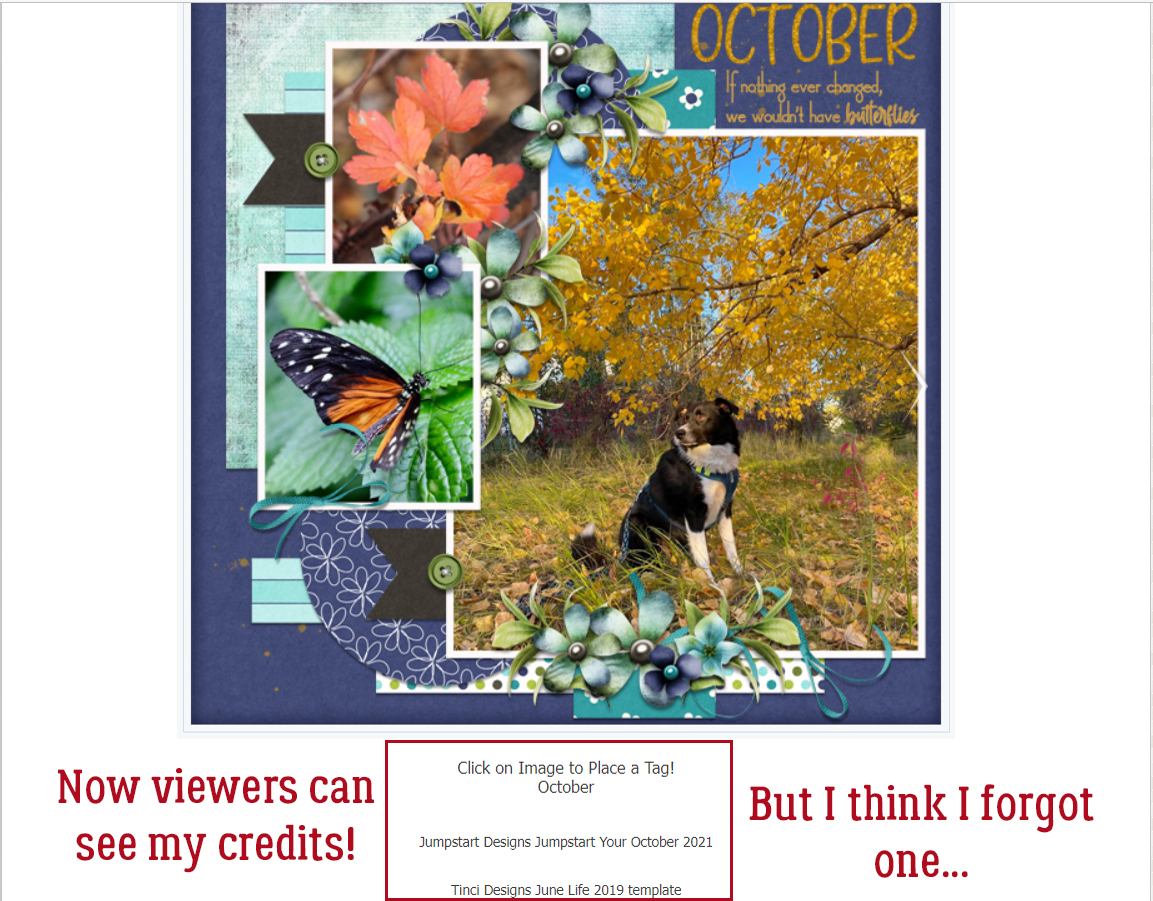
Now everybody can see which kit and template I’ve used for my layout. The only time it’s not necessary to include credits is if you’re using Commercial Use products. Oh darn… I just realized I forgot one very important credit! Back to the Edit screen…
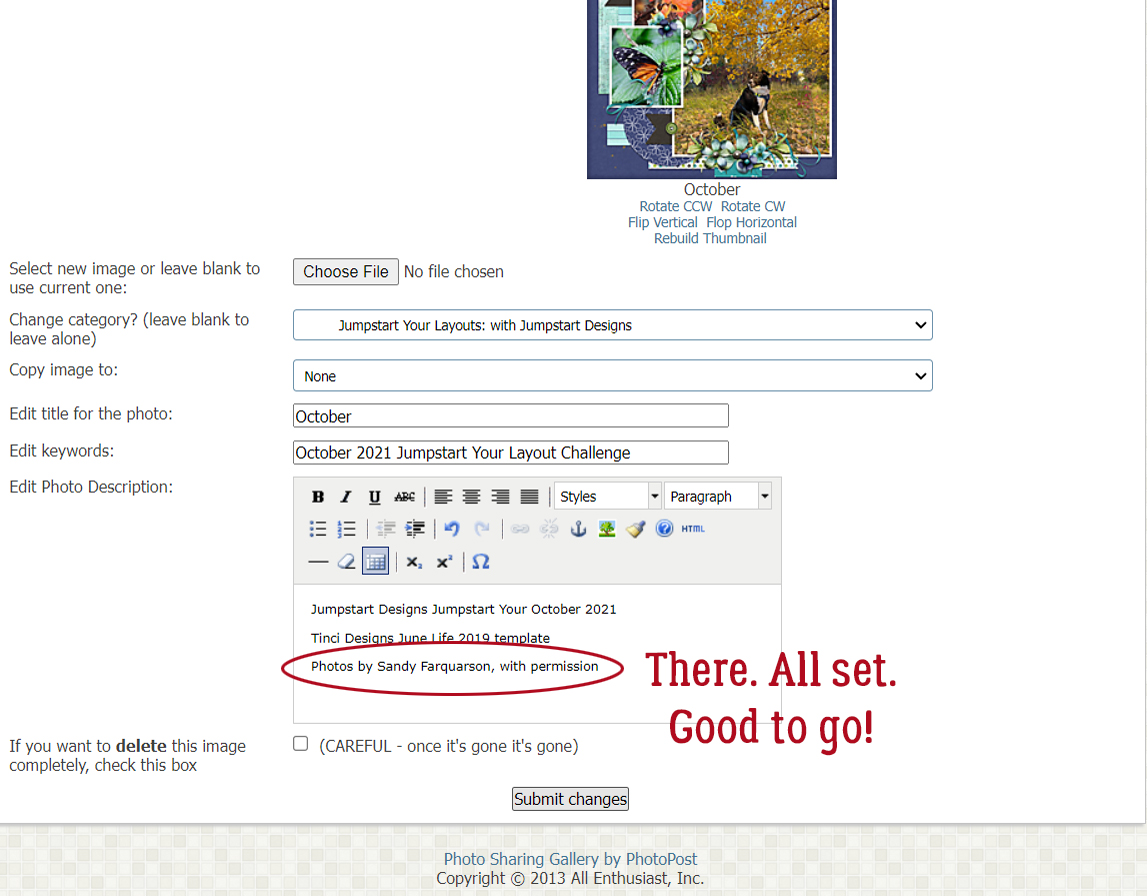
I neglected to give credit to my dear friend Sandy, the photographer who rescued Beau so that Beau could rescue her. She has graciously given me permission to use her photos for scrapping and deserves to be recognized for her talents too!
Now, which of this month’s Challenges should I Feature next week?
PDF Version : https://bit.ly/3xD8rqw
![]()


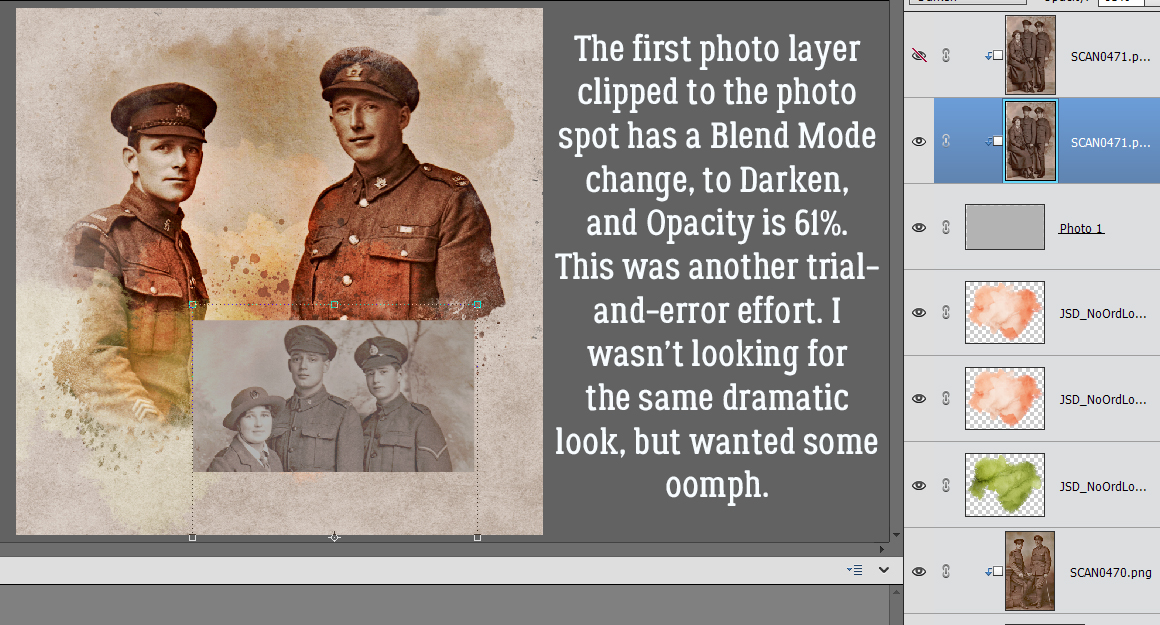
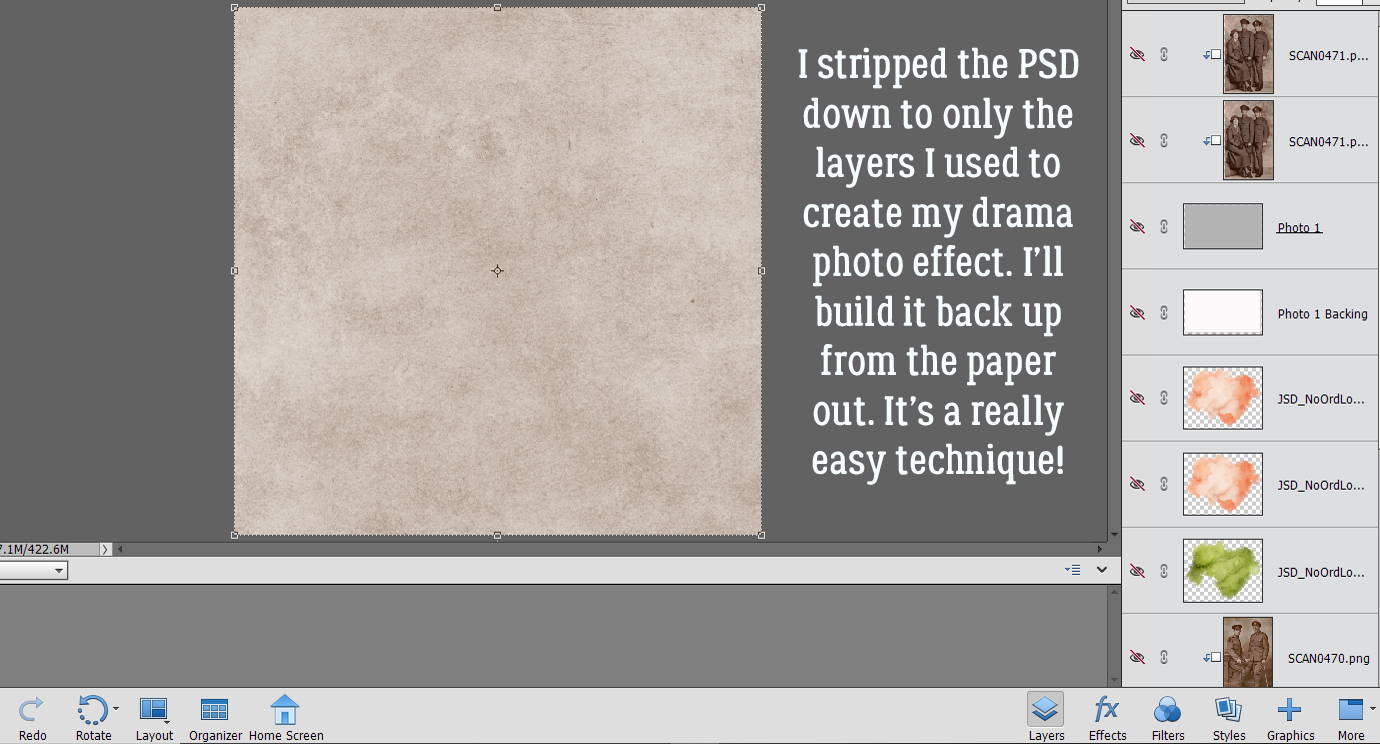 In the Gallery comments, Jill pondered whether I’d done any (labour-intensive) extractions or other witchery to obtain my results, but I didn’t. I used the mask exactly how
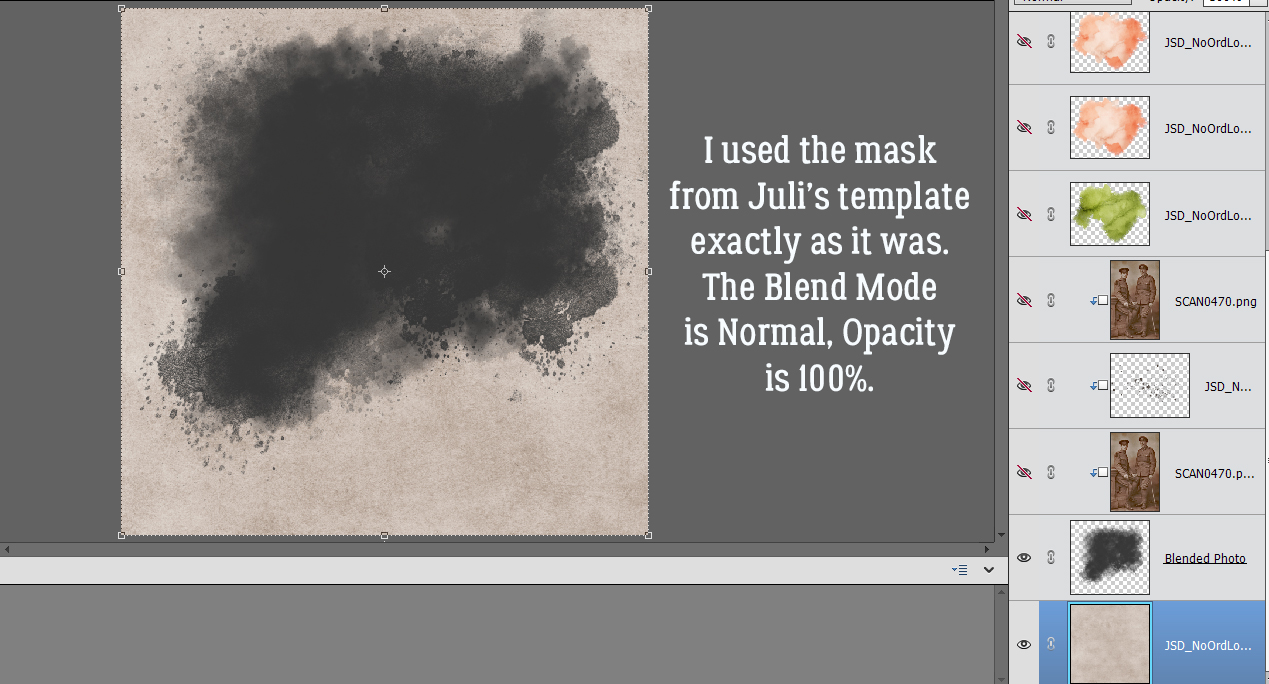

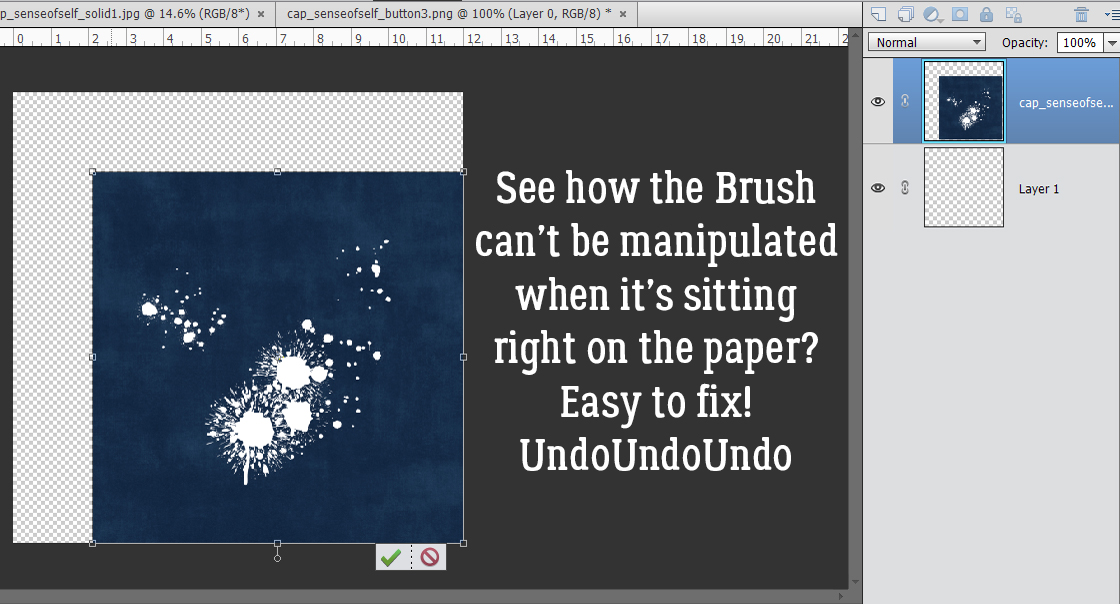
 Another example: this month’s