Happy Thursday!!! It’s already too hot in Florida for Spring. I was hoping to get a couple weeks of great temps before the heat came but nope, its in the 80’s. At least I got a few layouts done with this week’s new releases! They are awesome! Let’s take a peek!
From Dagi


From Clever Monkey Graphics


From Tinci


From Down This Road Designs


From Lindsay Jane


From JB Studio


From Aimee Harrison


From LDrag Designs


From Miss Fish

Have a great rest of the week!


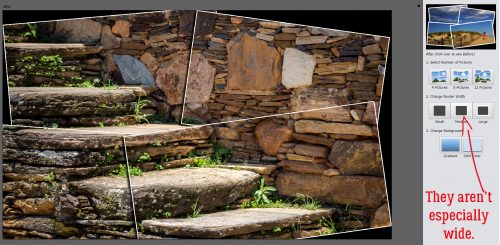
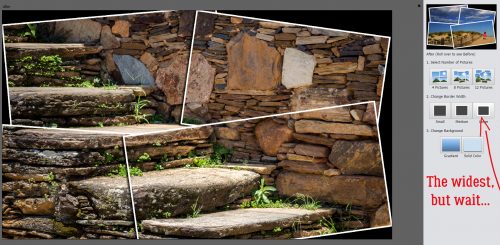


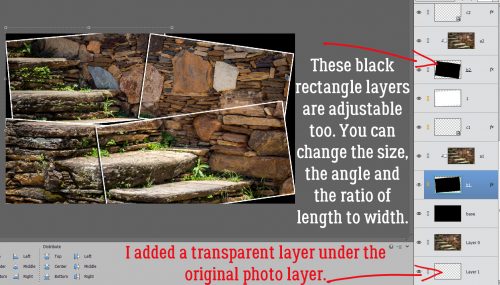

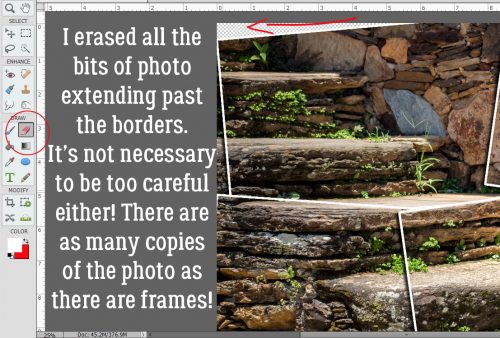


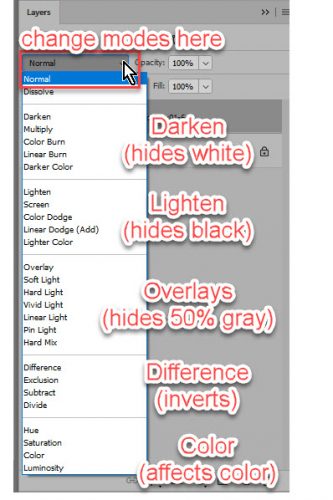
 Time Saving Tip: