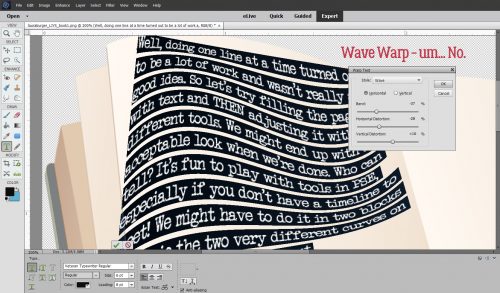
Everything New is Old Again
![]()
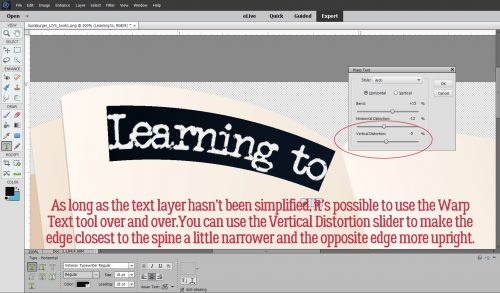
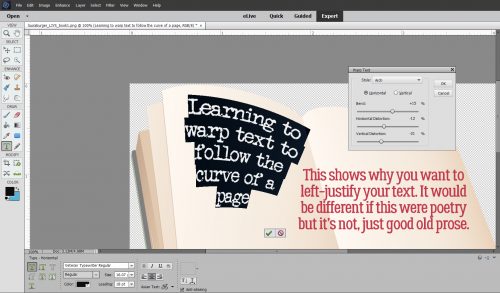
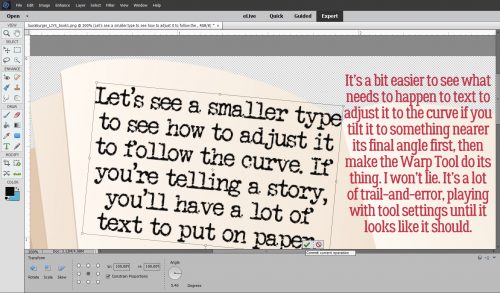
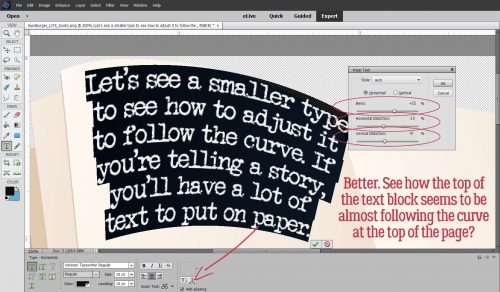
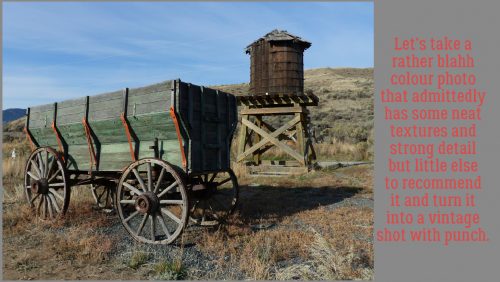
No, you didn’t read that wrong. Today’s technique is going to turn a sort of ho-hum colour photo into something that looks like a vintage one. It will work with any colour photo at all, but it looks best when there’s lots of detail and texture.
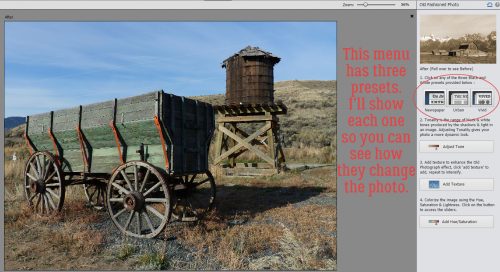
To begin, I opened my photo in Elements then selected Guided Edit. When the menu shown below opened up, I selected Fun Edits>Old Fashioned Photo. These Guided Edits transform photos with only a couple of clicks and a little tweaking.
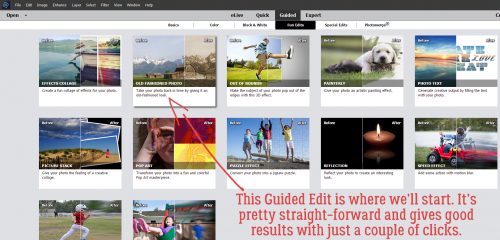
There are three presets in this menu as shown below.
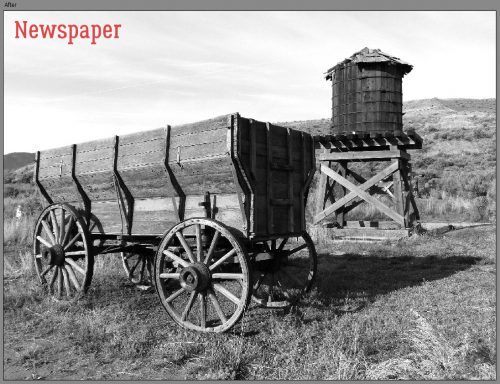
The first preset is called Newspaper. And it looks a lot like those black-and-white photos found in any newspaper. There’s a good amount of contrast and sharp details.
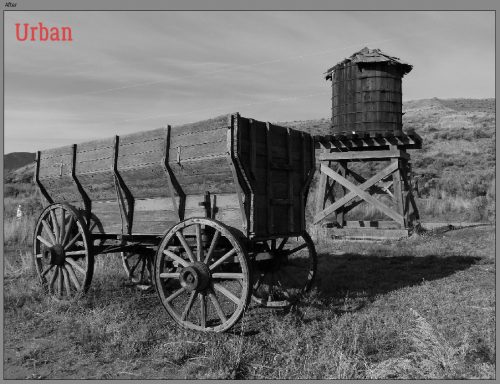
The second preset is Urban. It’s a little softer but grungier.
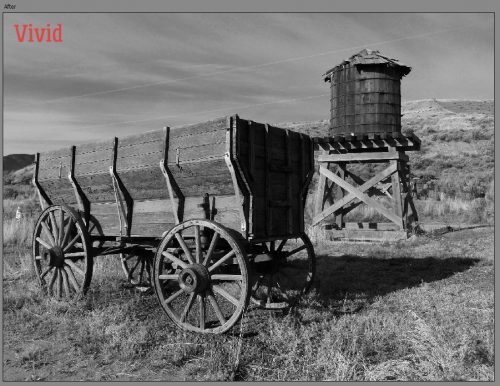
The last one is Vivid; it looks like a happy medium between the first two. It’s the one that adds the most oomph to the sky.
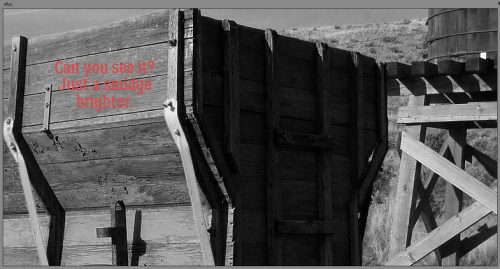
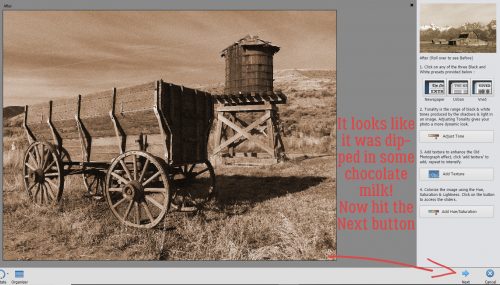
I liked the look of Vivid for this photo. The next step is Adjust Tone. The effect it has on the photo is pretty subtle, and you might not really see it.
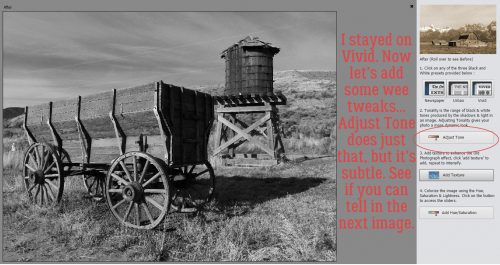
It’s just a little bit brighter, and perhaps the details are a tad bit sharper. Clicking on this tool multiple times doesn’t add any further effect.
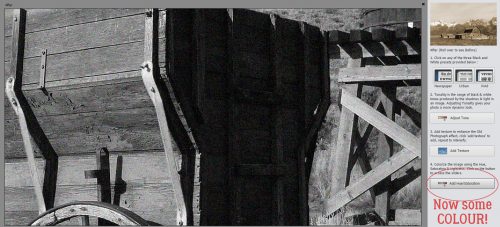
Let’s add some texture. Unlike the previous step, multiple clicks will increase the amount of “texture” which actually is more properly called noise.

It’s looking really interesting, but we still need to add some colour.
Shown below are the default settings for the colour adjustment.
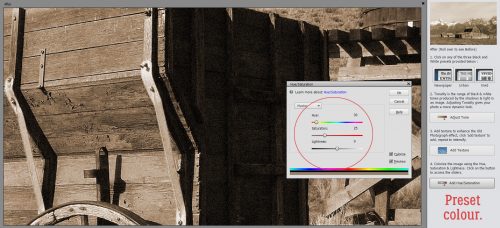
I made some very slight changes to the settings, warming up the colour just a hint, adding a tiny bit more saturation and lightening it up a barely-there amount.
I like how dramatic the sky looks with this Edit. Then I clicked the Next button.
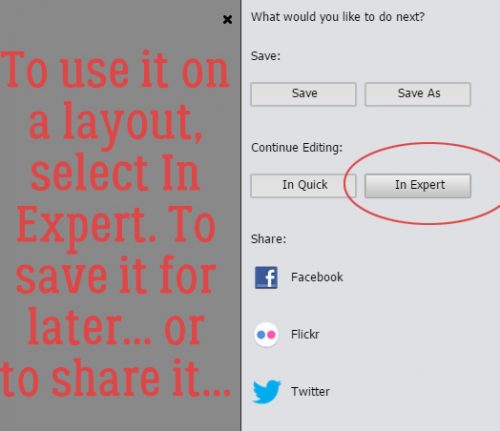
Here’s where you decide what you’re going to do with your photo. If you plan to use it right away for a layout, or if you want to make more adjustments to it, obviously you’ll click In Expert.
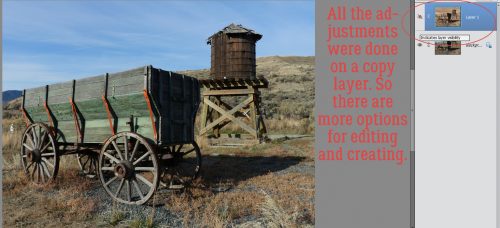
When the Expert workspace opens, you’ll see right away that all the changes you’ve made have been done on a copy of your photo.
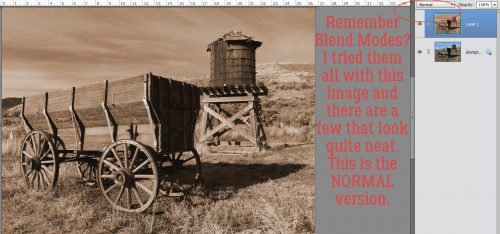
Let’s play a little more. Remember Blend Modes? I tried them all on this photo. Some looked really interesting, some where downright HORRIBLE. The ones I’ll show you are the ones that didn’t make my eyes hurt.
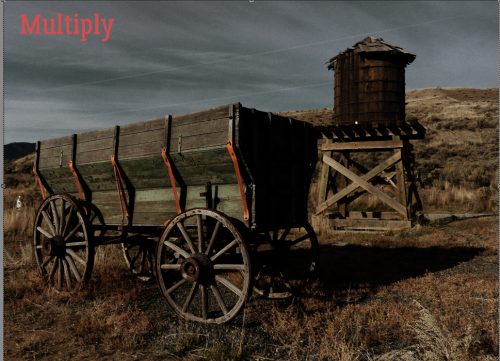
Multiply made the colour come back and the overall look is very moody.
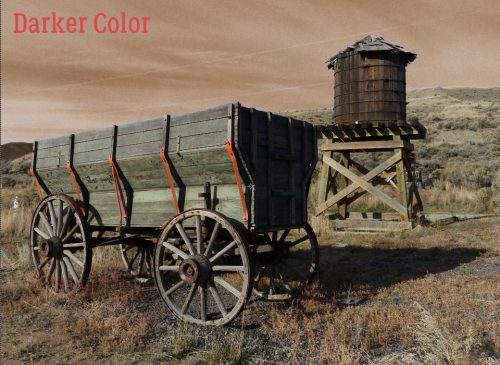
Darker Color also let the colour come through again, but kept the sky that weirdly unnatural brown.
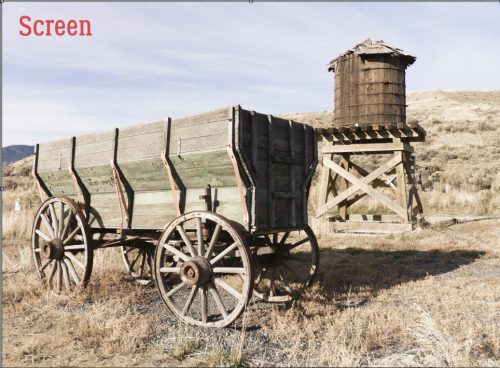
This one is muted and soft.
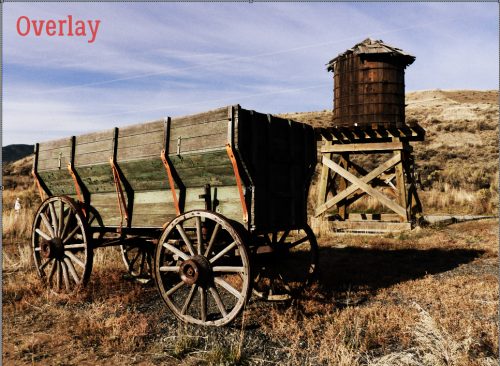
Usually Overlay lightens and softens too, but not on this technique.
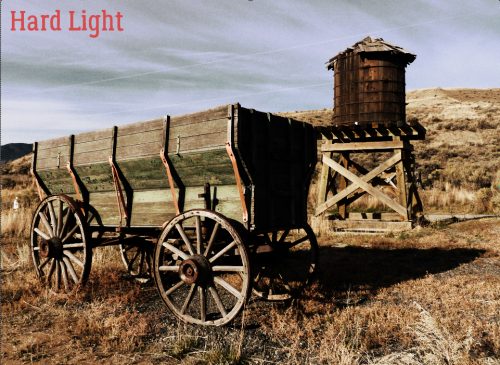
I think this mode is well-named. It’s HARD!
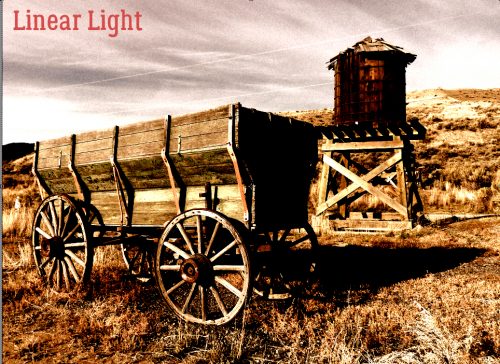
Linear Light makes me think of movie posters from the 50s and 60s.
This was one of the odder ones.
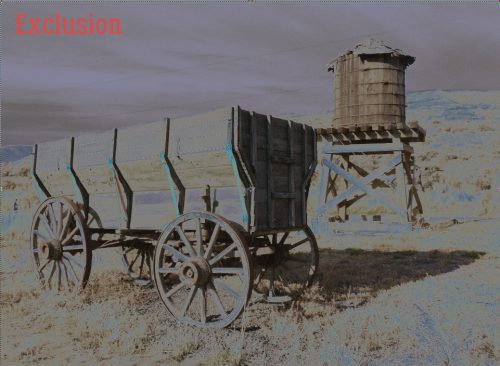
A Clockwork Orange, anyone?
I think this one is rather odd, too. Misnamed, for sure!
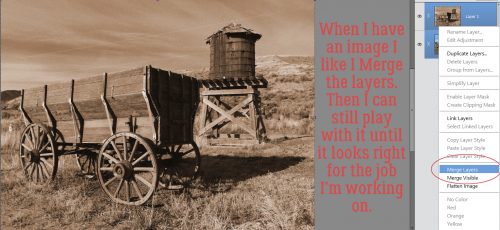
See anything you’d like to incorporate into a layout? At this point, I chose to Merge the two layers together. I could now save it as a new version of the original.
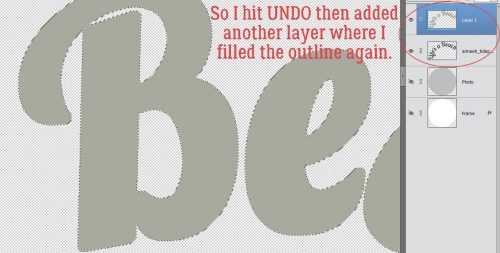
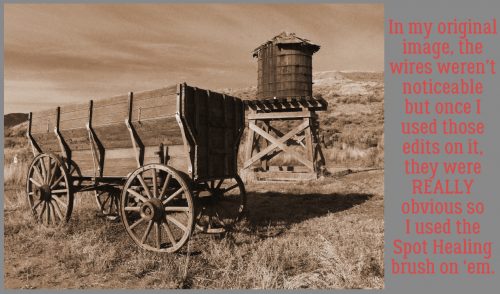
As I was running through this edit, I found the power lines were really jarring. In the original they were virtually unnoticeable, but in some modes they jumped off the screen. The water tower and wagon are so vintage, but the wires looked out-of-place. So I used the Spot Healing brush to remove them.
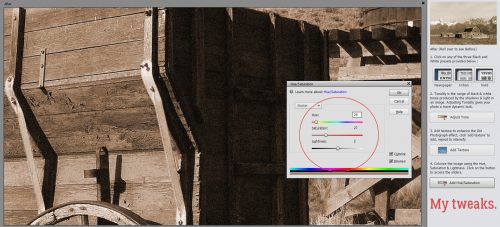
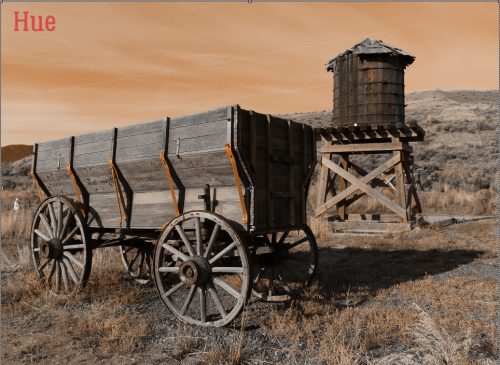
I played a bit with the Hue/Saturation a bit too. Quick keys for that adjustment are CTRL/CMD>U.
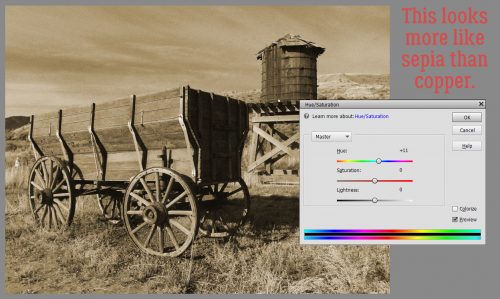
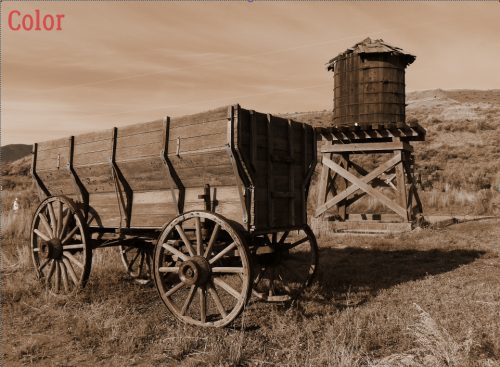
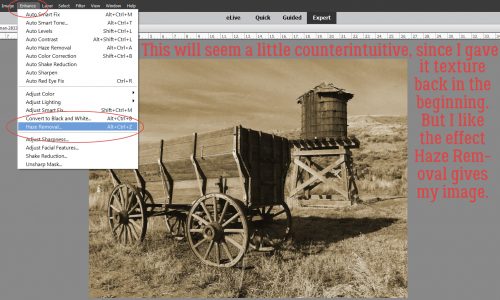
I liked it slightly more sepia than copper. This step will seem really bizarre, since I made a point of adding texture to the photo way back at the start. But when I hit it with Haze Removal, I LOVED how it looked.
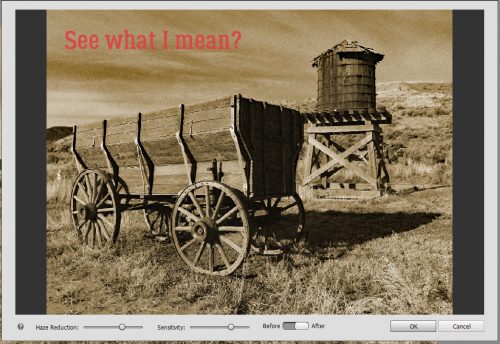
See the difference? I think it looks like a real, vintage photo from 100 or more years ago.
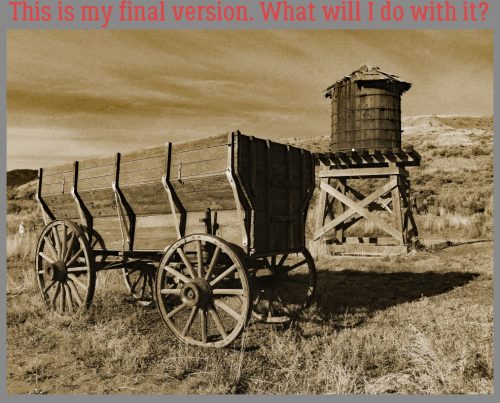
This is where I stopped. I have no idea what I plan to do with it, but I know I’ll be using this edit again!
Don’t be afraid to play with the features Elements has to offer. All you’ll give up is a little bit of time, and you might find something that defines your style perfectly!
![]()