Tutorial Tuesday (Potpourri)

Buckle Up for [inter]National Scrapbook Day

According to the Master Index, this is my 300th Tutorial Tuesday post! And it’s also the lead-up to [inter]National Scrapbooking Day, which is formally set for Saturday, May 6th. I thought it could be a good time to revisit and update the Tutorial I wrote 5 years ago on how to survive the next week with your sanity intact.

I’ve been seeing a LOT of sneak peeks, ads and excited chatter, and I know there will be an overwhelming number of opportunities to get your scrap on, starting at different times over the coming week.


Here at GingerScraps, the people behind the scenes have been very busy organizing a celebration jam-packed with sales, games and a ton of fun. I haven’t seen any insider info on what’s planned for this year, but in the past, we’ve had a store-wide 50% off sale and a gigantic free-with-$20-purchase collab. The scavenger hunt is not only fun, it might show you designers you’re not familiar with and may soon become new favourites. Our designers usually create a fine selection of $5 grab bags – they’re always a great deal. And then there are the chats, speed scraps and games in the Forum. You don’t want to miss them!! And that’s just this one (albeit fantastic!) store!!

Back in 2010 when I was a digiscrapping newbie, iNSD and DSD (Digital Scrapbooking Day, which used to be in November but has been moved ahead to October because with Thanksgiving in the US, November was already too frenetic) were so exciting, but I found that I was a bit scattered in my approach. I ended up confused and bewildered, I overspent, and I wound up with a bunch of freebies I never use. So here are my tips for making iNSD work for YOU instead of the other way around.

A] Don’t dive in head-first! Take some time to look at the stores you frequent to see what their special events look like. Make a list of things that interest you, including dates and times for things like chats or speed scraps. That way you can see conflicts easily and make a decision about which will be more fun for you. Also include deadlines for any contests you may want to enter. Planning right at the beginning will really help.

B] Once your list is compiled and double-checked, create some kind of reminder for things that have a specific time associated with them. This can be as simple as a couple of Post-It notes stuck to the edges of your monitor, or as techie as reminders on your phone, complete with beeps or bells to prod you into action. I don’t know about you, but I’m becoming more forgetful all the time and without the pings on my phone, I’d miss a lot of things! Now I’ve even set certain notifications on my smart watch that are pretty hard to ignore. 😉

C] Set a budget and stick to it. Figure out BEFORE you look at the sales how much you can afford to spend and make sure you don’t go over. Because iNSD is the same week as my birthday, I tend to be a little generous to myself, but I won’t spend more than $20 at any one store, and no more than about $50 for the entire event. Inflation (and lousy exchange rates) notwithstanding. I may have to increase my limits to $25 and $75.

D] There are going to be lots of blog-hops with free collections from various sources out there. Don’t fall into the “but it’s FREE!” trap. Even free is too much if it’s something you don’t love and won’t use. Think of the storage space you’ll waste if you go hog-wild with the freebies. Look at each and every freebie with a discerning eye and only download the ones you know will work for you. Take a look at how much room you have for new files and perhaps move some less-favoured (and therefore less-used) stuff onto a memory stick or external hard drive. Personal note: When I replaced my laptop last year I opted for one with a smaller hard drive, partly to force me to do some decluttering. And while it worked, I’m such a collector… I soon was getting warnings about the lack of capacity. So I bought a SanDisk 512 GB USB drive that is so small and handy, it can stay plugged in all the time. I moved a bunch of files to it, can access them instantly and the nagging stopped. It was a bargain at $60. Might have to buy another!

E] Speaking of blog-hops, if you find one that’s especially fabulous and you HAVE to have it, you might find yourself signing up for newsletters or Facebook pages for designers you may never want to have on your Rolodex (or filling up your inbox). So make a list of ALL the places where you’ve signed up/subscribed/liked/followed so that you can later return and un-do them again. Don’t worry about offending the designer; they’re too busy right now to notice!

F] You might want to give some thought to pre-planning for any speed scraps you might join. Create a folder of possible photos to use. Have some in there that are in landscape format as well as some in portrait format, and some that can be made square or circular without losing anything important. Also have some that will work for multi-photo layouts, just in case. This will save you a lot of time when the speed scrap starts. Make sure you’re unlikely to be disturbed for the 2 hours a speed scrap usually lasts. And have a beverage and a snack ready before you begin.

G] Don’t try to conquer the GS scavenger hunt in a single sitting!! Your eyes will thank you. But by all means, DO play along. This is the exception to my rule about freebies, since the prize is usually a fabulous GingerBread Ladies collab. Who couldn’t use one of those?

H] And finally, review the tutorial I’ve provided on using a multi-file extractor. Don’t wait to unzip and organize all those amazing kits you’ve gathered, do it while you’re on a roll! You won’t regret taking the time now, but if you leave it, you might never actually look at any of the super-duper kits you just bought. And that would be a terrible shame!!

I’ll see you all again once we emerge from our iNSD-induced fugues with a new tutorial! I’ll be back tomorrow with the Designer Spotlight. Always busy!

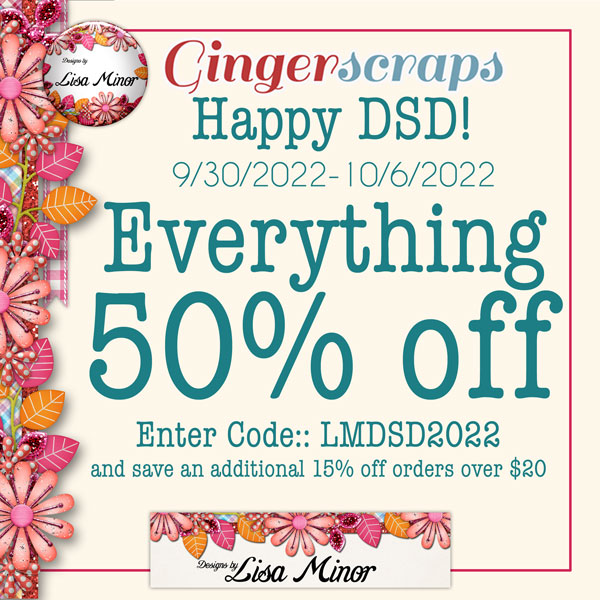
September 30, 2022. Fresh Baked and DSD!

Hold onto your computer mice my friends, we’re going to have some fun. Happy Digital Scrapbooking Day (week)! A week because we can’t just celebrate something like this on one day (or weekend). 

There are a lot of new items from the designers in this post, but please make sure to check out the store for even more goodies.

One of the great things about a celebration at GingerScraps is the Free with Purchase Mega. Spend $20 in the store and get this fabulous kit. I’m ready to {relax & rejuvenate}.

This great kits is a free with any purchase over $10 today. 

This is just a sampling of the new and fun kits, grab bags, and sales in the store. 

You still have time to get your September challenges in. Complete 10 challenges and get this kit as a reward.


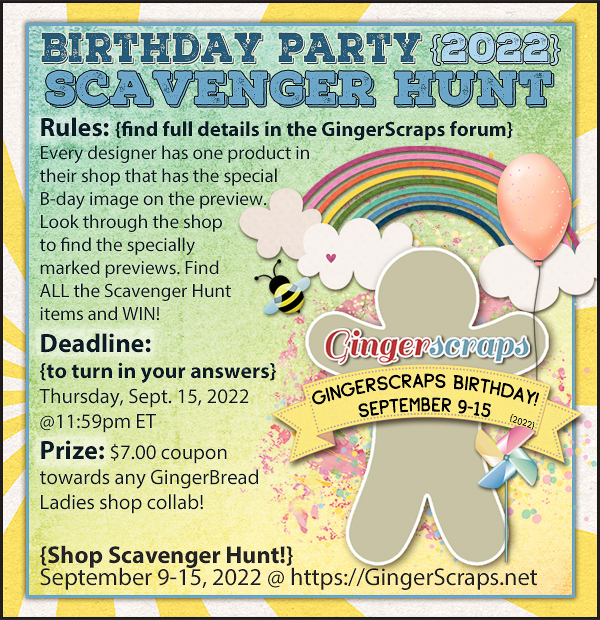
September 9, 2022: IT’S BIRTHDAY PARTY TIME!

There is SO much going on this week. I guess I should start off with the biggest thing, right?

HAPPY 14TH BIRTHDAY GINGERSCRAPS!! 

And you know Ginger when it comes to celebrations. She doesn’t do them small. So we’re having a HUGE party!!

Have you participated in one of the Scavenger hunts? They are so much fun and I always find kits I “need” while I’m looking for that crazy Gingerbread Man (he’s a little sneaky).

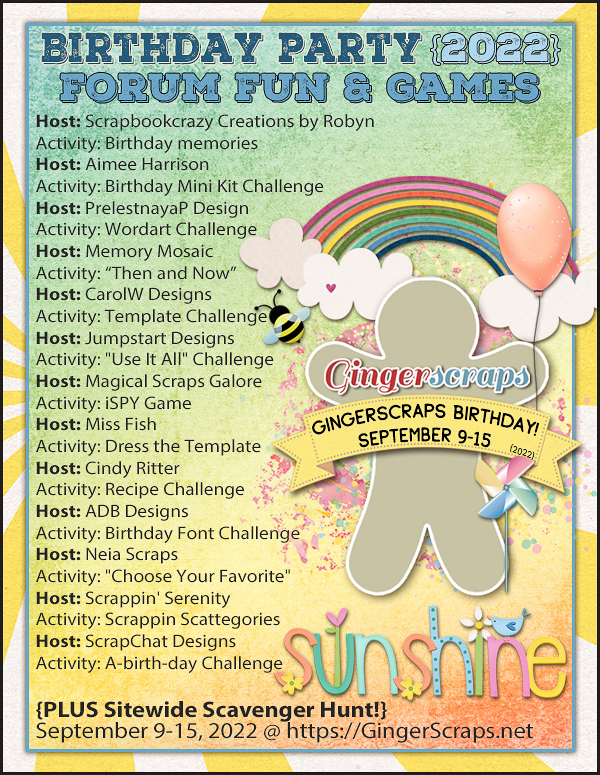
And our designers have some fun games going on in the Forum as well!

Don’t forget this great Free With Purchase kit you get with any $10 spent in the store!

On top of all that fun, we have some great kits and other special sales and new releases!

How are you doing on the challenges? Complete any 10 challenges and get this great collab as a reward!


Tutorial Tuesday (Potpourri)

Holiday Memories Start with Photos – a Review

It seems like we’ve all been through so much the last couple of years. Last Thanksgiving in the United States, with the COVID-19 pandemic raging, a lot of families opted to cancel their usual big gatherings to protect each other from the virus. Others went ahead with their traditions, then wished they hadn’t. Then there were the lucky ones with the best of both worlds. Quite a few things have changed for this year, access to a safe, effective vaccine being a big one. So maybe this year, traditions can be upheld without as much angst, although modifications might still be needed. Our layouts have gradually shifted to more hopeful thoughts, and the pandemic has been interwoven as a part of life as we know it. This run-up to Christmas and then the New Year may take a bit more planning than before, and planning how we’re going to memorialize our celebrations should be a priority too. We’ve played with a lot of techniques for editing our photos to make them worthy of scrapping, but why not skip a step (or ten)? Let’s review some tips for taking better photos. I know we’ve already talked about that before, but a few reminders probably won’t go amiss. Whether your photos are caught with a point-and-shoot, a high-end DSLR or a cell phone, there are some things you can do to get great photos.

  • Right now, right this minute, make sure your camera battery is fully charged. If they’re replaceable batteries, put fresh ones in your camera NOW!
  • Make sure you have an empty memory card (fully formatted, of course!) in your camera and a couple of spares so you won’t run out of space. If you’re using your phone, you should move some photos from your internal storage to your computer so you’ll have room for the new ones.
  • Think about how your typical holiday events usually evolve. There will be some traditions that are carried out no matter whose house you’re having the celebrations at, so plan ahead to capture those moments. Make a list, if you need to.
  • If you haven’t done it lately, review the manual that came with your camera. Review the settings and modes you’re most likely to use for your shots and remind yourself what each is doing while you’re shooting. I use the metadata from my most successful bokeh and full moon shots to set my camera up ahead of time so I don’t miss the shot.
  • Practice a few creative techniques that you can memorize so that when you’re ready to take photos of the candles on your dinner table or that gloriously brown turkey, you won’t have to fumble.
  • Refamiliarize yourself with your tripod, if you use one. I have two – an aluminum ball-head one that allows infinite adjustments but takes a lot of room and needs to be set up ahead of time and a Platypod Max, which looks like a little travel iron but is actually a very clever and sturdy tripod that can be set up in minutes on any surface. Why use a tripod? It lets you take longer exposures while keeping the images tack-sharp and it lets you be in the photo! Use the built-in timer and get in FRONT of the lens for a change.
  • Keep an eye on the lighting. Natural light from a big window is fantastic, as long as it’s not backlighting your subject. This is especially important for those group shots we all love. You want everyone’s face to be evenly lit, without harsh shadows everywhere. So maybe turn on some lamps so your flash won’t be so startling. Shoot a couple of test shots so you can see what needs to be tweaked.
  • Get in close to your subject! This “rule is even more valuable when that subject is a child. Get down on their level whenever possible so you capture their best smiles. Shooting from above should be reserved for those special-effect shots, not photos of kids having fun. For the most natural photos of people though, you can use a telephoto lens and shoot them from some distance. (As long as the light is right!) Some of the most memorable photos are those taken when the subject is unaware they’re being snapped. They’re relaxed, and acting naturally; smiles are genuine and emotion is often quite palpable.
  • Don’t insist on smiles. You know what I mean… those cheesy grins aren’t going to be your favourite images. Rather than having everybody say “cheese” for your group shots, have them say “family” or “money” or “gotcha”. You could go with a made-up phrase, such as “moldy mozzarella”. Another trick is to tell everyone you’re going to shoot on “3”, then count, “1… 2… (shoot) WHOOPS 3!” then shoot a second shot right after that. You’ll get some natural smiles that way.
  • When taking photos of food, again, get in close and vary the angles. Show the flaky texture of that piecrust, the glisten of the done-to-perfection skin on your turkey, the creaminess of your mashed potatoes, the detail of the frosting on your cupcakes. (That reminds me, I need to get some baking done!)
  • Do you take photos of your Christmas decor? If you’re getting harsh shadows and lots of glare, you can drastically reduce the odds of that occurring by using a big sheet of white cardboard as a reflector. (Dollar store foam core board is perfect for this.) It’ll bounce and soften the light in your space to produce much more even lighting and much more interesting images. Hold it at an angle to the source of your light (windows, lamps, even your flash) so the light is reflected at an angle too. If you’re using a flash and find it too harsh, you can wrap a tissue around it or in front of it and diffuse the light that way. Here’s where test shots are really time-savers.
  • Composition is key for any photo. Remember the rule of thirds, but don’t be a slave to it. Decide what your focal point will be and compose your photo to make it so – use leading lines where possible and don’t forget white space. Crop your photos in the viewfinder – so much less work later! And don’t forget the background. Is there anything growing out of someone’s head? Take a step to one side or the other and recompose.
  • Take LOTS of photos. Take several of each subject from different angles and distances so you have a choice of which one is best. More is definitely better!
  • This just popped into my head… Instead of an Ugly Christmas Sweater event, maybe this year you could do Ugly Christmas Masks. We’re still masking indoors in public here, with a government mandate. It’s such a small thing, but with such great potential for safer interactions.
  • We should take a moment to talk about safety. If you’re taking photos of weather phenomena (like the “atmospheric river” that just devastated the Pacific Northwest), landscapes or nature, do it safely!! People have died trying to take that one spectacular photo. I don’t want it to be you!
  • Last but not least, have FUN!

Next week I’ll be compiling a Challenge Spotlight post. Maybe one of your layouts will find its way onto the GingerScraps Blog.

PDF Version : https://bit.ly/3FXyoDW


Tutorial Tuesday (Tips and Tricks)

It’s Almost DIGITAL SCRAPBOOKING DAY!!

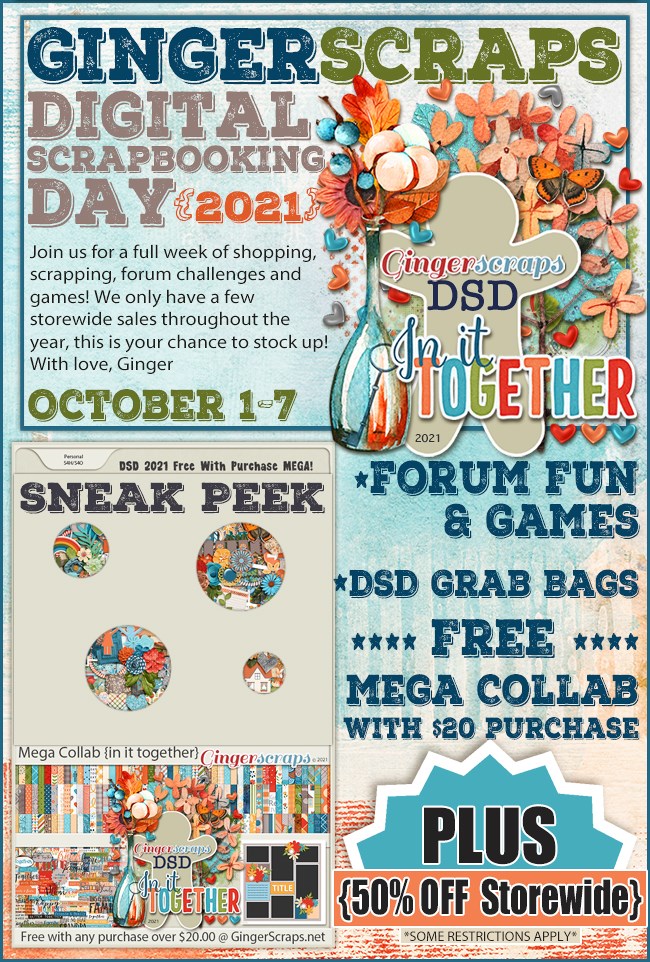
Hey all you GingerScrappers! Digital Scrapbooking Day is coming up fast!! It’s on Saturday, October 2 and it’s going to be a blast. But don’t let “Day” throw you off. It’s not just a day, it’s a week-long celebration of our hobby and it’s always epic. This year’s theme is just perfect. Ginger has given me the go-ahead to share this sneak peak with you. Drum roll please!

All the digital scrapbooking stores around the worldwide web have special events and sales. Here at GingerScraps, there are a bunch of grab bags specifically designed for DSD, special challenges, another scavenger hunt, and a free-with-$20-purchase MEGA collab. (I’ve seen the MEGA collab… you’re going to love it!!!! It has about 100 papers… and the palette is beautiful.) Other stores will have designer blog hops and special events on their sites too…

So start with a PLAN! Don’t just jump into the deep end. Check out the forums at your favourite stores to see what they have going on. Then make yourself a calendar of events. Set some reminders so you don’t miss the entry deadlines, speed scraps or chats. If you’ve ever missed out on something amazing by a matter of an hour, you’ll understand the need for some nudges.

Make sure you have hard drive space for your purchases and freebies. Or invest in some thumb drives or an EHD to transfer some of your older stuff to so you have lots of room for your downloads. That MEGA is going to need a bunch of room. Label this extra storage right away so you don’t forget what you’ve put on it. Forgetting to label them could mean you lose track of all the awesome kits you’ve moved and you don’t want that! I have a brand new 6TB EHD just waiting for me to fill it up.

Set a BUDGET! It’s way too easy to overspend when you’re surrounded by smokin’ hot deals, and PayPal makes it painless… until later. Figure out how much you have to spend, and stick with it. I usually save a bit of money so I can spend $20-25 per favourite digishop (I have 3 that I like a lot) without feeling guilty. (With the slightly stronger Canadian dollar this week, I might be able to make my money go a bit farther. As long as there isn’t some catastrophe here that causes our currency to tank. ‘Cause that’s never happened before….. 😉 )

Don’t feel obligated to participate in anything that isn’t going to make you happy. If you don’t have time to join in on the games in the Forum, don’t worry about it! If you aren’t into speed scraps, that’s great! Extra challenges might be fun, but if you have better things to do, you have better things to do. Freebies take up a lot of space, both on your computer and in your head; if you don’t think you’ll ever use what the designer is giving away, you don’t have to take it. This is especially true of blog hop freebies; the topic and palette may be really exciting, but there will be some designers’ contributions that don’t fit into your style of scrapping, so don’t download them. Believe me, you won’t miss them.

While you’re waiting for the festivities to begin, go through your photos and choose some for those challenges you just won’t be able to resist. Let your family know when you’re going to need some uninterrupted time and don’t stay up too late! Because there’s still Black Friday next month – we have to pace ourselves!

Sharing our stories is important, both for us now and for those who come after us. The last 18 months have had quite an impact on all of us in one way or another. Some of us have lost loved ones, some of us have been sick ourselves, some of us have worked harder than ever before to help others and some of us have channeled our energies in new directions. But we all have learned what matters and what doesn’t. Let’s celebrate ourselves!

Tutorial Tuesday (Celebrations!)

Plan Your Holiday Photos NOW!

I took a look at the calendar this morning and got a bit of a shock. (I’m sure I’m not the only one losing track of days and dates…) It’s going to be JULY next week! My granddaughter’s second birthday is on Monday, her cousin’s birthday the next day and her big brother’s birthday is the day after that. And of course it means that Canada Day and Independence Day are also next week. So that got me thinking… maybe I should talk about planning your celebration layouts now, so you get the best photos. Even though many of the big events usually held on these national holidays have been cancelled this year due to the pandemic, I’m sure there will be events worthy of documenting. Don’t forget, you can always come back to this post next year for a reminder too. I try to have a rough idea of which shots I’d like to get so I went to Pixabay and had a look for the basic themes for Canada Day and the Fourth of July: parades, flags, food, family gatherings and fireworks. (The photos I found were all Fourth of July – we Canucks are a little less exuberant on our national holiday, but these tips are easily adapted for a made-in Canada celebration too.)

Let’s start with parades, since they’re often in the late morning or early afternoon, and kick off the day’s events. Try to think of interesting scenes you can photograph. Look for people in costumes and try to find a camera angle that will give you an interesting composition. This photo,  taken by the contributor beccajanef, caught my eye because of the Liberty hats. I’d love to have seen the crowd afterward, with all those hats on heads everywhere.

BigBearVacations gave us this shot. What I like about it is that the sun flare conceals the guy walking into the frame on the right, putting the focus on those hero-worshipping kids with Uncle Sam. At first I thought the photobomber should be cropped out, but a second look told me doing that would take away from the scale of the stilt-walker. I always wanted to learn how to walk on stilts, didn’t you?

The amazing Jill Wellington took this photo, which speaks to how patriotism is learned early. The sun flare adds a softness to the photo without distracting from the subject. I love her blue-and-white dress and red bloomers too.

There are so many ho-hum ways to photograph flags. But filling the viewfinder with the most recognizable area of the flag, along with the draping of the fabric, elevates this photo by TechPhotoGal to a much more interesting level. It also shows that you don’t need to include the entire object in your image to create a photo with impact.

When I look at this image, credited to OohhSnapp (aka Angelique Johnson), I get the impression of a huge flag and Angelique standing directly underneath it. It has a definite God-blessed-America feel. It’s a visually pleasing image for sure.

Ah! Food!! When you’re documenting the feast, look for perspectives that hint at how good the food will taste and how perfectly it’s prepared. It’s very easy to take boring food pix… but TesaPhotography (Tesa Robbins) captured a true delight for the eye.  I can almost taste the corn now!

Here’s another I-can-almost-taste-it shots. Here, utroja0 uses both composition and depth of field to give us a visual feast. The skewer in the foreground is in sharp focus and the grill is only partly in the frame. Between them they give the impression of lots of food and incredible aromas.

Here in Canada those ice pops (or popsicles, which is actually a trademark…) are called Rockets. And they’re my favourite. (I lived on them, literally, when I was sick last year.) No cookout or picnic is complete without the sweet finish. What makes this photo, again from the camera of Jill Wellington, so successful are the red-white-and-blue colour palette, the scatter of candy and the creamy background. The drips of melting ice cream hint at the heat of the day too, offering another clue to the kind of celebration going on.

Candid photos are almost always more appealing than tightly posed ones. This scene looks so natural and it’s easy to see the kids are enjoying their picnic with their dad. The background suggests it wasn’t taken in July, but that’s not the point… capturing those special moments when the subject isn’t aware you’re shooting them takes a bit of thought and some stealth, both of which Victoria_Borodinovea managed here. But… if you really want to have a formal-ish, posed group photo, try to arrange your people so their faces from visual triangles, allowing those triangles to overlap a bit. Use a small aperture so that your depth of field is large enough to keep all the eyes nice and bright. Another option is to line the kids up, shortest in the front, tallest in the back. If necessary, have them tilt their heads to one side, alternating sides so you can see everyone’s eyes, then snap away. Everybody will be recognizable in the shot, and everybody should be in focus.

Families who have cottages at the lake or on the beach may include a bonfire in their holiday plans. Photos of these can be incredibly beautiful, but can also be just okay. I like this photo by Free-Photos because it tells the story of a campfire through imagery.

I like this shot for the texture in the charring wood, the heat suggested by the flames and the containment of the firepan. flyupmike created his appealing image by getting in close (I’m hoping he zoomed the camera and not the photographer!) and intentionally cropping his shot in the viewfinder. This gives context to the image. Your could add context to your fire photos with silhouettes, or framing the flames in some way. Zooming in even more closely to capture the intensity of the burning fuel would work too.

Is there any better reason to have a bonfire than to make smores?? This tight shot of a toasted marshmallow, taken by skeeze, would immediately make me want to have a smore – and I don’t particularly like them!

Everything about this photo says “Fourth of July” to me: the flag in the background, the sparklers and the hint of a smile on the only face visible. The depth of field has the sparklers in sharp focus – where it should be, softening everything else into background. Free-Photos got it right again!

Doesn’t this photo just shriek JOY? Jill Wellington knows how to use her camera to capture the most captivating images. She has the children in silhouette to draw the eye into the scene and the upflung arms reveal the excitement of seeing the light show. The fast shutter speed she used froze both the girls and the fireworks, while her small aperture got the whole scene in focus.

Photographing fireworks is a real challenge. For more tips on how to get the best shots, Darlene Hildebrandt offers her tips here. The most important ones are the quality setting, figuring out where in the sky the bursts will appear, shooting into the eastern sky with a medium aperture, starting early in the show to avoid the smoke and using a TRIPOD. You want that camera stock still to get the best images. I just checked out the camera on my Android phone and it has some pro settings I’m going to have to play with. Our new house will give us a ring-side seat for any fireworks in our city, since we’re halfway up a mountain with nothing built behind us!

I’ve been gathering ideas for future tutorials and have some great ones lined up, so stay tuned!

Tutorial Tuesday (Potpourri)

Beyond the Ordinary – Holiday Photos

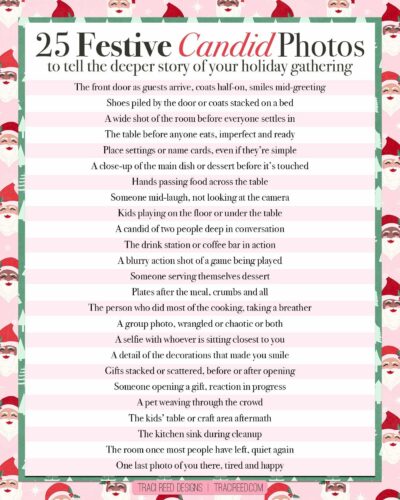
Wow, can it really be only 8 days until Christmas? Even fewer until the first night of Chanukah… Families all over are getting ready for the Main Event and of course, no special occasion is ever complete without the photos to prove it happened. I think I can speak for most of us when I say I’ve taken a LOT of really ho-hum photos over the years. If you’re like me and browsing through the Gallery in late December makes you envious of the amazing photos OTHER scrappers have scrapped, I’m going to offer some thoughts on how to make our holiday photos better. I’m not going to completely rehash this tut from last year but some things do bear repeating.

First, make sure you have fresh batteries and a large SD card for all the great shots you’re going to take. If you’re into phonetography, you might want to trim your in-phone collection by saving them to your computer or the Cloud, then deleting them from your internal storage.

Make a list – physical or mental – of the shots you MUST have. We all have our own preferences for what we want to document so don’t feel like you’re being forced to conform. But there are some sort of standard images we all like.

Even if you feel like decorating for the holidays is a dreaded chore, take some photos of the process. Get a shot of the decor while it’s still in the box. If your kids are helping, turn them into models for your portfolio. Remember to get down on their level. Even the cutest kids aren’t great photo subjects if they’re always shot from above. And get in close!!!! I know I’ve mentioned before that the best crop is the one you do in the viewfinder. so fill the frame! Don’t be afraid to zoom in. Same goes for your pets, if you want them in your photos.

When shooting your tree, look for a different approach than the typical 8-feet-away-so-the-whole-tree-and-gifts-are-in-the-shot. Maybe take some close-ups of your favourite ornaments. Use a portrait mode to soften the background and make the ornament totally the focal point. Get down on the floor and shoot up toward the topper, or shoot down through the branches and make the presents the subject. Turn off all the room lights and shoot the tree with just the tree lights. Experiment with shutter speed and aperture to create some lovely bokeh effects. Add a human or a pet to the frame. Or take a photo of the lights reflected in a window. (If you don’t want your reflection in your photo, stand at an angle to the window and look carefully at what’s in the viewfinder.) Or take a photo of the tree THROUGH the window! Turn off your flash though, so you don’t spoil the shot.

If you’re celebrating Chanukah, there are lots of great ways to take photos of your menorrah. A series, with each night’s new candle lighting, would make a lovely layout. Look at the angles. On the last night, when all the candles are burning, an angled shot from one end with each flame visible would be incredible. Some of my favourite photos of my grandsons are of them lighting a candle, with the soft glow of the flame on their cheeks and wonder in their eyes. (Their mom takes amazing photos.)

We’ve all got a folder full of group photos where everybody is stiffly lined up and fake-smiling at the camera. So how can we take better group shots? Having the subjects doing something together is a good start. If you have snow in your area, have the group build a snowman, or have a snowball fight. Or play football in the snow. Beach ball volleyball (in sand or snow) would make some entertaining shots. But if you just have to have a posed group shot, give some thought to who goes where. If you can arrange the people so that their faces form little triangles, you’ll have a nicer image. Have them turn their shoulders toward each other or the centre of the photo so they can get a bit closer together. Make sure you’ve chosen a landscape setting so everybody will be in focus. Think about trying not to cut people’s legs off. If you can, shoot everybody down front from the waist up. Your subjects will thank you.

Do you go all out with a gorgeous table-scape for your guests? I’ve never done it, but I love seeing how others do it. If you’re hosting and have your table all set well in advance (like the experts recommend for sanity’s sake 😉 ) take a few minutes to look at it with your photographer’s eye. Take a shot of a single place setting. Try and get the whole table in a shot, easiest if you shoot from one end. Take a closeup of your crystal.

Don’t forget to get some shots of the dinner prep. Be stealthy and get some candids of the main cook, or if that’s you, get some of your helpers. Look for interesting camera angles of your turkey, ham or standing rib roast. Ask someone to be the carver and get some action shots. And look for smiling faces as the meal commences.

What about gifts? Well, there’re lots of opportunities around gift opening. Get down on the floor with the kids. Try to capture the moment when they identify what’s in the package. If it’s your thing, you can take some of them channeling Vanna White, holding up a favourite gift. If there’s a very special gift being given, arrange for it to be delivered when you have a moment to frame your image. I really wish I had a photo of myself when I opened a gift from my sister quite a few years ago. It was a resin frame with dragonflies on it, but what made it truly special was that it held a photo of me with my grandfather, who died when I wasn’t yet 4 years old. If you know in advance, you can be ready to catch the emotion.

After the dust settles, you can relax, but don’t forget there might still be some great photos yet to happen. Like when a child falls asleep in the middle of a game, or the dog takes off with a long piece of ribbon… they could be the best shots you get all day. But don’t concentrate so hard on getting good photos that you don’t have fun! At a family reunion, my niece made a point of taking a selfie with every single one of us, and they were all fantastic. If you have mad selfie skills, give it a whirl. You might surprise yourself!

I’ll be taking next Tuesday off, as I expect most of you will too… bigger fish to fry! Merry Christmas! Mazel tov! Kwanzaa blessings to all!


Tutorial Tuesday (Photoshop Elements)

DIY Christmas Card Workshop

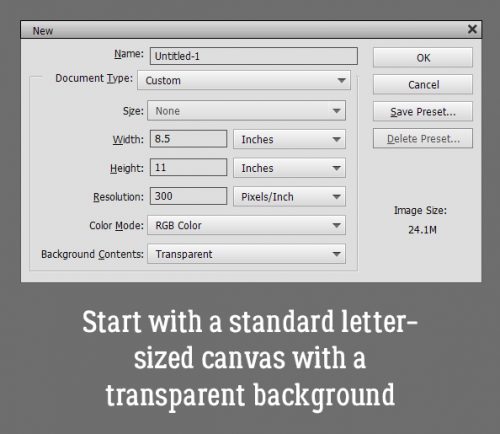
Woohoo! I’m on deadline today!! Things are looking up. Today’s tutorial isn’t necessarily scrapbooking-related, but it definitely uses digital scrapbooking supplies. It’s also not really in time for this year, but it can be a thought for next year. I’m going to show you how to make 2 personal Christmas cards from 1 sheet of cardstock. The resulting cards are 4 1/4 inches by 5 1/2 inches. You can get 50 envelopes that will hold these beauties at Michaels for $8 (Canadian, so about $5 in the US).

If I would have been thinking I could have skipped this step by putting the dimensions in reverse in the New Document screen. But I didn’t so I had to Rotate the canvas 90°.

Next I snapped a line across the centre of the page, and another from top to bottom. I used the Ruler and the Pencil Tool. To snap a straight line in a project, select the Pencil Tool and set the size of the line you want. I wanted these lines to be faint, so I went with 1 pixel. Line up the cursor with the halfway point along one side of your canvas. You can see a moving dashed line on the Ruler so you’ll know when you’re in the right place. Click once just barely inside the edge of your canvas. Then hold down the Shift key and move the cursor to the same spot on the opposite side and click again. It’s just that easy. Then do the same with the top-to-bottom centre point. These are guidelines for placement of elements and for cutting and scoring later.

Then I opened up the folder where I’d collected the objects I wanted to use. I have a photo taken several Christmases ago, a 3D snowflake from Lindsay Jane‘s Snowed Under kit and a mask from PrelestnayaP‘s December Wishes.

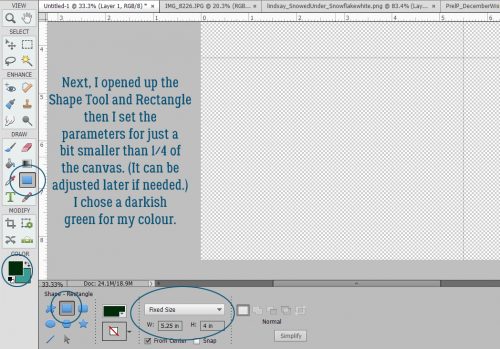
Working in the lower left corner of the canvas, I opened up the Shape Tool, chose the Rectangle, set a Fixed Size of 5.25 by 4 inches and chose a darkish green colour.

The resulting rectangle will fit inside the guidelines for one card. and by Simplifying the layer, I can make adjustments to it as needed because it’s now a Smart Object.

The next step is to add the mask. I resized it to fit inside the green rectangle completely.

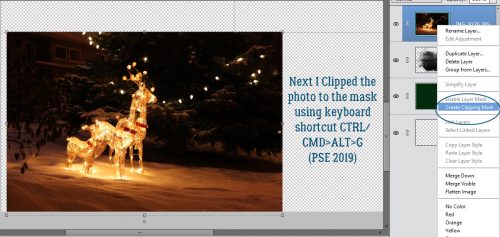
The photo went on top of the mask and was resized to approximately the size I’d need. I want the deer and some of the illuminated snow visible later.

Clipping the photo to the mask is simple. Right click>Create Clipping Mask or CTRL/CMD>ALT>G for more recent versions of PSE or just CTRL/CMD>G for versions pre-15.

Final position tweaks included a little shifting and a little more shrinking.

I chose a gold colour from my photo to use for the sentiment. Here’s where all those amazing fonts you have in your stash will come in handy. You can make this text as personal as you want, even making it family- or person-specific. But it still looked like it needed something. So I CTRL/CMD>clicked on the green rectangle layer’s thumbnail to select the outer edges of the rectangle. Then Select>Modify>Contract.

I pondered for a nanosecond how much I should shrink my selection and settled on 25 pixels.

And then I added a Stroke to the new selection. Edit>Stroke (Outline) Selection

I then used the same gold as for the text and added my Stroke. The position for this isn’t a make-or-break thing, so don’t obsess over it.

Yes, I think that’s what it needed.

The final step for this card is to add a trademark to the back. I went with the green for this.

Knowing that it’s on the BACK of the card and should be readable with the card right-side-up, I Rotated the text 180°.

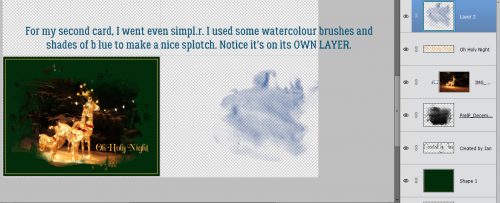
I’m going for 100% honesty here… I saw a card like this second one on Pinterest so I’m not taking credit for the idea. (Ignore the typo on the screenshot please!) I added a new blank layer to the stack and Loaded some watercolour Brushes. These are from a set of 20 free brushes from Brusheezy. I chose 3 shades of wintery blue for the brush area.

I layered the brushes, each on its own layer so I can make adjustments to just one – or all – if I need to.

For a bit of contrast I chose an aqua for the topmost brush layer.

I added in the snowflake and sized it appropriately. But it wasn’t quite enough by itself. So I added a Layer Style from Ooh La La ScrapsIn the Frosty Air collection.

It still was missing something so I turned off the snowflake layer for a second and added a white paint splatter. That makes a big difference!

A few words and it’s pretty much what I was looking for.

A trademark on the back in the dark blue and it’s finished!

I saved the file as a .png so the printer wouldn’t need to add a white background to everything. To turn this into cards, I’ll load up my printer with white cardstock and print several copies. Using my guillotine cutter I’ll cut the cards apart on the top-to-bottom guideline and score then fold along the side-to-side guideline. I choose to print my sentiments for the inside of the card on resume paper (it’s a bit fancier than regular printer paper) and trim to fit the inside of the folded card. Word art would be perfect for this! Another option is to use a sentiment stamp and ink in a colour to match the front of the card. All that’s left is to sign them, pop them into their envelopes and mail them!

Whew… two weeks until Christmas Eve! Better get on that!

Black Friday, Sales, and So much More!

01

Turkey Coma time has commenced, and so has the sales! Take advantage and get so many kits to get you through … oh, a couple of days at least.

Enjoy some shopping, without having to leave your home, and enjoy the amazing sales!

mm3222

This fall will be remembered with snow before Halloween Surprised smile   

02

03

04

05

06

07

08

09

10

11

12

13

14

15

16

17

18

19

20

21

22

23

24

25

26

27

29

ADB Designs

31

ADB Designs

33

34

35

36

37

38

39

40

41

42

43

44

45

46

47

48

49

50

51

52

53

54

55

56

57

58

59

60

61

62

63

Remember, if you complete 10 challenges, just ten, you get a free kit as well!!

cr_thumb3_thumb_thumb_thumb

Everyone has a bad day! At least this kit makes it a little better!

Love and Chaos Ruling This DSD!

“Fillet of a fenny snake,

In the caldron boil and bake;”

Macbeth, Shakespeare

Family. Friends. Life. Love. Chaos. It all plays together and it always creates memories!


https://forums.gingerscraps.net/forumdisplay.php?1621-2019-DSD-Digital-Scrapbooking-Day-CLICK-HERE-for-all-the-info

There is SO MUCH GOING ON! Scavenger Hunt. Forum games!


https://forums.gingerscraps.net/forumdisplay.php?1621-2019-DSD-Digital-Scrapbooking-Day-CLICK-HERE-for-all-the-info

And when you spend $20, you get this MEGA COLLAB!

You KNOW you want to get in with the DSD Grab Bags!


https://store.gingerscraps.net/


Make sure you check out the Scavenger Hunt!


And this is just a sneak of the activities! Make sure you check out the forum for more information: https://forums.gingerscraps.net/forumdisplay.php?1621-2019-DSD-Digital-Scrapbooking-Day-CLICK-HERE-for-all-the-info

Remember when you spend $10 in the store, you get a great new collab! There’s something about the changing of the leaves that makes autumn just shimmer.

fwp_thumb
https://store.gingerscraps.net/GingerBread-Ladies-Collab-Autumn-Shimmer.html

33
https://store.gingerscraps.net/Be-The-Light-5-Grab-Bag.html 

37
https://store.gingerscraps.net/Traveling-Album-Grab-Bag.html

36
https://store.gingerscraps.net/Fall-Blessings-Grab-Bag.html

01
https://store.gingerscraps.net/ADB-Designs/

02
Collection: https://store.gingerscraps.net/Copper-Spice-Collection-by-Aimee-Harrison.html
Kit: https://store.gingerscraps.net/Copper-Spice-Page-Kit-by-Aimee-Harrison.html
Alphas: https://store.gingerscraps.net/Copper-Spice-Alpha-Sets-by-Aimee-Harrison.html
Borders: https://store.gingerscraps.net/Copper-Spice-Borders-by-Aimee-Harrison.html
Graffiti: https://store.gingerscraps.net/Copper-Spice-Graffiti-by-Aimee-Harrison.html
Plaids: https://store.gingerscraps.net/Copper-Spice-Plaid-Papers-by-Aimee-Harrison.html
Messy Edges: https://store.gingerscraps.net/Copper-Spice-Messy-Edges-by-Aimee-Harrison.html
Glitters: https://store.gingerscraps.net/Copper-Spice-Glitters-by-Aimee-Harrison.html

04
Cozy Comfort Grab Bag: https://store.gingerscraps.net/Cozy-Comfort-DSD-Grab-Bag-by-Aimee-Harrison-and-JB-Studio.html
Mini Kit Grab Bag: https://store.gingerscraps.net/Mini-Kit-DSD-2019-Grab-Bag-by-Aimee-Harrison.html

58
https://store.gingerscraps.net/2019-DSD-Template-Grab-Bag.html

57
Hello October – Kit https://store.gingerscraps.net/Hello-October-Kit-Aprilisa.html
Hello October – Cards https://store.gingerscraps.net/Hello-October-Cards.html
Hello October – Template Pack https://store.gingerscraps.net/Hello-October-Template-Pack.html
Hello October – Bundle https://store.gingerscraps.net/Hello-October-Bundle-Aprilisa.html

05
https://store.gingerscraps.net/RV-There-Yet-Grab-Bag-by-CathyK-Designs.html

06
Grab Bag 1: https://store.gingerscraps.net/Build-Your-Own-Grab-Bag-1-iDSD-2019-by-CathyK-Designs.html
Grab Bag 2: https://store.gingerscraps.net/Build-Your-Own-Grab-Bag-2-iDSD-2019-by-CathyK-Designs.html

42
https://store.gingerscraps.net/cozy-fall-fun-by-Clever-Monkey-Graphics.html

43
https://store.gingerscraps.net/cu-dsd-grab-bag-by-Clever-Monkey-Graphics.html

44
Color Roll Ribbons: https://store.gingerscraps.net/cu-color-roll-ribbons-by-Clever-Monkey-Graphic.html
Wood Slices No1: https://store.gingerscraps.net/cu-wood-slices-no1-by-Clever-Monkey-Graphics.html
Driftwood: https://store.gingerscraps.net/cu-driftwood-by-Clever-Monkey-Graphics.html
Ornament Caps: https://store.gingerscraps.net/cu-ornament-caps-by-Clever-Monkey-Graphics.html

07
https://store.gingerscraps.net/Halloween-Night-Grab-Bag-by-Connie-Prince.html

08
Bundle: https://store.gingerscraps.net/Farmhouse-Fall-Bundle-by-Connie-Prince.html
Kit: https://store.gingerscraps.net/Farmhouse-Fall-Kit-by-Connie-Prince.html
Border Clusters: https://store.gingerscraps.net/Farmhouse-Fall-Border-Clusters-by-Connie-Prince.html
Word Art: https://store.gingerscraps.net/Farmhouse-Fall-Word-Art-Pack-by-Connie-Prince.html
Messy Papers: https://store.gingerscraps.net/Farmhouse-Fall-Messy-Papers-by-Connie-Prince.html
Plaid Papers: https://store.gingerscraps.net/Farmhouse-Fall-Plaid-Papers-by-Connie-Prince.html
Flowers and Leaves: https://store.gingerscraps.net/Farmhouse-Fall-Flowers-and-Leaves-by-Connie-Prince.html

53
https://store.gingerscraps.net/By-The-Number-3-Templates-by-Dagilicious.html

13a
https://bit.ly/ddnd-GS

13b
https://bit.ly/ddnd-GS

38
Smell My Feet | Collection: https://store.gingerscraps.net/Smell-My-Feet-Collection.html
Smell My Feet | Kit: https://store.gingerscraps.net/Smell-My-Feet-Kit.html
Smell My Feet | Alpha: https://store.gingerscraps.net/Smell-My-Feet-Alpha-Pack.html
Smell My Feet | Element Pack: https://store.gingerscraps.net/Smell-My-Feet-Element-Pack.html
Smell My Feet | Paper Pack: https://store.gingerscraps.net/Smell-My-Feet-Paper-Pack.html
Smell My Feet | Alpha Bundle: https://store.gingerscraps.net/Smell-My-Feet-Alpha-Bundle.html
Smell My Feet | Finishing Touches: https://store.gingerscraps.net/Smell-My-Feet-Finishing-Touches.html
Smell My Feet | Journal Cards: https://store.gingerscraps.net/Smell-My-Feet-Journal-Cards.html

39
Sweater Weather | Collection: https://store.gingerscraps.net/Sweater-Weather-Collection.html
Sweater Weather | Kit: https://store.gingerscraps.net/Sweater-Weather-Kit.html
Sweater Weather | Alpha pack: https://store.gingerscraps.net/Sweater-Weather-Alpha-Pack.htm
Sweater Weather | Element Pack: https://store.gingerscraps.net/Sweater-Weather-Element-Pack.html
Sweater Weather | Paper Pack: https://store.gingerscraps.net/Sweater-Weather-Paper-Pack.html
Sweater Weather | Finishing Touches: https://store.gingerscraps.net/Sweater-Weather-Finishing-Touches.html
Sweater Weather | Pattern Paper Pack: https://store.gingerscraps.net/Sweater-Weather-Pattern-Paper-Pack.html

40
https://store.gingerscraps.net/DSD-2019-Grab-Bag-Down-This-Road-Designs.html

09
https://store.gingerscraps.net/Cozy-Comfort-DSD-Grab-Bag-by-JB-Studio-and-Aimee-Harrison-Designs.html

10
Bundle – https://store.gingerscraps.net/Fall-in-Love-BUNDLE-by-Heather-Z-Scraps.html
Kit – https://store.gingerscraps.net/Fall-in-Love-KIT-by-Heather-Z-Scraps.html
Elements – https://store.gingerscraps.net/Fall-in-Love-ELEMENTS-by-Heather-Z-Scraps.html
Papers – https://store.gingerscraps.net/Fall-in-Love-PAPERS-by-Heather-Z-Scraps.html
Alphabets – https://store.gingerscraps.net/Fall-in-Love-ALPHABETS-by-Heather-Z-Scraps.html
Accents – https://store.gingerscraps.net/Fall-in-Love-ACCENTS-by-Heather-Z-Scraps.html
Journal Cards – https://store.gingerscraps.net/Fall-in-Love-JOURNAL-CARDS-by-Heather-Z-Scraps.html
Weathered Wood – https://store.gingerscraps.net/Fall-in-Love-WEATHERED-WOOD-by-Heather-Z-Scraps.html
Extra Papers – https://store.gingerscraps.net/Fall-in-Love-EXTRA-PAPERS-by-Heather-Z-Scraps.html
Paint – https://store.gingerscraps.net/Fall-in-Love-PAINT-by-Heather-Z-Scraps.html

11
Collection: https://store.gingerscraps.net/Copper-Spice-Collection-by-Ilonka-s-Designs.html
Mega Kit: https://store.gingerscraps.net/images/T/xctmpLjojid.png
Fall Papers: https://store.gingerscraps.net/Copper-Spice-Fall-Papers-by-Ilonka-s-Designs.html
Ripped Papers: https://store.gingerscraps.net/Copper-Spice-Ripped-Papers-by-Ilonka-s-Designs.html
Borders: https://store.gingerscraps.net/Copper-Spice-Borders-by-Ilonka-s-Designs.html
Overlays: https://store.gingerscraps.net/Copper-Spice-Overlays-by-Ilonka-s-Designs.html
Embellishments: https://store.gingerscraps.net/Copper-Spice-Embellishments-by-Ilonka-s-Designs.html
Clusters: https://store.gingerscraps.net/Copper-Spice-Clusters-by-Ilonka-s-Designs.html
Plaids: https://store.gingerscraps.net/Copper-Spice-Plaids-by-Ilonka-s-Designs.html
Paper Pack: https://store.gingerscraps.net/Copper-Spice-Paper-Pack-by-Ilonka-s-Designs.html

12
Collection: https://store.gingerscraps.net/Leaves-Fall-All-Around-Collection-by-Ilonka-s-Designs.html
Mega Kit: https://store.gingerscraps.net/Leaves-Fall-All-Around-Mega-Kit-by-Ilonka-s-Designs.html
Template Pack: https://store.gingerscraps.net/Leaves-Fall-All-Around-Template-Pack-by-Ilonka-s-Designs.html
Borders: https://store.gingerscraps.net/Leaves-Fall-All-Around-Borders-by-Ilonka-s-Designs.html
Fallen Leaves Papers: https://store.gingerscraps.net/Leaves-Fall-All-Around-Fallen-Leaves-Papers-by-Ilonka-s-Designs.html
Shapes: https://store.gingerscraps.net/Leaves-Fall-All-Around-Shapes-by-Ilonka-s-Designs.html
Clusters: https://store.gingerscraps.net/Leaves-Fall-All-Around-Clusters-by-Ilonka-s-Designs.html
Plaids: https://store.gingerscraps.net/Leaves-Fall-All-Around-Plaids-by-Ilonka-s-Designs.html
Paper Pack: https://store.gingerscraps.net/Leaves-Fall-All-Around-Paper-Pack-by-Ilonka-s-Designs.html
Elements: https://store.gingerscraps.net/Leaves-Fall-All-Around-Elements-by-Ilonka-s-Designs.html

13
https://store.gingerscraps.net/Home-Is-Where-Memories-Live-Template-Pack-by-Ilonka-s-Designs.html

45
https://store.gingerscraps.net/JoCee-Designs/

14
https://store.gingerscraps.net/Jumpstart-Designs/

15
https://store.gingerscraps.net/Jumpstart-Designs/

16
https://store.gingerscraps.net/Jumpstart-Designs/

54
https://store.gingerscraps.net/Kristmess/

55
https://store.gingerscraps.net/Layered-Page-Templates-Halloween.html

17
https://store.gingerscraps.net/Magical-Treats-GrabBag.html

18
https://store.gingerscraps.net/Lauries-Scraps/

19
https://store.gingerscraps.net/Lindsay-Jane/

20
https://store.gingerscraps.net/DSD-Page-Kit-Grab-Bag-2019-by-LouCee-Creations.html

21
https://store.gingerscraps.net/Magical-Scraps-Galore/

22
Bundle: https://store.gingerscraps.net/Memory-Keeper-BUNDLE-by-MagsGraphics.html
Kit: https://store.gingerscraps.net/Memory-Keeper-KIT-by-MagsGraphics.html
Journal Cards: https://store.gingerscraps.net/Memory-Keeper-JOURNAL-CARDS-by-MagsGraphics.html
Wood Papers: https://store.gingerscraps.net/Memory-Keeper-WOOD-PAPERS-by-MagsGraphics.html
Word Art: https://store.gingerscraps.net/Memory-Keeper-WORD-ART-by-MagsGraphics.html

60
https://store.gingerscraps.net/Building-Blocks-Album-Templates-by-Miss-Fish.html

61
https://store.gingerscraps.net/Blended-Clusters-3-Templates-by-Miss-Fish.html

62
https://store.gingerscraps.net/Blended-Clusters-3-Templates-by-Miss-Fish.html

23
DSD 2019 Grab Bag 1 – https://store.gingerscraps.net/Special-DSD-2019-Grab-Bag-1-Buy-6-Packs-for-8.html
DSD 2019 Grab Bag 2 – https://store.gingerscraps.net/Special-DSD-2019-Grab-Bag-2-Buy-5-Packs-for-6.html
DSD 2019 Grab Bag 3 – https://store.gingerscraps.net/Special-DSD-2019-Grab-Bag-2-Buy-10-Packs-for-12.html

24
Kit – https://store.gingerscraps.net/Copper-spice-Kit.html
Clusters – https://store.gingerscraps.net/Copper-spice-Clusters.html
Painted papers – https://store.gingerscraps.net/Copper-spice-Painted-papers.html
Photo-Blended papers – https://store.gingerscraps.net/Copper-spice-Photo-Blended-papers.html
Solid papers – https://store.gingerscraps.net/Copper-spice-Solid-papers.html
Stamps – https://store.gingerscraps.net/Copper-spice-Stamps.html
Stamps&Bordes – https://store.gingerscraps.net/Copper-spice-Stamps-and-Borders.html
Masks&Frames – https://store.gingerscraps.net/Copper-spice-Masks-Frames.html
Full Bundle – https://store.gingerscraps.net/Copper-spice-Bundle.html

25
Blurred Photomasks Set1 – https://store.gingerscraps.net/Blurred-Masks-Photomasks-Set1.html
Arbitrary movements Photomasks Set1 – https://store.gingerscraps.net/Arbitrary-Movements-Photomasks-Set1.html
Watercolor Fantasy Photomasks Set4 – https://store.gingerscraps.net/Watercolor-fantasy-Photomasks-Set4.html
Masks&Frames Standard Set8 – https://store.gingerscraps.net/Masks-and-Frames-Standard-Set8.html

35
https://store.gingerscraps.net/A-Day-In-The-Life-Bundle-by-Scraps-N-Pieces.html

26
https://store.gingerscraps.net/Tapestry-DSD-Digital-Scrapbooking-Bundle-by-Shepherd-Studio.html

34
https://store.gingerscraps.net/10-kits-for-25-Scraps-N-Pieces-SNP.html

59
https://store.gingerscraps.net/Aprilisa-Designs/

27
Personal Use Shop: https://store.gingerscraps.net/Snickerdoodle-Designs-PU/
Commercial Use Shop: https://store.gingerscraps.net/Snickerdoodle-Designs-CU/

28
https://store.gingerscraps.net/Magical-Scraps-Galore/

48
https://store.gingerscraps.net/4-bundles-For-20-DSD-grab-bag.html

46
https://store.gingerscraps.net/JoCee-Designs/

47
https://store.gingerscraps.net/5-for-10-dsd.html

52
https://store.gingerscraps.net/Build-Your-Own-Grab-Bag-iNSD-Offer.html

56
https://store.gingerscraps.net/Kristmess/

49
https://store.gingerscraps.net/LDragDesigns/

50
BYO GB 1: https://store.gingerscraps.net/Build-Your-Own-Grab-Bag-1-by-LDragDesigns.html
BYO GB 2: https://store.gingerscraps.net/Build-Your-Own-Grab-Bag-2-by-LDragDesigns.html
BYO GB 3: https://store.gingerscraps.net/Build-Your-Own-Grab-Bag-3-by-LDragDesigns.html

51
https://store.gingerscraps.net/Tami-Miller-Designs/

29
JB Studio: https://store.gingerscraps.net/JB-Studio/
JB Studio Templates: https://store.gingerscraps.net/JB-Studio-templates/

30
https://bit.ly/ddnd-GS

41
https://store.gingerscraps.net/Down-This-Road/

63
https://store.gingerscraps.net/Alexis-Design-Studio/

31
https://goo.gl/DQK8T

32
https://store.gingerscraps.net/CathyK-Designs/

03
Cozy Comfort Grab Bag: https://store.gingerscraps.net/Cozy-Comfort-DSD-Grab-Bag-by-Aimee-Harrison-and-JB-Studio.html
Mini Kit Grab Bag: https://store.gingerscraps.net/Mini-Kit-DSD-2019-Grab-Bag-by-Aimee-Harrison.html

Remember, if you complete 10 challenges, just ten, you get a free kit as well!!

cr_thumb
It’s time for those wonderful moments in nature!