Archives for January 2017

Tutorial Tuesday (Photoshop Elements)

Yes! You CAN Warp Shadows in PSE!

Photoshop Elements is a great program for most applications the average digi-scrapper wants to accomplish, but it does have limitations. One of these is that shadows aren’t on their own layer. That means getting your photos or other objects to look like they’re lifting off the page isn’t possible. Or is it…….? Actually, there are a couple of ways to move your drop shadows onto a separate layer and the one I’m going to show you today is the one I find to be the easiest.

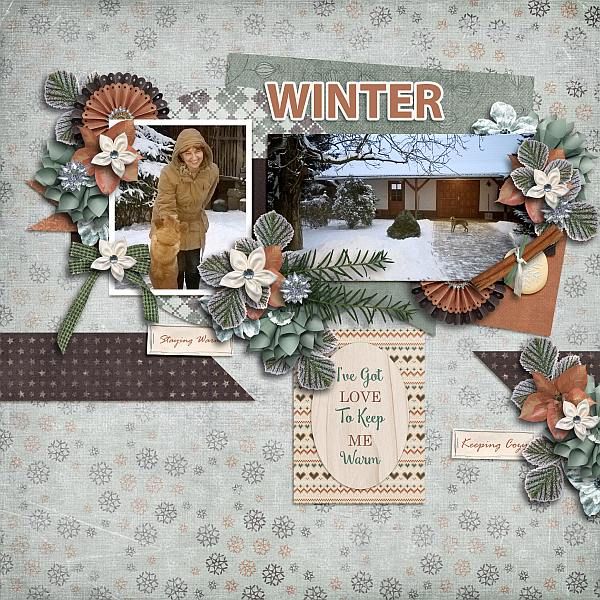
I wanted to have a photo lift at one corner within my layout for the Mix It Up challenge this month. I chose a template created by Krisztina of Tinci Designs, found in her Autumn Stories V.2 collection. Krisztina’s templates come pre-shadowed, which makes them especially awesome for beginners.

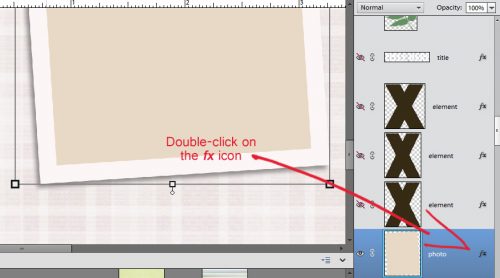
To start the process of making this photo spot look like it’s lifting, first I had to move the shadow onto its own layer. To do that, double-click on the little fx icon as shown below. That opens the Layer Style menu for that layer.

It looks like this. By moving the Distance slider to the right, the shadow is offset – it moves away from the item.

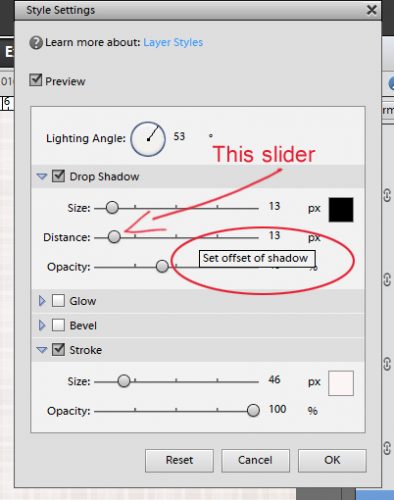
To make the process easier I temporarily changed the angle on the shadow to 180°, which moved the shadow off to the right of the photo spot. (This step might not be necessary, depending on the size of your item and its location on the page. This photo spot is in the lower left corner, so I was a little restricted in what I could do with it.) You’ll see that I also set the distance to 1000 pixels. This gives me some space between the shadow and the photo spot, which is essential to make this technique work. Once I’m done moving the shadow to its own layer I’ll move it back into position at the same angle as the other photo spots.

Now that I’ve set the distance, it’s time to Simplify the layer. VITAL STEP!! Right click on the layer in the Layers panel and select Simplify Layer. That effectively eliminates the fx icon so you can manipulate the visible layer on your layout.

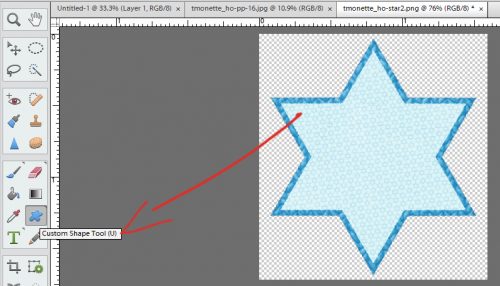
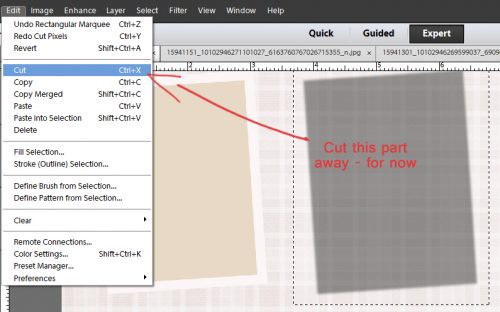
Select the Rectangle Marquee tool then click and drag a rectangle around the shadow portion of your image as shown.

Now I’m going to Cut that shadow away from the photo spot. Edit>Cut or CTRL/CMD+X will do it.

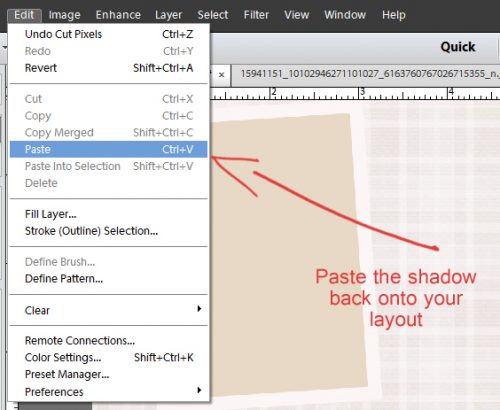
Now Edit>Paste (CTRL/CMD+V) the shadow back onto the layout… and look! It’s on its own layer!

Elements will have put the shadow layer ABOVE the item, so move it down so it’s underneath where it belongs. You can click and drag the layer down or CTRL/CMD+[ will do it for you. Now you can shift the shadow back to its correct angle under the photo/item.

Now we’re getting into the really fun part! Select Image>Transform>Skew.

I grabbed the lower left handle (the little box at the corner) and pulled it to the left. See how the bounding box looks wonky? That’s the Skew in action. Then I clicked OK.

There’s another way of changing the shape of an item. Image>Transform>Distort give a little more variety to how the shape can be altered.

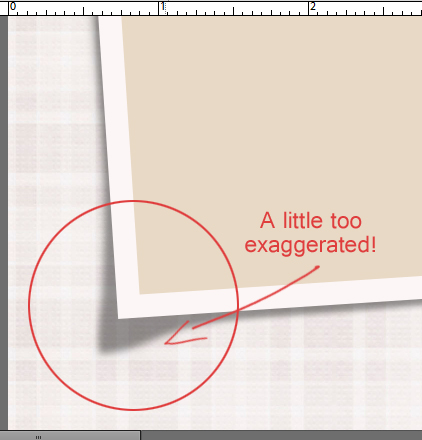
Looking at the new shadow, it looks like the photo is resting on something underneath it and it’s too umm… ordinary. So the next step is to nudge the edges of the shadow a little so it’s closer to the photo in some areas. The Smudge tool is the way to make that happen. It looks like a finger.

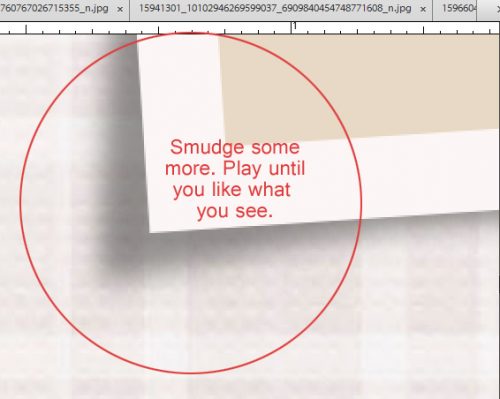
Using a fairly big setting, click and drag the Smudge tool along the edge of the shadow, positioning the tool’s cursor something like shown below. Don’t take it all the way to the very end of the shadow though, because then it’ll have a tail and it’s not going to make you happy.

The image below shows what happens when you get carried away. It’s very bizarre looking and NOT what I want at all. Rather than try to correct it, I undid (CTRL/CMD+Z) back to where I was still liking the look, and then continued.

Now that’s more like it!

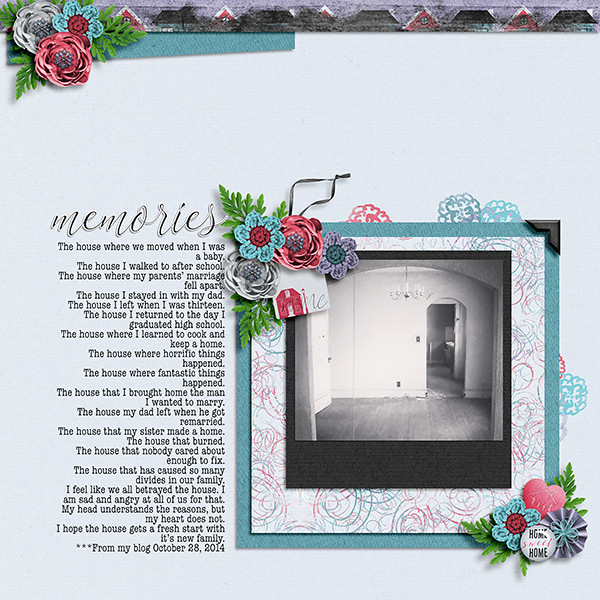
And for that final touch of realism I hit the Image>Transform>Distort again and pushed the corner of the PHOTO (see that the photo layer is the active one) in just a tiny bit. You can see the final result in the gallery. The effect is subtle but it’s there.

Think about how you could apply this new skill to a paper item you’ve stapled to your layout. You can use the Smudge tool to bring the shadow in really close to the edge of the paper where the staple is for a much more realistic look. It also lets you make your photo look like it’s cupped a little and the centre of the photo is closest to the paper. This technique can be used to adjust shadows for a lot of things other than paper too. Flowers, butterflies, string, ribbon, the sky’s the limit! Give it a shot and let me know how you like it!

Bake Sale – January

Good morning scrappers. It’s that time of the month again. Today starts the GingerScraps Bake Sale. From January 15 to January 20, our designers have some of their kits reduced to just $1. Yes – $1 for a full kit or template set. Let’s see some of the goodies.

Just head over to the Bake Sale area of the store and grab these and more!!

Creative Style | Project 52/365

Happy 2017 everyone! I got a bit overwhelmed at the start of the year; and I failed to bring you your weekly inspiration. Even though we are two weeks into 2017, it isn’t too late to start on our photo projects. I am talking about Project 365 and Project 52. What are those? According to Google

Simply put, Project 365 is committing to taking one photo a day for a year. Whether you’re using a fancy DSLR, or simply using your phone, there is no wrong or right way to put together your own Project 365.

Basically a photo a day for project 365 and a photo a week for project 52. You can capture it however you want, post it however you want (or not at all)…or scrap it! I personally post them on Instagram with my personal hashtag, as well as scrap them.

To help you on your way (and to keep going) GingerScraps has a challenge area just for this, as well as a section in the store dedicated to the products you can use on your layouts. Today we are going to showcase a few of those items.


Fresh Baked: January 13, 2017

The weeks just keep flying by! The designers are not letting the time get away from them and are putting out beautiful kits and templates this week!

Remember when you spend $10 in the store, you get a great new collab!

fwp32 
https://store.gingerscraps.net/GingerBread-Ladies-Collab-Puttin-On-The-Glitz.html

[Read more…]

Sneak Peeks January 12, 2017

Happy Thursday! We had a bit of Winter at the beginning of the week here in Florida but now it’s in the high 70’s again. Hopefully most of you fared well during the first Snowmageddon of the year. If you are still trapped inside, our designers have some great new releases coming out tomorrow to help you pass the time!

From Laurie’s Scraps

From JoCee Designs

From JB Templates

From Dagi’s Temp-Tations


From Amy Stoffel

From Tinci Designs

From Little Rad Trio

From LouCee Creations

From Miss Fish


From CathyK

Have a wonderful weekend filled with making memories and scrapping them!


GingerBread Ladies Sneak Peeks – 01/13/17

Oh my goodness do I have some fabulous sneak peeks for you this week. Our designers have been super busy.

Whew… I am totally excited about the new goodies this week. Make sure you head over to the store on Friday to pick up your favorites. Make sure to check out the blog tomorrow for some sneak peeks from our fabulous store CT.

Tutorial Tuesday (Photoshop Elements)

Journaling INside the Box!

Greetings GingerScrappers! I’m hoping against hope the big server swap-out goes smoothly and quickly so nobody misses out on anything around here. I’m actually at work today – but you know nurses are capable of being in two places at one time (or at least the hospital thinks we are…) so you’re still going to get your dose of PSE instruction. Today we’re going with something really simple and straight-forward. Carol (user name gnana) requested a lesson on putting text inside a shape. Sadly with PSE, we’re limited to the custom shapes available within the software, but that doesn’t mean we can’t still be creative! So let’s have a look…

I was putting together a Chanukah layout for the January Recipe Challenge the other day, using Tracey Monette‘s (aka Clever Monkey Graphics) Hanukkah Oy kit and wanted to put my journaling inside a Star of David. (I made this tag out of an element and some paper.) See how I’ve selected the Custom Shape Tool below? The pop-up menu will automatically give you the Default Shapes so go ahead and select Show All then pick a shape that’s close to the one you want to journal within.

The best the software could do for me was a sheriff’s badge. So I went with that. I put my cursor on the tag then left-click>dragged out the shape to the size I wanted. (Make the shape as large as you can without extending past the edges of your item. You can always reposition it once you’ve got the shape and size you want.) The shape will then appear in your Layers Panel.

I don’t know about you, but I have a gazillion fonts and choosing the one I want to use is painfully difficult. So when I heard about wordmark.it I knew I’d use it a LOT! All you do is go to the website and pop some of your text into the box at the centre of the black band at the top. The site will then show you what it looks like in every font on your hard drive. How awesome is that?

Once I decided on the font I wanted to use (which isn’t the one shown in the screenshot… I actually used one called Worship Display, which seemed to be an appropriate choice) I made sure Horizontal Type Tool was selected. Then when I moved my cursor over to the shape layer, I got a slightly modified text cursor that looks a little like I’ve shown you below. That’s how you know it’s going to do what you want.

Sizing your text will determine how well your text fills the space. I could have gone smaller with the font, used more words and extended my text a little closer to the edges but the shape wasn’t huge and I wanted to be able to read it. You may well have to adjust what you want to say to make sure it all fits inside your shape. See how my text fits neatly and has a nice border around it?

I zoomed out a bit so you can see the entire text and how it fits.

Of course, I don’t want that white sheriff’s badge to stay there. When I turn the visibility of the shape layer off, my text remains and is still exactly where I put it. So guess what! That layer can just be deleted altogether. Cool, right?

So now you can go ahead and make your own tag shapes for journaling and have a polished look to your finished layout. The easiest way to do that is to create a shape. Then make a copy of that shape (CTRL/CMD+J) and simplify them (right-click on the layer>Simplify Layer) so you can play with them. Make the bottom one a little larger than the one on top so you have a nice border. Then clip papers to each layer. Bingo!

I hope you’re having fun learning new tricks! See you all next week.

January Featured Designer – Ponytails Designs

Happy 2017. Hard to believe it’s a new year. With a new year (month) comes a new GingerScraps Featured Designer. This month we are talking to Natasha of Ponytails Designs.

How did you get started in digital scrapbooking?

After my daughter was born I was looking for something quiet to do while baby napped. A friend had tried digital and I thought it was a cool idea. I gave it a try and was hooked.

What made you decide to design?

I’ve always been a creative person and so I thought I’d give it a try. I love the whole process from planning to the actual design work itself.

What do you use to create your designs (program, additional tools, etc.)?

I mainly use Photoshop CC. I’ve been trying to learn AI but am finding it really frustrating.

Describe your design workplace.

I have a small desk in the kitchen where I set up my laptop. From there I’m fairly central in the house and can keep an eye on my daughter, as well as be a part of whatever else is going on in the house.

What is your favorite thing about designing?

I love the creative process.

What is your favorite kit currently in your GS store and why?

My favorite is probably Country Girl. I designed that completely for myself. It reflects who I am and what my life is all about.

What’s your favorite holiday?

Summer holidays for sure. Does that count? lol

What is your favorite family holiday tradition?

Our annual summer RV trip we take with friends. We take 2-3 weeks and explore new places and definitely new wineries!

If you had a warning label, what would yours say?

Do not attempt to approach in the morning unless coffee has been consumed.

Aside from necessities, what one thing could you not go a day without?

Coffee, for sure.

How would your friends describe you?

Friendly, warm, welcoming, and always smiling

What would you prefer as a second home: Mountain cabin, beach house, or big city condo?

Beach house for sure. In my dream world I’d have a ranch next to a beach on Maui.

Thanks Natasha!!

Make sure to check out her GS Store, Facebook page, and blog.

Also make sure you are checking out the GS Blog every day to grab pieces of the special kit she is sharing with us this  month.

Fresh Baked: January 06, 2017

Still getting the hang of typing 2017. Writing it, too. The first week of 2017 is nearly over and the designers are already showing that they’re going to do some amazing things this year!

Remember when you spend $10 in the store, you get a great new collab!

fwp3 
https://store.gingerscraps.net/GingerBread-Ladies-Collab-Puttin-On-The-Glitz.html

[Read more…]

Sneak Peeks January 5th, 2017

Happy New Year! I hope 2017 brings a lot of scrapbooking time! And to help fill that time, check out some of the goodies releasing tomorrow!

From Laurie Scraps

From Dagi’s Temp-tations

From Miss Fish

From Lindsay Jane

From Tinci


From JB Studio

Have a Wonderful first weekend of the New Year!