Tomorrow starts the last month for the year of 2018, but that doesn’t mean that the fun stops! Nope! Time to get your shop on!
Remember when you spend $10 in the store, you get a great new collab! It’s time to spend time with your loved ones!
https://store.gingerscraps.net/GingerBread-Ladies-Collab-Time-With-Family.html

https://store.gingerscraps.net/Power-of-Three-Templates-Bundle-by-JB-Studio.html

https://store.gingerscraps.net/Kristmess-Angels-Holiday-Photo-Cards.html

Bundle: https://store.gingerscraps.net/Sweater-Weather-Bundle.html
Kit: https://store.gingerscraps.net/Sweater-Weather-PageKit.html
Flairs: https://store.gingerscraps.net/Sweater-Weather-Flairs.html
Grunge: https://store.gingerscraps.net/Sweater-Weather-Grunge.html
Clusters: https://store.gingerscraps.net/Sweater-Weather-Clusters.html
Titles: https://store.gingerscraps.net/Sweater-Weather-Titles.html
Cards: https://store.gingerscraps.net/Sweater-Weather-Cards.html

https://store.gingerscraps.net/December-Magic-by-LDragDesigns.html

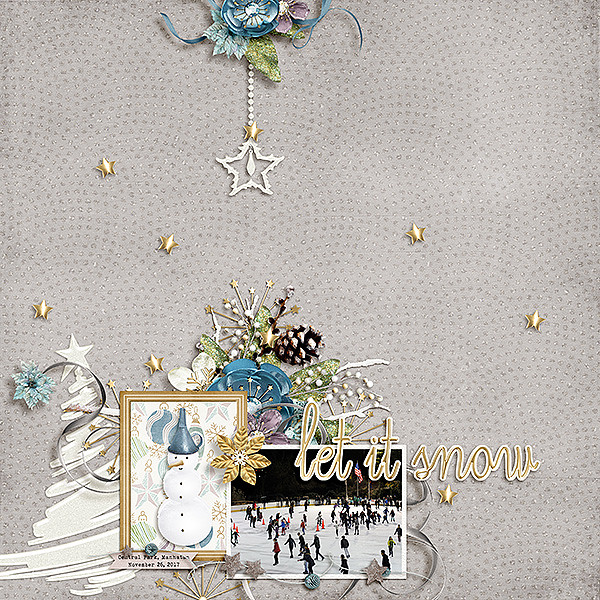
https://store.gingerscraps.net/Let-It-Snow-by-LDragDesigns.html

https://store.gingerscraps.net/Peacock-Christmas-by-LDragDesigns.html

https://store.gingerscraps.net/its-christmas-collection-by-Lindsay-Jane.html

Kit: https://store.gingerscraps.net/its-christmas-by-Lindsay-Jane.html
Quick Pages: https://store.gingerscraps.net/its-christmas-quick-pages-by-Lindsay-Jane.html

https://store.gingerscraps.net/Our-Life-Templates-1-and-2-by-Miss-Fish-Templates.html

https://store.gingerscraps.net/Our-Life-Templates-3-and-4-by-Miss-Fish-Templates.html

https://store.gingerscraps.net/Our-Life-Templates-5-and-6-by-Miss-Fish-Templates.html

https://store.gingerscraps.net/Neia-Scraps/

https://store.gingerscraps.net/Neia-Scraps/

Collection: https://store.gingerscraps.net/Sweet-Christmas-Coll-by-Snickerdoodle-Designs-and-Linda-Cumberland-Designs.html
Kit: https://store.gingerscraps.net/Sweet-Christmas-Kit-by-Snickerdoodle-Designs-and-Linda-Cumberland-Designs.html
Accents: https://store.gingerscraps.net/Sweet-Christmas-Accents-by-Snickerdoodle-Designs-and-Linda-Cumberland-Designs.html
Alphas: https://store.gingerscraps.net/Sweet-Christmas-Alpha-by-Snickerdoodle-Designs-and-Linda-Cumberland-Designs.html
Borders: https://store.gingerscraps.net/Sweet-Christmas-Borders-by-Snickerdoodle-Designs-and-Linda-Cumberland-Designs.html
Clusters: https://store.gingerscraps.net/Sweet-Christmas-Clusters-by-Snickerdoodle-Designs-and-Linda-Cumberland-Designs.html
Edgers: https://store.gingerscraps.net/Sweet-Christmas-Edgers-by-Snickerdoodle-Designs-and-Linda-Cumberland-Designs.html
Glitter: https://store.gingerscraps.net/Sweet-Christmas-Glitter-by-Snickerdoodle-Designs-and-Linda-Cumberland-Designs.html
Quick Pages: https://store.gingerscraps.net/Sweet-Christmas-Quick-Pages-by-Snickerdoodle-Designs-and-Linda-Cumberland-Designs.html

https://store.gingerscraps.net/Under-The-Canopy-Bundle-by-ADB-Designs.html

https://store.gingerscraps.net/Family-Portrait-by-ADB-Designs.html

Collection: https://store.gingerscraps.net/360-Life-All-About-December-Collection-by-Aimee-Harrison.html
Kit: https://store.gingerscraps.net/360-Life-All-About-December-Page-Kit-by-Aimee-Harrison.html
Alphas: https://store.gingerscraps.net/360-Life-All-About-December-Alpha-Sets-by-Aimee-Harrison.html
Borders: https://store.gingerscraps.net/360-Life-All-About-December-Borders-by-Aimee-Harrison.html
Templates: https://store.gingerscraps.net/360-Life-All-About-December-Templates-by-Aimee-Harrison.html
Date Tabs: https://store.gingerscraps.net/360-Life-All-About-December-Date-Tabs-by-Aimee-Harrison.html
Titles: https://store.gingerscraps.net/360-Life-All-About-December-Word-Art-Titles-by-Aimee-Harrison.html
Quotes: https://store.gingerscraps.net/360-Life-All-About-December-Quotes-by-Aimee-Harrison.html
Messy Edges: https://store.gingerscraps.net/360-Life-All-About-December-Messy-Edges-by-Aimee-Harrison.html
Glitters: https://store.gingerscraps.net/360-Life-All-About-December-Glitters-by-Aimee-Harrison.html

https://store.gingerscraps.net/Camo-Christmas-by-BoomersGirl-Designs.html

Bundle: https://store.gingerscraps.net/-2018-December-Bundle-Collection-by-Connie-Prince.html
Kit: https://store.gingerscraps.net/-2018-December-Kit-by-Connie-Prince.html
Mixed Media: https://store.gingerscraps.net/-2018-December-Mixed-Media-by-Connie-Prince.html
Snippets: https://store.gingerscraps.net/-2018-December-Snippets-by-Connie-Prince.html
Messy Papers: https://store.gingerscraps.net/-2018-December-Messy-Papers-by-Connie-Prince.html
Border Clusters: https://store.gingerscraps.net/-2018-December-Border-Clusters-by-Connie-Prince.html
Templates: https://store.gingerscraps.net/-2018-December-12×12-Template-Pack-CU-Ok-by-Connie-Prince.html
Extra Papers: https://store.gingerscraps.net/-2018-December-Extra-Papers-by-Connie-Prince.html
Alpha Pack Add On: https://store.gingerscraps.net/-2018-December-Alpha-Pack-AddOn-by-Connie-Prince.html
Word Art: https://store.gingerscraps.net/-2018-December-Word-Art-Pack-by-Connie-Prince.html
Quick Pages: https://store.gingerscraps.net/-2018-December-Quick-Pages-by-Connie-Prince.html


Remember, if you complete 10 challenges, just ten, you get a free kit as well!!

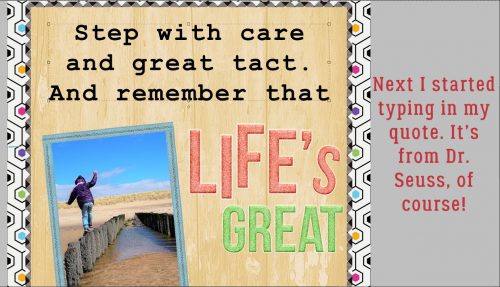
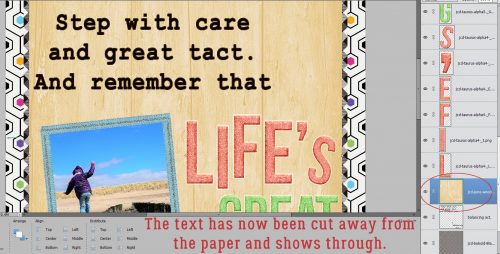
It’s time to get some time with your family.