Archives for September 2021

DD: SEPT SPECIAL POST

This is a special file for the September Daily Download that contains corrections to several elements. We have placed these in one zip file to make it easier for you to download.

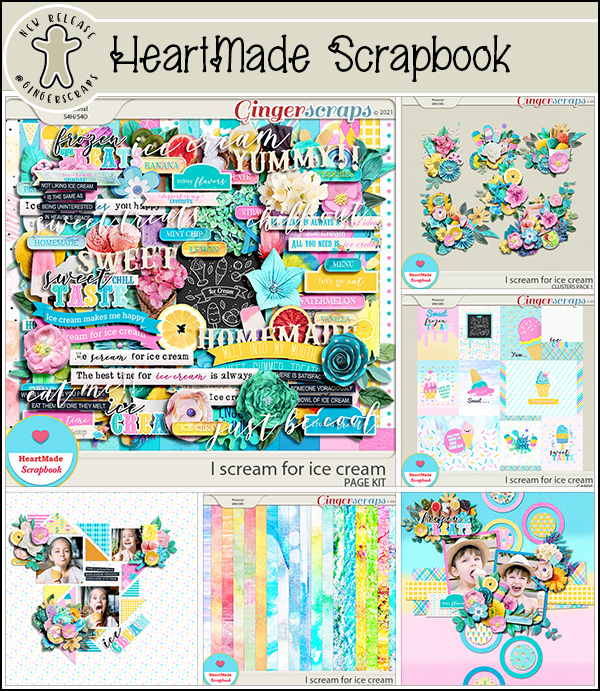
Heartmade Scrapbook and all of us at GingerScraps apologize for any inconvenience.

https://bit.ly/3ulowzz

This link will not expire.

Tutorial Tuesday (Tips and Tricks)

It’s Almost DIGITAL SCRAPBOOKING DAY!!

Hey all you GingerScrappers! Digital Scrapbooking Day is coming up fast!! It’s on Saturday, October 2 and it’s going to be a blast. But don’t let “Day” throw you off. It’s not just a day, it’s a week-long celebration of our hobby and it’s always epic. This year’s theme is just perfect. Ginger has given me the go-ahead to share this sneak peak with you. Drum roll please!

All the digital scrapbooking stores around the worldwide web have special events and sales. Here at GingerScraps, there are a bunch of grab bags specifically designed for DSD, special challenges, another scavenger hunt, and a free-with-$20-purchase MEGA collab. (I’ve seen the MEGA collab… you’re going to love it!!!! It has about 100 papers… and the palette is beautiful.) Other stores will have designer blog hops and special events on their sites too…

So start with a PLAN! Don’t just jump into the deep end. Check out the forums at your favourite stores to see what they have going on. Then make yourself a calendar of events. Set some reminders so you don’t miss the entry deadlines, speed scraps or chats. If you’ve ever missed out on something amazing by a matter of an hour, you’ll understand the need for some nudges.

Make sure you have hard drive space for your purchases and freebies. Or invest in some thumb drives or an EHD to transfer some of your older stuff to so you have lots of room for your downloads. That MEGA is going to need a bunch of room. Label this extra storage right away so you don’t forget what you’ve put on it. Forgetting to label them could mean you lose track of all the awesome kits you’ve moved and you don’t want that! I have a brand new 6TB EHD just waiting for me to fill it up.

Set a BUDGET! It’s way too easy to overspend when you’re surrounded by smokin’ hot deals, and PayPal makes it painless… until later. Figure out how much you have to spend, and stick with it. I usually save a bit of money so I can spend $20-25 per favourite digishop (I have 3 that I like a lot) without feeling guilty. (With the slightly stronger Canadian dollar this week, I might be able to make my money go a bit farther. As long as there isn’t some catastrophe here that causes our currency to tank. ‘Cause that’s never happened before….. 😉 )

Don’t feel obligated to participate in anything that isn’t going to make you happy. If you don’t have time to join in on the games in the Forum, don’t worry about it! If you aren’t into speed scraps, that’s great! Extra challenges might be fun, but if you have better things to do, you have better things to do. Freebies take up a lot of space, both on your computer and in your head; if you don’t think you’ll ever use what the designer is giving away, you don’t have to take it. This is especially true of blog hop freebies; the topic and palette may be really exciting, but there will be some designers’ contributions that don’t fit into your style of scrapping, so don’t download them. Believe me, you won’t miss them.

While you’re waiting for the festivities to begin, go through your photos and choose some for those challenges you just won’t be able to resist. Let your family know when you’re going to need some uninterrupted time and don’t stay up too late! Because there’s still Black Friday next month – we have to pace ourselves!

Sharing our stories is important, both for us now and for those who come after us. The last 18 months have had quite an impact on all of us in one way or another. Some of us have lost loved ones, some of us have been sick ourselves, some of us have worked harder than ever before to help others and some of us have channeled our energies in new directions. But we all have learned what matters and what doesn’t. Let’s celebrate ourselves!

Fresh Baked: September 24, 2021

Here we are at another Friday. And another end of the month. I don’t know why it amazes me that time seems to fly, but it does. Every month I am blown away by how fast it all goes.

Remember when you spend $10 in the store, you get this great kit for free.

There is a wide range of topics and colors in this week’s new releases.

Have you grabbed the Monthly Mix? Only on more week to pick it up at this reduced price.

And you have one more week to complete those challenges. You only need to complete 10 challenges to get this great reward.

DD: SEPT 23

https://bit.ly/2YbH0qb

Remember, the download is kept up for 5 days, and then it is taken down. If you miss pieces, the kit will be available for purchase on the first day of the following month.


DD: SEPT 22

https://bit.ly/3ysIR6j

Remember, the download is kept up for 5 days, and then it is taken down. If you miss pieces, the kit will be available for purchase on the first day of the following month.

Tutorial Tuesday (Individual Style)

Jumpstart Your Layouts!

So how many of you are Challenge fans? If you aren’t, you should be!! The GingerBread Ladies designers are incredibly generous with their talents both through their participation in the GingerBread Ladies‘ collaborations: Monthly Mix, Free-with-Purchase and Challenge rewards, and within the Challenges themselves. Did you know there are freebies included in several Challenges EVERY month? Brushes, templates, word art, mini kits, add-ons – so many gifts!! Sheri, whose design handle is Jumpstart Designs, provides a mini kit every month in the Jumpstart Your Layouts Challenge (although these minis are the same size as some designers’ full kits…) and they’re amazing. I posted my JSYL Challenge layout to the thread in the Forum and couldn’t help but notice how every scrapper’s layout – using the identical collection of supplies – looked SO different. So I thought we could talk a bit about how we all have such individual approaches to creativity.

This is the preview for the Jumpstart Your Layout Challenge. Like all of Sheri‘s kits, the colour palette is versatile, it’s a bit grungy, a bit pretty, a bit sophisticated and 100% awesome.

A-M chose to use only the cream and brown parts of the kit. Her layout is simple, but eye-catching. Having a black-and-white photo as the centerpiece was genius.

Breoni too chose mainly the neutrals, but added a couple of aqua pops… which are the perfect accompaniments for her photo. Her positioning of the metal tag and ribbon element frames her face and really leads the eye to her photo.

In keeping with the mostly cream background, next up is this beauty. What makes this layout by nimble4u truly stunning is the way she’s used her photo. She embellished with restraint and the sentimental feel of the photo is the star of the show.

Roxana has added a bit more of the aqua to her layout. The large word art is perfectly displayed against the aqua paper and the photo she chose adds a bit of whimsy. I think she’s used every single item in the kit as well, even though it’s not a requirement.

Kristal’s background is also mainly cream, but with some taupe details that adds to the seaside impact of her photos. Masking the boat photo with some aqua behind it makes it look like the water continues outside the photo. Genius!

Maskyra used the papers with such panache! The grungy, rubbed, torn and splattered background is a masterpiece! Her layout is a bit of a segué from mostly neutral/cream background into more colour detail.

This layout by beckturn moves us to an aqua background with a beautiful tear revealing the shades-of-brown striped paper behind it. I love the way she repeated her heritage photo with a tighter crop on the girls’ faces.

What immediately caught my eye about jcfdelaware‘s layout is the undulating anchor behind her photos. With aqua paint behind all the brown paper hexagons, it moves the eye across the page. and the large word art tucks into the lower left corner so neatly.

LisaCampbell‘s layout doesn’t really use a lot of aqua elements, but it “reads” as an aqua background, thanks to the curved paper cuts and aqua paint wrapping around her photos. (

Alasandra‘s layout just screams HAPPY to me! The aqua elements pop right off the paper.

I love how Pippin has turned her photo to sepia and makes it look like it grew out of the paper behind it. The dark brown border draws the eye, the bokeh leads it to the photo and the clusters keep it moving.

This layout is so perfect in every respect! It’s from the creative mind of kabrak1207 and is gently shifting us toward a darker brown palette. Her use of the scalloped borders is clever, and really frames the focal photo perfectly.

MomDoc_99 went monochromatic with the browns and it works very well. The scatters echo the circles on the background paper  and by framing the photos inside a circular paper mat and creating a similar frame for her title, her repeating shapes create a pleasing layout.

Here, DebraB has given us a grid-style layout on a deep brown background that makes the photos stand out. The border along the left draws attention to her journaling. I love how she used only part of the word art on a paper strip to customize her look.

And last… this layout by galavictor is completely different! She’s changed the Blend Mode on the striped paper and the floral aqua paper to accent the orange in her photo, created a bokeh effect with the scatters while also making brilliant use of masking to blend papers together and fade the photo into them. She applied some Layer Styles to the word art too. So much creativity!!

There you have it, fifteen unique layouts using a single kit. (You can see my own vision for this kit here. And yes, my granddaughter does eat non-stop.) What might YOU do with this FRE-E-E-E-E-E-E kit?


PS… What do you think about a Challenge spotlight post every once in awhile?

PDF Version: https://bit.ly/2ZeFvb3


Fresh Baked: September 17, 2021

Oh my goodness. It’s already mid-September and the season is definitely changing. It’s getting to be cooler here and I am loving it.

Remember when you spend $10 in the store, you get this great kit for free.

Let’s see a sampling of what is new in the store this week.

Have you picked up the September Monthly Mix? It’s great for those school pics.

Are you working on those challenges? Just 10 completed challenges gets you this great kit as a reward.

GingerScraps $1.00 Bake Sale NOW OPEN!

Who’s ready for some amazing deals!?!?

The $1.00 Bake Sale is NOW OPEN! 

Remember when you spend $10 in the store, you get this great kit for free.

*$1.00 Bake Sale* September 15-20

Don’t forget to stop by The Cherry on Top’s shop, 70% off until her closing on September 19, 2021

Are you working on those challenges? Just 10 completed challenges gets you this great kit as a reward.

Tutorial Tuesday (Photoshop Elements)

Anchors Aweigh! (Reverse Masking)

Hey GingerScrappers! It’s raining in the Okanagan… something that hasn’t happened much around here for months. That makes today a perfect day to do some scrapping.

I want to talk a little bit about anchors though. Not the heavy iron pieces that keep ships from floating away. The kind that help bring cohesion and polish to our layouts by keeping our photos from floating away! Think for a minute about how template designers create their templates and what draws your eye to them. There are lots of factors that come into play when choosing a template, and consciously or unconsciously, anchors are usually involved. They can take many forms. Paper strips and stacks are likely the most common anchors. But paint splats, brushes, masks, scatters and ephemera can all play that supporting role. Even a grungy paper itself can provide an anchoring effect when there’s a faded area that sort of frames your photo. But what if you want something a little different? Let me show you how to create an anchor point using paper, brushes and a reverse mask. The suggestion for this topic came from Ellen [gmae], with a hat-tip to AnnieA for the example she provided in the Gallery.

In my demo, I’ll be using a semi-solid paper and a patterned paper from Aprilisa‘s (retired) Captured Romance kit. [I chose it because my layout will be showcasing a heritage wedding photo.] If you choose to use this technique, you can use whatever combo you like: solid/solid, solid/patterned, patterned/patterned or any other combination you like. I’m using a freeform method in my demo; if you choose to use a template, turn visibility to all layers but the background and your focal photo spot off so you can see what you’re doing while we work through it. My photo spot is sized to the wedding photo I’m going to use.

I stacked the semi-solid gray paper behind the photo spot and popped the patterned paper above it.

If you’re a faithful follower [thank you!!] you’ll already know I love layer masks. They’re considered a non-destructive way of removing parts of a layer; you’ll see that the colour pickers change to white and black when you add a layer mask. White reveals, black conceals. But whatever you’ve concealed is still there, lurking in the background, just in case you want it to reappear. That’s the definition of non-destructive in the Photoshop/Elements context. If you’re concealing some part of a photo or an object and you oops, all is not lost. Just click the X key to swap conceal for reveal and paint it back in! The uses for layer masks are infinite, limited only by your imagination. So to create a layer mask, click on the blue square icon with the circle in the centre, found across the top of the layers panel. You’ll see the mask appear to the right of the layer you’re masking, and it’ll have a blue box around it indicating that’s the part of the layer that is active.

Elements has a default selection of brushes already installed in the software when you download it. They’re pretty basic brushes but are useful for a lot of things. My assumption is that we’re not making a nice straight, crisp edge on our contrasting papers so for this demo I’m going to use a Wet Media Brush. The number at the bottom of the thumbnail is the default size of the brush. You can ignore that. [Yeah. I have a lot of brushes. Many of them were free.]

Resize the brush so it’s manageable but not too big. 200 pixels is a good place to start. The default brush settings are shown in the Brush Settings menu.

Before using the brush, the layer mask must be inverted. We want it to conceal everything then reveal only the parts we want to see. The mask thumbnail will be black and the paper/object being masked will be invisible. To get there, just click CTRL/CMD>I. Make sure the foreground colour in the Color Picker is white… otherwise nothing will happen!

My first version is a simple oblong heart shape. I just dragged the brush to draw out a heart! Check out the layer mask. See what happened?

Here I’ve just dragged my brush in a sort of swath, cutting off a corner of the gray paper.

Zig-zags can look pretty cool.

Or making several vertical passes frames the photo as well as anchors it.

But what if we go horizontally?

Following are a few examples of using a brush as a stamp to create an anchor. To do this, make the brush as large as you can. With this butterfly brush, I think it would look better under a smaller, squarer photo. See how the polka dots on the paper show up?

This star scatter [a challenge brush from CathyK a long time ago] would work better with a much smaller, more obvious pattern, don’t you think?

Ooh, I like the idea of this one. Not necessarily the execution though… I used three different brushes from a free set called Corners with Birds. I’d want to make sure the brushes don’t overlap because the contours are muddied.

Then there’s this filigree floral corner. I really like this one! But which version will I settle on? You’ll have to look for my layout in the Gallery to find out. I’m still on the fence!!

If you’ve seen something you’d love to emulate but aren’t sure how to get there, just shoot me a message and I’ll see what I can do to make it work for you!

PDF Version: https://bit.ly/39cdrH3

Fresh Baked: September 10, 2021

Happy Friday. Have you all recovered from the epic 13th birthday party? I hope you had some fun in the forum and grabbed some great deals in the store.

Remember when you spend $10 in the store, you get this great kit for free.

We’ve got some great kits new in the store this week. Let’s see a sampling of what the designers are adding.

JB STUDIO

AIMEE HARRISON

POLKA DOT CHICKS

MEMORY MOSAIC

Are you working on those challenges? Just 10 completed challenges gets you this great kit as a reward.