SKETCHIER!
![]()
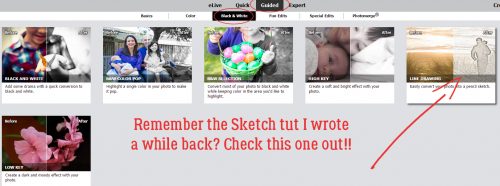
If you’ve been reading these tutorials from the beginning you might remember one on turning a photo into a sketch. It had a lot of steps and might have been a little daunting for the novice Elements user. So I think you’re going to love this one for its total simplicity. It’s one of the black-and-white Guided Edits in PSE 15 called Line Drawing. (It might also be there in 14, but when I tried to find out which version it debuted in, I wasn’t successful.) And the possibilities with it are endless!

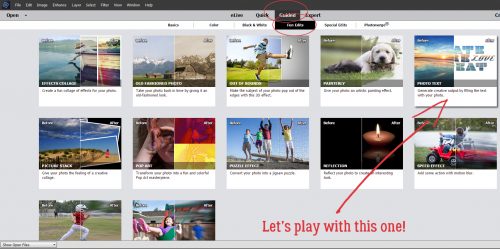
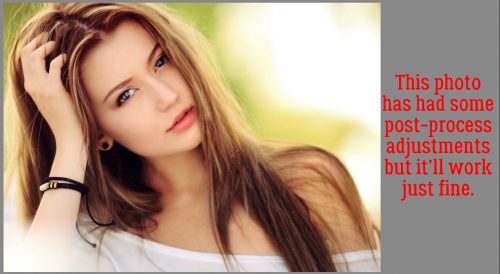
The best photos for this technique are ones with sharp focus and lots of detail. I played with it using a close-up photo of my dog and loved it. For this example though, I used a stock photo from Pixabay. Then select Guided>Black & White>Line Drawing.
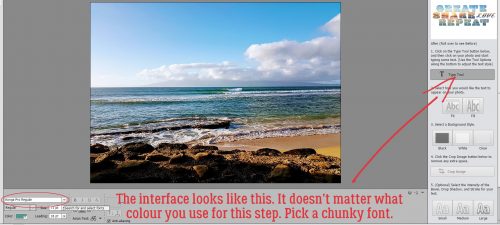
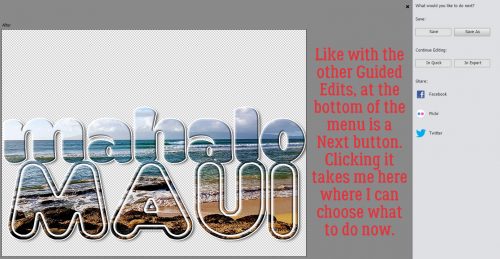
Take a look at the different items I’ve highlighted in the image below. They’re the controls for this Guided Edit and they’re all really useful.

In the upper left corner of the workspace, you can choose the way you view the changes. Your choices are After Only, Before Only, Before & After – Horizontal and Before & After Vertical. Below I’m showing you Before & After Horizontal, where you can watch the transformation as it happens. You also have the option of zooming in on specific areas of the photo.

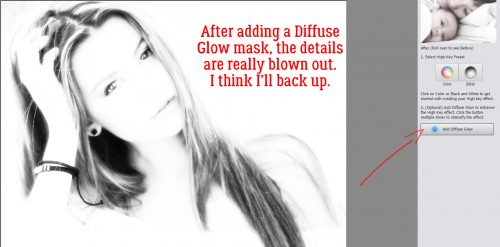
The Pencil Sketch Effect button takes all the work out of the process. One click is all it takes. If you click more than once, the sketch effect becomes more minimalist; give it a try and see if you like it. You can always CTRL/CMD>Z back to the initial step if you don’t.

Here’s what my example looks like after 2 clicks.

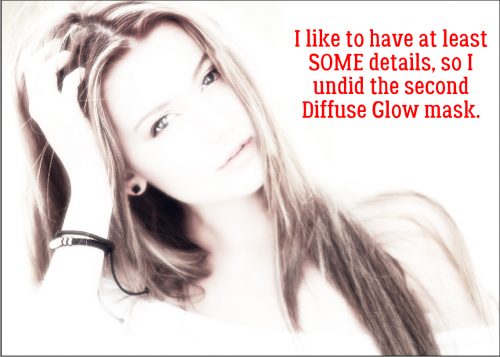
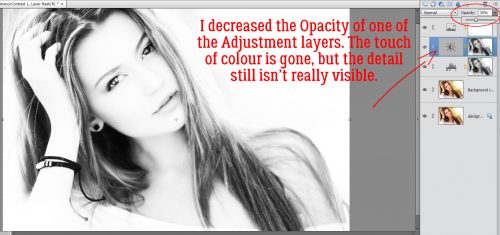
The next step is optional. Clicking on the Adjust Layer Opacity button adds back a hint of colour without losing the sketchy effect. Multiple clicks on this button however don’t produce additional effects. As you’ll see below, you can still make adjustments to this step later.

Adjusting Levels is where the REAL magic happens. My copy of Elements has a glitch in it such that the Levels button in this Edit doesn’t work. But I know that CTRL/CMD>L will bring up the Levels interface. If you’ve never used the Levels adjustment menu you’re in for a treat.

Levels adjustments can be made on all the different channels (RGB, Red Green and Blue) but for this purpose RGB – the default – is the only one we need worry about. I played with the sliders so you could see the way each adjustment changes the image. Looking at the histogram – that black bit in the Input Levels box – you can see the way the curve bends as you move the sliders. For this adjustment, moving the right little wedge to the left lightens the image.

On the other hand, moving the left wedge to the right darkens the lines on the image and seems to sharpen it too.

The trick is to adjust them so that the image pleases you. Watch what’s happening as you move the sliders and you’ll know when you see what you like.

My final settings for this image are shown below. I moved the left Input Levels slider to the right and the right Output Levels to the left.

So, once you’ve got that image looking the way you want it to, maybe like a lithograph from an old book… click on that Next arrow at the lower right of the workspace.

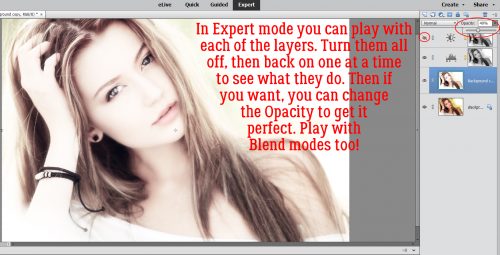
Now you have a choice. Remember from our other Guided Edits? You can save it or you can work on it some more. I picked In Expert so I could play with it just a bit more.

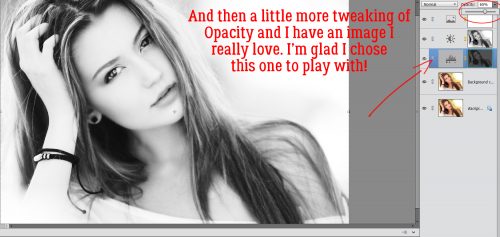
As you can see, there are two layers there when you move to Expert. There’s no limit to the things you can do once you get to this point. The Opacity of the sketch layer is 82% when you first open up your project in Expert.

Just as an example, I put the Opacity of the sketch layer to 100% and that hint of colour (really obvious when you look at the sky) is GONE. I don’t think it looks as interesting, do you? But you could use this to make personalized colouring books… think of the options1

So then I lowered the Opacity to 60%, which keeps the sketchy detail but lets more of the colour come through. You could also lighten up the coloured layer underneath in spots so only the sketchy bits are visible in that area. If you plan to do that, right-click on the photo layer and select Layer from Background, so you can add a transparent layer underneath it.

When you’re totally happy with how it looks, you can merge the layers together and save it with a funky name. Of course, that step is optional, but if you use it for something you’ll have to be sure to link the layers so they move together.

Whaddya think? Are you going to give it a try?
![]()