Archives for March 2019

Tutorial Tuesday (Fonts)

Fontastic Spring!

Once again I’m apologizing for not having a great tutorial prepared for you. I’ve been caught up in family obligations the last several days and haven’t had time for much else. I didn’t even get my family bible layout done. But I’ve noticed that almost all the comments on last week’s post mentioned the fonts I showed you. And I also noticed that I haven’t done a post about spring-y fonts. So there we’re going!

As I’ve mentioned before, I love dafont.com as a great source of free fonts; their selection is outstanding! I made a quick cruise through there and have found you a baker’s dozen of fonts (and a dingbat set) that would make great titles or subtitles for spring layouts. See if you agree. Each font is hyperlinked to the site; just click on the font name in the description.

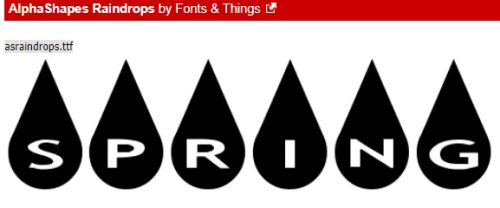
Alpha Shapes Raindrops might be what you’re looking for when you scrap rainy-day layouts. If you simplify each letter on its own layer, you can use the Smudge tool to animate your drops.

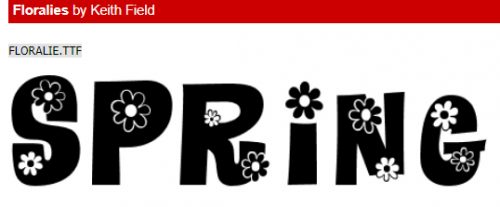
Floralies is similar to Blomster, but a little “lighter”.

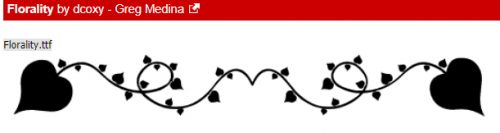
Florality isn’t technically a font, but the viny, leafy look of it is so pretty!

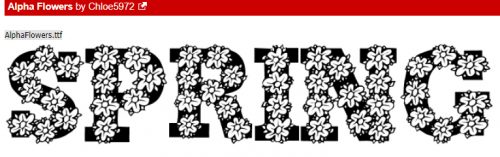
I’m thinking there are so many ways to make Alpha Flowers just POP off the page.

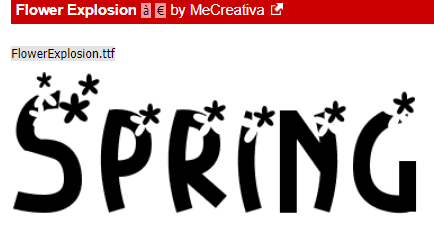
Flower Explosion is a little lighter too, but still really pretty.

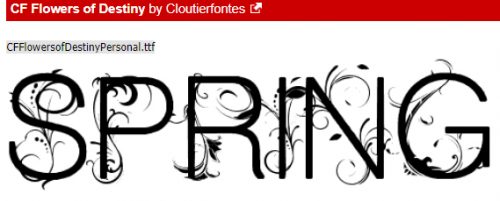
Think how beautiful CF Flowers of Destiny would look with a Blend Mode like Multiply! Ooh, and a gradient… smashing!

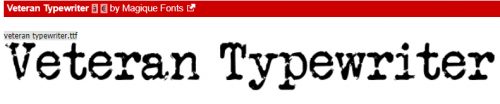
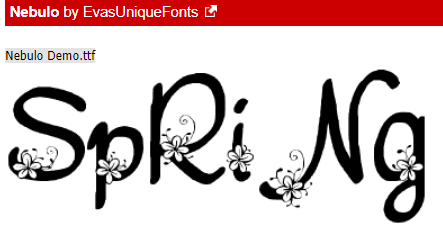
Nebulo is really gorgeous, just be aware that it’s a mishmash of capital and lowercase letters.

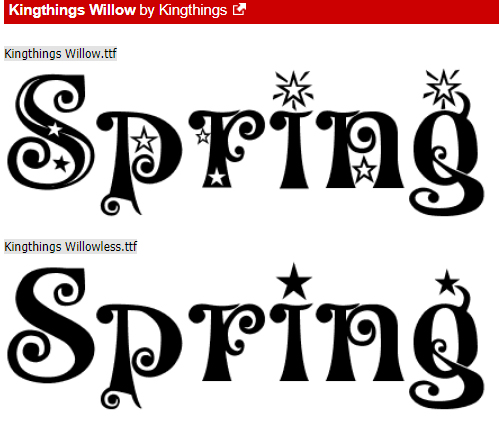
I just love this one! Kingthings Willow has two choices for even more freedom and control.

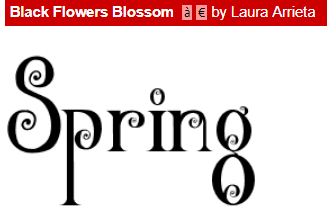
Black Flowers Blossom is just pretty.

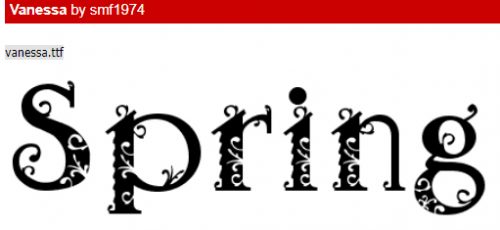
Vanessa is another really pretty font; imagine it clipped to a paper, maybe with a little border around it.

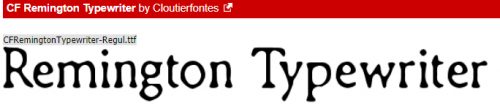
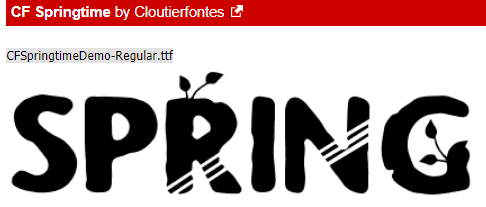
CF Springtime has a nice bit of heft to it, and those sprigs are a cute touch.

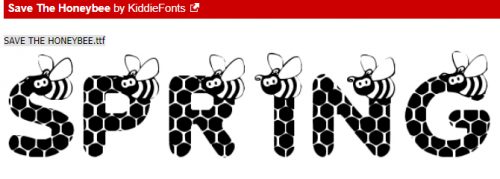
This whimsical little beauty would be an amazing addition of layouts with Day Dreams ‘n Designs‘ Daily Download kit Bee Mine. I think we also need to heed the message… Save the Honeybee.

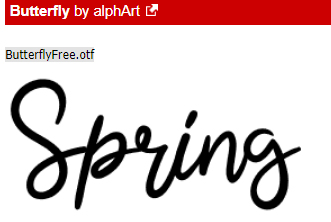
This one doesn’t say spring so much as the name of it does. I like it though. Butterfly

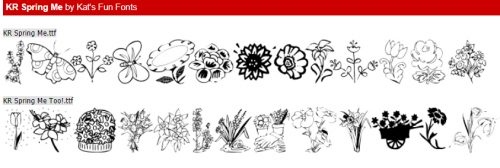
That leaves only the dingbat set. KR Spring Me has LOTS of spring-y images and so many possibilities.

Do you have any favourite fonts that make you think of spring? It looks like spring might actually be on its way to my corner of the world. Our temperature finally got above freezing on Sunday for the first time since January 31. That’s a long time to be cold!

How to use Distressed Patterns and a Freebie

Hey everyone! Today I’m here to talk about patterns.  Subtle or bold, distressed or not,  patterns add so much to a digital scrapbook page.

With the use of Blend Modes and Opacity Levels you can convert a plain paper to a pretty paper. Here’s how:

  1. In Photoshop CC or Photoshop Elements, open a background paper.
  2. Place a Pattern on the layer above the background paper.
  3. Experiment with Blend Modes and Opacity Levels of the Pattern.

Yes. It’s really that simple. Sure there are other things you can do to add even more interest, but basically, that’s it.

Here is a simple cardstock paper with a Distressed Pattern in Normal mode on the layer above the cardstock.

snickerdoodle-deslgns-how-to-use-patterns-01

In the image below I’ve changed the Blend Mode of the pattern to Multiply and lowered the opacity to 26%. The result is a soft and pretty look.

snickerdoodle-deslgns-how-to-use-patterns-02

By changing the Blend Mode to Screen, and increasing the opacity (to 73% in this case), we can get a totally different look:

snickerdoodle-deslgns-how-to-use-patterns-03

Here’s another example.  I changed the blend mode of the pattern to Hard Mix and lowered its opacity to 47%. I added a Color Balance adjustment layer to it, tweaking some of the colors. Now we have a totally different paper from the one above.

snickerdoodle-deslgns-how-to-use-patterns-7

Don’t restrict yourself to plain cardstock though. Here is a paper from my This is Me April kit.

snickerdoodle-deslgns-how-to-use-patterns-04

It’s a pretty paper by itself, but if you wanted to add even more interest, here’s something you might try:

  1. Add a pattern on a layer above a paper
  2. Experiment with Blend Modes and Opacity Levels. In this case, I used Color Burn and lowered the Opacity to 84%
  3. I added a Mask to the Pattern, and brushed away a majority of the pattern, just leaving it near the top of the paper to add more interest.

snickerdoodle-deslgns-how-to-use-patterns-06a

There are just so many ways to play with patterns!

These patterns are provided in PNG format, which gives you the ultimate flexibility!

Distressed Patterns 01 & 02

Available at  here in my Commercial Use Store

Take advantage of the 40% sale on these products, valid through March 14th.


Distressed Patterns Snickerdoodle Designs

And here is a freebie for you to experiment with. Just click on the image below to download!

Distressed Pattern Freebie Snickerdoodle Designs


Experiment and have fun!!

Fresh Baked: March 08, 2019

Sunday is Spring Forward Time! Though you’re losing an hour of sleep, you’re not going to miss out on some amazing new products in the store!

Do you feel lucky? Do you? If so, make sure you try your hand at Lady Luck and see if you can win your whole wish list!

00_thumb
https://forums.gingerscraps.net/showthread.php?46264-Are-You-Feeling-Lucky-WIN-YOUR-WISH-LIST-(2019)

Remember when you spend $10 in the store, you get a great new collab! Birthdays in March are so much more special!

fwp_thumb3
https://store.gingerscraps.net/GingerBread-Ladies-Collab-Lets-Celebrate.html

1
https://store.gingerscraps.net/In-The-Moment-Digital-Scrapbook-Kit-by-Dandelion-Dust-Designs.html

2
https://bit.ly/ddnd-GS

3
Bundle: https://store.gingerscraps.net/Sweet-Ride-Collection.html
Kit: https://store.gingerscraps.net/Sweet-Ride.html
Finishing Touches: https://store.gingerscraps.net/Sweet-Ride-Finishing-Touches.html
Journal Cards: https://store.gingerscraps.net/Sweet-Ride-Journal-Cards.html
Quickpages: https://store.gingerscraps.net/Sweet-Ride-Quickpages.html

4
Bundle: https://store.gingerscraps.net/Route-66-Collection.html
Kit: https://store.gingerscraps.net/Route-66.html
Finishing Touches: https://store.gingerscraps.net/Route-66-Finishing-Touches.html
Journal Cards: https://store.gingerscraps.net/Route-66-Journal-Cards.html

5
Months-Vertical: https://store.gingerscraps.net/Months-Photo-Overlays-Vertical.html
Months-Horizontal: https://store.gingerscraps.net/Months-Photo-Overlays-Horizontal.html
Months-Bundle: https://store.gingerscraps.net/Month…ys-Bundle.html

6
Days-Vertical: https://store.gingerscraps.net/Days-Photo-Overlays-Vertical.html
Days-Horizontal: https://store.gingerscraps.net/Days-Photo-Overlays-Horizontal.html
Days-Bundle: https://store.gingerscraps.net/Days-Photo-Overlays-Bundle.html

7
https://store.gingerscraps.net/Small-World-Ireland-Bundle.html

8
[kit] https://store.gingerscraps.net/Green-Thumb-by-LDragDesigns.html
[Collection] https://store.gingerscraps.net/Green-Thumb-The-Collection-by-LDragDesigns.html
[templates vol 1] https://store.gingerscraps.net/Green-Thumb-Templates-Vol.-1-by-LDragDesigns.html
[templates vol 2] https://store.gingerscraps.net/Green-Thumb-Templates-Vol.-2-by-LDragDesigns.html
[cards] https://store.gingerscraps.net/Green-Thumb-Journal-Cards-by-LDragDesigns.html
[wornout papers] https://store.gingerscraps.net/Green-Thumb-Worn-Out-Papers-by-LDragDesigns.html
[alphas] https://store.gingerscraps.net/Green-Thumb-Alphas-by-LDragDesigns.html
[glitters] https://store.gingerscraps.net/Green-Thumb-Glitterstyles-by-LDragDesigns.html

9
[kit] https://store.gingerscraps.net/A-Happy-Day-by-LDragDesigns.html
[Collection] https://store.gingerscraps.net/A-Happy-Day-The-Collection-by-LDragDesigns.html
[cards] https://store.gingerscraps.net/A-Happy-Day-Journal-Cards-by-LDragDesigns.html
[stacked papers] https://store.gingerscraps.net/A-Happy-Day-Stacked-Papers-by-LDragDesigns.html
[worn out papers] https://store.gingerscraps.net/A-Happy-Day-Worn-out-Papers-by-LDragDesigns.html
[alphas] https://store.gingerscraps.net/A-Happy-Day-Alphas-by-LDragDesigns.html
[glitters] https://store.gingerscraps.net/A-Happyl-Day-Glitterstyles-by-LDragDesigns.html

10
https://store.gingerscraps.net/Border-It-11-by-Lindsay-Jane.html

11
9: https://store.gingerscraps.net/Border-It-9-by-Lindsay-Jane.html
10: https://store.gingerscraps.net/Border-It-10-by-Lindsay-Jane.html
11: https://store.gingerscraps.net/Border-It-11-by-Lindsay-Jane.html
12: https://store.gingerscraps.net/Border-It-12-by-Lindsay-Jane.html

12
https://store.gingerscraps.net/Border-It-12-by-Lindsay-Jane.html

13
https://store.gingerscraps.net/Wee-Bit-Lucky-Templates-by-Miss-Fish.html

14
https://store.gingerscraps.net/Wee-Bit-Lucky-Collection.html

15
https://store.gingerscraps.net/CU-by-Neia-Scraps/

16
https://store.gingerscraps.net/CU-by-Neia-Scraps/

17
Full Bundle – https://store.gingerscraps.net/Nostalgia-Bundle.html
Kit – https://store.gingerscraps.net/Nostalgia-Kit.html
Painted papers – https://store.gingerscraps.net/Nostalgia-Painted-papers.html
Solid papers – https://store.gingerscraps.net/Nostalgia-Solid-papers.html
Masks&Frames – https://store.gingerscraps.net/Nostalgia-Masks-and-Frames.html
Photomasks – https://store.gingerscraps.net/Nostalgia-Masks.html
Stamps&Borders – https://store.gingerscraps.net/Nostalgia-Stamps-and-Borders.html
Accents – https://store.gingerscraps.net/Nostalgia-Accents.html

18
March 2019 Templates Bundle – https://store.gingerscraps.net/March-2019-Templates-Bundle.html
Full of memories Vol.61 – https://store.gingerscraps.net/Full-of-memories-Templates-Vol.61.html
Creative blending Vol.47 – https://store.gingerscraps.net/Creative-blending-templates-Vol.47.html
Lovely day Vol.1 – https://store.gingerscraps.net/Lovely-day-Templates-Vol.1.html
Remember these days Vol.1 – https://store.gingerscraps.net/Remember-these-days-Templates-Vol1.html

19
https://store.gingerscraps.net/Second-Chance-Vol-1-Templates-by-Shepherd-Studio.html

20
https://store.gingerscraps.net/Cluster-and-colors-Ice-cream.html

21
Collection: https://store.gingerscraps.net/Hygge-Collection-by-Aimee-Harrison.html
Kit: https://store.gingerscraps.net/Hygge-Page-Kit-by-Aimee-Harrison.html
Alphas: https://store.gingerscraps.net/Hygge-Alpha-Sets-by-Aimee-Harrison.html
Titles: https://store.gingerscraps.net/Hygge-Titles-by-Aimee-Harrison.html
Borders: https://store.gingerscraps.net/Hygge-Borders-by-Aimee-Harrison.html
Solids: https://store.gingerscraps.net/Hygge-Solid-Papers-by-Aimee-Harrison.html
Edges: https://store.gingerscraps.net/Hygge-Messy-Edges-by-Aimee-Harrison.html
Glitters: https://store.gingerscraps.net/Hygge-Glitters-by-Aimee-Harrison.html

22
https://store.gingerscraps.net/-Quilted-1-Templates-by-Aimee-Harrison.html

23
https://store.gingerscraps.net/Word-Up-4-Templates-by-Aimee-Harrison.html

24
Hello March – Kit https://store.gingerscraps.net/Hello-March-Kit.html
Hello March – Cards https://store.gingerscraps.net/Hello-March-Cards.html
Hello March – Templates https://store.gingerscraps.net/Hello-March-Templates.html
Hello March – Bundle https://store.gingerscraps.net/Hello-March-Bundle.html

25
Bundle: https://store.gingerscraps.net/Lucky-Me-Collection-Bundle.html
Kit: https://store.gingerscraps.net/Lucky-Me-Kit.html
Flair: https://store.gingerscraps.net/Lucky-Me-Flair-Pack.html
Journal Cards: https://store.gingerscraps.net/Lucky-Me-Journal-Cards.html
Ombre Paper Pack: https://store.gingerscraps.net/Lucky-Me-Ombre-Paper-Pack.html
Smatter Pack: https://store.gingerscraps.net/Lucky-Me-Smatter-Pack.html

26
https://store.gingerscraps.net/The-Man-Cave-BGD.html

27
https://store.gingerscraps.net/This-Crazy-Life-Bundle-by-CathyK-Designs.html

28
https://store.gingerscraps.net/embroidery-frames-by-Clever-Monkey-Graphics.html

29
Cute Stuff: https://store.gingerscraps.net/Filled-Hoops-cutestuff-by-Clever-Monkey-Graphics.html
Jeans and Flowers: https://store.gingerscraps.net/Filled-hoops-jeansandflowers-by-Clever-Monkey-Graphics.html
Animals: https://store.gingerscraps.net/Filled-Hoops-animals-by-Clever-Monkey-Graphics.html

30
Bundle: https://store.gingerscraps.net/Travelogue-Alabama-Bundle-Pack-by-Connie-Prince.html
Kit: https://store.gingerscraps.net/Travelogue-Alabama-Kit-by-Connie-Prince.html
Word Bits: https://store.gingerscraps.net/Travelogue-Alabama-Word-Bits-by-Connie-Prince.html
Templates: https://store.gingerscraps.net/Travelogue-Alabama-12×12-Temps-CU-Ok-by-Connie-Prince.html
Word Art and Flair Pack: https://store.gingerscraps.net/Travelogue-Alabama-Word-Art-and-Flair-Pack-by-Connie-Prince.html

31
https://store.gingerscraps.net/Pocketful-Of-Love-7.html

32
https://store.gingerscraps.net/BGD-Pick-10-for-25.html

16_thumb3
https://goo.gl/DQK8T

Remember, if you complete 10 challenges, just ten, you get a free kit as well!!

cr_thumb3 They say it’s nearly spring! Maybe this kit will inspire Mother Nature to agree!

Sneak Peeks March 7th 2019

Happy Thursday! This week the designers went crazy and are releasing a TON of new goodies! Let’s check them out!

From Dagi

From LDrag Designs

From Tinci

From Clever Monkey Graphics

From JoCee

From CathyK

From Down This Road Designs

From Just Because Studio

From Aimee Harrison

From Miss Fish

Check out the full reveals tomorrow!


Tutorial Tuesday (Potpourri)

Heritage and History: Recorded

Late last week, I connected with one of my distant cousins on my mom’s mother’s side through Ancestry DNA. I never expect anything to come from my contacting them, and am always so thrilled when they respond. This particular long-distance connection led to an explosion of “new” family members for me and the beginnings of several friendships. But perhaps the best thing that has come from this is that I now have several photos of the old family Bible, that dates back to 1884.

I know there are more than a few of you loyal readers who are also interested in your family history and in recording what you learn for future generations. My family Bible photos are going to make an amazing layout. And GingerScraps has pretty much everything I’m going to need to make it special. And I’m going to let you in on my design process.

First, did you know you can search the store using keywords? On the far left of the store’s home page, there’s a search box right underneath the log-in panel. I typed in “heritage” and the search returned THIRTY-TWO pages (more than 500!) of possibilities. I know the right kit for me to use for my special layout will be in there somewhere. Here are some of the options I’m considering.

Many of these kits are part of a larger bundle, which of course is your very best value.

My heritage layouts go in one of two directions; I either focus on a single photo or I go with a collection of them. Because the photos by themselves are just “nice” but don’t tell the story, lots of room for journalling is a must. Our GS designers have so many options for templates that it’s like an embarrassment of riches. Here are some options for multi-photo layouts.

For titles and journalling, there are nearly as many options for (free) fonts as there are days in a year. I like to use decorative fonts for titles, typerwriter fonts for journalling – it needs to be completely legible for the story to be preserved. Here are some that I like.

Now, my challenge to you is to see if you can guess which kit, template set and fonts I will use for my layout. Check in the gallery at the end of the week to see if you’re right!

4 Ways to Add Color Pop

Colorizers, by Snickerdoodle Designs, are a new product here at Ginger Scraps. But what are they and what do you do with them?

Colorizers by Snickerdoodle Designs

Colorizers by Snickerdoodle Designs

Hi! I’m Karen, of Snickerdoodle Designs; and I’m here today to show you how to use my Colorizers to easily add color to your digital scrapbook papers, text, elements, and shapes.

I’ve prepared a 2-minute video to show you how easy Colorizers are to work with. Take a look at the video, and then scroll down for 4 additional ways to add color to your digital scrapbooking projects.

4 ways to add color pop to your digital scrapbook pages Snickerdoodle Designs

1. Changing the Color of an Element

Many designers include graffiti, doodles, or other graphic elements in their digital scrapbooking kits.   They are usually provided in papers or colors that coordinate with the designers kit, which makes them super easy to use. But if you love a specific graphic and want to use it with a kit of a different color palette, using a Colorizer is a fast and easy way to achieve that goal.

Here is a piece of graffiti from This is Me November Graffiti. While it coordinates beautifully with the kit, it is also a piece that could easily be used on any scrapbook page with a simple recolor.

snickerdoodle-4-ways-to-use-colorizers-tutorial-1

We could add a Hue/Saturation Adjustment Layer, to change the color, from brown to blue in this example.

snickerdoodle-4-ways-to-use-colorizers-tutorial-2

But if we wanted to add multiple colors to the design element, using a Colorizer is a quick method. Place a Colorizer above the graffiti and clip the Colorizer to the mask, and you’re done! The variegated color adds a unique flavor to this piece.

snickerdoodle-4-ways-to-use-colorizers-tutorial-3

2. Coloring Black Stamps

Stamps can add great interest to our pages. Most often they are black or gray in color. We can blend them into our backgrounds, colorize them, and apply Styles to them. Another quick way to color black elements in with Colorizers.

This is an element from You Color my World.” In the kit, it is colored, but I have made it Grayscale for this tutorial. I am going to use Colorizer #8 from Pack 1 to quickly color this Stamp.

I clipped the Colorizer to the stamp and experimented with Blend Modes. We can get a variety of different effects, based on the color of the stamp and the color of the Colorizer that we are using. In this example, Hard Light gives the best result. Sometimes just clipping a Colorizing to an image adds enough color, so you don’t need to do anything else. How easy is that?

snickerdoodle-4-ways-to-use-colorizers-tutorial-16

If you really want to play and experiment try adding a Levels or Curves Adjustment, or a Brightness / Contrast Adjustment. Or use 2 Colorizers – one Colorizer for half the stamp and a second Colorizer for the other half of the stamp.

3. Coloring Grayscale Backgrounds, Basic

No matter what type of grayscale background you have handy, whether it is plain or patterned, using a Colorizer is a quick way to create a lovely background paper.  Place a Colorizer on the layer above your grayscale background and experiment with Blend Modes of the Colorizer. (Grayscale paper from Crumpled Textures 01).

4. Coloring Grayscale Backgrounds, Advanced

If you want a little more fun with the Colorizers, start with an artsy, mixed media background. The texture I am using for this example is from my Artsy Textures 01, #6. I placed the Colorizer on a layer above the grayscale texture and changed the Blend Mode of the Colorizer to Screen.

Next, I merged the grayscale texture and the Colorizer to create one layer.  I placed the merged layer above a Crumpled Texture and changed the Blend Mode of the merged paper to Difference.

It was way too dark for my taste, so I added a Levels Adjustment, followed that with a slight Curves Adjustment. I was happy with that result.

Colorizers were designed to give you a multitude of options. You can get fabulous results by just using one Blend Mode, or you can use multiple techniques to get the effect you want. The key to using Colorizers is to play, experiment, and just have fun!

Go ahead! Give it a try!  Here’s a sample for you to experiment with. Just click on the image to download.

If you would like to download a PDF of this tutorial, you may do so here:  4 Ways to Add Color Pop.

Let’s Get Lucky @ Gingerscraps

March is full of all sorts of lucky things! St. Patrick’s Day! First day of Spring (or Autumn, if you’re on the other hemisphere).

It is the First of the month, and that means the reveal of our new Buffet!!

Don’t forget to check out the Buffet Bundles, one easy click to add bundles of Buffet goodies to your cart, and an amazing value too!

[Read more…]