Archives for July 2017

From The Archives Vol. 10

From the title you can probably guess that we are going to go back in the archives. What archives? Well, we are going to show you some digital scrapbooking supplies that are in the store that are at least a year old. Some of us may be new to digital scrapbooking or new to GingerScraps. Some people don’t check the store every week. Basically, things can and do get lost in the weekly shuffle of the store. With that in mind, we are going to go back and look at some great products. Our hope is that you find some great things you might have been looking for; or find something that you didn’t know you needed but totally do now that you see it! 🙂

Today is the 10th edition of From the Archives; and we have just scratched the surface of our lovely older kits. Here are some of the oldest kits in the store. All images are linked so you can check them out in the store. They might be oldies, but I promise they are goodies!!
Step right up! The county is fair is open and you’ll have a rootin’ tootin’ good time. Play some games, take a ride, watch the show! The prize is in the memories you’ll scrap with this County Fair kit! Too huge for just one kit, County Fair is split into two parts… Carnival and Exhibition. There’s something here for everyone. Yee haw!


Puppy dog tails. Snips and snails. When boys are little, they’re short and sweet. As they get older, they get bigger, and usually aren’t so cuddly. They’re into anything that requires outdoors. They live in dark but bright colors.
This kit signifies all of that. It’s perfect for anything that says “I know a boy”. It can be used for outdoor-related activities, as well. It’s a very versatile kit.


When life gives you choices, how will you handle it? Reflect your unique way behind each decision you take with this kit.
 

This kit is perfect for scrapping all your beach/ocean/sea photos!


Document your social butterflies with this digital scrapbooking collection from Trixie Scraps! With bright and fun colors and patterns, tons of wordart, and just the right scrappy bits, you’ll have just what you need for all your pages about social networking, pin obsessions, blogging and so much more!
 

Blue Heart Scraps and Pretty in Green teamed up and used the force, to create an out of this world collabed kit, perfect for any intergalactic team ready to save a princess or the world!
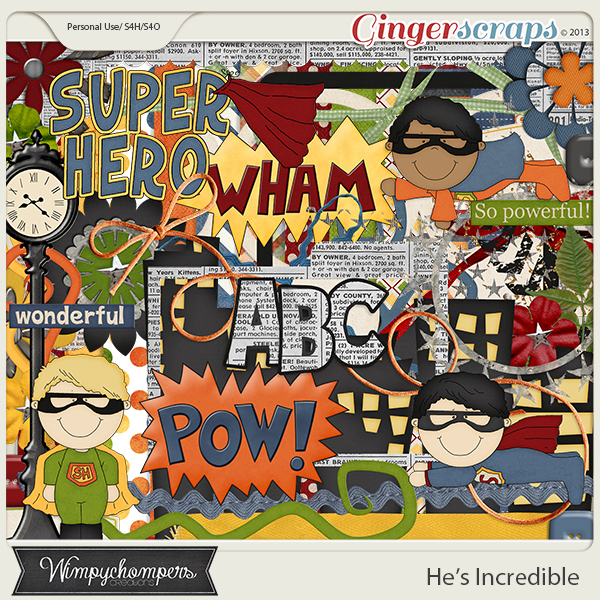


This little boy is here to save the day! He’s not afraid of anything and has the courage of a lion. Celebrate those special moments when he feels like he can take on the world.


There you go. 10 kits from the archives. Maybe you have some or all of these. Or maybe these designs and designers are new to you. I suggest taking a look back in the store to see what you can find. I will be back once a month to help you do just that.

Fresh Baked: July 28, 2017

The last Friday of the month! So many great kits and templates are coming out this week! There are some great sales as well!

Remember when you spend $10 in the store, you get a great new collab!

fwp3222
https://store.gingerscraps.net/GingerBread-Ladies-Collab-Life-Is-A-Picnic.html

missfish
https://store.gingerscraps.net/Vacation-Album-Add-On-1-Templates-by-Miss-Fish.html

neiascraps
https://store.gingerscraps.net/just-a-boy-Full-Kit-By-Neia-Scraps.html

tinci
https://store.gingerscraps.net/Pocket-full-of-memories-5..html

aimee
Collection: https://store.gingerscraps.net/August-s-Peridot-Collection.html
Kit: https://store.gingerscraps.net/August-s-Peridot-Page-Kit.html
Alphas: https://store.gingerscraps.net/August-s-Peridot-Alpha-Sets.html
Borders: https://store.gingerscraps.net/August-s-Peridot-Borders.html
Date Tabs: https://store.gingerscraps.net/August-s-Peridot-Date-Tabs.html
Messy Edges: https://store.gingerscraps.net/August-s-Peridot-Messy-Edges.html
Glitters: https://store.gingerscraps.net/August-s-Peridot-Glitters.html

blueheart
Bundle: https://store.gingerscraps.net/With-The-Girls-Bundle.html
Kit: https://store.gingerscraps.net/With-The-Girls-Kit.html
Journal Cards: https://store.gingerscraps.net/With-The-Girls-Journal-Cards.html
Ombre Papers: https://store.gingerscraps.net/With-The-Girls-Ombre-Papers.html

boomers
https://store.gingerscraps.net/Whats-Your-Sign-BGD.html

connie
Collection: https://store.gingerscraps.net/-2017-August-Bundle-Collection.html
Kit: https://store.gingerscraps.net/-2017-August-Kit.html
Date Pack: https://store.gingerscraps.net/-2017-August-Date-Pack.html
Inked Bits: https://store.gingerscraps.net/-2017-August-Inked-Bits.html
Messy Papers: https://store.gingerscraps.net/-2017-August-Messy-Papers.html
Border Clusters: https://store.gingerscraps.net/-2017-August-Border-Clusters.html
Templates: https://store.gingerscraps.net/-2017-August-12×12-Template-Pack-CU-Ok.html
Extra Papers: https://store.gingerscraps.net/-2017-August-Extra-Papers.html
Alpha Pack AddOn: https://store.gingerscraps.net/-2017-August-Alpha-Pack-AddOn.html
Word Art Pack: https://store.gingerscraps.net/-2017-August-Word-Art-Pack.html
Flair Pack: https://store.gingerscraps.net/-2017-August-Flair-Pack.html
Quick Pages: https://store.gingerscraps.net/-2017-August-Quick-Pages.html
Facebook Timeline Covers: https://store.gingerscraps.net/-2017-August-Facebook-Timeline-Covers.html

heartstrings
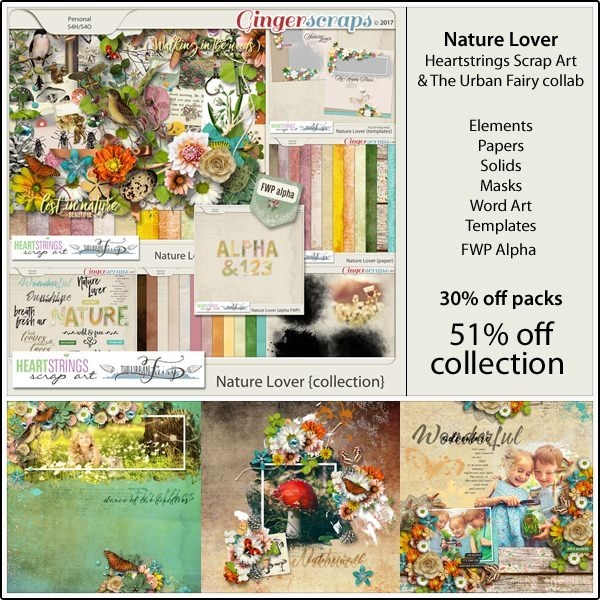
Page Kit: https://store.gingerscraps.net/Nature-Lover-Page-Kit-HSA.html
Elements: https://store.gingerscraps.net/Nature-Lover-Elements-HSA.html
Papers: https://store.gingerscraps.net/Nature-Lover-Papers-HSA.html
Solids: https://store.gingerscraps.net/Nature-Lover-Solids-HSA.html
Word Art: https://store.gingerscraps.net/Nature-Lover-Word-Art-HSA.html
Masks: https://store.gingerscraps.net/Nature-Lover-Masks-HSA.html
Templates: https://store.gingerscraps.net/Nature-Lover-Templates-HSA.html
Collection: https://store.gingerscraps.net/Nature-Lover-Collection-HSA.html

kristmess01
https://store.gingerscraps.net/Kristmess/

kristmess02
https://store.gingerscraps.net/Kristmess/

kristmess03
https://store.gingerscraps.net/Kristmess/

ad01
https://store.gingerscraps.net/Seatrout-Scraps/

ad02
https://store.gingerscraps.net/Lindsay-Jane/

ad03
https://store.gingerscraps.net/Dear-Friends-Designs/

ad04
https://store.gingerscraps.net/Dear-Friends-Designs/

Remember, if you complete 10 challenges, just ten, you get a free kit as well!!

cr_thumb3_thumb_thumb_thumb

I’m not going to let anything rain on my chances to get some sunshine with this!

Sneak Peeks July 27, 2017

Happy Thursday! It’s scorching outside but that means I have made a dent in pages I wanted to scrap! And this week’s new releases sparked so much creativity! I hope they inspire you as well!

From Ponytails

From Tinci

From Neia Scraps

From Miss Fish

From Heart Strings Scrap Art

From Aimee Harrison

Have a wonderful weekend!

Save

Tutorial Tuesday (Photoshop Elements)

More Fun with FONTS

I’ve confessed it before – I’m a fontaholic. I LOVE fonts and the options they provide. But have you ever downloaded a font because the example the email or website shows makes it look like it’s been hand-painted – cool, right? – only to find out it’s just… a font? And it looks sort of like the screenshot below. That makes me so cranky! So I’m going to show you how those cheaters do it.

Pick a colour. It doesn’t matter what you choose because it’s going to disappear later, but you want to be able to see it clearly.

Then pick a font, one with some weight to it. I like this one called Cedar. It’s one of the ones I was enticed to buy because of its lovely watercolour paint look in the samples. Umm. Yeah.

This step is optional, but I’m going to use this as a title so I filled in those gaps and made the letters all solid shapes. Tip: When using the paint bucket Fill tool, if you only click inside the space once, there will be a faint outline of the gap left when you’re done. Solution: click TWICE.

And in case you haven’t been paying attention, Simplify your font layer.

Now you’re going to choose a watercolour brush. Or one with some kind of texture. You want to make the font look fabulous, but you also want it to be grounded to the paper below it. Letting a little of that background colour show through does that nicely. Because this text will mimic a painted-on title, it won’t be shadowed later, so ground it now. Choose your paint colour at this step as well.

Create a new layer for your brush. Always. ALWAYS! If you hover your brush over your text, you can see where the edges should be, but this isn’t always so with this type of brush. It does, however, give you some idea of whether your brush will cover your text and whether it needs any adjustments. I tipped my brush a little to get a more uniform coverage by using the Brush tool Settings menu as shown below.

Then just click your brush over your text. If you want more oomph, click more than once, but be careful not to lose the tonal variations you’re trying to create.

Stay on your brush layer and Select your text by clicking on your text layer’s thumbnail. Behold, marching ants!

To Invert your Selection, you can Select>Inverse as shown, or you can CTRL/CMD>Shift>I, which shifts the active area to everything OUTSIDE the text.

This next step Deletes the paint outside the edges of the text. There are 3 ways this can be done: Edit>Delete or CTRL/CMD>X or simply hit the Delete key.

So now the paint only covers the area over the text! CTRL/CMD>D makes the marching ants disappear.

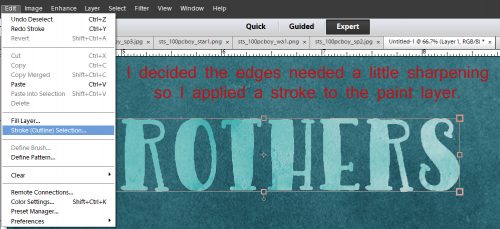
Once I eliminated the marching ants, I wasn’t totally happy with the look so I just added a Stroke to the edges… still on the brush layer.

I used the same colour for my stroke. But I could have pulled one of the other shades of teal from the background paper. I think that would have ruined the effect though. Centering the stroke on the edge eliminates those raggedy jaggedy pixels some fonts have when they’re enlarged.

The change made by the stroke isn’t obvious but I think it just defines the text a little better.

You could leave the original text layer and colour show through your brush layer, or you can turn the visibility off to see how you like the look. I found that some of the tonal variation was lost when I did that. But if you’re happy with the visibility turned off you can go ahead and delete the text layer.

Okay, so let’s try something a little different, but using the same basic steps. We’re going to reverse the look.

Back up all the way to where we Selected the text. We’ll use the same brush and colour.

But this time, don’t Invert your selection, just Delete it. Edit>Delete, or Ctrl/CMD>X or just hit Delete.

Now the Text layer is fully visible and the brush is smooshed all around it.

Turning the visibility of the Text layer off looks like this. Decision time. Happy? Not happy? What should be changed, if anything?

Let’s make some small changes.

Would a Stroke make it look better?

Same settings, same everything else.

It’s better, but not really what I want.

So I just Undid – CTRL/CMD>Z – my way back to the Select text step and changed my brush to a dirty spray.

I know I reminded you to put your brush(es) on its own layer – here’s why. You can adjust it to your heart’s content without affecting anything else. You can make the brush bigger or smaller, change the angle of it, decrease the opacity of it, change the Blend Mode, duplicate just the brush… a schwack of things can be done to it that can’t be done if it’s on the same layer as something else.

This time I clicked my brush several times, moving it around to cover the text more but still letting some of the background colour show through.

Et voilà! Turn off the text layer and it looks like a reverse stencil.

If you’ve seen the layout I used this technique for, you’ll know I went with a different colour and the very first method. Despite the appearance of a great deal of time consumed, this actually only takes a matter of minutes to do. Give it a whirl!

Fantastic Free Fonts

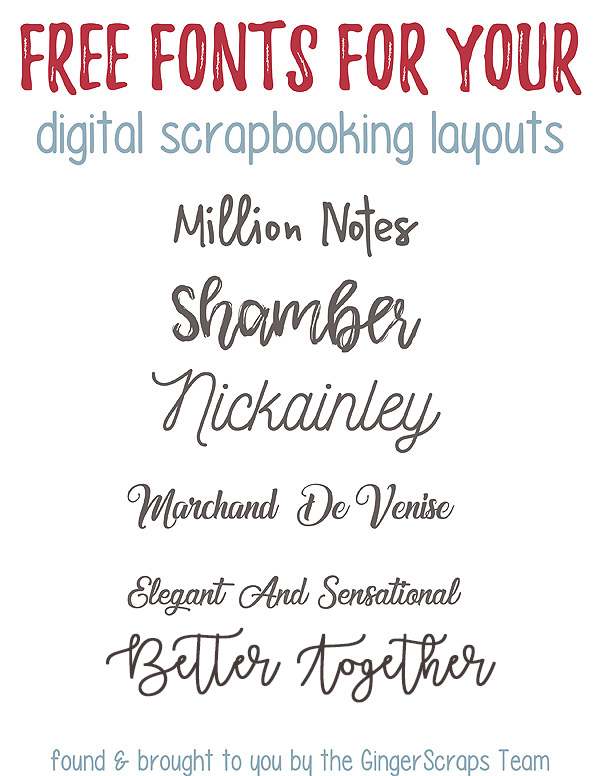
It goes without saying more of the time for us digital scrapbookers…We love fonts! I know there are a few of you out there that have thousands! So, let me add to your collection. I love a good script font. They are my favorite go-to when it comes to title work. I thought I would share a few of my favorites with you. They are all free! (the links for each one, including the title work, are below the image).


Here are the links to these fonts:

Million Notes
Shamber
Nickainley
Marchand De Venise
Elegant And Sensational
Better Together
Free Font For Your -> Playlist Script Font
digital scrapbooking layouts -> Please write me a song

Please write me a son and the Playlist Script Font are use on 90% of all my layouts. They are my favs! We would love to see any layouts you create using these fonts. Make sure you upload your layout to the gallery and link us back up here in the comments!

Fresh Baked: July 21, 2017

Woo hoo! It’s Friday! We’re already into the third week of July! The sneak peeks spotted for August’s Buffet are amazing. But this week’s designs are even more gorgeous! You don’t even have to wait for them! Everything is available right now!

OH! OH! OH! There’s a big sale going on as well!

Summer Dreamin’ 65% Off Sale! {2017}
3 Days only, THOUSANDS of items at 65% off!

01
https://store.gingerscraps.net/-Summer-Dreamin-FLASH-SALE-65-OFF/

Remember when you spend $10 in the store, you get a great new collab!

fwp322
https://store.gingerscraps.net/GingerBread-Ladies-Collab-Life-Is-A-Picnic.html

magical
Bundle: https://store.gingerscraps.net/Mr-Mouse-and-Co-collection.html
Page kit: https://store.gingerscraps.net/Mr-Mouse-and-Co.html
Graffiti Pack: https://store.gingerscraps.net/Mr-Mouse-and-Co-graffiti.html
Journaling Cards: https://store.gingerscraps.net/Mr-Mouse-and-Co-journal-cards.html
Bonus Papers: https://store.gingerscraps.net/Mr-Mouse-and-Co-bonus-papers.html
Word Bits: https://store.gingerscraps.net/Mr-Mouse-and-Co-word-bits.html

neia
Bundle: https://store.gingerscraps.net/At-The-Beach-Bundle-By-Neia-Scraps.html
Kit: https://store.gingerscraps.net/At-The-Beach-kit-By-Neia-Scraps.html
Cards: https://store.gingerscraps.net/At-The-Beach-Cards-By-Neia-Scraps.html

ponytails
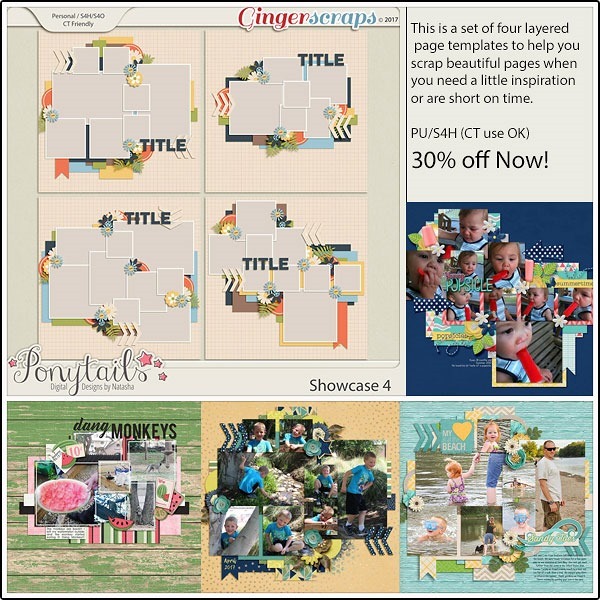
https://store.gingerscraps.net/Showcase-4.html

scraps
https://store.gingerscraps.net/Scraps-N-Pieces/

tinci
https://store.gingerscraps.net/My-life-in-photobook-21..html

aimee01
Collection: https://store.gingerscraps.net/Heirloom-Chic-Collection-by-Aimee-Harrison.html
Kit: https://store.gingerscraps.net/Heirloom-Chic-Page-Kit-by-Aimee-Harrison.html
Alpha: https://store.gingerscraps.net/Heirloom-Chic-Alpha-Sets-by-Aimee-Harrison.html
Borders: https://store.gingerscraps.net/Heirloom-Chic-Borders-by-Aimee-Harrison.html
Messy Edges: https://store.gingerscraps.net/Heirloom-Chic-Messy-Edges-by-Aimee-Harrison.html
Stamps: https://store.gingerscraps.net/Heirloom-Chic-Stamps-by-Aimee-Harrison.html
Quotes: https://store.gingerscraps.net/Heirloom-Chic-Inspirational-Quotes-by-Aimee-Harrison.html
Glitters: https://store.gingerscraps.net/Heirloom-Chic-Glitters-by-Aimee-Harrison.html

aimee02
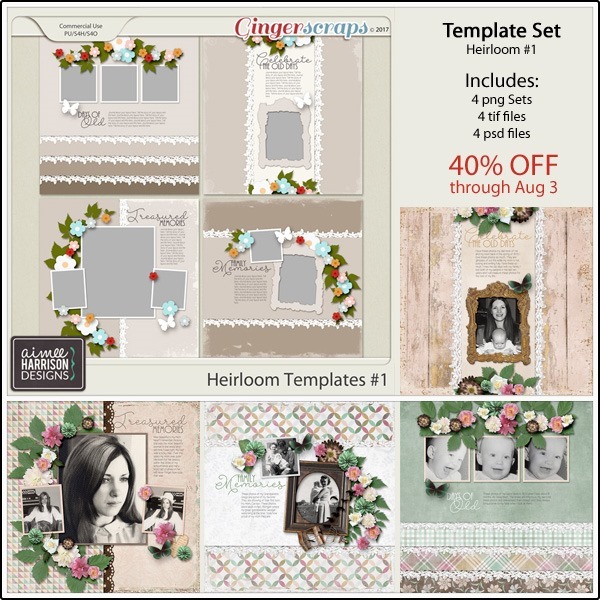
https://store.gingerscraps.net/Heirloom-Templates-Set-1-by-Aimee-Harrison.html

blue
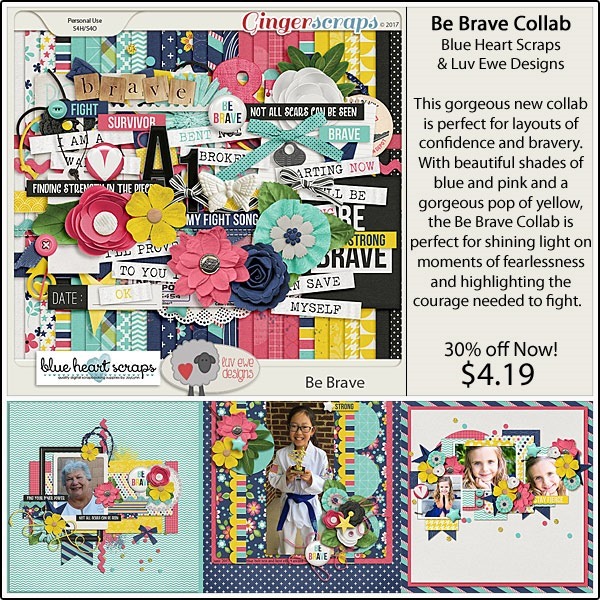
https://store.gingerscraps.net/Be-Brave-Collab-with-Luv-Ewe-Designs.html

boomers
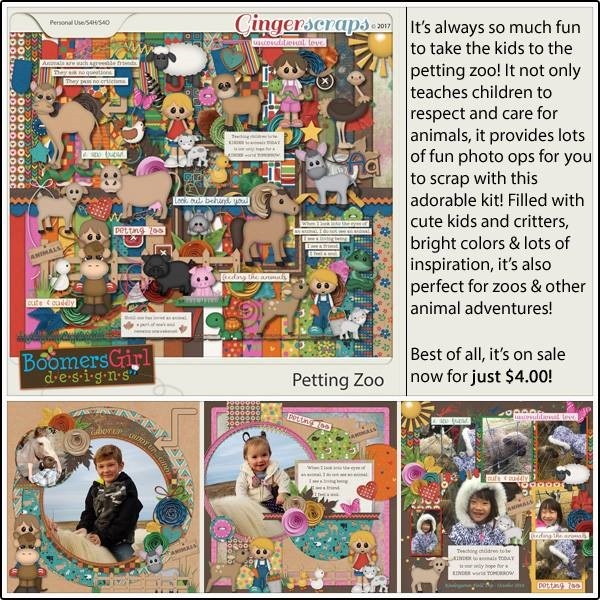
https://store.gingerscraps.net/Petting-Zoo-BGD.html

connie
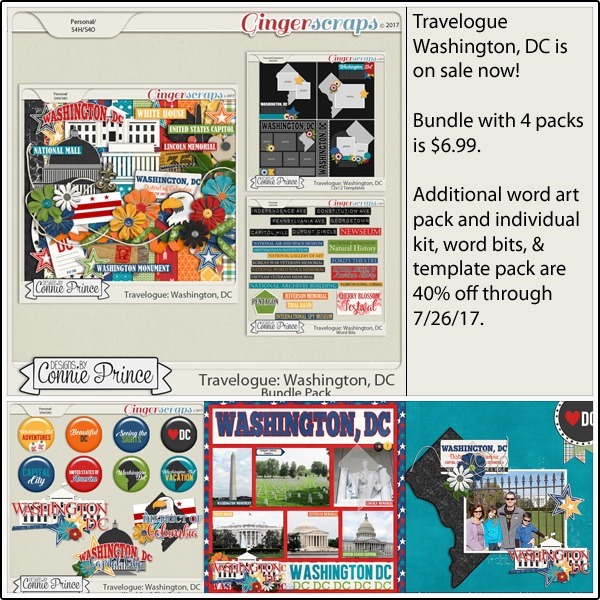
Bundle Pack: https://store.gingerscraps.net/Travelogue-Washington-DC-Bundle-Pack.html
Word Art and Flair Pack: https://store.gingerscraps.net/Travelogue-Washington-DC-Word-Art-and-Flair-Pack.html
Kit: https://store.gingerscraps.net/Travelogue-Washington-DC-Kit.html
Word Bits: https://store.gingerscraps.net/Travelogue-Washington-DC-Word-Bits.html
Templates: https://store.gingerscraps.net/Travelogue-Washington-DC-12×12-Temps-CU-Ok.html

dagi
https://store.gingerscraps.net/2017-Happenings-Week-25-28.html

dandelion
https://store.gingerscraps.net/On-Par-Digital-Scrapbook-Kit-By-Dandelion-Dust-Designs.html

kristmess01
https://store.gingerscraps.net/Kristmess/

kristmess02
https://store.gingerscraps.net/Kristmess/

kristmess03
https://store.gingerscraps.net/Kristmess/

lindsay01
https://store.gingerscraps.net/Road-Trip-Collection-by-Lindsay-Jane.html

lindsay02
https://store.gingerscraps.net/Road-Trip-by-Lindsay-Jane.html

lindsay03
https://store.gingerscraps.net/Page-Borders-19-by-Lindsay-Jane.html

littlerad
https://store.gingerscraps.net/Straight-as-an-Arrow-full-kit.html

ad01
https://store.gingerscraps.net/Neia-Scraps

ad02
https://store.gingerscraps.net/Blue-Heart-Scraps/

Remember, if you complete 10 challenges, just ten, you get a free kit as well!!

cr_thumb3_thumb_thumb

I’m not going to let anything rain on my chances to get some sunshine with this!

Sneak Peeks July 20th, 2017

Happy Thursday! I hope the summer is going well for you! I hope you busy scrapping all those photos you have taken so far! Maybe one of the new kits might help complete your page!

From Dagi

From Neia Scraps

From Miss Mis

From Tinci

From Lindsay Jane

From Aimee Harrison

From Little Rad Trio

From Luv Ewe and Blue Heart Scraps

Tutorial Tuesday (Photoshop Elements)

A Little Bit Sketchy

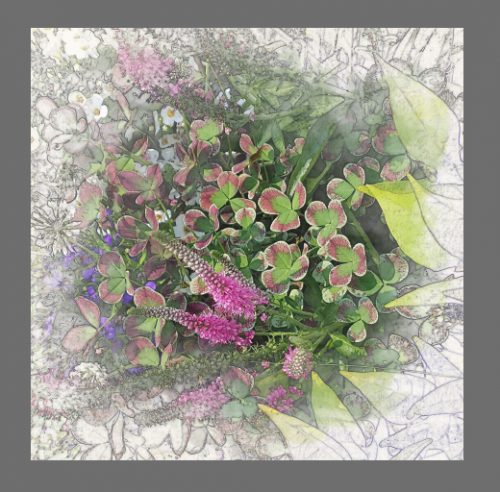
Today I’m going to show you how to go from THIS…

to THIS!

And it’s only going to take you about 10 minutes to create your own sketchy image. Really! (Glee, did you figure it out? Of COURSE I planned a tutorial when I created my Designer Spotlight challenge layout!)

First things first. Open up a new blank 12×12 canvas on your workspace. You can always resize it later, but having a big canvas to work on makes it a lot easier to get it right.

Drag and drop a soft white paper onto your canvas. You have lots of choices in your GingerScraps stash so pick one you like that will work with your photo.

Now drag and drop your photo onto the paper. Enlarge it to fill the workspace with the section you want to work on… or leave it… it doesn’t matter which you do. I wanted a square image when I was done, so I resized. Then Duplicate that photo layer. (WSNH: CTRL/CMD>J)

Then turn the TOP LAYER‘s visibility off.

We’re going to play with the Filters that come with the software. Remember to select the bottom photo layer to work on for this step, then Filter>Stylize>Find Edges.

Now you’ve got a neat pencil sketch right there. You could be happy with that, but with a couple of other tweaks you can have something much more unique.

To make the white areas disappear decrease the saturation of the layer down to -100. There are two ways to get there: Enhance>Adjust Color>Hue/Saturation is one and the WSNH way – CTRL/CMD>U is the other. The menu should look like this when you’re done.

Now we have to make the sketch vanish. Hold down the ALT key and click on the Layer Mask symbol at the top of the Layers panel. In case this is your first attempt at one of my tuts, it’s the one that looks like a piece of paper with a blue circle on it, the middle of five symbols grouped together.

Now for the magic! Go to your Brush tool (hit the B key) and find a nice watercolour brush. There are some in the default brush set Natural Brushes 2 that came with your software, or you can download some free ones via a quick Google search. I used some that I found at Brusheezy. Either way, you want to decrease the Opacity of the brush to give you more control over how your sketch comes together.

Make sure you’re working on the layer mask and NOT on your image. Start painting back your sketch with your watercolour brush, either by clicking on the mask with a full-sized brush several times or by clicking and dragging the mouse over the area you want to make visible. You want to keep the edges of your sketch soft and indistinct so it all seems to blend into the background.

You can change brushes and adjust the size and angle of the brush to vary their effects.

If you’ve never changed the angle of a brush, this will show you how. Click on the Brush Settings… bar and either move the tip of the arrow around or type a number into that box highlighted blue in the screenshot.

Keep moving your brush(es) around until your sketch looks well-defined in the area you want to highlight in your finished image and softer towards the edges.

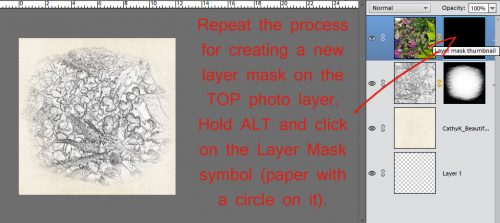
To bring some colour into your sketch, just follow the same process with your top-most photo layer. Turn the visibility back on so you can actually do stuff to the photo layer. Hold down the ALT key, click on the Layer Mask symbol and make your photo disappear.

Using the same watercolour brush or a different one, your choice, decrease the opacity a bit more and start painting the colour in.

Work carefully from your focal point out. You can have areas where the photo is 100% visible and other areas where the sketchy aspect is more visible. All up to you!

If you feel like you’ve made the photo TOO clear, you can change the foreground colour of your brush from white to black and soften it up again.

That could have been where I stopped. You could stop there and have a simply stunning photo effect that will make people so impressed with your skills. I wanted to see what I would have if I duplicated just the sketch layer. To do that, I used my WSNH keyboard shortcut (CTRL/CMD>J) then right-clicked on the new sketch layer to disable the layer mask. A second right-click let me delete the layer mask and left me with just the sketch. With it sandwiched in between the original sketch and the photo, it looked like the screenshot below. I played with the Opacity of that layer, which is what I used for my layout.

Rather than make you look for it, here it is.

I can’t wait to see what you do with this one!! This technique is perfect for those scenic shots we all have in our collection. Have fun!!

Have y’all met our featured designer for July yet? She’s the incomparable CathyK!  If you’re collecting her Daily Download Back to Nature you’re not going to be disappointed. I can’t wait to get busy with it.

I asked Cathy to tell us a little about herself.

1…How long have you been designing?

I opened my first digi shop in 2008, so about 9 years.

2…What is your design process?

My design process varies a little, depending on how I get started. Sometimes, the color palette comes first, then I pick a theme that goes with it. Sometimes, I have a theme in mind, then work up a color palette to go with the theme. Once I have a color and theme, I always do papers first, then elements, then alphas and any other add-ons.

3…What do you use to create your designs? (software, hardware, etc)

I use Photoshop CS4 for the majority of my design work and Inkscape for any illustrations I need to do.

4…Describe your design workspace.

I have a computer desk with a large display in our family room. I’ve tried working on a laptop, but the tiny screen size just doesn’t work for me.

5…What motivates and inspires you as a designer?

I like seeing an idea come to fruition and then seeing how scrappers use that kit to scrap their precious memories. I get inspiration and ideas from color, everyday life, my sons’ activities and interests, magazines, Pinterest, textures, a song, a good quote. Really, anything can be the inspiration for a product!

6…What kit currently available in your GingerScraps store is your favourite? Why?

Oh gosh, it’s usually the latest kit I’ve created! My favorite now is Back to Nature (this month’s Daily Download), because I LOVE the colors! But, since it’s not technically in my store yet, I’d say my Are We There Yet Buffet collection. I especially love how the enamel pins turned out. [I can’t wait to see it. The Buffet is the BEST!]

7…Do you craft outside the digital world?

Not as much as I used to. Sometimes I do still make things to use in my kits.

8…What is the last book you read?

I can’t remember when I last sat down to read an entire book! Mostly I’m reading online articles and magazines.

9…Tea or coffee?

Coffee, for sure. I’ve been making cold brew coffee lately and using it to make iced coffee with Chocolate Stevia.

10…Do you have a guilty pleasure?

Starbucks Coffee Frappucino. The sugar content (even in the light version) makes it just an occasional treat. 

11…If time travel were possible, where would you go and why?

I’d love to go back and talk to my grandparents and great-grandparents when they were younger and meet my parents as kids. 

12…What’s your favourite thing about GingerScraps?

My favorite thing about GingerScraps is the friendly, helpful people that make up this wonderful community and the amazing designers and site staff that I work with!

I can’t argue with that! GingerScraps is a true community, in all the best senses of the word. Thank you Cathy, for letting us have a peek into your life.

https://gingerscraps.net/gsblog/2017/07/20028/

July Bake Sale!! On NOW!!!

Trust me, you don’t want to miss this month’s Bake Sale. It’s gotta be the best sale in all of Digiland. Just look at the possibilities!

Our amazing designers and guest designers have chosen a terrific collection of kits on sale from now until the 20th at the cost of only a BUCK! (Did you notice this month’s Featured Designer CathyK has 3 kits in the catalog?) I see at least three kits I MUST have… Time to go shopping!