Archives for March 2017

Tutorial Tuesday (Photoshop Elements)

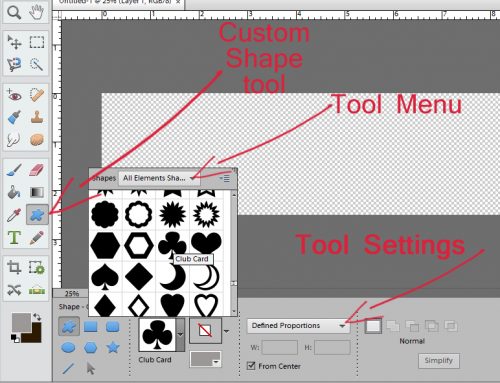
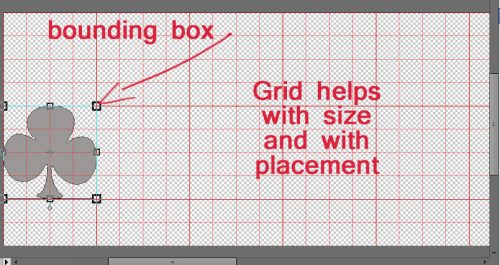
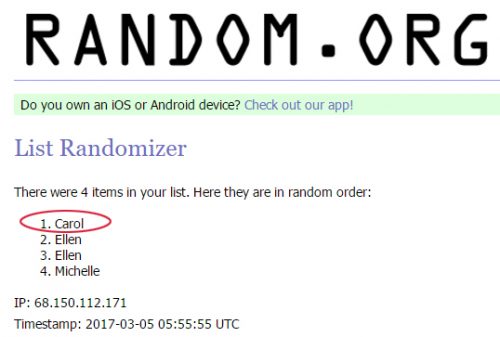
Carol: Objects Inside Other Objects and Going Incognito

At the end of last week’s tutorial I announced that Carol (gnana96) had been selected to challenge my PSE skills. When I contacted her she told me she had two tricks she’d like to learn and couldn’t decided between them. They were both relatively simple so I decided to show her how to accomplish both. Ready, Carol?

In her message to me, she said she was building a recipe book and wanted to use cooking-related elements but was having trouble making them look right. She wanted to know how to put something (ground meat) into something else (a frying pan) so that it looked good. I don’t have those sorts of elements in my stash, so I’m going to use toys instead, but the principle is the same.

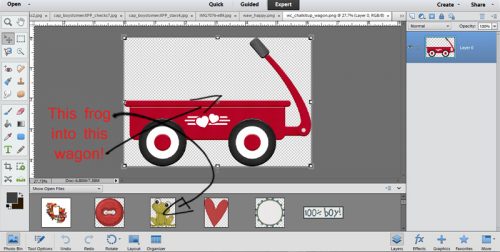
I pulled a wagon from a Wimpychompers kit called Chalk It Up (acquired via The Daily Digi). Then I grabbed a puppy and a frog from Boomers Girl Designs‘s Boys Will Be Boys. I proceeded to put the puppy and the frog into the wagon, so to ensure I had enough room to manoeuvre, I changed the Canvas Size. The long way is Image>Resize>Canvas Size [WorkSmartNotHard: CTRL/CMD>Alt>C]. Then I moved the wagon down to the bottom of the canvas.

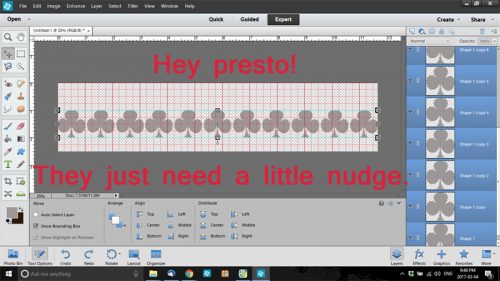
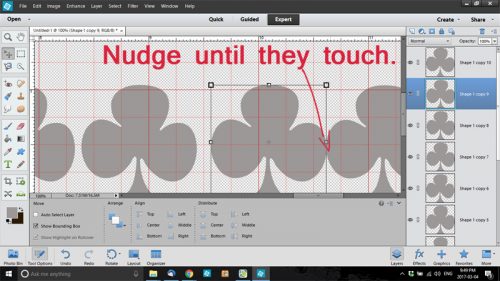
To see where things needed to sit for the best effect, I put the puppy element and the frog element on layers on top of the wagon, resizing as necessary, and adjusted them so they didn’t extend below the bottom of the wagon. Then to make sure they were properly aligned I used the Align tool. To do that, select as many layers as you want to line up then go to the Tools work space. Determine which edge you want to line up, then click on the appropriate icon – NOT the descriptor, because that does nothing!

Then, with both puppy and frog layers still selected, I moved them under the wagon on the Layers panel. Now it looked like they were inside the wagon, and that might have been enough (ground meat in a pan) but these little things have articulating limbs, so I could take them another step toward really looking like they were inside the wagon.

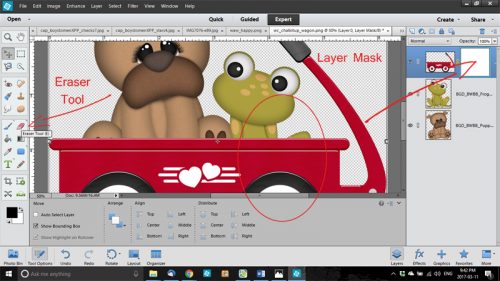
I wanted to have one of the frog’s legs and one of the puppy’s legs hanging down over the side of the wagon, so I created a Layer Mask. (Lots of previous tutorials have used Layer Masks, so if you’ve read those ones, feel free to skip ahead.) The reason for using a Layer Mask is to give more control over what happens to an image. Layer>Layer Mask>Reveal All [WSNH: Click on the blue-square-gray-circle icon at the top of the Layers panel]

Now I was ready to erase the wagon where it overlaid the frog’s leg. Make sure you’re on the Layer Mask, not the actual element. I selected the Eraser tool with white as my foreground colour.  (Black Conceals, White Reveals) You can toggle between white and black using the X key.

Don’t worry if you erase more of the object than necessary, because you can switch from erasing to painting back by toggling foreground colours. I did the same process to reveal one of the puppy’s legs too.

I zoomed in really close for the painting-back step so I could see exactly where the limb’s edges were. Looking good!

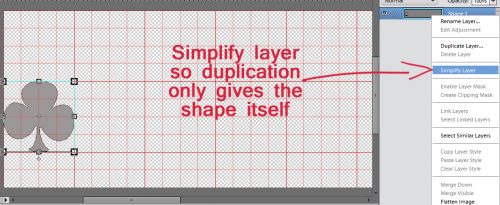
Once I was satisfied the image looked perfect, I right-clicked on the layer in the Layers panel and selected Simplify. That incorporated the masked areas into the layer and eliminated the risk of messing it up. But…

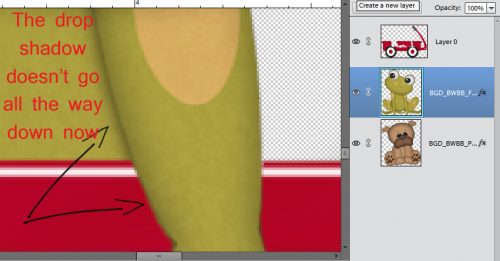
The detailed images of the frog and the puppy had shadows where they overlaid the critters’ bodies. Shouldn’t there also be shadows on the side of the wagon? Simply using a drop shadow Layer Style isn’t going to help (even though I DID use one at this step so that the frog threw a shadow on the puppy where they overlapped) because the layer’s shadow will be behind the wagon. What to do?

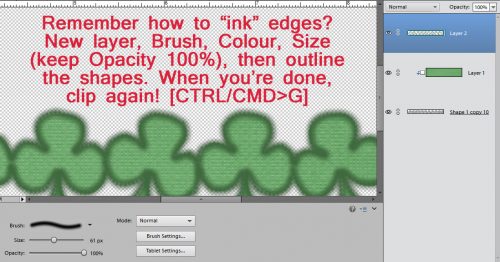
Drop Shadow brushes to the rescue!! These brushes come preloaded with your PSE software, so just look in your Brushes menu for them. Remember, for ease of adjustments later, put your brushes on their OWN LAYER. For this step, don’t worry about the Opacity of the brush, just pay attention to the colour you’ve chosen and the size of the shadow you’re extending. It’ll take some trial and error to get it right so be patient! Following the direction of the light source the designer used, I painted in my shadows.

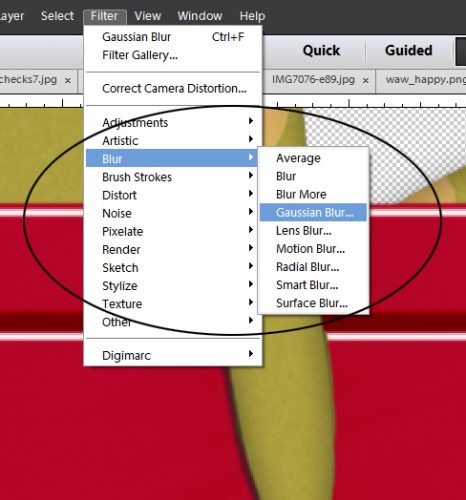
When I was done, I wanted to soften the edges of the shadows. Filter>Blur>Gaussian Blur will do that nicely.

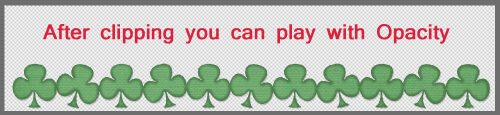
I pulled the slider to the right to increase the radius of the blurring, and watched the actual image as I went along. When the shadows I’d painted blended into the shadows on my little frog, I selected OK. Then I decreased the Opacity of this shadow layer to seamlessly blend the edges in. You can adjust Opacity first and then Blur if you like. It might give you more control, so try it both ways to see what works best. CTRL/CMD>Z  (Undo) is your best friend!

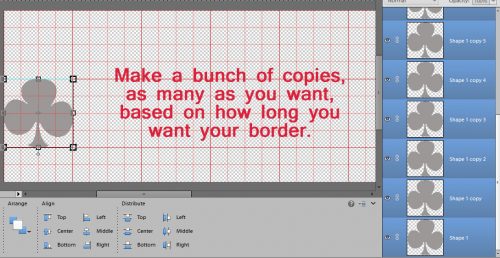
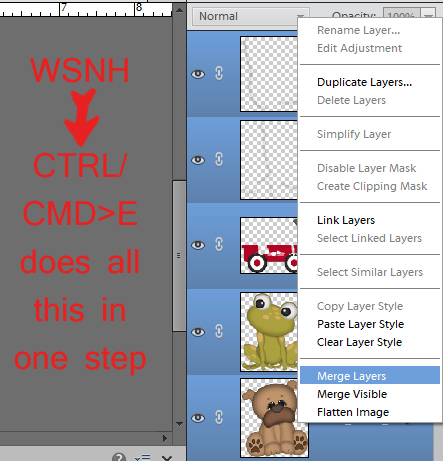
I repeated the process for the puppy. When I was finished, I knew I wanted to Merge the layers together to move them to my layout as one object.

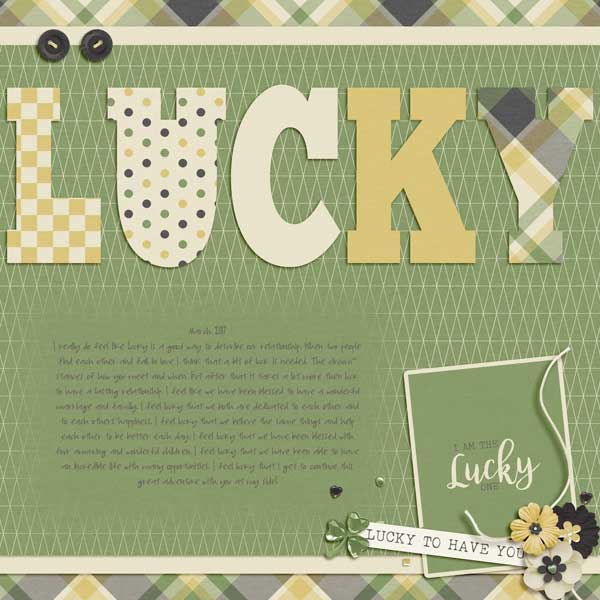
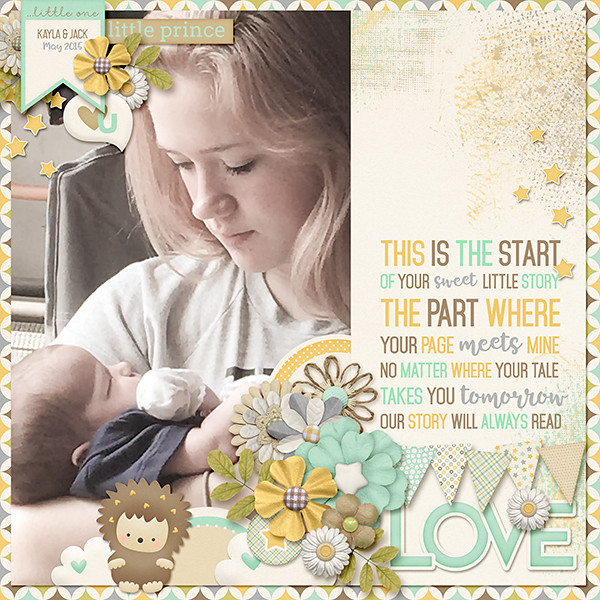
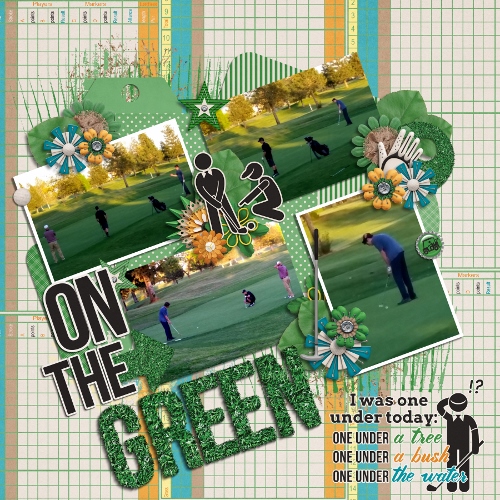
After selecting all the layers, I merged them as shown. (You’re saying, “Yeah, sure… you used the keyboard shortcut.” And you’re correct!) Then I carried on with building my March 2017 Inspiration Challenge layout.

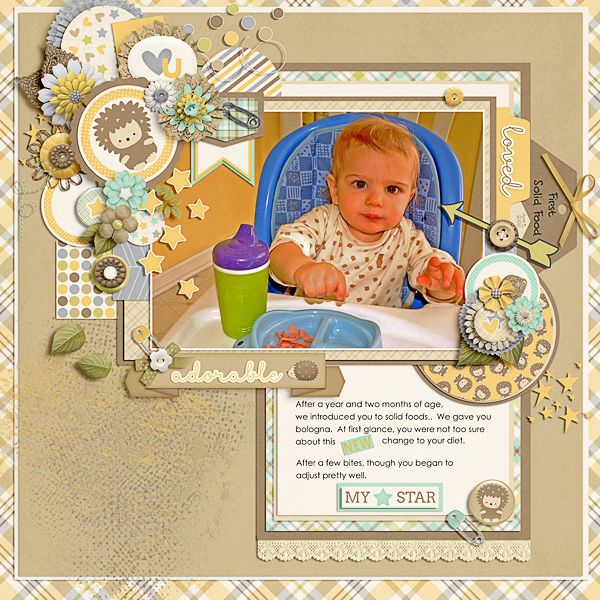
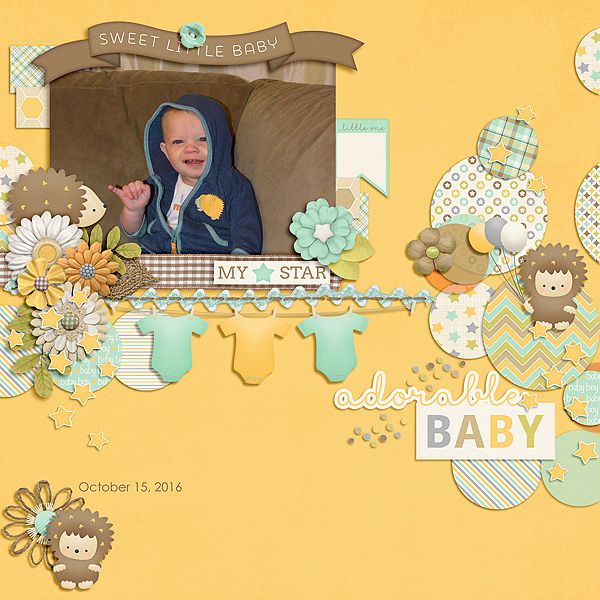
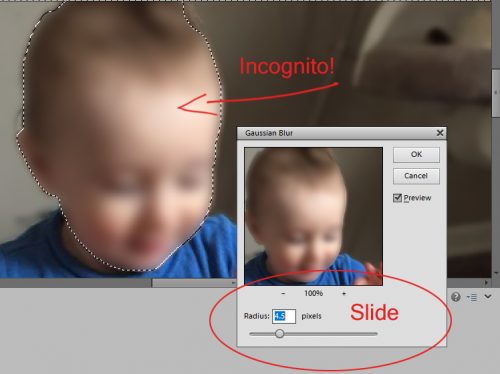
When choosing something that makes me happy – the theme of the Inspiration Challenge – the first thoughts that come to mind are thoughts of my grandchildren. The second of Carol’s requests was about concealing the identities of her older grands, who value their privacy. So this was a natural! Little A isn’t concealed at all below, is he? I clicked on the Quick Selection Tool, which many people just call the Magic Wand. Using it, I outlined his little face, which put a line of marching ants around it. That’s my “selection”.

Then I went to Filter>Blur>Gaussian Blur just as I did for my limb shadows above.

A little tug to the right and his features are blurred, but his expression is still discernable. It’s really that easy! To conceal parts of her journaling, Carol could select the words in question on her text layer (simplified, of course!) using the Rectangular Marquee tool then blurring the very same way. Now Carol (and all the rest of you grandmothers out there) can scrap photos of her older grands as often as she wants.

Remember, if you’ve used a technique from these tutorials, post your finished layout in the GingerScraps Facebook Tutorial Tuesday Challenge Gallery for an opportunity to have YOUR chance to challenge me. If you’re not a Facebooker, you can post a link to the layout you’ve created with the tutorial you used in the comments section here on the Blog. I’ll get a notification and will then enter you into the draw. The first week of each month I’ll have a random draw of all entries and the winner will be announced at the end of the first tutorial of that month.

See you all next week!

Let’s Celebrate: St. Patrick’s Day

Hello scrappers! Next Friday is St. Patrick’s Day. So today we are going to take a look at some of the fun things in the store that will have us scrapping all things St. Patrick’s Day! I am sure most of us know what that holiday is. However for those who do not:

St Patrick’s Day is a global celebration of Irish culture on or around March 17. It particularly remembers St Patrick, one of Ireland’s patron saints, who ministered Christianity in Ireland during the fifth century. St Patrick’s Day is celebrated in countries with people of Irish decent.

Here at GingerScraps we have a section dedicated to this holiday. If what we showcase below is not what you are looking for, you probably can find it in that section.  We are going to showcase a number of digital scrapbooking supplies for your St. Patrick’s Day projects. We will follow it up with some fun layouts as well. All images are linked of course. 🙂

St. Patrick’s Day Digital Scrapbooking Supplies


Irish Charm by Clever Monkey Graphics || Irish charm is a fun little mini kit to mix and match with all your other St. Patrick’s Day kits. Enjoy! Make sure you check out Tracey’s other St. Patrick’s Day kits. A Little Irish Luck and Lucky Leprechaun.


Happy Go Lucky Page Kit by Kristmess || This wonderful kit was made as part of her Happy Go Lucky Collection. This collection is perfect for all your St. Patrick’s day celebrations but versatile enough for many other spring pages.


St Patrick’s Day Templates by Blue Heart Scraps


Lucky Me Digital Scrap Kit by Just So Scrappy || This kit is part of the Lucky Me Collection


March Sectional Templates by Miss Fish Templates || March Sectional templates offer you 2, 12×12 digital scrapbook templates perfect for your favorite spring photos. These templates have divided sections to show off lots of fun patterned papers along with your photos. The Flower and Shamrock/clover shape let you scrap your fun March memories in a unique way.


Lucky Me by BoomersGirl Designs || Not just for St. Patrick’s Day, this kit is also perfect to help us celebrate the everyday things in our lives that make us feel lucky. The fresh color palette includes white as well as shades of purple, green and yellow.


Project 2015 March – Kit by Connie Prince || This kit is part of the huge Project 2015 March Collection


Oh So Lucky! by Magical Scraps Galore! || It’s always important to remember just how lucky we are. In shades of green and turquoise, with a dab of white and black, Oh So Lucky! collection is perfect to scrap St Patrick’s Day celebrations, your Irish heritage, as well as March or springtime layouts and all those lucky everyday moments that you wish to cherish forever.


Lucky Girl: A collaboration from our GingerScraps designers.
This kit includes:
1 full alpha, 34 papers, 36 elements, 6 journal cards


Lucky One Kit by CathyK Designs


St Patrick’s Day Layouts

Lucky by kristal


2013 Being Irish for the Day by TraceyMonette


Be the Rainbow by Jazz2000


County Kerry by Elizabeth


St. Patrick’s Day by familyhistoryscrapper


St. Patrick’s Day Freebie!

I hope you enjoyed these great items and lovely scrapped digital scrapbooking layouts for St. Patrick’s Day. I want to leave you with a freebie alert. Make sure you are checking out of Challenge Forum; and participating of course. This month’s Mini Kit Challenge has a mini kit perfect for those St. Patrick’s Day projects. Click HERE to go check it out.


In case you were wondering more about those fun challenges; and what is in it for you (besides new layouts):


March 2017 – Challenge Reward Info
Monthly Challenge Rules – 

  • You will receive the collab of the month in which you COMPLETE your 10 challenges.
    For Example:
    You do 5 in March, 2 in April and 6 in May – you would get the May collab.
    You do 7 in March and 4 in April – you get the April collab
    You do 10 each month you get EACH Collab!! (BEST DEAL!!)
  • Challenge rewards will be sent out after the 5th of the month
  • All challenges layouts must have at least 50% of GS products – Daily Download and Welcome wagon counts. (See individual challenge rules for specific rules on usage such as Designer Spotlight Challenge)
  • Speed Scraps and Chats DO NOT count towards your challenge rewards (of course your host will usually provide fun goodies for all attending their SS or Chat)
  • Every challenge must have a unique LO. Meaning, you can not use the same LO for more then 1 challenge.
  • You are responsible for tracking your completed challenges, find the monthly tracking thread in the “Cookie Jar”, and follow the guidelines.


Challenge Rewards:
Complete any 10 challenges, and you will receive a brand new designer collab!
Each month we will offer a brand new GingerBread Ladies collab as a reward for completing the GS challenges.

Complete any 10 challenges, during the month of March 2017, and receive this collab for FREE!!

Brighter Days Ahead: A collaboration from our GingerScraps designers
By Designers: Craft-tastrophic, Lindsay Jane, Neverland Scraps, Ponytails Designs


  • 1 Full Alpha
  • 39 Papers
  • 110 Elements

Fresh Baked: March 10, 2017

Welcome back to Friday! Just a week until St. Paddy’s Day! Just about 10 days until Spring (or Fall, if you’re on the other hemisphere!). Weather will be changing, one way or the other. The designers are feeling a change in the air and are creating up a storm! So many new goodies this week!

Remember when you spend $10 in the store, you get a great new collab!

fwp32 https://store.gingerscraps.net/GingerBread-Ladies-Collab-United-We-Stand.html

[Read more…]

Sneak Peeks March 9, 2017

Happy Thursday! Have any good weekend plans? Well if you don’t, you should plan on scrapping with this weeks new releases! they are awesome and I have a sneak peek just for you!

From Ponytails

From Aimee Harrison

From Amy Stoffel

From JoCee Designs

From Tinci

From Blue Heart Scraps

From Miss Fish

From Neverland Scraps

Have a wonderful weekend!

GingerBread Ladies Sneak Peeks – 3/10/17

Happy Wednesday! 🙂 Just stopping by with a few sneak peeks for this week. Let’s see what our wonderful designer’s have for us this week.

Watch the blog tomorrow for some Sneak Peek layouts from our fabulous store CT and then head over to the GS Store on Friday to do some shopping.


Tutorial Tuesday (Photoshop Elements)

Down on the Border (not the Little River Band version)

A while back some of my fellow Sugar Cookies (praise team members) and I were kicking around ideas for tutorial topics. I usually have some ideas about what I can show you, but coming up with new, fresh lessons every week isn’t as easy as it sounds. So my Cookie gals gave me a couple of ideas that I could use for quick tuts, and this was one of them. Well, not precisely what was suggested, but I think it’s even better! I’m going to show you how to build a border, using repeating shapes. I could have taken the easy route and showed you how to make a simple scalloped border that some template designers use routinely, but I thought, no… let’s do something with a little more vision. And here we are…

I didn’t do the Signature Challenge in February (it’s a difficult month for me and I can’t get excited about it) so it was time for a new siggie. March doesn’t mean spring in this part of the world – we still have snow well into April most years – but March has other wonderful implications. Both my daughters were born in March, and St Paddy’s Day is right in the middle. Since I’m mostly Irish by ancestry, my March siggie will always include some reminders of those good things. And that led me to create a border of shamrocks, using the Custom Shape tool.

The first task before you can get going is to open a new file work space in PSE. If you want your border to extend from edge to edge on your layout, choose that measure for one of the dimensions, and go with 1 or 2 inches for the other. Because I was doing a siggie, I selected the same dimensions I described in the tutorial on signatures. I also added a grid so my shape could be easily sized. But you can do that even more simply by setting Defined Proportions. When you use this setting your Custom Shape tool will automatically give you a shape in exactly those dimensions.

I usually select All Elements Shapes from the pop-up menu when I open up the Custom Shape tool so I have a wide variety of choices. I know there are all four playing card suits represented as standard shapes, so I went right there and chose the CLUBS shape – which is a shamrock! (Real shamrocks have three leaves, not four.)

Once I had all that figured out, I went ahead and made a shamrock shape on my canvas. You can use the grid, or not. I’ve played around with using the grid and and without – either method will work just fine.

I knew I wanted the shamrock border to extend from one side of my canvas to the other, so I Simplified my shape to get rid of the extraneous stuff the software puts on a shape layer.

Then I made a stack of copies, all identical to my first shape. [Work Smart Not Hard tip: CTRL/CMD>J duplicates your layer.]

The software stacks them one on top of the other, so when I had as many copies as I thought I’d need, I selected only the top-most shape and moved it all the way to the other side of my canvas. Once I had shapes at each side, I selected ALL the shape layers. Then I went down to the Tool Options menu and clicked on Distribute>Middle.

Whoa! All my shapes lined themselves up in a nice, tidy, evenly-spaced line! (This is a fabulous tip to use when you’re putting buttons in a row, or lines of stitches, or almost any objects you can come up with.)

There was some space in between my shapes, which won’t work well for a continuous border, so I nudged them until they were all very slightly overlapping. Then I resized the whole group of them to regain my edge-to-edge border.

Then I decided to get fancy. So I tilted some of them to the right, and others to the left. If you’re a little OCD (like I am) you can use the tool settings to make the tilts uniform, simply by keying in the angle you want. Tilting to the right uses a positive number, to the left a negative.

Once I was happy with the way it all looked, I merged the layers. [WSNH tip: Select all the layers you want to merge, then CTRL/CMD>E] And now I had a clipping mask!

Once I clipped a paper to it, my border was done! (Almost…) [WSNH tip: CTRL/CMD>G to clip the current layer to the layer below it.]

I looked at my border for a couple of minutes and decided it needed some inked edges. Keep your brush size a little bigger than you think you want, because otherwise it won’t fade away into the paper in that nice way you want it to.

When your edges are all inked, create another clipping mask [CTRL/CMD>G] and cut away the brush edges that extend past your border.  Then you can adjust the Opacity of your brush until you like the way it looks. Finish up by merging [CTRL/CMD>E] the ink mask with the border. And you’re done!

Remember, if you’ve used a technique from these tutorials, post your finished layout in the GingerScraps Facebook Tutorial Tuesday Challenge Gallery for an opportunity to have YOUR chance to challenge me. If you’re not a Facebooker, you can post a link to the layout you’ve created with the tutorial you used in the comments section here on the Blog. I’ll get a notification and will then enter you into the draw. The first week of each month I’ll have a random draw of all entries and the winner will be announced at the end of the first tutorial of that month.

At the end of February there were 4 names on the list of people who had either posted a layout to the Tutorial Tuesday Challenge Gallery on Facebook or posted a link to a layout in the Blog comments section. Mr Random chose Carol’s name (gnana96) … Carol!! Think about what you’d like me to show you and your peers for next week, send me a PM and I’ll get right on it!

GS Book Club – March – The Wave at Hanging Rock

For the month of March, we will be reading:

The Wave at Hanging Rock by Gregg Dunnett

The e-book is currently FREE on both Amazon and Barnes and Noble. I’m very hopeful that this will allow several of you will to read along with us (or join us for the mid-month discussion, if you’ve read the novel before).


March Feature Designer – Mags Graphics

Welcome to March. This month our Feature Designer is Maggie from Mags Graphics. She was wonderful about answering my questions so that all of you could get to know her a little better.

How did you get started in digital scrapbooking?

I’ve been scrapbooking in some form or another since I was 15 years old. My very first albums were made with construction paper albums, Elmer’s Glue, and quotes from magazines. When I went to my first Creative Memories party, I bought just about everything, ripped apart my old albums, and re-made them in acid-free, lignon-free, Creative Memories products!

In 2001, I became a stay-at-home-Mom. I started learning Paint Shop Pro to make animated graphics and stumbled upon the now-defunct Digital Scrapbooking Place and realized that I could merge my computer skills with scrapbooking!

What made you decide to design?

Once I realized that I could use Paint Shop Pro to make layouts, I wanted to figure out how to make the kits that I needed for my own layouts. Those early “kits” were, honestly, TERRIBLE, but I kept at it, joining small stores to get better and better. I’ve been designing as my “job” since 2009.

What do you use to create your designs (program, additional tools, etc.)?

I use Paint Shop Pro and CS2 to design. I use MyMemories Suite 8 for my own personal layouts – because it’s fast.

Describe your design workplace.

Why don’t I show you… I have my office in our basement – filled with my favorite NERD TOYS!

What is your favorite thing about designing?

I scrap with the kits I make so I love to be able to know that when my kids look through their albums, that most of the kits in there were created by me.

What is your favorite kit currently in your GS store and why?

I love the “NERD” kits – “Across The Galaxy” is a Star Wars-themed kit, “Wizard World” is a Harry Potter-inspired collection, and “Go! Catch ‘Em All” is a Pokemon Go set!

What was your first job?

Technically, I started babysitting when I was 9 years old. I made most of my spending money babysitting all the way up through high school and college.

How many languages do you speak? What are they?

Just English

What’s your favorite holiday?

Christmas. I could listen to Christmas music and watch Hallmark Christmas movies all year around.

What is your favorite family holiday tradition?

I love celebrating Christmas with my family.

What three things do you think of most each day?

My family, my scrap business, and whether I can take nap.

If you had a warning label, what would yours say?

WARNING: UNFILTERED!

Is there anything you wished would came back into fashion?

Peg-rolled jeans, and big 80’s hair 😉

Do you collect anything?

Um… Yeah! I’m a HUGE Buffy the Vampire Slayer Fan as well as a fan of Harry Potter, The Walking Dead, Outlander, Orphan Black, etc. I have over 100 Funko Pop characters and was one of Funko’s Fanatics of the week back in November.

IMAGES of my collection:

If you were a super-hero, what powers would you have?

Telekinesis and I want to be able to fly.

Aside from necessities, what one thing could you not go a day without?

My cell phone.

How would your friends describe you?

Loyal, quirky, definitely unfiltered!

If you were a fruit or vegetable, which one would you be?

Neither. I’d be dessert!

What would you prefer as a second home: Mountain cabin, beach house, or big city condo?

Mountain House

Thanks Maggie. These answers are just delightful and make me smile reading them.

Make sure to check out her GS Store, her FB page, and her FB group. Also, make sure you are grabbing the daily download from the blog each day. She has a few coordinating packs in the store that go with the daily download.

And – now that you’ve read this far, I have a treat for you. Her store is on sale plus she is sharing a coupon with us.

I hope you have enjoyed getting to know Maggie as much as I have. Happy Scrapping!

Creative Style | The Color Green

GS_blog_CreativeStyle_Header

Hello scrappers. Today we are going to take a look at a creative style. Well, let me honest. It isn’t really a style so much as getting some inspiration from color.

There are many things that can make a layout stand out in the gallery. What grabs one person’s attention might not grab another’s. I could write multiple blog posts about what grabs mine. That being said, seeing a layout that has predominantly one color always grabs my attention.  Since we are edging up on St. Patrick’s Day, I thought it would be fun to get some inspiration from the color green.

We are going to take a look at some pretty green images, some great digital scrapbooking layouts done up in green, and round it up with the latest green filled goodies from the store.

Now, here are some lovely images to get those creative juices flowing. Did you know there was a place you could get pretty nice stock photos for free? These images are from Pexels. (All photos on Pexels are licensed under the Creative Commons Zero (CC0) license. This means the pictures are completely free to be used for any legal purpose.) I use them on my personal blog. I thought I would share with you guys while we get some inspiration for scrapping with green.

Fantastic right? I find inspiration for layouts in all kinds of places. Looking at beautiful photos are one of them. Want a bit more inspiration? Here are some layouts that are predominantly green. You know, to help get those ideas flowing! (all images are linked to their counterpart in the gallery. Go leave some loving!)

by meagan43


by LindsayJane


by pixleyyy


by Jill

Are these not some lovely layouts! I know part of that is the great designers we have here at GingerScraps. These layouts are beautifully scrapped though. I hope you found at least some inspiration from today’s post. I will leave you with some great designs to get those green filled layouts scrapped. As usual, all images are linked to their counterpart. We actually have an entire location in the store just for GREEN items.


If none of these are what you are looking for when it comes to scrapping green, make sure you check out the section dedicated to it. There are hundreds…literally hundreds of pages of choices. Have fun!

GS_footer_LaShawn

Fresh Baked: March 03, 2017

Spring is coming soon. You can feel it in the air!  The designers are enjoying the soon to be crisper and warmer air! They have some gorgeous designs out this week!

Remember when you spend $10 in the store, you get a great new collab!

fwp3 https://store.gingerscraps.net/GingerBread-Ladies-Collab-United-We-Stand.html [Read more…]